Q-stream evolution


Hi all,

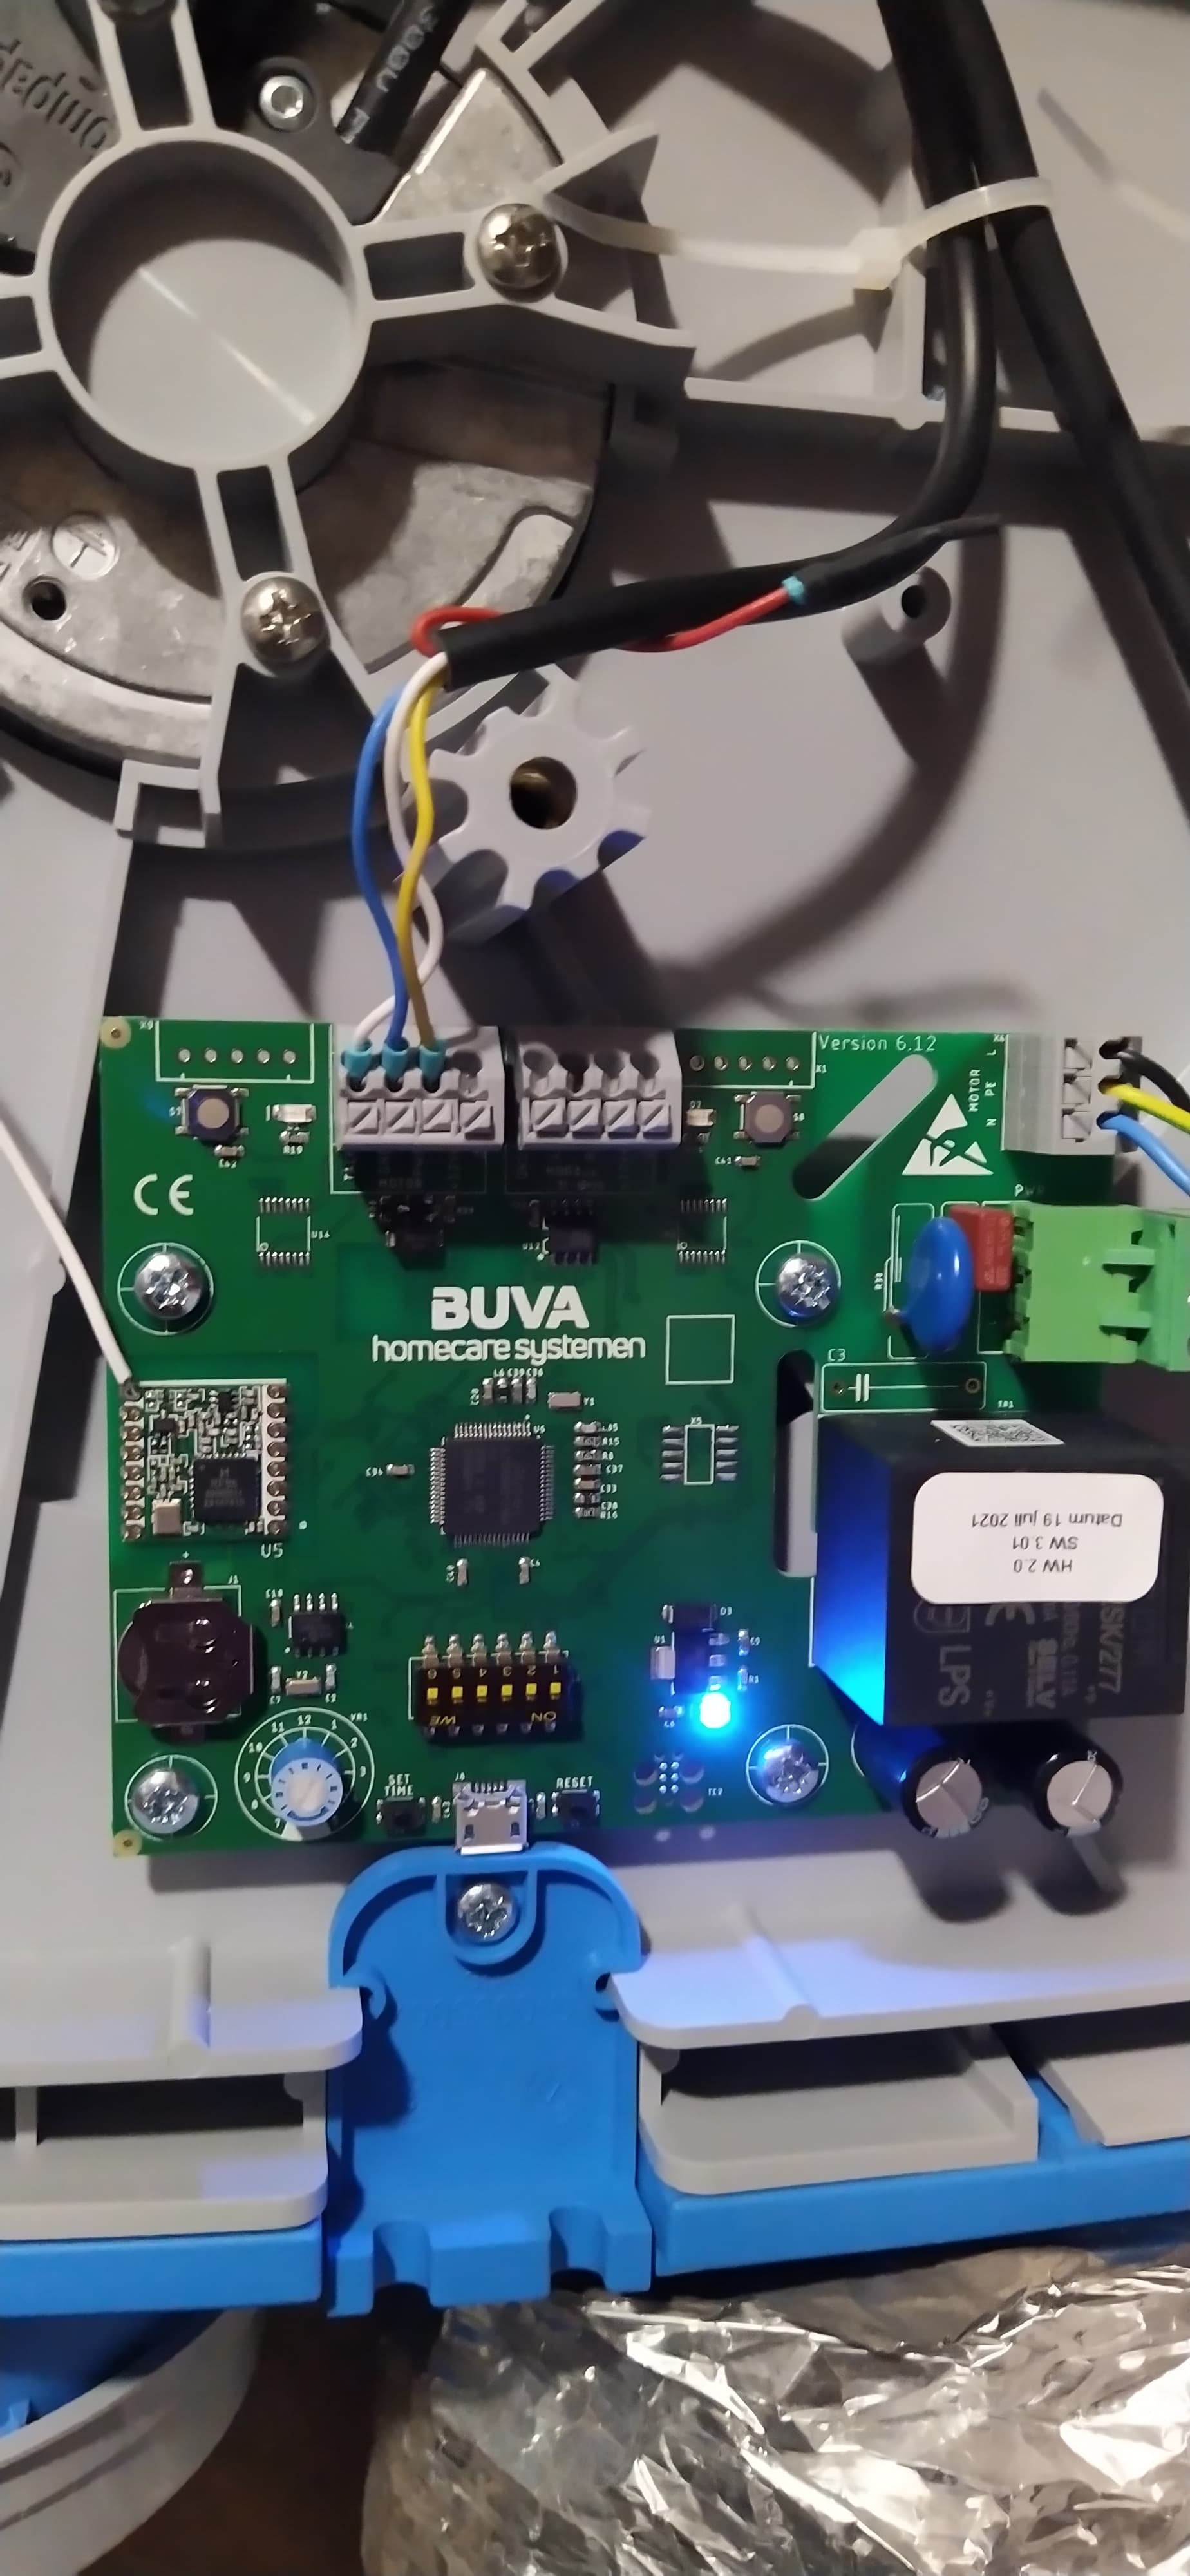
I have looked at a previous post about the Buva Q-stream. I have gotten the Q-stream Evolution. The board of which is completely different. There is a modbus for 12-24 volt. I do not know if I should use the klik aan klik uit option or can use the cubino. I think the cubino is underpowered for this. But I could be wrong.

Thank you,

Jeroen

I am now trying to make it work with a 12-24 dimmer from Tuya. Will keep you updated

Have you been able to make any progress on this?

Been thinkering with it myself a little and so far I figured there are a few methods to go about this;

  • Accessing the modbus using on the Q-Stream Evolution
  • Accessing the USB interface using on the Q-Stream Evolution (on first attempt it only showed a tiny menu with not many options of interest)
  • Accessing the USB interface on the remote (which I have been told allows more…- https://play.google.com/store/apps/details?id=het.mag.van.wesley)
  • Through RF (826.200 mhz)

Incase anyone is looking for any documentation this is what I found on the BUVA website;

i’m also strugeling with controlling the Q-stream Evolution. I want to regluate the Q-stream with an ESP or another wifi module. At the moment it goes only on when there is moisture in the air afte a shower.

has somone build a solustion for the new type Q-stream evolution?

I know this is an old topic, but I’m wondering if by now anyone has had any luck adding the non-10v Q Stream Evolution (the above pcbs version 6 or 7) to Home Assistant? Maybe using the Modbus connector?

Not on my end, still hoping for a solution.

I had ordered an extra wired (modbus) control panel in hopes of intercepting the modbus commands and reverse engineering the communication so I could send the same commands from an ESP32 or whatever.

I was able to intercept something, but I realised I know way to little about it (modbus especially) to really make any sense of it :frowning:

Did anyone try to use a hoperf lora chip for wireless communication with the q-stream?

if you have the buva q-stream with wifi, you can control it with a simple python script. here’s the interface:

Get the IP-address for the device, the mac address is the prefix after the word "QStream"in the app (for example: QStream 807A4C7BCEE7)
best to set the ip-fixed of fixed by dhcp.

# the structure from the q-stream
# TIMER    INACTIVE/ACTIVE     [0] [1]
# SCHEDULE/{val} OFF/MIN       [2] [3]
# Qanalog  0%        [4] [5]
# Qset     20%       [6] [7]
# Qactual  20%       [8] [9]
# DEMAND CONTROL ON  [10] [11] [12]
# DAY VALVE CLOSED   [13] [14] [15]

the http interface returns a string with all its values. (get)

in browser : http://<ip-address>/Status

result :

{
Value: "TIMER INACTIVE SCHEDULE OFF Qanalog 0% Qset 20% Qactual 20% DEMAND CONTROL ON DAY VALVE CLOSED"
}

to set a value do : (put)

http://<ip-address>/TIMER { }

so for example in python :

Get:

r = requests.get("http://192.168.0.100/Status")
Stringline = result.json()
ArrayData = Stringline['Value'].split()
ArrayLength = len(ArrayData)
TimerStatus         = ArrayData[1]
ScheduleStatus      = ArrayData[3]
QAnalogValue        = ArrayData[5]
QSetValue           = ArrayData[7]
QActualValue        = ArrayData[9]
DemandControlStatus = ArrayData[12]
ValveStatus         = ArrayData[15]

Set:

data = {  "Value": "TIMER 3 MIN 70% DEMAND CONTROL OFF DAY"}
headers = {'Content-type': 'application/json', 'accept-encoding':'gzip' }
r = requests.post("http://192.168.0.100/Timer", data=json.dumps(data), headers=headers)

maybe someone can make a nice package or python-code for this.

note: there are more values to read/set, look at this node-red flow : Buva Qstream 2.0 Wifi (flow) - Node-RED

I am running into the same problem, but I am looking at a completely different solution. Namely, directly controlling the motor.

When I look at the detailed photos, the motor is an R3G140-AF23-10.

That is a 230V EC motor. It has the 230V wires and the 4 control wires.

According to the manual of the R3G140-AF23-10, the purpose of the wires is as follows.

If I send a control signal of 0-10 volts to the blue-yellow control cables, I should be able to control the motor.

I was thinking of using a Qubino ZMNHVD1 Flush 0-10V Dimmer Z-Wave, where I could possibly use the signal from the circuit board as input to ensure that the humidity sensor still works