Adding Snapmaker to HA (need help on making UDP updatable sensors)

That would be nice, And I would be happy to be able to test the Integration and post the results (but I’m currently very limited in time so this can take some time).

My setup:

  • Snapmaker A350ENT
  • Enclosure
  • Emergency Stop button
  • 3DP: Single extrusion
  • Laser: 1600mw and 40w (incl. Air assist pump)
  • CNC (50w)
  • Rotary module
  • Quick Swap Kit

If you can point me where to obtain the .json data files for these I’ll grab them for you.

1 Like

Hi CCarpo!
Would be nice. I do not have time to fiddle around with a HA-Integration, for the moment… But I can try to support if you need some help.
Greets

Hi Mathijs

Can you give some instructions how to run the script on HA?
I’ve already tried with HACS pyscript and HASS python_script but I’m a beginner in coding…

Thanks
Raphael

Hi there, unfortunately I was planning to run the scripts via HA and prolly also’ve gone through the same steps you did (using pyscript) but I didn’t succeed on that one yet.
However this is still a To-Do on my list so as soon as I’ve figured out I’ll let you know by posting here :+1:

For now I got the.py scripts running on my NAS (Synology) which also works flawless but in the end it’s a pretty “Dumb” solution as I want to only have the second script running when the Snapmaker has a state else than IDLE.
As enabling/disabling via a webhook or ssh command isnt possible, I really need it to be run via HA.

2 Likes

It should be no problem to modify the Script that it connects only to Snapmaker if the state is something other than IDLE.
I will have a look at it if I have some spare time.

I have just created a git commit which reports the full process only if the SnapMaker is NOT in state IDLE. This means, the Touchscreen will not be locked in idle state.
Feel free to test.
Regards
Stefan

Nice, I’ll try that one next week…

With every bit it gets slightly better and better :+1:

Thnx

Hi there, thanks for all the work with the script.
I tried to use it with HA but like Raphael I stumbled over running scripts. If I run it on my PC, it wrotes the txt-file, but not in HA. I have no clue, wich writing-path I can choose and how the script gains writing-access to a directory in HA. When there is a file SMtoken.txt there are no more errors but also no more feedback. The file is also empty and on the touchscreen of the SM there is no authentication request.
Sadly I have no other option to run the script on another raspi or nas.

Maybe its get done with an integration, so I hope that ccarpo made some progress :slight_smile:

The new script works great :+1:
I got a suggestion:
It would be great if the script behaves a bit else:
IF Snapmaker state equals offline → then send only the Offline state
ELSEIF Snapmaker state equals IDLE → Then ALWAYS send Model/State/IP
ELSEIF Snapmaker state equals RUNNING → Then send ALL details

This ensures the status of the snapmaker is always as accurate as possible. And this allows us to create automations e.g. based on when the Snapmaker State changes from OFFLINE to IDLE, and from IDLE to RUNNING etc.
I’m announcing the via the smart speaker that the snapmaker started running (Trigger: IDLE to RUNNING) and change the DIMMED the lights down to color red untill the status changes from RUNNING to IDLE.
I instructed my youngest to keep away from the snapmaker as long as the lights are turned RED this is most important when running the 40W laser cutter.

Funny but dumb fact about Snapmaker:
The snapamker has a shitload of fancy features like continue the job after power-loss etc. But when simply opening the enclosure door during a Laser Job, the laser light is immediately shut off and the head is moving like the laser is active. The laser becomes active when closing the door again…results: the laser missed some cutting or engraving parts :upside_down_face:

Hi,

Great to see this thread becoming bigger, which means there’s really some animo for having Snapmaker added to HA.

I’m affraid I can’t help right now (due to time), but I can tell you that I’ve tried to run python scripts using HA, and it’s a lot hassle.

As far as i know HA runs docker on the background for some ADD-ONS and also HA supports the Docker commands.
Perhaps you can create a simple linux container and submit a cronjob to it to run the python script required for this?
Or I also saw another tut showing how to run Pythin scrips directly using docker, but then it doesnt seem to be scheduled:
How to Run a Python Script using Docker? - GeeksforGeeks

Anyway, I think this goals can be accomplished by runign some kind of container and schedule the python script there…

Didn’t do any deepdiving, so probably there’s a less hassle solution. When I found it I’ll post it in here.

But in the end all the knowledge we build in here can be of benefits of someone who decides to build some kind of Integration @ccarpo :wink:.

Running a python script for Home Assistant - the first thing I think about in this context is appdaemon.

I have refactored the python script and added a sensor template

1 Like

Hi there,
first of all thanks for this great work. I found the post yesterday and must integrate this in my home assistant.
My problem was, that python_script dosn‘t allow scritps with imports. I tryed pyscript and python_script pro, but I can‘t run the script with this tools.
Now my solution:
First I load the script on my filebrowser in HA. Next I logged me in in via ssh shell. There I can install the nessesary modules and test the script. After I get the script running there I only need to integrate the shell command:

shell_command:
ex_smsatusv2: python /config/python_script/SNStatusV2.py

This create a service that I can trigger via Automations. In my case I wrote two of them. The first Automatisation runs the script every two minutes. The second switch the first on and off, triggerd by my smart socket witch power the printer on an of.
Maybe some of you helps this. I hope in future we will see an custom comonent. But I don‘t have the time to wrote it at the moment.

Hi, could someone make a set by step or video on how to add this to home assistant. since idk what I’m doing.
thanks

any news on this or some more help please, i can´t get to run too

I’ve got writing up an howto on my to-do list for a while now as I see there’s a lot of animo for it.
As soon as I’ll find time. I’ll write it up for you guys but even then I can only show you my solution as in:
running the script via my Synology NAS as a scheduled task and the Home assistant part of Course.

Don’t expect it to be there quickly but it has my attention.

Kind regards

1 Like

This script is not intended to run directly in HomeAssistant. Instead I run it on a separate rapsberry pi which submits all information to HomeAssistant via Webhook. I am currently trying to create an Integration, but this will take some additional time…

1 Like

I almost finished writing a full step by step Manual, based on the refactored script made by @NemesisRE

In the manual I will also describe on how to make everything work from only the Home Assistant device without any needs of a second device for running the script and without any additional steps to perform the first authorization step separately.

The Manual is technically correct but I got some work to make this readable/understandable.

To be continued…

1 Like

EDIT 16-02-2025: *Today I tested this again and this method seems to be broken already, right now I get an error on running the .py script. Unfortunately I don't have time atm to look further into it, but I will shortly. Decided to keep this post here as teh steps remain the same, but it sems it need some additional steps I'll add later on. To be continued.*

As I feel some kinda love for my fellow HA homies, this will be my present to you right in front of valentine’s day :heart:

Credits
Ok here we go, at first I would like to start with the credits as I just figured out how to perform this on you home assistant instance without any needs of a second machine running the scripts and made a manual of it, but the real work was done by @Guybrush_T and @NemesisRE , thanks for that guys.
And last but not least some credit delivery to AlexxIT for offering and maintaining his PythonScriptsPro integration.

The setup
I’m using a Proxmox VE and I’m running Home Assistant OS on a Virtual Machine.
I don’t know the limitations on other setups, but if you use this manual on another setup, it would be nice if you left a comment with your setup to let us know if this manual also applies to your setup (this could save others a lot of time).

Step 1. Getting a Home Assistant API Token
In Home Assistant perform these steps:
• Go to your Account (Located under Notifications) → Click on tab “Security”
• Scroll all the way down to “Long-lived access tokens”
• Click “CREATE TOKEN”
• Give the new token a Name

• In the next screen copy the token and make you’ll save this in a safe place (e.g. passwordmanager)

Step 2. Add/Create the Snapmaker Webhook trigger tto the Home Assistant Config
This can be done by:

  1. Adding the piece of code plain to your configuration.yaml file
  2. Import a separate yaml into your configuration file.

I like to keep my configuration file as clean as possible so I chose option 2 but that’s up to you. To keep this guide as simple as possible I’ll put the instructions below to add it to your configuration.yaml file:
• Download this yaml file
• Edit “webhook_id:” to the webhook name of your choice (best practice is to generate something difficult)
• (Optional): At “- name:” You can change the name of the sensor which will end up in Home Assistant, the default should be sufficient but if you have more snapmaker devices it’s more convenient to give them names.
• Copy the whole yaml code to your Home assistant configuration.yaml file (Don’t forget to put it under “template:”

My recommendation is to add: local_only: true as part of the platform, this makes sure only local machines can make use of the webhook which eliminates all external sources and improves the safeness of this solution.

Step 3. Download and Edit the script

Now that the Home assistant API and webhook is known, you can enrich the to be download script with these details:

  • Download this script

  • Edit the script and fillout these variables:

    • Line 15
      haToken = “TokenGoesHere”
      Replace the TokenGoesHere with your generated token in Step 1.
    • Line 16
      whUrl = ‘http://:8123/api/webhook/
      Example: whUrl = ‘http://192.168.1.167:8123/api/webhook/B&ENiqw5H5jHMW
      Enter the full URL to you webhook here
    • Line 24
      tokenfile = ‘’
      Replace the by a path to which the script has read and Write access to.
  • Copy/safe the script to this folder (if not exist → Create it) on your Home Assistant computer:

  • /config/python_scripts/SNStatusV2.py
    The results should look like this:

FYI:
The first time this script runs there should be no “SMtoken.txt” file in the directory given in the “tokenfile” variable. This is required, because if this file isn’t present, the script automatically starts the steps to authorize the script with your snapmaker device.
Without this step the script will never be able to read out you Snapmaker device.

It doesn’t matter where and how this script runs, ideally it’s running from HA.

TIP:
At line 68 in the Python script you can change the value of: time.sleep(10), I’ve changed it to 60 to make sure I’ll make it in time.

Step 4. Install Python Scripts Pro
Use this guide to install it

After installing you have to add this integration to your configuration.yaml file. You can figure it out yourself or just copy paste this:

python_script:
  requirements:
  - requests>=2.32.3

NOTE: it’s important to add the requirement of requests as this is used by the py script to be able to communicate with your snapmaker.

After this is done make sure you’ll restart Home Assistant to make this integration happen (this also ensures the sensors created in step 2 become active in HA)

Step 5. Create a script in Home Assistant

This script can be used at first to authorize, and after that the script will be used by an automation that on a recurring base (5 minutes in this guide) will be ran.

  • Navigate to:
    Settings → Automations & scenes → Scripts + Click on create script

  • Use the top right 3dots and select Edit in YAML to switch to Yaml mode

  • Paste this to the script and save it using the name SnapmakerStatus

Step 6. Authorizing with your Snapmaker
Now it;s time for the first run which will be the authorize step. To do this simply follow these steps:
• Turn on your Snapmaker and wait until it’s fully booted
• Settings → Automations & scenes → Scripts
• Look for the script of step 5 called SnapmakerStatus
• Click on the 3 dots and click run to run this script
• Now go to your snapmaker and allow permission
• After thats done, verify if this file was created: ”config/python_scripts/SMtoken.txt”
Also open up the file to make sure it has contents. In there you should have a string which looks like this:

Step 7. Create an automation to repeatly run the py script and update the HA sensor

  • Go to: Settings → Automations & scenes -->Automations
  • Click: + CREATE AUTOMATION
  • In the popup select Create new automation
  • Configure the automation as follows to make the update happen every 5 minutes:
      • Add Trigger
        Time pattern
        Minutes: 15
      • Add Action
        Script: Turn on
        Targets → Choose Entity → SnapmakerStatus

TIP: I got my snapmaker behind a smartplug so I only run this automation when the smartplug is turned on by adding a condition. As a bonus I got one with energy metering so I can measure how much my prints are costing.

Good to know:
The Python script will only post updates on the webhook when the snapmaker is not in IDLE state, this way your screen won’t get locked while setting things up directly on the snapmaker itself.

FAQ:
Q: Authorizing failed, what to do?
A: when you need to authorize, make sure the ”config/python_scripts/SMtoken.txt” should not exist. E.G. when you missed the authorization screen on your snapmaker while authorizing, there will be created an empty ”config/python_scripts/SMtoken.txt” file. So delete it and retry.

I wrote this a bit in a hurry, so please leave a comment when you have any questions or if things are unclear to you.

4 Likes

Hi, first i would like to say thank you for this amazing project.
Currently i am struggling with some points.

I cant see the sensors in HA.

Here is my config.yaml:
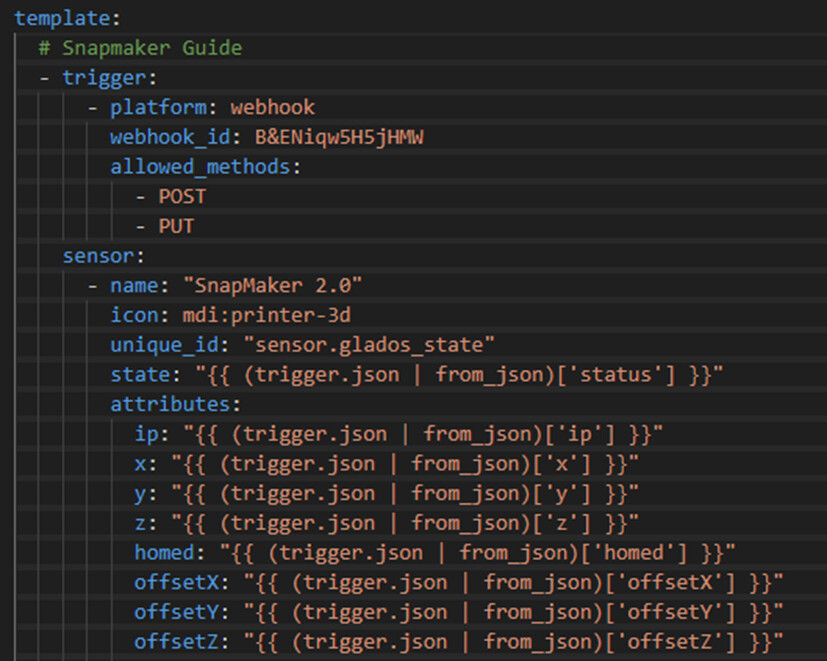
template:
  # Snapmaker Guide
  - trigger:
      - platform: webhook
        webhook_id: whsnapmakera250t
        local_only: true
        allowed_methods:
          - POST
          - PUT
    sensor:
      - name: "SnapMaker 2.0 A250T"
        icon: mdi:printer-3d
        unique_id: "sensor.glados_state"
        state: "{{ (trigger.json | from_json)['status'] }}"
        attributes:
          ip: "{{ (trigger.json | from_json)['ip'] }}"
          x: "{{ (trigger.json | from_json)['x'] }}"
          y: "{{ (trigger.json | from_json)['y'] }}"
          z: "{{ (trigger.json | from_json)['z'] }}"
          homed: "{{ (trigger.json | from_json)['homed'] }}"
          offsetX: "{{ (trigger.json | from_json)['offsetX'] }}"
          offsetY: "{{ (trigger.json | from_json)['offsetY'] }}"
          offsetZ: "{{ (trigger.json | from_json)['offsetZ'] }}"
          toolHead: "{{ (trigger.json | from_json)['toolHead'] }}"
          nozzleTemperature: "{{ (trigger.json | from_json)['nozzleTemperature'] }}"
          nozzleTargetTemperature: "{{ (trigger.json | from_json)['nozzleTargetTemperature'] }}"
          nozzleTemperature2: "{{ (trigger.json | from_json)['nozzleTemperature2'] }}"
          nozzleTargetTemperature2: "{{ (trigger.json | from_json)['nozzleTargetTemperature2'] }}"
          heatedBedTemperature: "{{ (trigger.json | from_json)['heatedBedTemperature'] }}"
          heatedBedTargetTemperature: "{{ (trigger.json | from_json)['heatedBedTargetTemperature'] }}"
          isFilamentOut: "{{ (trigger.json | from_json)['isFilamentOut'] }}"
          spindleSpeed: "{{ (trigger.json | from_json)['spindleSpeed'] }}"
          laserFocalLength: "{{ (trigger.json | from_json)['laserFocalLength'] }}"
          laserPower: "{{ (trigger.json | from_json)['laserPower'] }}"
          laserCamera: "{{ (trigger.json | from_json)['laserCamera'] }}"
          laser10WErrorState: "{{ (trigger.json | from_json)['laser10WErrorState'] }}"
          workSpeed: "{{ (trigger.json | from_json)['workSpeed'] }}"
          printStatus: "{{ (trigger.json | from_json)['printStatus'] }}"
          fileName: "{{ (trigger.json | from_json)['fileName'] }}"
          totalLines: "{{ (trigger.json | from_json)['totalLines'] }}"
          currentLine: "{{ (trigger.json | from_json)['currentLine'] }}"
          progress: "{{ (trigger.json | from_json)['progress'] }}"
          estimatedTime: "{{ (trigger.json | from_json)['estimatedTime'] }}"
          elapsedTime: "{{ (trigger.json | from_json)['elapsedTime'] }}"
          remainingTime: "{{ (trigger.json | from_json)['remainingTime'] }}"
          enclosure: "{{ (trigger.json | from_json)['moduleList']['enclosure'] }}"
          rotaryModule: "{{ (trigger.json | from_json)['moduleList']['rotaryModule'] }}"
          emergencyStopButton: "{{ (trigger.json | from_json)['moduleList']['emergencyStopButton'] }}"
          airPurifier: "{{ (trigger.json | from_json)['moduleList']['airPurifier'] }}"
          isEnclosureDoorOpen: "{{ (trigger.json | from_json)['isEnclosureDoorOpen'] }}"
          doorSwitchCount: "{{ (trigger.json | from_json)['doorSwitchCount'] }}"


The script is running from a different container and is sending data via webhook to ha.

this is the script:

#!/usr/bin/python3
# Requires: sudo pip3 install requests
#
import socket
import requests
import json
import urllib3
import ipaddress
import time
from datetime import timedelta
urllib3.disable_warnings(urllib3.exceptions.InsecureRequestWarning)

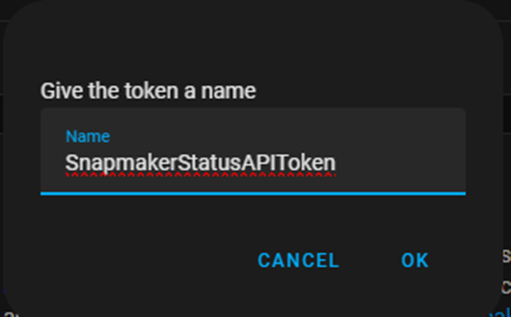
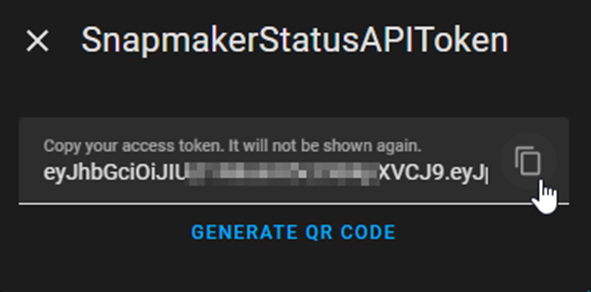
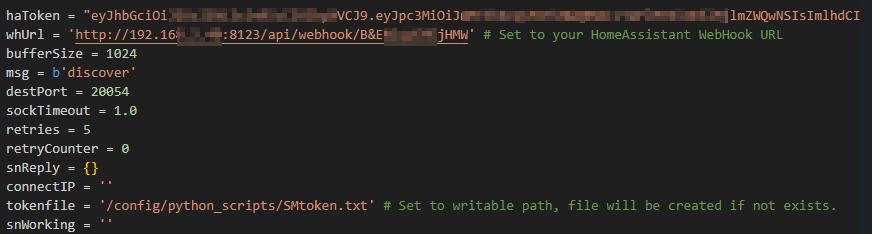
haToken = "yourAPItoken" # Set your HomeAssistant API Token
whUrl = 'http://10.0.0.99:8123/api/webhook/whsnapmakera250t' # Set to your HomeAssistant WebHook URL
bufferSize = 1024
msg = b'discover'
destPort = 20054
sockTimeout = 1.0
retries = 5
retryCounter = 0
snReply = {}
connectIP = ''
tokenfile = '/root/SMtoken.txt' # Set to writable path, file will be created if not exists.
snWorking = ''

# Main Program
def main():
    global connectIP
    UDPClientSocket = socket.socket(family=socket.AF_INET, type=socket.SOCK_DGRAM)
    UDPClientSocket.setsockopt(socket.SOL_SOCKET, socket.SO_BROADCAST, 1)
    UDPClientSocket.settimeout(sockTimeout)

    # Get Status and IP of Snapmaker
    checkState(UDPClientSocket,msg,destPort,retries)
    if validate_ip_address(snReply.get("snIP")):
        connectIP = snReply.get("snIP")
        print("Snapmaker found:", connectIP)
        if snWorking == 'IDLE':
          SMtoken = getSMToken(connectIP)
          postIt(snReply)
        else:
          SMtoken = getSMToken(connectIP)
          print("Connecting with Token:",SMtoken)
          postIt(readStatus(SMtoken))
          # Not yet used
          #readStatusEnclosure(SMtoken)

    else:
        postIt(snReply)
        print("No Snapmaker found.")


def getSMToken(connectIP):
    # Create file if not exists
    try:
        f = open(tokenfile, "r+")
    except FileNotFoundError:
        f = open(tokenfile, "w+")

    SMurl = "http://" + connectIP + ":8080/api/v1/connect"
    SMtoken = f.read()
    if SMtoken == "":
        # Create token
        connected = False
        while not connected:
            r = requests.post(SMurl)
            print("Please authorize on Touchscreen.")
            time.sleep(60)
            if "Failed" in r.text:
                print(r.text)
                print("Binding failed, please restart script")
                exit(1)
            SMtoken = (json.loads(r.text).get("token"))
            headers = {'Content-Type' : 'application/x-www-form-urlencoded'}
            formData = {'token' : SMtoken}
            r = requests.post(SMurl, data=formData, headers=headers)
            if json.loads(r.text).get("token") == SMtoken:
                f.write(SMtoken)
                print("Token received and saved.\nRestart Script for autoconnect now.")
                connected = True
                return(SMtoken)
                exit(0)

    else:
        f.close()
        # Connect to SnapMaker with saved token
        headers = {'Content-Type' : 'application/x-www-form-urlencoded'}
        formData = {'token' : SMtoken}
        r = requests.post(SMurl, data=formData, headers=headers)
        return(SMtoken)


# Read Status of Snapmaker 2.0 via API
# Example Data IDLE:
# {"status":"IDLE","x":112,"y":142,"z":150,"homed":false,"offsetX":0,"offsetY":0,"offsetZ":0,"toolHead":"TOOLHEAD_3DPRINTING_1",
# "nozzleTemperature":19,"nozzleTargetTemperature":0,"heatedBedTemperature":20,"heatedBedTargetTemperature":0,
# "isFilamentOut":false,"workSpeed":1500,"printStatus":"Idle",
# "moduleList":{"enclosure":true,"rotaryModule":false,"emergencyStopButton":true,"airPurifier":false},
# "isEnclosureDoorOpen":false,"doorSwitchCount":0}
#
# Example Data RUNNING:
# {"status":"RUNNING","x":-19,"y":339,"z":310.763,"homed":false,"offsetX":0,"offsetY":0,"offsetZ":0,"toolHead":"TOOLHEAD_3DPRINTING_1",
# "nozzleTemperature":63,"nozzleTargetTemperature":205,"heatedBedTemperature":20,"heatedBedTargetTemperature":70,
# "isFilamentOut":false,"workSpeed":1500,"printStatus":"Printing",
# "fileName":"Leon_Base.gcode","totalLines":20295,"estimatedTime":3204,"currentLine":91,"progress":0.004483863245695829,"elapsedTime":20,"remainingTime":3195,
# "moduleList":{"enclosure":true,"rotaryModule":false,"emergencyStopButton":true,"airPurifier":false},
# "isEnclosureDoorOpen":false,"doorSwitchCount":0}
#
def readStatus(SMtoken):
    #print("Reading SN Status...")
    SMstatus = "http://" + connectIP + ":8080/api/v1/status?token="
    r = requests.get(SMstatus+SMtoken)
    snStatus = json.loads(r.text).get("status")
    snNozzleTemp = json.loads(r.text).get("nozzleTemperature")
    snNozzleTaTemp = json.loads(r.text).get("nozzleTargetTemperature")
    snHeatedBedTemp = json.loads(r.text).get("heatedBedTemperature")
    snHeatedBedTaTemp = json.loads(r.text).get("heatedBedTargetTemperature")

    if json.loads(r.text).get("fileName") is not None:
        snFileName = json.loads(r.text).get("fileName")
    else:
        snFileName = "N/A"
    if json.loads(r.text).get("progress") is not None:
        snProgress = ("{:0.1f}".format(json.loads(r.text).get("progress")*100))
    else:
        snProgress = "0"
    if json.loads(r.text).get("elapsedTime") is not None:
        snElapsedTime = str(timedelta(seconds=json.loads(r.text).get("elapsedTime")))
    else:
        snElapsedTime = "00:00:00"
    if json.loads(r.text).get("remainingTime") is not None:
        snRemainingTime = str(timedelta(seconds=json.loads(r.text).get("remainingTime")))
    else:
        snRemainingTime = "00:00:00"

    snReply = {"snIP":connectIP,"snStatus":snStatus,"snNozzleTemp":snNozzleTemp,"snNozzleTaTemp":snNozzleTaTemp,
               "snHeatedBedTemp":snHeatedBedTemp,"snHeatedBedTaTemp":snHeatedBedTaTemp,"snFileName":snFileName,
               "snProgress":snProgress,"snElapsedTime":snElapsedTime,"snRemainingTime":snRemainingTime}
    return(snReply)

# Read Status of Enclosure
# Example Data:
# {"isReady":true,"isDoorEnabled":false,"led":100,"fan":0}
#
def readStatusEnclosure(SMtoken):
    print("Reading Enclosure Status...")
    SMenclosure = "http://" + connectIP + ":8080/api/v1/enclosure?token="
    r = requests.get(SMenclosure+SMtoken)
    print(r.text)
    return(r.text)


# Check status of Snapmaker 2.0 via UDP Discovery
# Possible replies:
#  '[email protected]|model:Snapmaker 2 Model A350|status:IDLE'
#  '[email protected]|model:Snapmaker 2 Model A350|status:RUNNING'
def checkState(UDPClientSocket,msg,destPort,retries):
    global snReply
    global snWorking
    global retryCounter
    UDPClientSocket.sendto(msg, ("255.255.255.255", destPort))
    try:
        reply, server_address_info = UDPClientSocket.recvfrom(1024)
        elements = str(reply).split('|')
        snIP = (elements[0]).replace('\'','')
        snModel = (elements[1]).replace('\'','')
        snStatus = (elements[2]).replace('\'','')
        snIP, snIPVal = snIP.split('@')
        snModel, snModelVal = snModel.split(':')
        snStatus, snStatusVal = snStatus.split(':')
        snWorking = snStatusVal
        snReply = {"snIP":snIPVal, "model":snModelVal, "snStatus":snStatusVal}
    except socket.timeout:
        retryCounter += 1
        if (retryCounter==retries):
          snReply = {"snIP":"N/A", "model":"N/A", "snStatus":"OFFLINE",
                     "snNozzleTemp":0,"snNozzleTaTemp":0,
                     "snHeatedBedTemp":0,"snHeatedBedTaTemp":0,"snFileName":"N/A",
                     "snProgress":0,"snElapsedTime":"00:00:00","snRemainingTime":"00:00:00"}
          return
        else:
          checkState(UDPClientSocket,msg,destPort,retries);

# Check if IP is valid:
def validate_ip_address(ip_string):
   try:
       ip_object = ipaddress.ip_address(ip_string)
       return True
   except ValueError:
       return False

# POST to HomeAssistant Webhook
def postIt(state):
    session = requests.Session()
    session.verify = False
    print("Sending State:", state)
    try:
        requests.post(whUrl, json = state, verify=False)
    except requests.exceptions.ConnectionError:
        print("Could not connect to HomeAssistant on", whUrl)
        return

# Run Main Program
main()

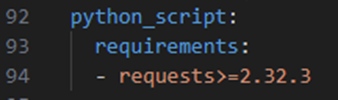
If i got this running my next steps would be trying to run this directly from HA. I tried this, but my HA got freezed every time i tried to run it via python_script.

Many thanks in advance
Best regards