That didn’t work for me but it worked doing that:
template:
  - sensor:
    - name: "Time spent home Lovalace"
      state: >
       {% set list = states('sensor.time_at_home').split('.') %}
       {{ list[0] }}h {{ (60 * ('0.'~list[1]) | float) | round(0) }}m
Where ‘sensor.time_at_home’ is the history stat sensor
1 Like
Shan
May 6, 2022, 6:00pm
414
Thanks all including the devs for this card.
Im finally shaping my dashboard the way I wanted.
Few more cleanups, tweaks to do. When completed, Ill share my code and resources if anyone is interested.
5 Likes
@Shan , that’s a great looking design!
1 Like
Hi there anyone knows an anwser to this:
I want to show 2 states of different entities in one button.
button:
type: custom:button-card
entity: weather.buienradar
show_name: false
show_state: true
state:
  - value: cloudy
    color: white
    icon: mdi:cloud
  - value: clear
    icon: mdi:weather-sunny
  - value: fog
    icon: mdi:weather-fog
  - value: rainy
    icon: mdi:weather-pouring
  - value: snowy
    icon: mdi:weather-snowy
  - value: lightning
    icon: mdi:weather-lightning
styles:
  card: null
  icon:
    - width: 42px
    - height: 42px
    - padding: 18%
    - color: white
    - border-radius: 50%
  name:
    - font-size: 14px
    - font-weight: bold
  state:
    - font-size: 14px
    - font-weight: bold
1 Like
qoheleth
May 12, 2022, 2:01pm
418
Look way, way, back in this thread (here: Fun with custom:button-card - #94 by qoheleth ) and you’ll see a way to put multiple entity states on a single card.
petro
May 12, 2022, 3:57pm
419
Don’t use static button sizes, use aspect ratio
Leonardons
May 12, 2022, 7:55pm
420
My code doesn’t work, can anybody help me?!
venue: >
[[[ return {{states['sensor.venue_england'].attributes['response']
|selectattr('name','search', variables.venue)
|map(attribute='image')
|list
|replace("]","")
|replace("[","")
|replace("'","")  }}
]]]
petro
May 13, 2022, 8:54pm
422
custom button card uses JS templates, not jinja templates.
Leonardons
May 13, 2022, 9:57pm
424
it’s possible to do this same filter with js?
ThaNerd
May 14, 2022, 11:13am
425
Is there a way to have a script for several buttons? For example lets say I have 4 custom buttons, they all call the same script but in the script I want something like this:
- service: number.set_value
        data_template:
          {% set entity_id = 'number.'+button_name %}
          value: 140
petro
May 14, 2022, 3:11pm
426
it is, but the syntax is completely different and much harder. It’s probably better to just do your template in a template sensor’s attribute and display the attribute.
venue: >
  [[[
    return states['sensor.venue_england'].attributes['response'].filter(item => item.name.includes(variables.venue)).map(item => item.image).join(', ');
  ]]]
No idea if that will work as I had to google all the calls.
EDIT: You might need to change item.image to item['image']. Same goes for item.name.
2 Likes
maxym
May 15, 2022, 12:30pm
428
Hello guys.button-card html element from within a JS template of a custom button card?
The goal is to hide the card completely when some conditions are met. Here is my attempt but it doesn’t work (see below why)
              - type: custom:button-card
                template: subsection_bottom
                entity: binary_sensor.garbage_mixed
                show_icon: true
                styles:
                  card:
                    - display: >
                        [[[ return (states['binary_sensor.garbage_mixed'].state
                        != 'on' ? 'none' : 'undefined') ]]]
it seems that documentation is not 100% precise:
The style object members are:

card: styles for the card itself. Styles that are defined here will be applied to the whole card and its content unless redefined in the elements below.
The method is good if I want to hide a card, leaving an empty space in the layout instead.ha-card element which is yet wrapped by button-card element. I need to set display:none to the latter, but being able to use JS template at the same time.
Probably I have to use card mod, but not sure how to address button-card - the card’s most parent element.
Incidentally there is an issue reported to the card author with the same question. Fortunatelly (to me), some other user posted there an workaround.
opened 12:16PM - 10 Jul 20 UTC
FR
**Is your feature request related to a problem? Please describe.**
A clear and … concise description of what the problem is. Ex. I'm always frustrated when [...]
I need some of my buttons to show/hide depending on a templated value, in this case view:
```
[[[ return window.location.pathname.split('lovelace/')[1]; ]]]
```
The above is used in various config templates, but I couldn't find a way to show/hide a full button based in this. Not can I use state-switch, or conditional core card for that matter.
**Describe the solution you'd like**
A clear and concise description of what you want to happen.
Id wager a new config variable `show:` could be added, either being boolean hard coded, or using a template like the above
**Describe alternatives you've considered**
A clear and concise description of any alternative solutions or features you've considered.
conditional core card
state-switch custom card
**Additional context**
Add any other context or screenshots about the feature request here.
<img width="450" alt="Schermafbeelding 2020-07-10 om 14 15 31" src="https://user-images.githubusercontent.com/33354141/87153479-d6fe1180-c2b7-11ea-9083-fdddc2023323.png">
is an experimental short cut menu bar. I which I would like to have the current view button be hidden (now highlighted)
if at ll possible, it would also need to auto slide in, and not leave a gap in de middle of the button-bar... This is where my hopes are set on stack-in-card ;-)
first couple of menu buttons of the above:
```
type: vertical-stack
cards:
- type: custom:stack-in-card
mode: horizontal
keep:
background: true
cards:
- type: custom:button-card
template: button_shortcut_menu
icon: mdi:home
tap_action:
action: navigate
navigation_path: home
variables:
path: home
styles:
icon:
- color: >
[[[
return (states['sensor.count_alerts_notifying'].state > 0)
? 'red': 'green';
]]]
state:
- operator: template
value: >
[[[ return (states['sensor.count_alerts_notifying'].state > 0) ]]]
spin: true
# spin: >
# [[[ return (states['sensor.count_alerts_notifying'].state > 0)
# ? true : false; ]]]
- type: custom:button-card
template: button_shortcut_menu
icon: mdi:light-switch
tap_action:
action: navigate
navigation_path: lights
variables:
path: lights
styles:
icon:
- color: >
[[[
return (states['group.all_inside_lights'].state == 'on')
? 'gold': 'grey';
]]]
- type: custom:button-card
template: button_shortcut_menu
icon: mdi:home-outline
tap_action:
action: navigate
navigation_path: home_summary
variables:
path: home_summary
styles:
icon:
- color: >
[[[
if (states['sensor.hubs_badge'].state > 0 ||
states['sensor.status_badge'].state > 0)
return 'red'; return 'var(--text-primary-color)';
]]]
card:
- animation: >
[[[ return (states['sensor.hubs_badge'].state > 0 ||
states['sensor.status_badge'].state > 0)
? 'blink 2s ease infinite' :'none';
]]]
```
Can anyone help?
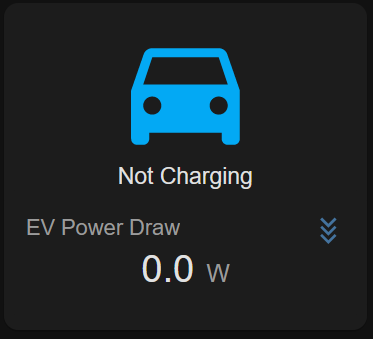
I have used the custom fields function to combine two entities into one card. I want to remove the name of the bottom entity (EV Power Draw) but I cannot figure out how.
custom_fields:
  graph:
    card:
      entity: sensor.ev_power_energy
      style: |
        ha-card {
          box-shadow: none;
        }
      type: sensor
entity: binary_sensor.leaf_charging
hold_action:
  action: more-info
name: Leaf Charging
state:
  - color: rgb(3,169,244,255)
    icon: mdi:car
    name: Not Charging
    value: 'off'
  - color: green
    icon: mdi:car-electric
    name: Charging
    operator: default
styles:
  card:
    - overflow: unset
  custom_fields:
    - filter: opacity(50%)
    - overflow: unset
  grid:
    - grid-template-areas: '"i" "n" "graph"'
type: custom:button-card
I have read and re-read the doc but I am struggling to figure this one out. Can anyone tell me whats wrong with my yaml?
Thanks
1 Like
qoheleth
May 22, 2022, 6:51pm
430
I believe that title is part of the graph. (That’s the only thing that makes sense.)
1 Like
maxym
May 22, 2022, 8:05pm
431
You are using a sensor card that is not much configurable.card-mod to remove the name part (find the object in html tree and set display css property to none)
You can also use other cards which are more configurable, like apexcharts-card or mini-graph-card
1 Like
Shan
May 23, 2022, 6:42pm
432
Gloss buttons theme.
Ok, Im not an expert in coding, based on what I learned and little bit of photshop, I created this for my dashboard tablets and phones that work well. Enjoy :
Download Pngs
I saved my images under www folder
\192.1xx.x.x\config\www\images
Sample codes for a RGB Light
color: black
color_type: card
aspect_ratio: 2/1
entity: light.sofa_lamp_1
name: Sofa Lamp 1
state:
  - value: 'on'
    styles:
      card:
        - background-image: url('/local/images/button_b1.png')
        - background-size: cover
        - border-radius: 0%
        - padding: 4%
      icon:
        - color: var(--button-card-light-color)
    icon: mdi:floor-lamp-dual
  - operator: default
    styles:
      card:
        - background-image: url('/local/images/button_bk1.png')
        - background-size: cover
        - border-radius: 0%
        - padding: 4%
      icon:
        - color: grey
    icon: mdi:floor-lamp-dual-outline
type: custom:button-card
tap_action:
  action: toggle
hold_action:
  action: more-info
Sample for Home security button on preview with little blink animation.
color: black
color_type: card
aspect_ratio: 2/1
entity: input_boolean.home_security
name: Home Security
state:
  - value: 'on'
    styles:
      card:
        - background-image: url('/local/images/button_g1.png')
        - background-size: cover
        - border-radius: 0%
        - padding: 9%
      icon:
        - animation: blink 3s ease infinite
        - color: white
    icon: hass:shield-home
  - operator: default
    styles:
      card:
        - background-image: url('/local/images/button_r1.png')
        - background-size: cover
        - border-radius: 0%
        - padding: 9%
      icon:
        - animation: blink 1s ease infinite
        - color: grey
    icon: hass:shield-home
type: custom:button-card
tap_action:
  action: none
hold_action:
  action: more-info
3 Likes
Shan
May 23, 2022, 6:44pm
433
One more screenshot case it wont allow me to post all at once.
1 Like
remmob
May 26, 2022, 8:39pm
434
Can anyone help me with the correct syntax for a sensor state in a span, so that it can be styled.
This is not working:
[[[
  return "<ha-icon icon=mdi:wifi style='width:12px; height:12px;'></ha-
  icon><span>${states['sensor.signalstrength_screen_dubbeledeuren'].state}</span>"
]]]
This is from the documentation looks the same to me:
<span style="color: var(--text-color-sensor);">${states['sensor.raspi_cpu'].state}%</span>
Thanks
1 Like