Going to next level of Aquarium Automation...who's with me?

Also I find it funny there was a small discussion on soil moisture sensors because I have a project on hiatus for auto watering of the plants in my house.

The problem I ran into was I couldn’t find a script using a platform I understood that would report the values over mqtt. I wanted to use a nodemcu for them but the only way I know how to flash a nodemcu is through Arduino IDE. So until someone makes a sketch like that I’m kind of stuck!

1 Like

Hahahaha… thanks @Ciwyn … I consider imitation the highest form of flattery. :slight_smile:

BTW, you better buckle in then, because I’ve done something rather interesting since my last post.

As previously mentioned above in the past, before I began the hardware rebuild - I knew I needed to get my primary HA controlling Pi moved up to the latest current releases and off of version 0.53. But, I’d hit the Python2.7 --> Python3 wall in terms of upgrading directly on the Pi itself, but couldn’t upgrade HA until I upgraded Python which was sure to break everything (high potential of risk.)

Additionally, there was another operational detail that was becoming a real PITA. Restarts of HA were taking anywhere from 10-15 minutes, thanks largely due to a massively large config file & lots of checks and scans being performed at startup. And this was on a very recent RaspberryPi 3+. And having to step through each major version of HA on path to 0.7x goalposts to figure out the various “breaking changes” quickly along the way … meant this wasn’t going quickly at all. I was using a secondary RaspberryPi as my ‘evolution server’ in this process…but as I said, it was a PITA.

Then, something fortunate happened - I had another computer failure in the house for another service I have running, and it’s replacement got me to thinking about VM’s and the possibility and benefits to run HA on a VM, instead. And on top of that…I learned about the new OpenSource project to reclaim control of XenServer, called XCP-ng, from the same group that develops Xen Orchestra. We’d used XenServer at my former employers, but I wasn’t responsible for running it & never sat one up myself… so I thought I’d give that a try over VMware’s ESXI, esp since it’s OpenSource. :slight_smile:

Dug out a couple of old Laptops (circa 2010) that had VTd / Virtualisation support, slapped in 8GB and a 120GB SSD and started installing XCP-ng and building Xen Orchestra Community Edition and then Home Assistant on a bare min Debian 9 install, and a companion Debian 9 VM to host the PostgreSQL server, sporting a Virtual Network linking the HA VM and the PostgreSQL VM.

BTW, important note: Everything get’s logged. Everything. I know this isn’t ‘recommended’ or ‘desirable’ in 99% of the cases, but I have my own reasons for doing so & migrated to a dedicated RaspberryPi for DB functions. It was a big improvement for awhile, but over time, as my HA install and feature set grew, even my dedicated Pi for this function was getting bottle-necked with the 100mb Ethernet interface.

I did consider going to a AlternatePi hardware platform, and there’s some good candidates, as well as installing USB based SSD’s for storage over the SD cards I was using now, but there was another issue in the back of my head: Backups. I have backups now, but going through a restore / recovery process is still a pain. I wanted something better.

After about almost 2 months with it, I found XCP-ng and Xen Orchestra give me what I’m looking for and am really happy with the performance. Actually, the performance is amazing. Boot times of Debian AND Home Assistant (both) are under 30 seconds. If for some dreaded reason, I have to reboot the whole computer, it takes just under 3 minutes for XCP-ng’s Hypervisor & Four separate guest VM’s to spin up: HA, Database Server, Xen Orchestra VM (the tool to manage your VM’s through. web interface), and a Windows10 running Seneye Connect App.


(IP and MAC addresses removed to protect the innocent)

Furthermore, I get the added ability to do Snapshots of my entire HA environment (including Debian OS). This ability to back out of a botched change to my Config file or various other add ons I’ve got in my install is just a dream, as the ability to make a snapshot of everything - just single digit seconds, whereas my old backup script would need up to 2 minutes to run, if HA was running at the same time. Maybe 30 seconds, if it wasn’t.

Further, since HA controls a major portion of my house & my aquariums, I have always been keen on Disaster Recovery. And that’s what the Second laptop is for - to have a place to stream Disaster Recovery images too, ready to fire up as ‘warm stand by’ backup copies, in the event the primary Hypervisor / Laptop fails.


What’s really cool about this - is when you have similar enough hardware specifications - you can not just copy VM’s between machines for backup, but you can also migrate said VMs to another Hypervisor hardware host AS THEY RUN…which is just amazing and reminiscent of the time I first saw this on Sun Solaris on E10000 Hardware that cost hundreds of thousands of Euros. :smiley:

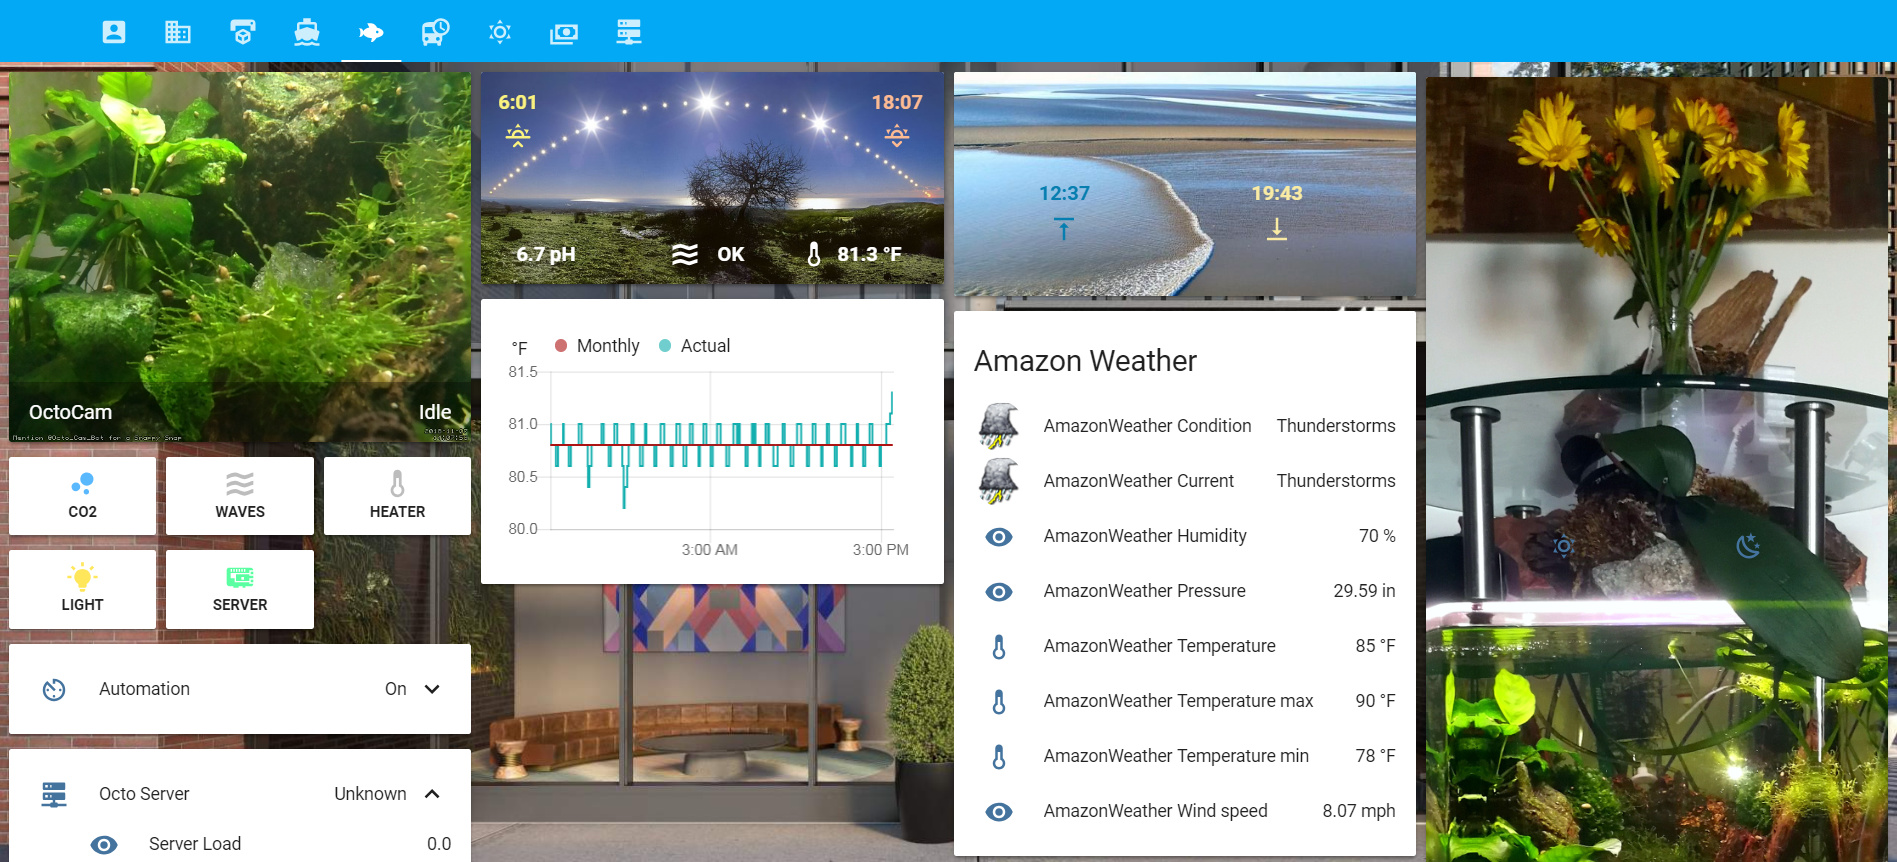
In the screen cap above, the VM’s running across two Laptops (Thinkpad and Daisy) are shown.


On my old RaspberryPi 3B +, system load used to run around 0.9 on the load side, and could easily peg 2.0 and just stay there for up to 30 minutes. Loading times on iPads and in browsers would still work, but you could feel it was “slow” sometimes on the Pi’s (disclaimer: I have lots of Tabs and dynamically changing Panels on my HA interface). And if you attempted to view the History Graph page or Logbook page… it would either bring the Pi-based HA instance to a crawl for up to 3-4 minutes before recovering… or crashing and freezing up because of RAM issues.

The log / history viewing problems are all gone now. So is the high load. It runs along nicely at between 0.05-0.2 load and with 3GB+ of RAM available, even the long standing Synology Cam memory leak issue isn’t a problem so much anymore - more of a nuisance than a stability issue.

All of this is just peanuts to my real goal with all of this tho: I finally just completed the migration, testing, debugging of my HA version to version .77. Finally, I am “current” on all my HA instances now (both Pi and VM based), and can move onward toward rebuilding CoralPi and documenting all of that.

BTW, those who might be asking “How do I get GPIO’s physically out from my Home Assistant VM?” The answer is, I don’t. In fact, on the “core controller” (aka Joshua in the screen caps above) - that RaspberryPi was always a GPIO “free” box & it was based upstairs away from all my aquarium stuff. Coral Pi and NemoPi are the RaspberryPi’s that have all the GPIO connections and are located by my aquariums. TimelordPi also has GPIO aquarium related sensors for my Phytoplankton farm and provides GPS synced Time to the network, but all of that is on the roof. Splashes, Spills and “knocking things over” happens around the aquariums. I didn’t want my primary logic controller for everything to be around the aquariums - so HA Pi and Database Pi were always located far away from that - everything happens over HTTPS, MQTT and other protocols. This makes “virtualisation” of my primary logic controller rather easy.

Oh yeah, I also got rid of the dedicated PC running Win7 to host the Seneye Connect App - or more correctly stated - recycled it and moved it upstairs where it now runs Win10 on a XCP-ng VM. I used the brilliant VirtualHere USB client app on Windows to forward USB over Ethernet and plugged the actual Seneye Device into one of my RaspberryPi (NemoPi), which also now runs a VirtualHere USB Server along with an instance of HA. This should hold me over until I can get this working natively in Python on a RaspberryPi & means I don’t have to dedicate an entire laptop to this tiny function, and can now use it for other things as well… like automated redundant backups of my entire HA environment. :slight_smile:

If you’re interested in looking at the OpenSource alternative to XenServer (or ESXI or other) for hosting your HA environment, have a look here to getting started with the core Hypervisor:
https://xcp-ng.org

To manage it from a Windows desktop, install this windows client: https://github.com/xcp-ng/xenadmin/releases

To manage it from a Web interface (i.e. - Mac/Linux users) have a look Xen Orchestra Community Edition:
https://xen-orchestra.com/docs/from_the_sources.html

Tip: If you decided to build the XO Community Edition, you can build it piece by piece following the instructions above - OR - as I have done more recently… follow this instructions which automates the whole process, kindly produced by Lawrence Systems (see Youtube channel of same name). It’s basically downloading their install script, running it and go for coffee and 15 mins later, it’s done.

Furthermore, I’m now seriously considering… AFTER I do the CoralPi / NemoPi Rebuild and co-documentation for the DIY guide… :slight_smile: … I’m seriously thinking about doing a Publicly shared prebuild of Home Assistant + Debian and essentials on a VM for public distribution & use on XCP-ng (should be backwards compatible with XenServer, me thinks)… not unlike Hassbian (my fav of the Home Assistant distros) but for XCP-ng, and might even explore the idea of creating a custom HA component to manage XCP-ng right from the HA interface, thereby eliminating the need for Xen Orchestra. Hmmmm… :slight_smile:

But again, and for now, I’ve got all my HA instances upgraded and current and I freed up two RaspberryPi 3+'s for re-use in my Coral Pi rebuild (NemoPi is already a 3+).

I’ve also revised my rebuild plans a little bit. I’m going to do two rebuilds and focus a bit different on each rebuild. I’m going to do what I call a “beginners” rebuild of Coral Pi as planned, but with the emphasis on “beginners and novices” who are new to the whole Hardware building topic / skillset. The idea will be to really try to pull you ladies and guys in further into your own comfort zone about getting your hands dirty with electronics and soldering. Then we’ll dive into installing HA and linking all the hardware to the software sensors we create & show how that is best done and maybe look at an alternative approach or two, and the reasons you might want to consider that. This should be interesting because until now, Coral Pi is the only Pi that doesn’t run HA actually. It’s a huge collection of scripts that communicates with my remote HA Pi upstairs (Joshua) but yet, has the single largest collection of GPIO sensors of all the RaspberryPi’s. It’s an original model RaspberryPi and it’s GPIOs are nearly all consumed - so the upgrade to a 40pin GPIO bus will be much welcome.

The second rebuild will focus on NemoPi and will come a bit later after CoralPi. It’s focus is going too be how do you take something from a “Breadboard (Proof of) Concept” design (which is what CoralPi is now, and will still kinda be after the rebuild) and turn that into the kind of thing that uses your own Printed Circuit Board designs and how you tackle doing all of that. It’s more Intermediate / Advanced level but the idea is to pick up where the Coral Pi rebuild leaves off. It’ll also serve as a nice topical bridge to other projects which I’m looking at doing & even maybe getting my wife to help with Video production of for a YouTube channel or something. Not that I really like being in front of a camera (just the opposite) but I am convinced that many people find instructional videos the more attractive way to learn things themselves.

I decided to take these extra steps because of the feedback I quite literally had - to keep in mind some of the intended readers / viewers of DIY Build guides aren’t so skilled with hardware (yet) - and also would like to say again Thanks to those who did say something to me about it.

Hopefully, now that I’ve sorted some operational / logistical pre-requisites, I can get started on the actual rebuild of CoralPi now in just a couple of weeks or less. It sucked to have to put everything on hold a couple of months ago, but now that I’ve managed to use that as an opportunity to solve / address other issues, I can pick up speed and get this out the door now,… finally. :smiley:

I retract my previous statement! I plan on copying a small bit of what you are doing!

I like having hassIO on a raspberry pi. That was involved enough for me. Those temp sensors are working out quite well though. So I am glad I undertook that project.

Hey!! Just saw this post… That’s awesome! My wife is very much into fish, and we have a total of 6 aquariums ive brought into the HA fold… But with just sensor temps, heater and lights. I want to integrate it all into Google Home, along with all of the other stuff😂. Thanks for the insight!

1 Like

@cowboy I haven’t checked in, in a while. Looks like you’ve made some progress.

I’ve just finished up the few minor issues I had with the AquaIllumination library and released it last night https://pypi.org/project/aquaipy/

I’m working on building this into HA next, as light component. I’ve got a bit of pressure behind it now as a friend wants me to create a dashboard for his aquarium shop, which allows him the ability to control all of his lights.

1 Like

Hey all, this has been a great thread to read through and I’ve picked up some good tips along the way. Just so you know you’re not the only crazy ones out there, I also control my 2 small aquariums (one 40 gal fresh, one 15 gal nano reef) with a combination of Home Assistant (which also takes care of my apartment) and Reef-Pi. If you havn’t looked into Reef-pi please do (https://reef-pi.github.io) - the development has come a long way in the past year. It’s pretty easy to add temp and relays and everything is published via API, which is easy for a remote Home Assistant installation to pick up.

I went for a slightly different goal with my controllers - I wanted the tanks to mirror specific locations as much as possible. For example, I’m querying various sites to get daily water temp data. Through automations, the reef water temp changes daily accordingly, dropping to lower averages at night, and higher at midday depending on the data coming from a reef in Bali. Same with sunrise / sunset times controlling the lighting and high/low tides controlling the wavemaker at that specific location. The freshwater tank is setup in a similar way, but targeted to a spot in the Amazon River instead. (Amazon water temp data is hard to find so I had to go with monthly averages.)

Improvement has become a never-ending project but I think it’s pretty cool so I wanted to share…

5 Likes

I have just started setting up a marine aquarium (110g) and I am trying to automate as much as possible. I did go with a Neptune Systems Apex controller because people have been able to make Home Assistant work with it.

It doesn’t support sending MQTT unfortunately, but I am not letting that stop me. In my quest to keep things cheap I purchased two of these lights http://a.co/d/3JE2o1i I went with 2x24" lights instead of 1x48". The cost wasn’t much different but each 24" puts out about the same light as the 48".

These are supposed to be smart lights but they have horrible controllers. If they lose power they lose their clock and programming. I set about trying to figure out how they were controlled. When I pulled the controller there were 4 wires. My first thought was power to the controller (which is contained in the end cap) and two communications lines. I hooked up a cheap analyzer to identify the protocol in use. Turns out I was over thinking this.

Wire 1 is +5v, Wire 2 is GND (which passes through to the power connector. More on why this is awesome later), Wire 3 is Blue, Wire 4 is white. If you pull 3 or 4 high with a 5v signal it switches on that color. This couldn’t be easier.

I flashed an ESP8266 wemos D1 with Tasmota and set about converting these lights into remotely controllable lights. I marked one light as the master and the other as slave. For the master light, I hardwired the 4 wires into the D1. +5 and ground were easy. I had to change the function on 2 of the digital output lines. After start up I was able to login to the Tasmota interface and toggle both lights. For the slave light I soldered in a 2 pin connector. On the 4 wires for the slave I just clipped the +5 and gnd lines short. Added a 2 wire extension to the blue and white wires and plugged them into the D1. Now I was able to control those lights as well.

Just a bit on the gnd thing. In digital logic, everything has to reference the same ground level. This means for 2 separate items like these lights, you have to tie ground together. Had the input ground been isolated from the controller ground I would have had to pull a 3rd wire for ground to the D1. In this case they were tied together by a common power plug (I replaced the 2 power supplies with a single larger one.)

DO NOT TRY TO TIE YOUR 5V LINES TOGETHER. These lights take in 15V and step it down to 5V for the controller. Since they have separate 5v regulators and the grounds are not isolated tying them together can create some weird problems if not damage. It’s not possible for both regulators to be at precisely the same voltage. This can cause the lower voltage one to sink more current from the higher one to try to bring the voltage down. This causes the higher one to source more current to compensate. Essentially they fight each other for control. Power supplies must be designed for bridging to make this work. Fortunately for this project it’s just not needed.

Next up, I am going to modify a cheap rotary feeder with a D1 to make it controllable. The one I found is easy to disassemble and there is actually a lot of room inside.

3 Likes

I just did something very similar. Here’s some info on how + the python script to make it work. Auto Fish Feeder by sfgabe - Thingiverse

1 Like

So I have decided to use my pi zero temp probes I made to control the heater on my frag tank. The problem I occasionally run into is the script seems to hang occasionally and will just freeze the temperature reading at the last temperature it read. This has rarely happened when the heater has been on fortunately (also the heater’s internal thermometer will keep it from overheating anyway) but in the winter when the script hangs it can drop the water temp quite a bit. I’ve seen it as low as 69 F.

My question would be is there a way to write an automation in HA that would detect the temp has been the exact same for the past half hour or so and then reset my pi zero? I have the pi zero plugged into a sonoff 4ch so I could send a command through home assistant to toggle the relay off then back on. I just don’t know if the proper automation parameters may exist to do this.

Thanks for any insight

Ciwyn,

You can write something in HA to do what you say, but that adds complexity and I’d say fix the script first (or PiZero) - that might be easier too.

Is this script running as part of HA or is it a bash / python or some other scripting language?

I’m running a bash script on my oldest Pi B. At 7 years old, it’s still running, but my slowest Pi of them all and is planned for replacement with a 3B. But it’s the Pi with the highest uptime without reboots. It’s just a dead simple script that parses temps off the wire and pipes it to the mosquito mqtt submit command with args and goes down a list of 10 probes, waits 30 seconds and runs again. There’s actually two such scripts - one for Temp probes and the other for Float Sensors. Your’s should be this reliable as well. :slight_smile:

More details please :slight_smile: Let’s see if there’s an easy fix & you can still monitor your temp as you wish.

The automation in HA is super easy - it’d just an state trigger in automations using the time function and checking if the value stayed the same for more than an hour or two or six. In fact, it’s shorter to type out than my entire explanation. lol

Below is an example of what you’d need, I believe. I’ve copy / pasted the example from the URL beneath it, and #'d out the bits you don’t need - leaving them for a reference for the page I took it from under STATE TRIGGER. It’s only interesting if you want those optional bits back in to use.

Basically it looks to see if the state of sensor.temp_probe_3 has been the same for 2 hours, if so, it’ll trigger.
You may need to fine tune the 2 hours value for your setup / tank.

automation:
  trigger:
    platform: state
    entity_id: sensor.temp_probe_3
    # Optional
    # from: 'not_home'
    # Optional
    # to: 'home'
    # If given, will trigger when state has been the to state for X time.
    for:
      hours: 2
     # minutes: 10
     # seconds: 5

WHAA??? I just saw this. Awesome bro!

I look forward to your component, but think I can work with this with the input sliders! lol

Got some days coming up it’ll be quiet around the house & I’ll have some time to get started with this. I can hardly wait.

Thank you!

It’s the script we worked out last year. Just a basic python script that in general is quite reliable but maybe less than half a dozen times has hung for reasons I’m not quite sure. Restarting the pi zero has fixed it every time.

I’m not home now so I can’t access the actual script but it is based on this script:

import time

os.system('modprobe w1-gpio')
os.system('modprobe w1-therm')

temp_sensor1 = '/sys/bus/w1/devices/28-#######/w1_slave'
temp_sensor2 = '/sys/bus/w1/devices/28-#######/w1_slave'

def temp_raw1():
    f = open(temp_sensor1, 'r')
    lines = f.readlines()
    f.close()
    return lines

def temp_raw2():
    f = open(temp_sensor2, 'r')
    lines = f.readlines()
    f.close()
    return lines

def read_temp1():
    lines = temp_raw1()
    while lines[0].strip()[-3:] != 'YES':
        time.sleep(0.2)
        lines = temp_raw1()
    temp_output1 = lines[1].find('t=')
    if temp_output1 != -1:
        temp_string1 = lines[1].strip()[temp_output1+2:]
        temp_c = float(temp_string1) / 1000.0
        temp_f = temp_c * 9.0 / 5.0 + 32.0
        return temp_c, temp_f

def read_temp2():
    lines = temp_raw2()
    while lines[0].strip()[-3:] != 'YES':
        time.sleep(0.2)
        lines = temp_raw2()
    temp_output2 = lines[1].find('t=')
    if temp_output2 != -1:
        temp_string2 = lines[1].strip()[temp_output2+2:]
        temp_c = float(temp_string2) / 1000.0
        temp_f = temp_c * 9.0 / 5.0 + 32.0
        return temp_c, temp_f

while True:
        print(read_temp1())
        print(read_temp2())
        time.sleep(1)

Then there is another script which publishes to MQTT. I have to imagine it’s likely the MQTT script which is causing the problem because when I catch the problem I notice my temp graph in HA will say last updated hours ago. If it was a problem with the temperature script the temperature would likely come back as an error. I don’t know how to verify I am correct on that though.

1 Like

I’ve got some basics of a component built now, very early work in progress.

I’ve also been using a custom UI component for it https://github.com/thomasloven/lovelace-slider-entity-row

Need to pull it all together and build something proper that can be contributed back to HA but for the moment this will get you a slider for each color channel, as is. If you add a light called “DT light” it will give you 7 entities called light.dt_light_uv, light.dt_light_violet…etc.

import logging

import voluptuous as vol

# Import the device class from the component that you want to support
from homeassistant.components.light import ( ATTR_BRIGHTNESS,
    SUPPORT_BRIGHTNESS, Light, PLATFORM_SCHEMA, LIGHT_TURN_ON_SCHEMA,
    VALID_BRIGHTNESS)
from homeassistant.const import CONF_HOST, CONF_NAME
import homeassistant.helpers.config_validation as cv

# Home Assistant depends on 3rd party packages for API specific code.
REQUIREMENTS = ['https://github.com/mcclown/AquaIPy/archive/1.0.0.zip#aquaipy==1.0.0']

_LOGGER = logging.getLogger(__name__)

# Validation of the user's configuration
PLATFORM_SCHEMA = PLATFORM_SCHEMA.extend({
    vol.Required(CONF_HOST): cv.string,
    vol.Optional(CONF_NAME): cv.string
})


def setup_platform(hass, config, add_devices, discovery_info=None):
    """Setup the AquaIllumination platform."""

    from aquaipy import AquaIPy
    from aquaipy.error import FirmwareError, ConnError, MustBeParentError

    host = config.get(CONF_HOST)
    name = config.get(CONF_NAME)

    # Setup connection with devices
    light = AquaIPy(name)

    try:
        light.connect(host)
    except FirmwareError:
        _LOGGER.error("Invalid firmware version for target device")
        return
    except ConnError:
        _LOGGER.error("Unable to connect to specified device, please verify the host name")
        return
    except MustBeParentError:
        _LOGGER.error("The specifed device must be the parent light, if paired. Please verify")

    colors = light.get_colors()

    add_devices(AquaIllumination(light, color, name) for color in colors)


class AquaIllumination(Light):
    """Representation of an AquaIllumination light"""

    def __init__(self, light, channel, parent_name):
        """Initialise the AquaIllumination light"""
        self._light = light
        self._name = parent_name + ' ' + channel
        self._state = None
        self._brightness = None
        self._channel = channel

    @property
    def name(self):
        """Get device name"""

        return self._name

    @property
    def should_poll(self):
        """Polling required"""

        return True

    @property
    def is_on(self):
        """return true if light is on"""

        return self._state == 'on' or self._state == 'schedule_mode'

    @property
    def state(self):
        """Get device state"""

        return self._state

    @property
    def supported_features(self):
        """Flag supported features"""

        return SUPPORT_BRIGHTNESS

    @property
    def brightness(self):
        """Return brightness level"""

        return self._brightness


    def turn_on(self, **kwargs):
        """Turn all color channels to given percentage"""

        brightness = (kwargs.get(ATTR_BRIGHTNESS, 255) / 255) * 100
        colors_pct = self._light.get_colors_brightness()

        for color,val in colors_pct.items():

            # means that we limit all channels to a max of 100%, when setting
            # the brightness. The next part works around that, until this
            # support is added.

            if val > 100:
                color_pct[color] = 100

        colors_pct[self._channel] = brightness

        _LOGGER.debug("Turn on result: " + str(colors_pct))
        self._light.set_colors_brightness(colors_pct)


    def turn_off(self):
        """Turn all color channels to 0%"""

        colors_pct = self._light.get_colors_brightness()
        colors_pct[self._channel] = 0

        self._light.set_colors_brightness(colors_pct)


    def update(self):
        """Fetch new state data for this light"""

        sched_state = self._light.get_schedule_state()
        colors_pct = self._light.get_colors_brightness()
        brightness = colors_pct[self._channel]

        self._state = "off"

        if sched_state:
            self._state = 'schedule_mode'
        elif brightness > 0:
            self._state = 'on'

        self._brightness = (brightness / 100) * 255

Caveats right now are:

  • no support for turning on/off schedule (you need to manually do that before using this, or else it will just flash the color change)

    • High priority for me, so I’ll fix this soon.
  • no support for setting more than one channel at once. I think I need to add a service to handle this scenario but I need to do more reading. This is useful for adding automatons for colours, getting it to go to all blues or all whites on command for instance.

    • Also high priority for me right now
  • no support for HD (ie. over 100%) yet. For safety I’m limiting all channels to 100% until I work out how to build the client side validation that would be needed to support this. The python module already has this safety build in though.

    • Lower priority for my current project but something I need to do in the long run. Probably won’t be part of v1, unless someone else wants to work on it.
1 Like

Ciwan - okay, post the actual script when you get home and have time. No rush, I’m heading to bed in just a bit. It’s 2:26am here. :slight_smile:

Ok here is my mqtt script

#!/bin/bash
until [ "$?" != "0" ];
do
#individual temp probe and mqtt commands here
        mosquitto_pub -u myuser -P password -t homeassistant/sensor/fishroom/temp5_F -m "`/home/pi/temp5_F.py`" -h myipaddress
# Sleep in seconds
        sleep 55

done

I changed my -u and -P and the ip but the script works

and here is the temp script:

#!/usr/bin/python
import os
import glob
import time

os.system('modprobe w1-gpio')
os.system('modprobe w1-therm')

base_dir = '/sys/bus/w1/devices/'
device_folder = glob.glob(base_dir + '28-03168a3e25ff')[0]
device_file = device_folder + '/w1_slave'

def read_temp_raw():
    f = open(device_file, 'r')
    lines = f.readlines()
    f.close()
    return lines

def read_temp():

Sorry it took me so long to finally get these. I pretty much forgot how to SSH into my pi and had to get a new router so it forced me to actually do it.

I can’t remember who was talking about Seneye on this thread but I wrote a custom component to support directly plugging your Seneye into your RPi and get the data via a native python driver that I wrote as well. Figured I’d add a link to this thread.

There is still the nagging question of does the device store results locally or not. From my reading/testing it seems like if you leave it in interactive mode (“HELLOSUD”) then it doesn’t cache local results and fill up. I guess further testing will reveal that. I’ll figure out a way around that if I have to.

1 Like

Fun thread! Very inspiring. We keep a 30 tank goldfish breeding room, so obviously aquarium threads are very intriguing. I’ve just recently found Home Assistant and am almost happy with our basic setup for the house, but I’d love to eventually do more with the fish room. We have lights and our central water change system on there, but very little in the way of monitoring besides a motion sensor for room temp/turning on the lights and a few leak detectors. I have a ton of Arduino stuff I never really got into because it was over my head at the time, but this is making me want to dig it out again :slight_smile:

1 Like

Hi all,
wow to begin with. This thread answered questions i had :slight_smile:
I’m doin some small time breeding too, fresh water.
Have lights and temperature in HA at the moment. Using Fibaro universal sensor for temperature.
Have thought about ph and other values and after reading this thread i will start looking at this again :slight_smile:
Thanks :slight_smile:
I will be lurking :stuck_out_tongue:

2 Likes

Welcome to the thread @aktill & @sabbath. :slight_smile:

I hope it’s useful for you both & please feel free to share your journey’s and experiences with the rest of us. We’re all learning together. I sometimes go quiet because other day job work keeps me busy but I still lurk & follow up what others are doing and contributing.

BTW, if there’s anyone in this thread who’s in the Netherlands / Germany / Belgium / UK & can make it to Hack in the Box Amsterdam HaxPo on May 9 & 10th, I’ll be there hosting the Wireless Hacking Village - come on over (it’s free to the public, you just have to register before hand on the website) and let’s meet face to face! :slight_smile:

Just a status update - I’m one year and 10 months into using Home Assistant for total system control and management of 8 aquariums at the moment & loving it still. I stopped with breeding clownfish after a successful run…too successful, still trying to sell off the last babies from last year. But the flexibility of Home Assistant to scale up and down economically (approx 300-350 euros vs. approx 15,000 euros for a multiple redundant Apex controller setup) is a serious boon and win.

I finally got around to setting up TTS Voice & Sound Effect Alerts last year, which is super nice on several levels. My primary controller actually sits upstairs, away from the tanks & on a completely different circuit breaker than the aquariums downstairs & pushes TTS Voice messages over MQTT to the Remote HA Pi’s downstairs & on every floor. That way I only have to change / add the TTS voice alerts on a single HA instance, rather than duplicating on every Remote Pi that has a speaker attached to it. I have alerts for Kalkwasser / Top Up problems, Tank Overflow Alerts, Status Alerts during the wholly automated Water Change Processes (cause that sometimes caused an alarm with the wife, when she didn’t know before hand I was running one. lol), as well as voice prompts for home automation & security. Just try to get an APEX or competing aquarium controller to do all that. :wink:

Enjoy!

1 Like

Thanks! Been learning a lot.

In terms of voice alerts I just leverage our Alexas. I can call any of them directly with TTS, and so for water change fills I have a series of notifications that go out (tank filling, tank full, tank drained). I don’t have ours completely automated because I don’t trust auto dosing of Seachem Safe, so that’s a manual step. I then turn on the change pump by voice, and it lets me know when the tank is drained (we change daily from a 150 gallon holding tank).

I also have the intention of voice alerting based off some Smartthings leak sensors (duck weed causes the odd issue), but I don’t want to buy a ST hub and I haven’t quite figured out Conbee/ST playing nice yet.

I did recently figure out how to make our Fluval 3.0’s play nicely with a timer, so I can get a few ramp on/off periods over the day (that’s sort of nice).

Otherwise, just a lot of wet sleeves keeping all the babies fed and happy.

1 Like