Thanks to everyone contributed to this thread (especially @aceindy ), I can confirm the Netburner works.
A couple of tips if you want to go down this route:
1_ The port that you are trying to communicate on with the Netburner should be opened on windows firewall. This is one of those simple tasks that you do not pay attention to and it gives you a painful headache
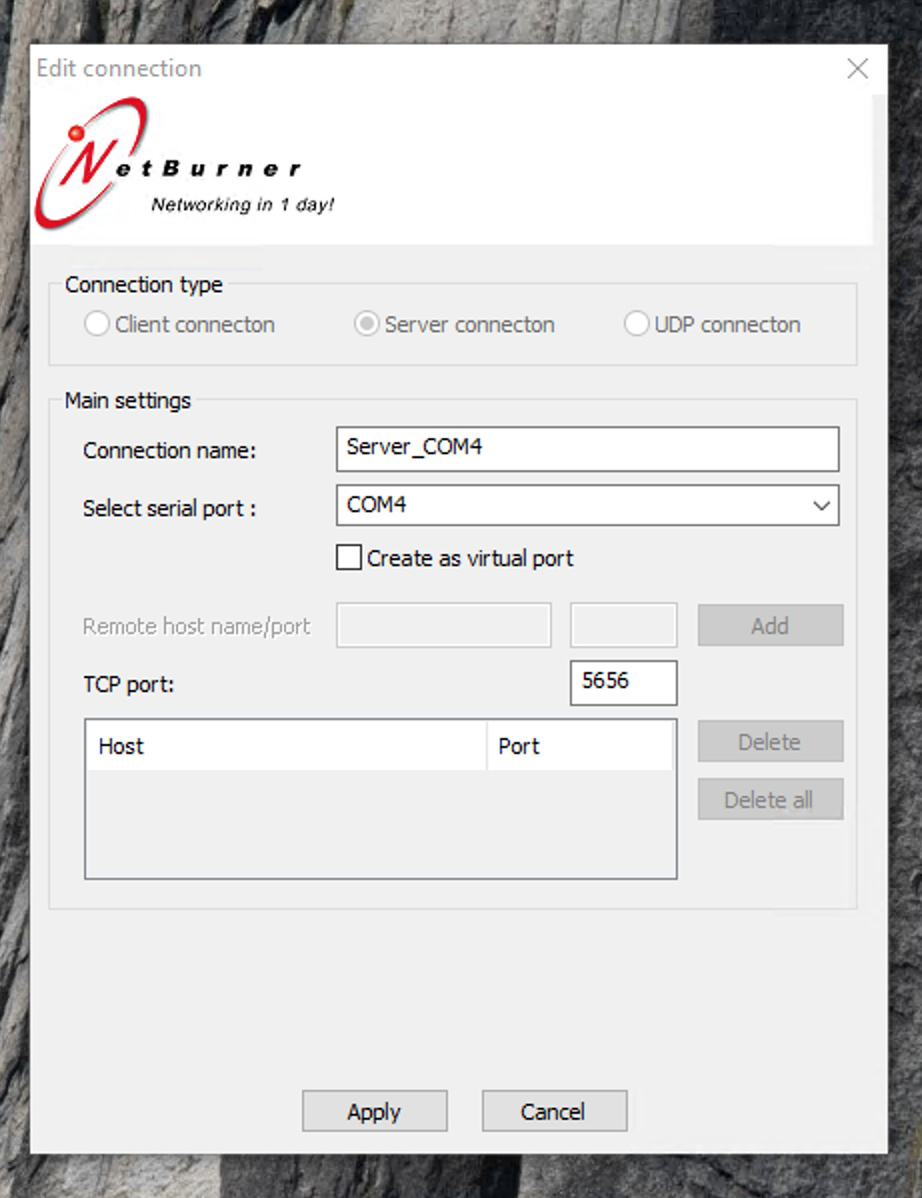
2_ As it has been mentioned above the virtual port should be created as a server. Also make sure that you use the correct USB Com port. In my case it was on Com4 .I attached a screenshot of mine. Hope that helps
Yes, but found different sensors drop frequently when they are a bit far away from the USB stick. So I changed the plan as of last night and put a tasmotised Zigbee-wifi hub. Now ALL the sensors provide their data happily without any interruption!
Thank you very much! I know this is an old thread, but i’m new to HA. Now i’m able to connect my Sonoff Zigbee USB device (cost me only 8 EUR, pretty cheap IMO). My initial fault was creating virtual COM port instead of real. Now i must think of a way to passthrough bluetooth to my Hyper-V HASS installation. Maybe anyone succeded with that? I mean, i could use ESP32 as a bridge but at the moment i’m unable to purchase one, but i do have full Windows Server installation with Hyper-V running. Maybe there is a windows bluetooth to mqtt software? So far i didn’t find any.
1- how does you configuration in zigbee2mqtt look like? Please paste your config…
2- Can you connect with telnet from another machine? telnet <ip address of host> 5656
Just to say that Virtual Here is perfectly running here (that’s a low-cost option, but not free) : HA Supervised on Debian 11, in Hyper-V Win Server 2019. Aeotec and Conbee plugged to a RPI.
I just carefully followed procedures on the VH website, and made it all work at first try. Didn’t believe my eyes, especially after reading the many comments about the difficulties.
Two usbip software were mentioned in the article: USB Network Gate ($159) and USB Redirector ($74). I also found a slightly cheaper one called VirtualHere ($49). I tested VirtualHere and it also works. Note that VirtualHere has a “node-locked” license that you cannot transfer to a different computer.
Now understood the concept and I start searching for a “FREE” solution (right, assume my time is free). And I did come up with a free solution. The only negative part is that the host windows OS has to run in Test Mode as the driver is self signed. In my use case I have an Intel NUC running Hyper-V and WSL2. A Zwave/Zigbee stick is plugged in the local NUC USB port.
And Here is the procedures:
Install Debian 11 in Hyper-V
Install Supervised HA on Debian
Build uspip windows server
3.1 Get the source code from github: https://github.com/cezanne/usbip-win. This is usbip server side driver and daemon.
3.2 Set up the build environment (Visual Studio 2019 Community Edition, Windows DDK, etc)
3.3 Build the binaries from the source
3.4 install certificate (follow instructions on github)
3.5 run command: “usbip list -l”, determine which usb device to bind
3.6 bind the device and start daemon: usbipd
Configure Debian usbip client
4.1 enable usbip module: modprobe vhci-hcd
4.2 attach usb over ip: usbip attach -r {host_ip} -b {bus_id}
4.3 run command: “usbip port” to confirm usb device binds successfully
In HA UI confirm the new device discovery. Test to make sure everything works (I did one z-wave switch inclusion and use that to test z-wave function)
Now everything works we need to steamline the process
6.1 Configure the Debian VM to remain off upon host start, and shutdown upon host shutdown
6.1 In windows, launch Task Scheduler, create new task, set trigger to “run at logon”. Check “run at highest privilege”
6.2 Add action to bind the usb device: {your_path}\usbip bind -b {bus_id}
6.3 Add action to launch usbipd and dettach: powershell Start-Process -FilePath ‘{your_path}\usbipd.exe’ -ArgumentList ‘-d -4’
6.4 Add action to start VM: powershell Start-VM ‘{your_VM_name}’
6.5 by doing above we guarantee the VM only starts after usbipd is already running. You need to run usbip using powershell Start-Process and do not call the exe directly. otherwise it will run a infinite loop and you can never pass that step and proceed to start the VM.
6.6 In Debian create a usbip.conf in /etc/modules-load.d to auto load module
6.7 In Debian create a service to auto load “usbip attach …” after network-online, enable service by systemctl enable usbip.service
Restart the system. by design the VM should shutdown when system is restarted. Upon logon, the task scheduler sequentially starts usbip binding, launches usbipd daemon and starts Debian VM. Inside Debian VM the vhci-hcd module gets loaded and the usbip service gets called to attach the remote usb device. Once HA core gets loaded we should have a fully functional system. Now we can finally sit back and enjoy the home automation.
If you use a RPI as server then you actually don’t need any commercial software. Linux has open-source support for usb over ip on both client and server side.
On RPI side, you do “modprobe usbpi-host” then “usbip bind -b {device_id}”, and start the damenon “usbipd -d”
On VM side, you run “modprobe vhci-hcd”, and attach usb device by “usbip attach -r {your_RPI_ip} -b {device_id}”.
You might have to install the usbip through apt-get and do an update and upgrade of apt-get.
I know this solution works because I am writing this post in the Debian VM on Windows Hyper-V (Ethernet), using a keyboard attached to a RPI 3B+ (Wifi). Honestly it just feels really cool (and weird) …