


I used an ESP8266 ESP01 with a stepdown converter (5v-3,3v). Also I didn’t use the solder pins like everybody else did, i used the solder pins at the end of the board. I think they are pins to accommodate a connector which is not on the board from the factory but they perform the same.
Ikea board 5v and GND → Stepdown
Ikea board REST → GPIO2 on ESP
Stepdown 3,3v → 3V3 and EN on ESP
Stepdown GND → GND on ESP
YAML config:
# Ikea Vindriktning PM2.5 sensor
uart:
rx_pin: GPIO2
baud_rate: 9600
# External component until final merge
external_components:
- source: github://Habbie/esphome@pm1006
components: [ pm1006 ]
sensor:
- platform: pm1006
pm_2_5:
name: Ikea_Vindriktning_PM25
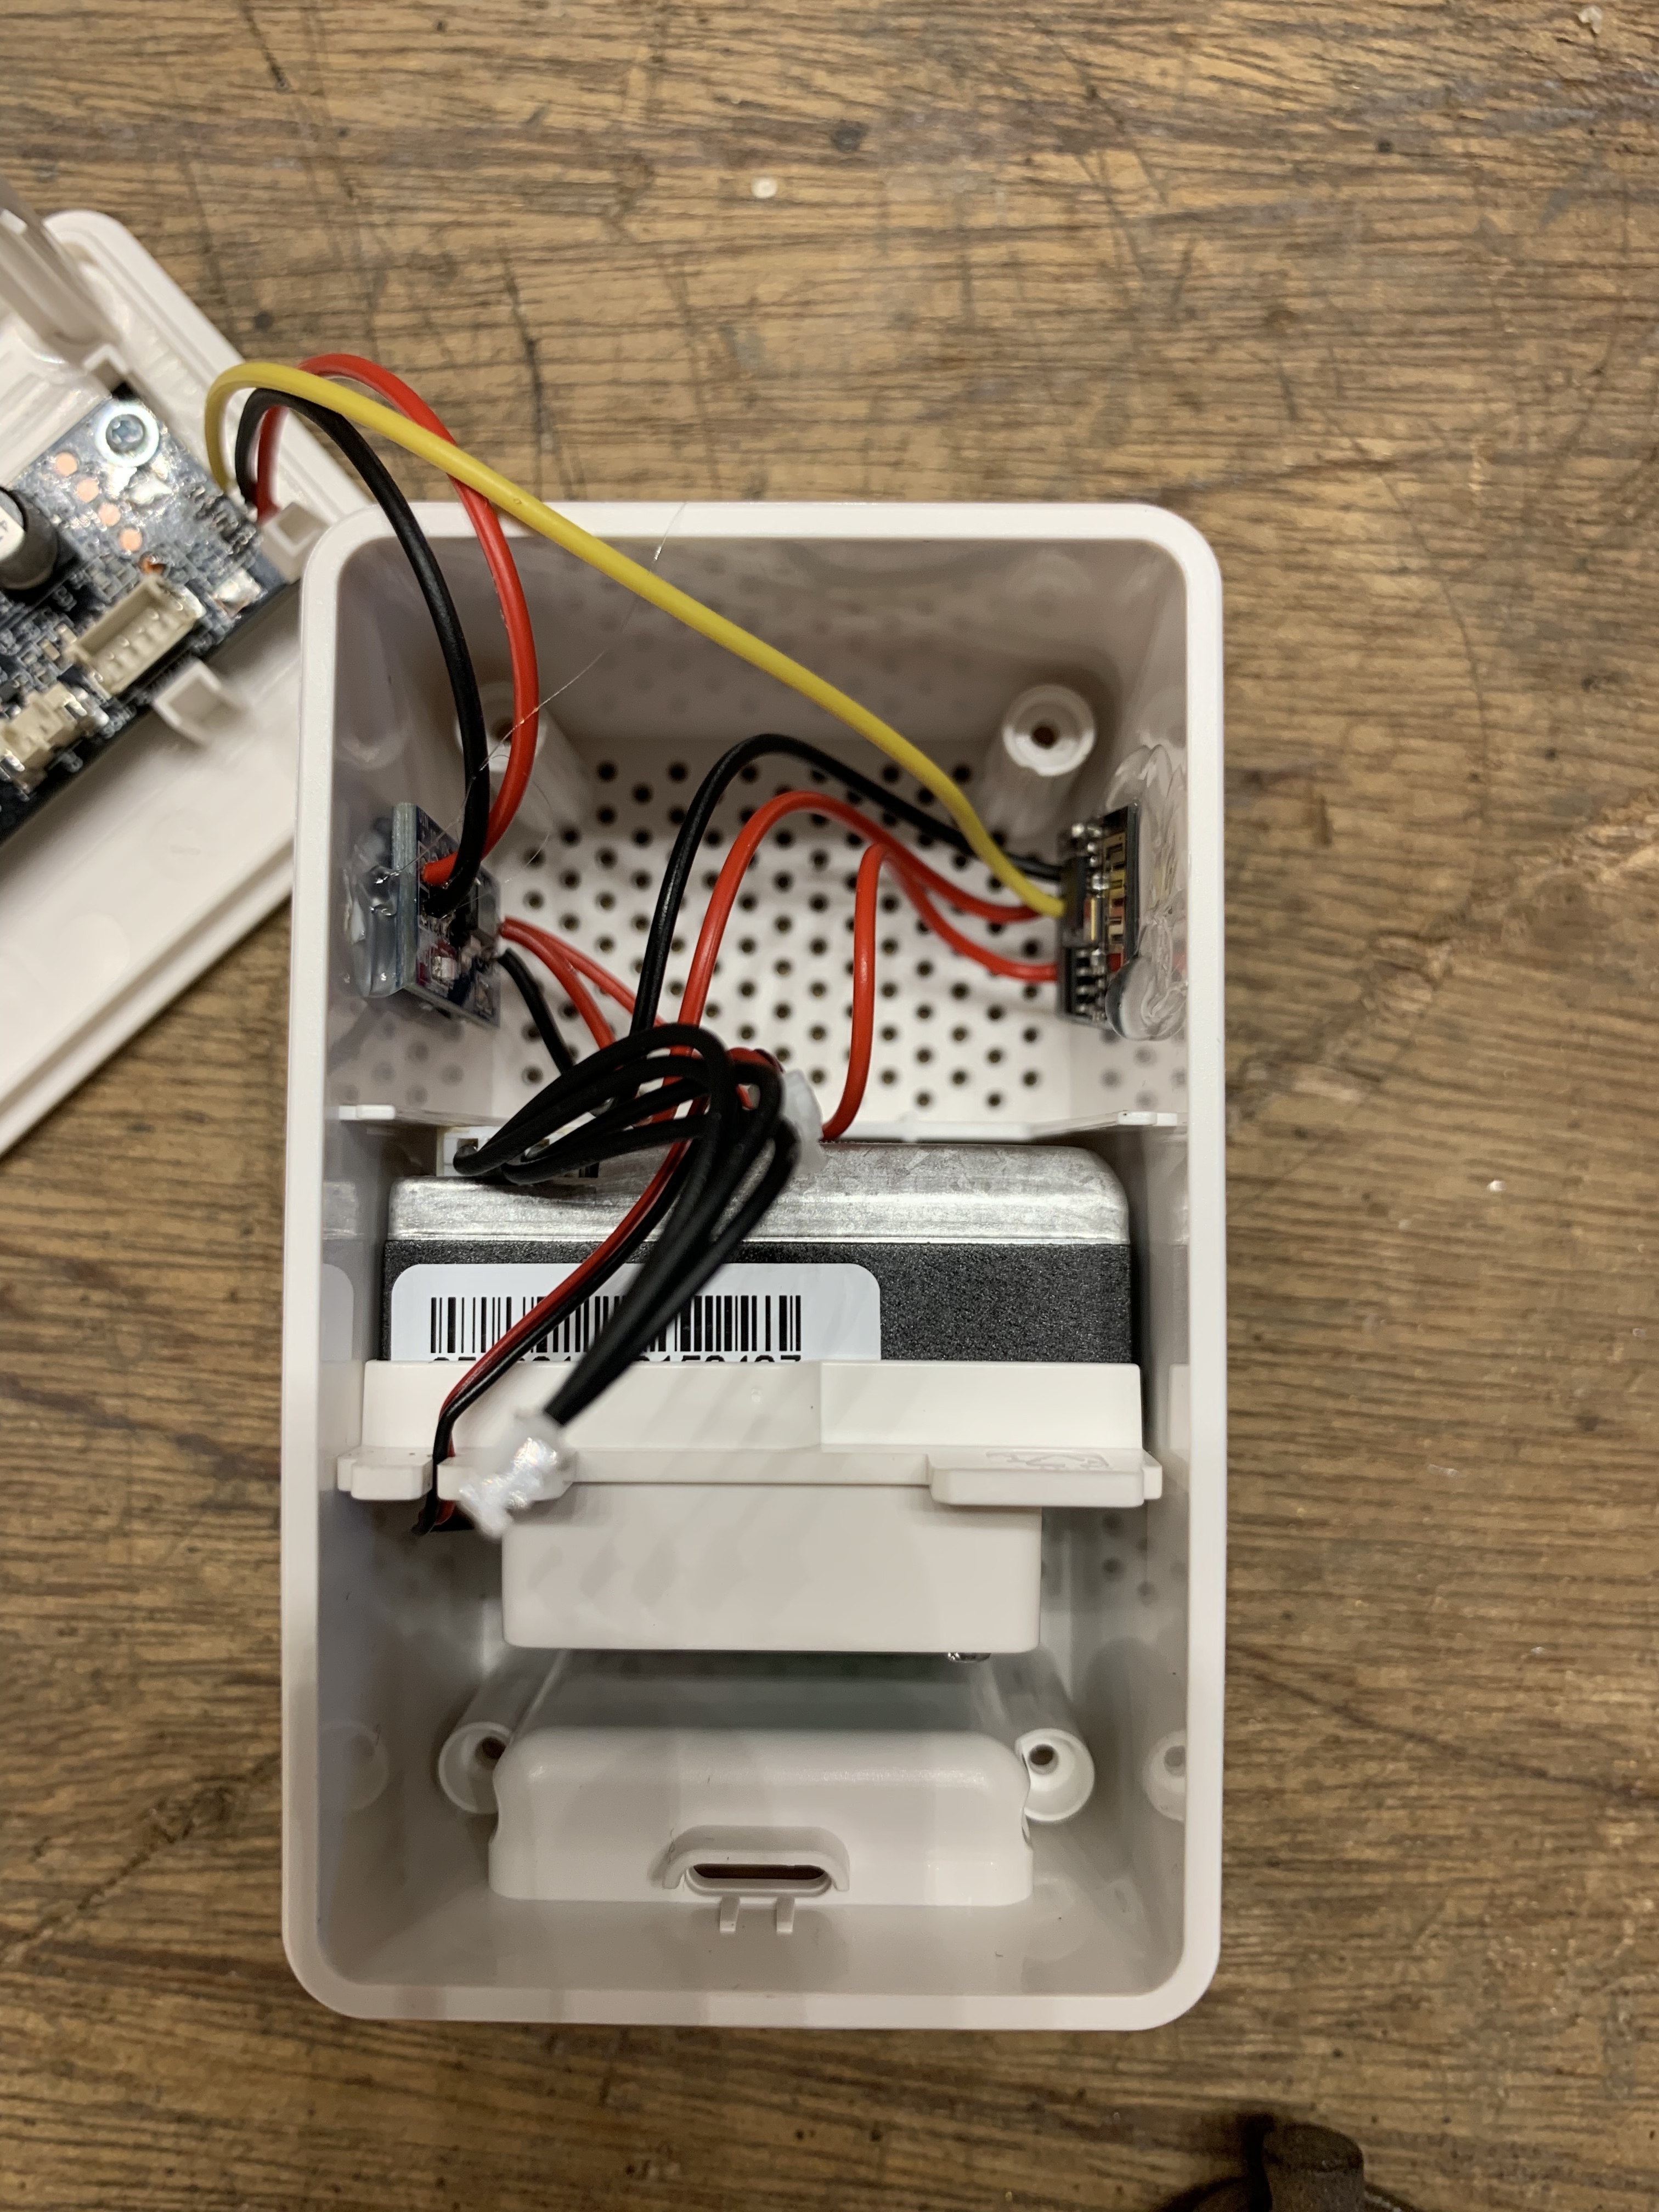
I used a hot glue gun to glue the pcb’s to the casing. These glue guns can be bought at your local hardware store or at your local Action (NL).
The reason why I used two little pcb’s is (1) I had them laying around and (2) they minimally disturb the airflow for the sensor.
To get the air quality data into HomeKit the name of the sensor must contain: ‘pm25’.
Side note: I’m running my first config from before the icon was changed. You should use:
source: github://sermayoral/esphome@pm1006
@Habbie, you may use my pictures for the docs.