Interactive waste collection display

I have posted about this blueprint on Reddit a few days ago and promised to put it online, so here it is. I hope it will be useful to someone.

Configuration in action:

Github Gist:
garbage_collection_confirmation_blueprint.yaml (github.com)

Importing

Click the badge to import this Blueprint or import this Blueprint by using the Gist URL.

Open your Home Assistant instance and show the blueprint import dialog with a specific blueprint pre-filled.

Prerequisites

You will need the following things to use this blueprint:

  • a working waste_collection_schedule integration (see here)
  • Custom Button card (this)
  • A few helper entities (read on)

Features

This example config will display your waste collection status in grey, orange (collection soon) and red and flashing (move your bins now). If you put out the bins you can push the button to confirm and display a green checkmark. The blueprint will take care of activating the flashing mode as well as resetting after the bins have been emptied. And it prevents the button from flashing in case you have already put it out (aka green checkmark).

Let’s put it together

waste_collection_schedule integration

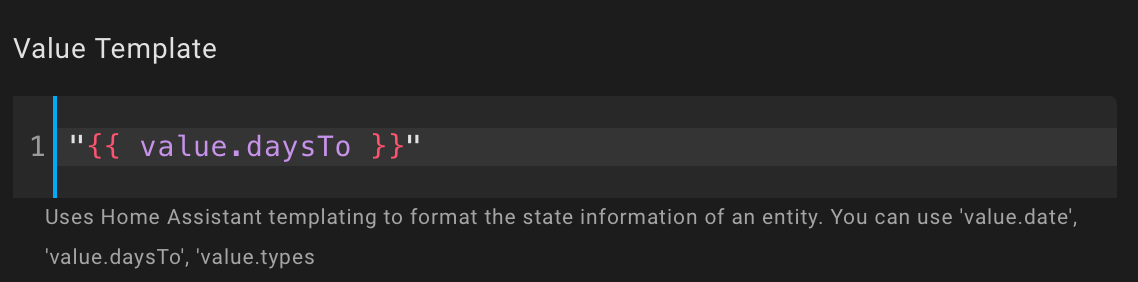
From the waste_collection_schedule integration you will get a sensor for every waste-type, as an example I will use the paper recycling. The sensor-config should look like this:

platform: waste_collection_schedule
name: paper
types:
  - Papiertonne
value_template: "{{ value.daysTo }}"

The important part is to use the correct value_template. This will yield the sensor:

  • sensor.paper

Your sensor should now display the number of days left to the next collection

Helper

Now we need to create a helper for every sensor to track the alert-state, in this case we create a sensor called

  • input_number.paper_alert

(Create Helper → Number, Set minimum value=0, maximum value=2)

Button

Now we can create the button for paper recycling with this YAML:

type: custom:button-card
entity: sensor.paper
layout: icon_name_state2nd
tap_action:
  action: call-service
  service: input_number.decrement
  service_data:
    entity_id: input_number.paper_alert
double_tap_action:
  action: call-service
  service: input_number.increment
  service_data:
    entity_id: input_number.paper_alert
show_label: true
label: |
  [[[
    var days_to = entity.state
    if (days_to == 0)
    { return "Today" }
    else if (days_to == 1)
    { return "Tomorrow" }
    else if (days_to == "unknown")
    { return "TBA" }
    else
    { return "in " + days_to + " days" }
  ]]]
show_name: true
name: Paper
icon: |
  [[[
  if (states["input_number.paper_alert"].state == 1)
  { return "mdi:check-bold" }
  else
  { return entity.attributes.icon }
  ]]]
state:
  - color: red
    operator: template
    value: '[[[ return states["input_number.paper_alert"].state == 2 ]]]'
    styles:
      icon:
        - animation: blink 1s ease infinite
  - color: '#1aba92'
    operator: template
    value: '[[[ return states["input_number.paper_alert"].state == 1 ]]]'
  - color: red
    operator: template
    value: '[[[ return entity.state == 0 ]]]'
  - color: orange
    operator: template
    value: '[[[ return entity.state == 1 ]]]'
  - value: default
  - operator: template
    value: '[[[ return entity.state > 1 ]]]'
    color: '#aaaaaa'

What does the button do?

The input_number.paper_alert helper can take three states:

  • 0 → everything normal, take status from sensor
  • 1 → garbage bins have been confirmed (taken out), display checkmark
  • 2 → alert, flash the icon

If you click the button this will decrease the value, so you can go from flashing to checkmark with one click. If you accidently click again it will go to normal mode, which is not what you want but you can also doubleclick to increase the value again. So if you confirmed you have put out the bins but now remember it was all just a dream, you can doublecklick the green checkmark to put on the flashing icon again :grinning_face_with_smiling_eyes:

Automation

Now if everything works (cycling through the button-states manually) you can create an automation using the blueprint (one automation per waste-type). Mine is called ‘automation.paper_set_alert’. You have to set the sensor entity and the helper entity as well as the time the alarm should start to display on the day before the collection (default is 16:00 / 4pm).

Now every day at the scheduled time the icon should start to flash.

Let me know if something doesn’t work or you have any questions.

Changelog

  • 2022-12-28: Initial version
8 Likes

A Question:
I have days_until in a attribute from the sensor and not in the sensor itself.
How do i add this in the button?

Now it looks like:
2image
1image
0image

type: custom:button-card
entity: sensor.recycleapp_papier
layout: icon_name_state2nd
tap_action:
  action: call-service
  service: input_number.decrement
  service_data:
    entity_id: input_number.waarschuwing_papier
double_tap_action:
  action: call-service
  service: input_number.increment
  service_data:
    entity_id: input_number.waarschuwing_papier
show_label: true
label: |
  [[[
    var days_to = entity.state
    if (days_to == 0)
    { return "Today" }
    else if (days_to == 1)
    { return "Tomorrow" }
    else if (days_to == "unknown")
    { return "TBA" }
    else
    { return "in " + days_to + " days" }
  ]]]
show_name: true
name: Paper
icon: |
  [[[
  if (states["input_number.waarschuwing_papier"].state == 1)
  { return "mdi:check-bold" }
  else
  { return entity.attributes.icon }
  ]]]
state:
  - color: red
    operator: template
    value: '[[[ return states["input_number.waarschuwing_papier"].state == 2 ]]]'
    styles:
      icon:
        - animation: blink 1s ease infinite
  - color: '#1aba92'
    operator: template
    value: '[[[ return states["input_number.waarschuwing_papier"].state == 1 ]]]'
  - color: red
    operator: template
    value: '[[[ return entity.state == 0 ]]]'
  - color: orange
    operator: template
    value: '[[[ return entity.state == 1 ]]]'
  - value: default
  - operator: template
    value: '[[[ return entity.state > 1 ]]]'
    color: '#aaaaaa'

i also would like to use a physical button to reset the value from the waste that just set outside to 0, but i don’t know if possible with 4 different types of waste.

I am a little confused on which sensors to choose for the two sensor choices. I also see the alert time, but I am unsure where to set the date. Still learning my way around.

Looks really nice. Would like to use this card, but I always get this error:

ButtonCardJSTemplateError: TypeError: Cannot read properties of undefined (reading ‘state’) in ‘return states[“input_number.paper_alert”].state == 2’

entity: sensor.papier
layout: icon_name_state2nd
tap_action:
  action: call-service
  service: input_number.decrement
  service_data:
    entity_id: input_number.paper_alert
double_tap_action:
  action: call-service
  service: input_number.increment
  service_data:
    entity_id: input_number.paper_alert
show_label: true
label: |
  [[[
    var days_to = entity.state
    if (days_to == 0)
    { return "Today" }
    else if (days_to == 1)
    { return "Tomorrow" }
    else if (days_to == "unknown")
    { return "TBA" }
    else
    { return "in " + days_to + " days" }
  ]]]
show_name: true
name: Papier
icon: |
  [[[
  if (states["input_number.paper_alert"].state == 1)
  { return "mdi:check-bold" }
  else
  { return entity.attributes.icon }
  ]]]
state:
  - color: red
    operator: template
    value: '[[[ return states["input_number.paper_alert"].state == 2 ]]]'
    styles:
      icon:
        - animation: blink 1s ease infinite
  - color: '#1aba92'
    operator: template
    value: '[[[ return states["input_number.paper_alert"].state == 1 ]]]'
  - color: red
    operator: template
    value: '[[[ return entity.state == 0 ]]]'
  - color: orange
    operator: template
    value: '[[[ return entity.state == 1 ]]]'
  - value: default
  - operator: template
    value: '[[[ return entity.state > 1 ]]]'
    color: '#aaaaaa'

@deepblue120: Were you able to fix your issue? I am having the same and ChatGPT says everything should be fine :frowning:

I had the same issue The fix is when making the sensor in waste collection make sure you fill out the Value Template .

Also I found the blueprint outdated and need to fix the input by taking ownership and updating the int to int(0)

Didn’t think this would help because I already had
value_template: ‘{% if value.daysTo == 0 %} Heute{% elif value.daysTo == 1 %} Morgen{% else %} in {{value.daysTo}} Tagen{% endif %}’

but it helped. Thank you for you help! I guess my code conflicted.