iOS Widget for Home Assistant via Scriptable

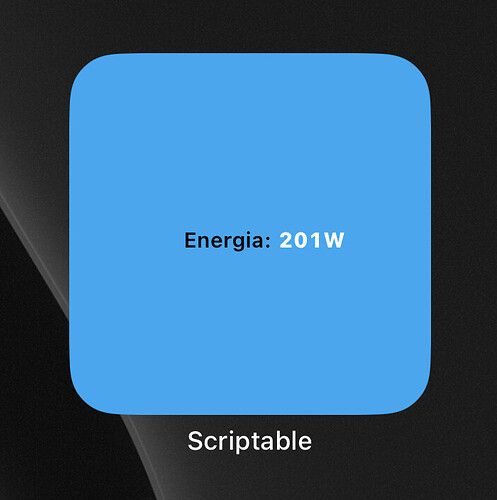
I manage to get the data value I need to work. The code sucks because I don’t know how to code, so I basically erase what I don’t needed and changed the sensor information.

This is the code: (removed token and HA ip)


let widget = await createWidget();
if (!config.runsInWidget) {
    await widget.presentSmall();
}

Script.setWidget(widget);
Script.complete();

async function createWidget(items) {

    /* Get data from API */
    let req = new Request("http://192.168.xxx.xxx:8123/api/states")
    req.headers = { "Authorization": "Bearer <token>", "content-type": "application/json" }
    let json = await req.loadJSON();

    /* Parse data received from API */
    let data = {energia: {}}

    data.energia = addData(json, data.energia, ['sensor.iammeter_power']);

    /* Create the widget */
    const widget = new ListWidget();
    widget.backgroundColor = new Color("#03a9f4", 1.0);

    /* Design the widget header */
    let headerStack = widget.addStack();
    const logoStack = headerStack.addStack();
    headerStack.addSpacer(2);
    const titleStack = headerStack.addStack();
    headerStack.addSpacer(7);
    const tempImageStack = headerStack.addStack();
    headerStack.addSpacer(14);
    const humidImageStack = headerStack.addStack();

    widget.addSpacer(5)

    /* Add the sensor entries */
    const bodyStack = widget.addStack();

    /* First, the label column */
    const labelStack = bodyStack.addStack();
    labelStack.setPadding(0, 0, 0, 0);
    labelStack.borderWidth = 0;
    labelStack.layoutVertically();

    addLabel(labelStack, "     Energia:")

    /* Second, the temperature column */
    const tempStack = bodyStack.addStack();
    tempStack.setPadding(0, 3, 0, 0);
    tempStack.borderWidth = 0;
    tempStack.layoutVertically();

    addTemp(tempStack, data.energia)

    /* Done: Widget is now ready to be displayed */
    return widget;
}

/* Adds the entries to the label column */
async function addLabel(labelStack, label) {
    const mytext = labelStack.addText(label);
    mytext.font = Font.semiboldSystemFont(10);
    mytext.textColor = Color.black();
}

/* Adds the entries to the temperature column */
async function addTemp(tempStack, data) {
    const mytext = tempStack.addText(data.temp + "W");
    mytext.font = Font.heavyMonospacedSystemFont(10);
    mytext.textColor = Color.white();
}

/* Adds the entries to the humidity column */
async function addHumid(humidStack, data) {
    const mytext = humidStack.addText("(" + data.humid + "%)");
    mytext.font = Font.mediumMonospacedSystemFont(10);
    mytext.textColor = Color.white();
    mytext.textOpacity = 0.8;
}

/* Searches for the respective sensor values ('state') in the API response of Home Assistant */
function addData(json, room, sensors) {
    room.temp = "N/A";
    room.humid = "N/A";
    var i;
    for (i = 0; i < json.length; i++) {
        if (json[i]['entity_id'] == sensors[0]) {
            room.temp = Math.round(json[i]['state']);
        }
        if (json[i]['entity_id'] == sensors[1]) {
            room.humid = Math.round(json[i]['state']);
        }
    }
    return room;
}

I wanted to do something similar to this, essentially a gauge from 0-5000 with changing colours between values, is it to hard to do?
Maybe you can “borrow” some code for your gauge from these examples:

1 Like

Well, I learned that iOS 16 lock screen widget supports a gauge-like thingy. So I created this for you:


Of course full of bugs, and heavily inspired by https://github.com/awaescher/home-battery-widget/blob/61c747e956fc75240e812dc8c2d7098c629b6d7d/widget.js

3 Likes

Wow that looks nice,

But i have a question, how cn i access the attributes of a sensor ?
I did really tru everything, i can only access the status, not the attributes.

thanks in advance

That’s line 153. Instead of [‘state’] you can do [‘attributes’][‘id’] as an example. And comment out the check in line 12-14.

Also have a look here: iOS Widget for Home Assistant via Scriptable - #43 by m33x

This is excellent, I’ve managed to tweak the icons but it would be good to also feature the value of the entity. Is that possible?

Oh my God, it’s 2023, robot dogs are walking the streets and AI has even made its way into Windows, but iPhone end users have to tinker with some code to add several temperature sensors to the screen?

Are there simpler and more user-friendly solutions? Not for programmers.
Thank you.

1 Like

Oh my God, it’s 2023, robot dogs are walking the streets and AI has even made its way into Windows, but iPhone end users still cannot write some simple JavaScript to add several temperature sensors to the screen?

Just kidding ofc. I’m not aware of any simpler way, but please post it here if you have found a solution that works for you. :grinning:

2 Likes

It took me a day to dig around, but I managed to get something working :grinning:.
Thanks for the project.

I had to remove the “%” because in the second column I have different data, including temperature and air quality…
But the script allows me to remove or add signs for all lines at once, that is, either “%” everywhere or nothing.
How can I add my data type designations line by line?

Very nice! You can fix this issue very easily. First copy Line 145 to 151 and create a new function that fits your data type (e.g., temperature, air polution, humidity, etc.), then have a look at Line 117 to 125, and call your new functions there. A toy example looks like this:

1 Like

Thank you very much!
I did it)

Very cool :clap:

Hi m33x,

I used this because I wanted to try and modify it and display other sensor data as text. For example Outside temperature is: -4c. but I couldn’t remove the circular bar or house. So I totally failed.

Do you have an example of how I could achieve this?
Many thanks from Sweden!

The problem about this is that the widget doesn’t auto update so it shows wrong data