I’m wondering if it’s possible to hook an ESP home device equipped with a potentiometer to control devices like light dimming, fan speed, thermostats, speaker volume, and other devices that might take variable inputs easier done with a knob.
I’m also wondering if the Phillips hue aurora wireless dimmer switch (I already have this in home assistant) could be used for the same purpose.
It would be great to be able to control multiple devices with a single potentiometer or Aurora, but I’d be fine with having a dedicated knob per device if that’s the best that could happen.
Yes. Sure this is possible. Where exactly is your problem?
Attach the poti to the ADC input (make sure to obey the ADC voltage range of your MCU). Use an Analog To Digital Sensor to transfer the ADC value to HA. In HA create an automation to control whatever you want with the ADC value.
Thanks, I’m a noob and have had HA for a matter of weeks. I understand most of what you said. I’m not sure how to expose the potentiometer values to HA yet. You said to use an analog to digital sensor. Can you explain that a bit further?
This sounds like you have never exposed any ESPHome sensor to HA? The process is really simple!
I recommend that you check some Youtube videos about that. There are plenty available.
In a nutshell: You add some sensor in your ESPHome YAML (i.e. the fore-mentioned Analog To Digital Sensor) together with the WiFi Component and the API Component and that’s it. Just compile and upload the code to the MCU.
When HA sees your MCU for the very first time you may have to accept the newly found ESPHome device in HA’s frontend in the section Configuration → Integrations. But you only need to do this once.
Thanks so far. Struggling with the automation part now.
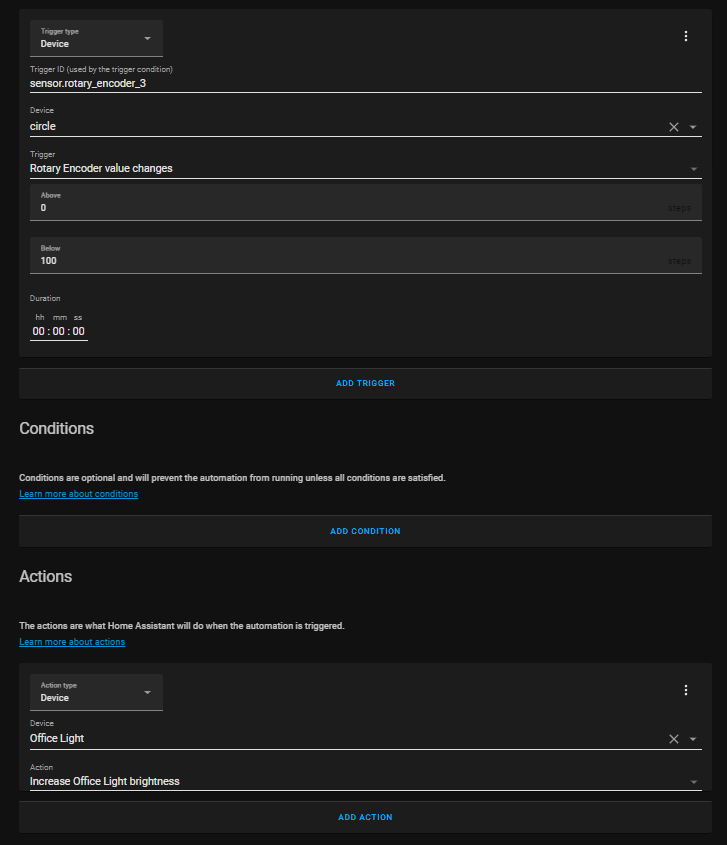
I have a the esp equipped with a rotary encoder and see the change in my dashboard however I’m not sure how to pass the value to a light to dim or brighten it when the encoder changes value. Under the “Actions”, is there something I’m missing. I feel like I should see a way to pass in my rotary encoder value.
Not an automation expert (as I do all this in Node Red) but this should work:
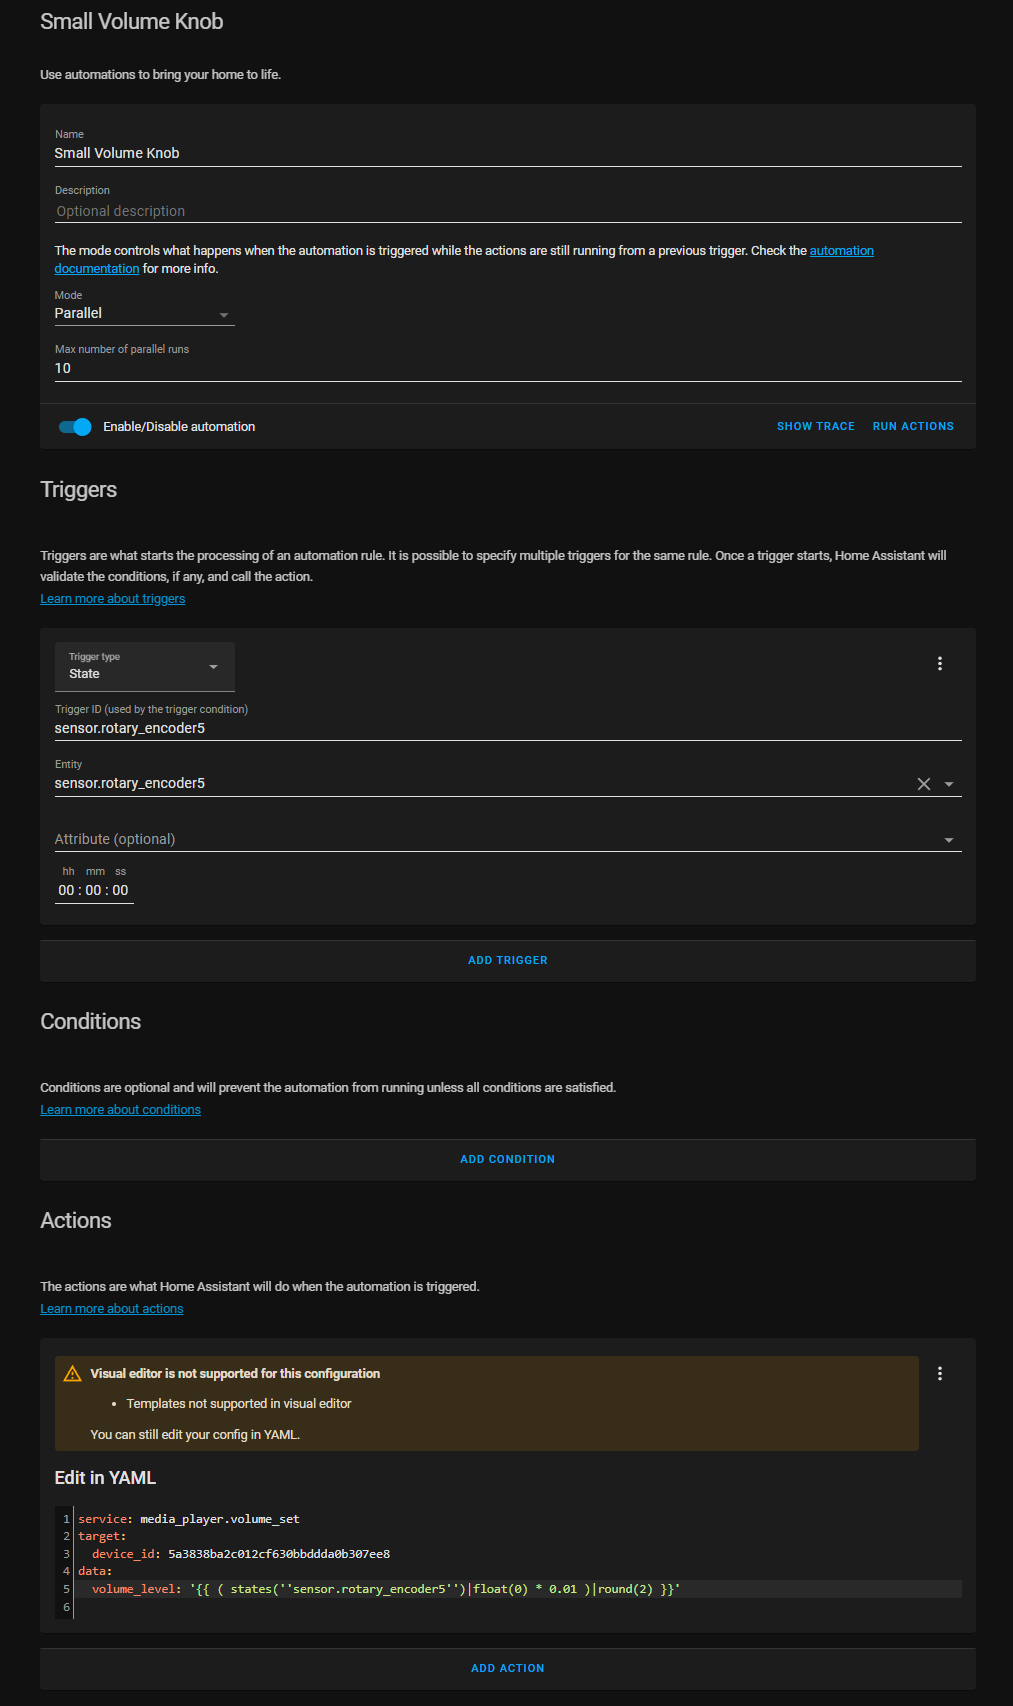
Set action to “Call service”, service to “Light: turn on”, add your target entity, switch to YAML mode (three dot menu) and add a data_template: block that sets the brightness: data parameter with a template that references the state of your rotary switch entity.
So this automation seems to trigger only when I pass the “0” and “100” thresholds. It doesn’t trigger continuosly. Seems like I should find a value change trigger?
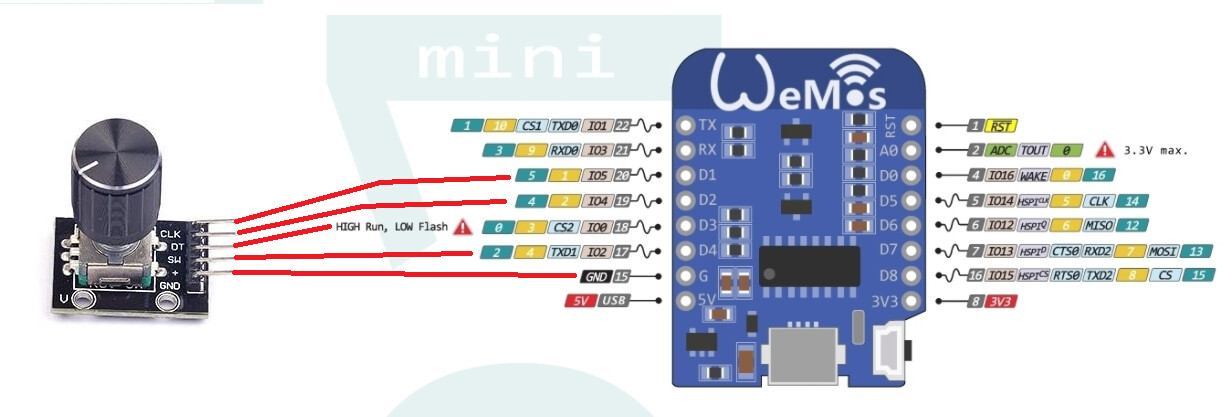
Can someone help me understand how the pot is powered from D4? I thought that the pins were wither high or low, not able to provide power to anything? Thank you and appreciate the insight!
Oh, I see it called out as GPIO2 and set to High… So the D1 mini is powering the encoder via D4 (GPIO2), it looks as also the encoder has a button function that you are not using, but hooked to D3 (GPIO0), correct?
I’m new to this, but guessing that you either do not use the switch (GPIO2) on the front end in Home Assistant, or that it is not displayed?
I’m looking at this for a fan speed control, and using the button function to toggle the fan on and off.
I have no idea why the rotary encoder is powered through GPIO02 in the diagram of the OP. You should instead connect it directly to 3.3V. No need to waste a GPIO for that. You better use it for the integrated push button function of the rotary encoder.
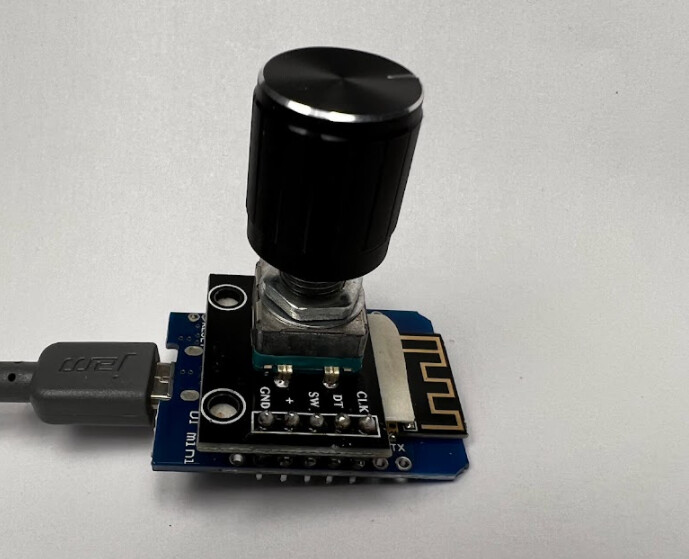
In the photo, it looks like the switch output it connected to D3 (GPIO 0). I suppose the OP did it this way to not have to run a separate wire for the 3.3v that the rotary encoder needs. It looks like the Wemos can supply 3.3v on GPIO pins. I had never thought of it being able to run a periphery like that though.
The way he has it wired and connected makes for a very nice little package that only needs 5v to operate and can be connected directly to a usb plug. For volume control as he is using it, it makes great sense I think!
@NateVolk’s got it! You’re on the money. The encoder is powered with GPIO pin 2 because I like the smaller package without wires, I don’t care about wasting the other GPIO pins I only wanted volume. I have the push button working the goal was to cycle through devices that could use a variable input from the potentiometer like thermostat, dimming lights, different volumes, blinds, fans, etc but I haven’t done that part yet. Video.
I have a large family; the family room entertainment center is a mess with an xbox, playstation, directv, appletv, and google cast. All audio is routed to a Google Home Max because we lose remotes, you can control all said devices with voice commands using a Harmony Hub paired with Google. It’s frustrating at times and with kids the volume gets out of hand so all I wanted was a simple volume knob to control the Google Home Max volume at any point.
I tried to build the volume knob with a battery and wireless charger but never did get the Wemos low power stuff working and the battery died within hours. Anyways I just made a wood enclosure and wired it with a usb cable. I’m happy with it.