For those of us running HAOS, how do we install the bscpylgtv package?
I’m also running HAOS (in a rpi). Using the “Advanced SSH & Web Terminal” add-on I connected to the docker container by running docker exec -it homeassistant bash and once inside installed it normally with pip install bscpylgtv. Then the usual Control+d to exit the container.
Thanks for the quick reply. I’m running HAOS in Proxmox, so could just do the same from the console in the VM. Works perfectly ![]()
1 Like
Too much meta information is being spread around here. Just to make things as easy and clear for everyone: The steps to add the picture mode option to Home Assistant are the following:
- Install the Advanced SSH & Web Terminal Add-On
- Configure the Add-On for your specific environment (Disable Protection mode and make sure the Add-On starts automatically on system boot!)
- Restart the Add-On
- Start an SSH session via the Add-On
- Execute the following command:
docker exec -it homeassistant bash - Execute the following command:
pip install bscpylgtv - Create the following
shell_commandin yourconfiguration.yamlfile:<yourCustomShellCommandName>: /usr/local/bin/bscpylgtvcommand <your_LGTVs_IP_address> set_current_picture_mode "{{ picture_mode }}"
Here’s my workingshell_commandas an example:
shell_command:
  lgwebos_set_picturemode: /usr/local/bin/bscpylgtvcommand 192.168.50.10 set_current_picture_mode "{{ picture_mode }}"
- Restart Home Assistant
- Create your according automations and/or scripts by using the
shell_commandintegration where you can just pass the required picture mode to the variable{{ picture_mode }}from above. Here’s my working example script to set the cinema picture mode:
sequence:
  - action: shell_command.lgwebos_set_picturemode
    metadata: {}
    data:
      picture_mode: cinema
Hope this helps someone.
EDIT: Everytime supervisor is being updated on my HAOS instance, the setup is being erased and therefore has to be installed again manually, which annoyed me too much.
So to make all of this permanently, you can create a shell_command containing the following command (Beware: The SSH port exposed by your Advanced SSH & Web Terminal add-on installation may not be the default port 22, especially if you have multiple SSH add-ons installed. Make sure you are using the correct port for the following command. You can check the according port within the add-on’s configuration settings!):
ssh -p <Your_Advanced_SSH_&_Web_Terminal_SSH_Port> -i /config/ssh/id_rsa -o 'StrictHostKeyChecking=no' root@<Your_HAOS_IP_address> 'docker exec homeassistant pip install bscpylgtv'
Then just create an automation which executes the shell_command from above everytime HAOS boots up.
Just for completion, here’s my working shell_command example:
ssh -p 222 -i /config/ssh/id_rsa -o 'StrictHostKeyChecking=no' [email protected] 'docker exec homeassistant pip install bscpylgtv'
Note: If it does not work and you want to troubleshoot further, open a default SSH session and get use of the verbose flag by executing the following example:
ssh -p 222 -v -i /config/ssh/id_rsa -o 'StrictHostKeyChecking=no' [email protected] 'docker exec homeassistant pip install bscpylgtv'
Sidenote: You may also be interested in this link.
4 Likes
So based on your comment, it sounds like you’re using the same kind of HA install that I’m using with docker containers.
How are you installing the library in the container since it won’t be permanent?
Referencing this: # Need to install bscpylgtvcommand in the docker container for this to work
EDIT: I figured out a way. Added it to my docker-compose file like this for anyone else that might need it:
  home-assistant:
    image: homeassistant/home-assistant:stable
    container_name: 0-home-assistant
    hostname: 0-home-assistant
    network_mode: host
    privileged: true
    restart: unless-stopped
    volumes:
      - home-assistant-config:/config
      - /etc/localtime:/etc/localtime:ro
    command: >
      sh -c "pip install bscpylgtv && python -m homeassistant --config /config"
1 Like
For anyone wondering how to make this work without the requirement to confirm a popup modal (i.e. fully automated; I have a rooted TV so YMMV):
action: webostv.command
data:
  entity_id: media_player.tv
  command: settings/setSystemSettings
  payload:
    category: "picture"
    settings:
      pictureMode: game
EDIT: I tried also setting “soundMode” (category “sound”) but it doesn’t work (“key is not allowed”), however it works when using the popup - probably a permission thing or something.
1 Like
ivm struggling with the commands to open up pictures from my nas.
my nas is not always on the same position ( I have multiple media players and sometimes my nas is on top, sometimes on the bottom). So using commands like “left” of down Arent always ok.
Is there a way to use luna to open a directory from a nas mediaplayer ?
Hi, my TV is rooted as well, but if I try your command I get the following error code:
{'type': 'error', 'id': 91, 'error': '500 Application error', 'payload': {'returnValue': False, 'errorCode': -1000, 'errorText': "category, picture doesn't support the key(s): undefined"}}
I can’t find your command in this list: aiopylgtv/aiopylgtv/endpoints.py at 6b676ea69cb77f4e363d8fc5934cc126d07ad537 · bendavid/aiopylgtv · GitHub, so are you sure it works? Tbh, getSystemSettings gives me a similar error ({'type': 'error', 'id': 93, 'error': '500 Application error', 'payload': {'returnValue': False, 'errorCode': -1000, 'errorText': 'keys are mandatory.'}}), but something simple as audio/volumeUp does work, so I assume I’m doing something wrong, but god knows what.
It works on my TV (rooted LG C3 OLED 2023), but the problem with these undocumented/internal APIs is that they might change between models and OS versions, so (assuming you did it right) it either works or it doesn’t ![]()
Yeah, I dove in a bit more and it appears to be pretty random sadly. The documented bits are next to useless ![]() . At least the version with the notification popup works for me!
. At least the version with the notification popup works for me!
Ok, so I used ssh to connect to my TV and send the luna command to get the picturemode that way, and then it works, like so:
luna-send -n 1 -f "luna://com.webos.settingsservice/getSystemSettings" '{"category":"picture","keys":["pictureMode"]}'
This returns the following:
{
    "dimension": {
        "input": "default",
        "_3dStatus": "2d",
        "dynamicRange": "sdr"
    },
    "subscribed": false,
    "category": "picture",
    "method": "getSystemSettings",
    "settings": {
        "pictureMode": "expert1"
    },
    "returnValue": true
}
So the info is there.
Setting the picturemode also works, using the following
luna-send -n 1 -f "luna://com.webos.settingsservice/setSystemSettings" '{"category":"picture"
,"settings":{"pictureMode":"game"}}'
So now I just have to figure out why this doesn’t work via webostv.command (I thought that literally did the same, but apparently not).
Here’s my frontend dropdown box for selecting picture mode. Thanks for posting method in this thread, hope this helps someone. Does not need rooted TV on my G4.
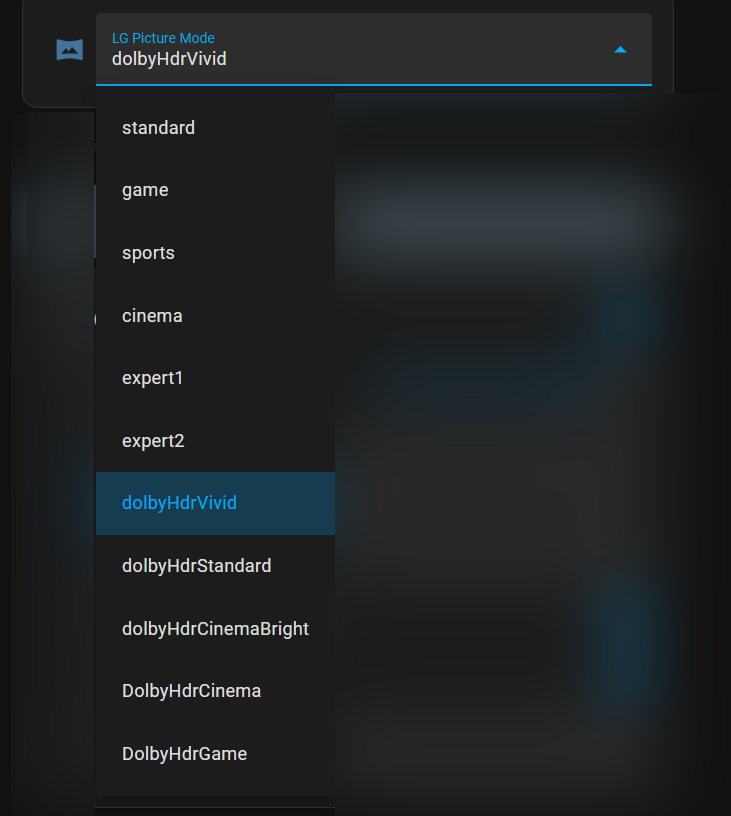
Step 1: Create an input_select helper with all picture modes
Go to Settings > Devices & Services > Helpers > Add Helper > Dropdown and create one, e.g.,
Entity ID: input_select.lg_picture_mode
Options:
standard
game
sports
cinema
expert1
expert2
dolbyHdrVivid
dolbyHdrStandard
dolbyHdrCinemaBright
dolbyHdrCinema
dolbyHdrGame
Step 2: Automation to apply mode when changed
Change your TV entity name and then add this automation to listen for changes on the dropdown and send the command:
alias: Apply LG TV Picture Mode from Dropdown
trigger:
  - platform: state
    entity_id: input_select.lg_picture_mode
action:
  - service: webostv.command
    data:
      entity_id: media_player.justinsg4lgtv
      command: settings/setSystemSettings
      payload:
        category: picture
        settings:
          pictureMode: "{{ trigger.to_state.state }}"
  - service: notify.justinsg4lgtv
    data:
      message: "Picture mode set to {{ trigger.to_state.state }}"
Step 3: Add the dropdown card to Lovelace UI
Use the Entities card or Input Select card with:
type: entities
entities:
  - input_select.lg_picture_mode
title: LG TV Picture Mode
There is a lot of good info in this thread. As a total newb to Home Assistant, I was able to take a lot of the info here and string together a way to change the picture mode on my LG G5 77" using a Google Home voice command.
From info in this thread, there was a lot I thought I had to do, but ended up not having to do. I didn’t have to root my TV. I didn’t have to SSH to my TV for anything. I didn’t have to install Homebridge/Homekit. I didn’t have to install Docker or pip install anything extra. I didn’t need to connect Home Assistant to my Google Assistant.
I only wrote one script for HA, one automation for HA, and one Google Home automation.
Here’s what I did:
-
I went to Home Assistant settings, clicked on “Automations and scenes”, clicked on “Scripts” at the top, and then clicked “Create Script”.
-
I clicked the three dots in the upper right and selected “Edit in YAML”, then added and saved this script, which is mostly copied from 1 or 2 scripts in this thread. Note the media_player.lgtv refers to my TV in Home Assisant. I think the rest of the entire script could be copied as is if someone wants to use it.
alias: Living Room TV Change Picture Mode
sequence:
  - data:
      entity_id: media_player.lgtv
      command: system.notifications/createAlert
      payload:
        message: Setting Dark Mode
        modal: false
        buttons:
          - label: ok
            focus: true
            buttonType: ok
            onClick: luna://com.webos.settingsservice/setSystemSettings
            params:
              category: picture
              settings:
                pictureMode: "{{ pictureMode }}"
        type: confirm
        isSysReq: true
    action: webostv.command
  - delay:
      milliseconds: 40
  - data:
      entity_id: media_player.lgtv
      button: ENTER
    action: webostv.button
mode: single
icon: mdi:gamepad
fields:
  pictureMode:
    selector:
      text: null
    name: pictureMode
    description: Picture Mode of the TV
    required: true
description: ""
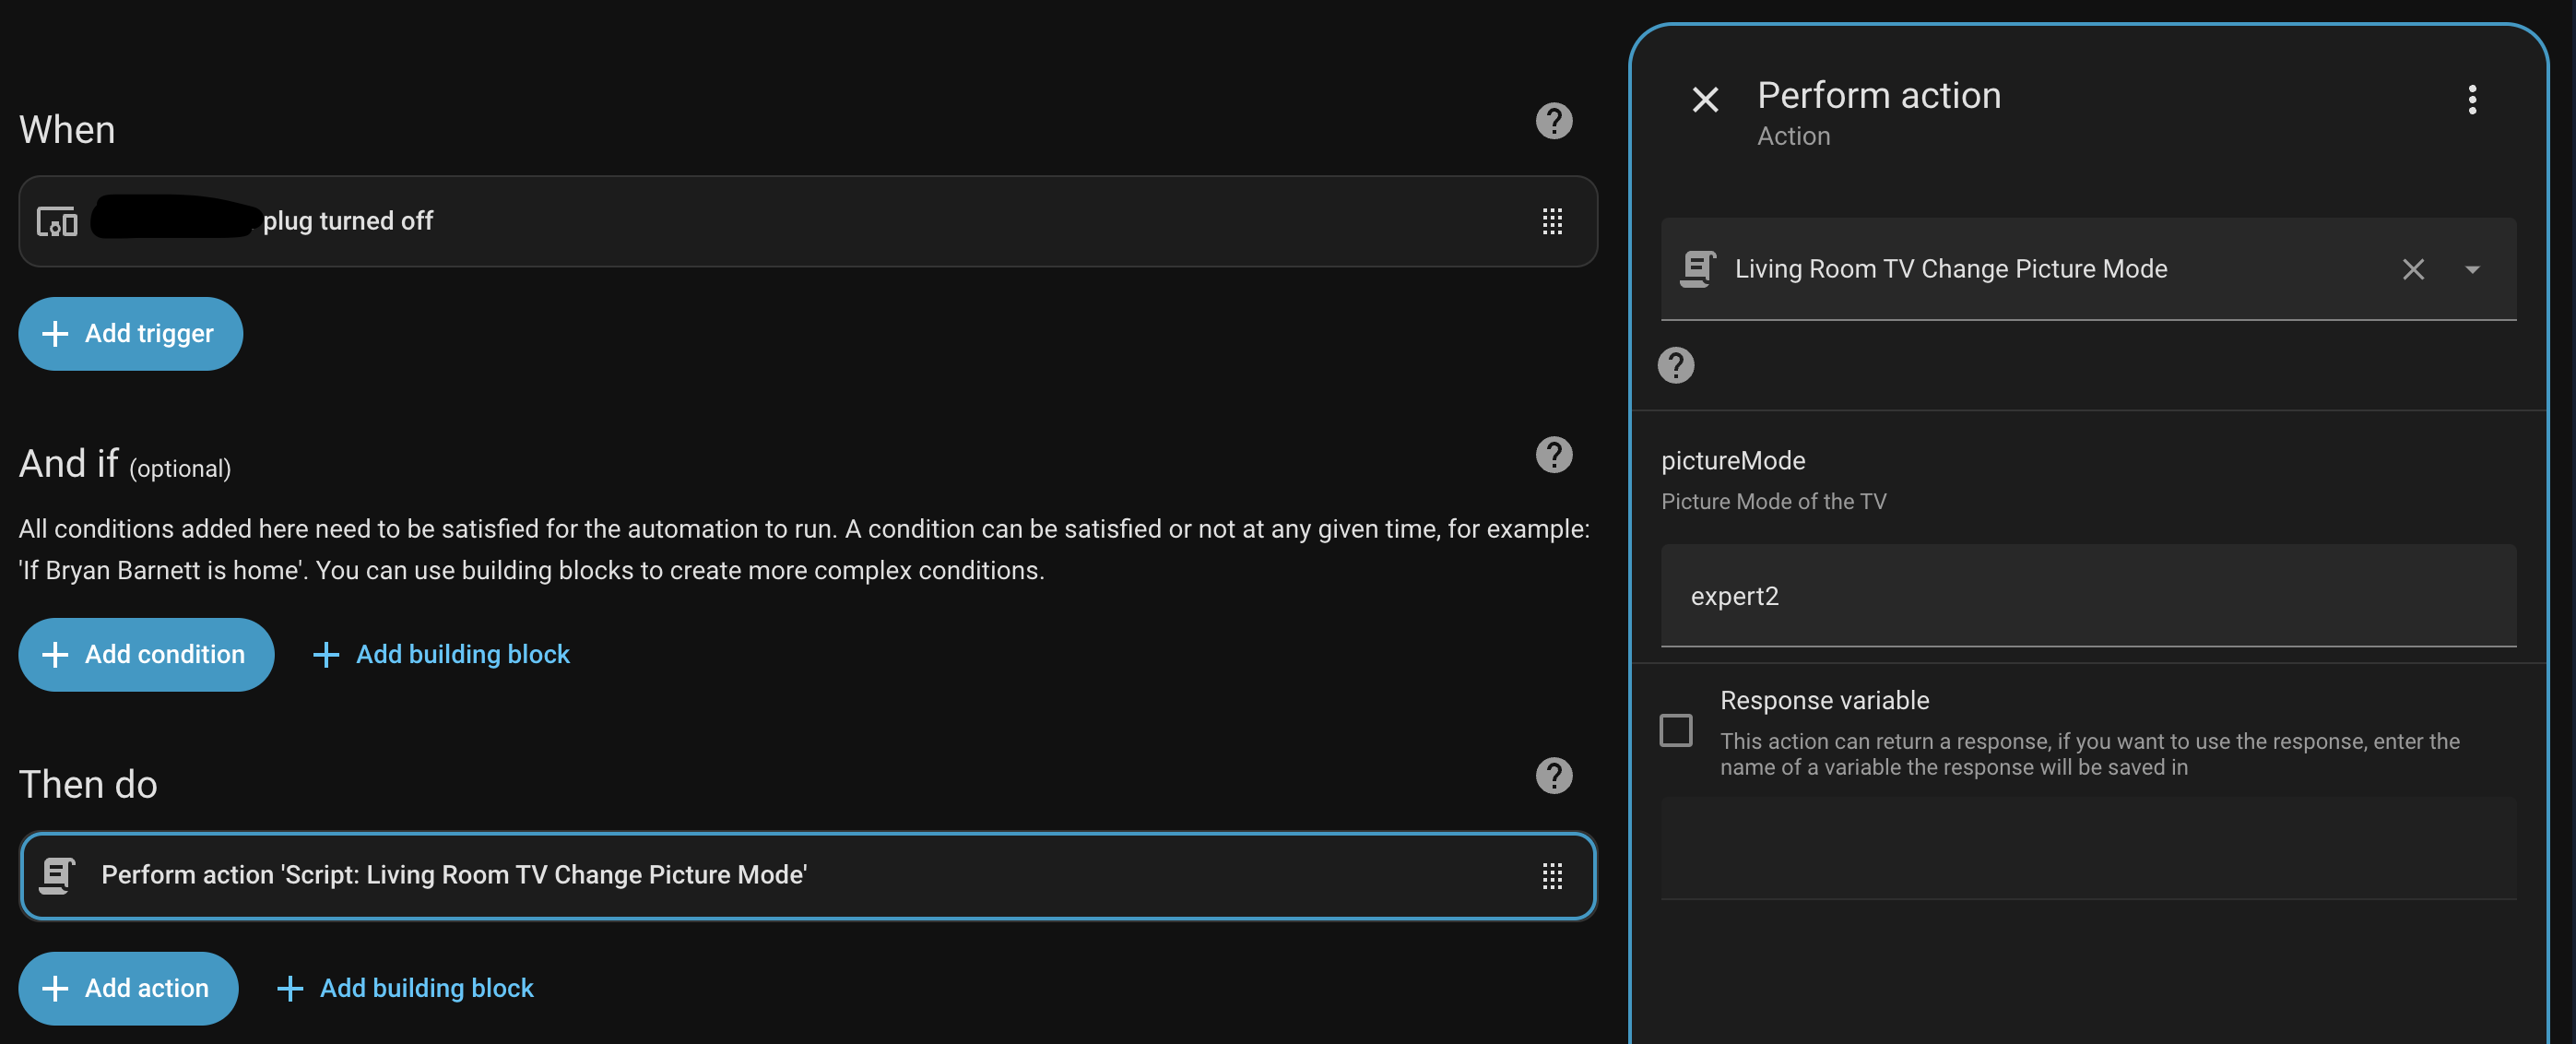
-
I then clicked on “Automations” at the top of the screen, then selected “Create Automation” at the bottom of the screen. I created this automation using the regular UI, not by editing YAML. I have a TP-Link smart plug connected to my Google Home, and I found that this plug could also be connected to Home Assistant through the TP-Link add-on. This process is pretty straightfoward, so I will skip the overview. In summary, I added an action “When smart plug is turned off”, then perform action “Script: Living Room Change TV Picture Mode”. When adding this action, there is an option (shown in the screenshot below) to type in the desired picture mode. I chose “expert2” which is a dark room setting.
-
Then I created an automation in Google Home to dim the lights and to turn off the smart plug defined in step 3 above. After 7 seconds, this Google Home automation will turn the smart plug back on. This automation is triggered by voice. Note that I don’t use this smart plug for anything, which is why I’m using it in this way. This was the most innocuous smart device that I have that could be easily added to Home Assistant. I’m sure there are better ways to accomplish what I’ve done here with Google Home.
It works well, except Google Home is acting up on a couple of my speakers (which seems like a separate issue). When I make the voice command to Google Home on my phone, my lights dim, and the TV picture mode changes to expert2. There is a brief pop-up on the TV for less than one second that goes away. It works amazingly well.
I have one problem though. I want to make another automation to change the picture mode back to filmmaker mode, but I don’t know what the webOS API calls filmmaker mode. I have the names of all the other modes below. The webOS picture mode names are on the left. Note they are all lowercase and they are case sensitive.
vivid: Vivid
normal: Standard
eco: Auto Power Save
cinema: Cinema
sports: Sports
game: Game Optimizer
expert1: Expert, bright space
expert2: Expert, dark space
These all work when I type them into the pictureMode box for the automation I referenced in step 3 above and click “Run Action”. For filmmaker mode, I’ve tried all of the below picture mode names (along with different variations without underscores and with different captilizations), but I still can’t find the webOS name for filmmaker mode.
photo, sports, technicolor, vivid, hdrEffect, hdrCinema, hdrCinemaBright, hdrExternal, hdrGame,
hdrStandard, hdrTechnicolor, hdrVivid, dolbyHdrCinema,dolbyHdrCinemaBright,
dolbyHdrDarkAmazon, dolbyHdrGame, dolbyHdrStandard, dolbyHdrVivid, dolbyStandard
FILMMAKER_MODE, fmm, filmmaker_mode, filmmakermode, film, fmmmode, fmm_mode, technicolorExpert, hdr_technicolorExpert, hdr_cinema, hdr_game, dolby_cinema_dark, dolby_cinema_bright, dolby_game
Can anyone help me find out what webOS calls filmmaker mode for the LG G5?
1 Like
I seem to recall that some of the modes aren’t accessible depending on the content you are playing (ex: if you are watching HDR content), could this be why? @bryanabarnett
EDIT: @daffyduck42 was right. Here is the explanation. Filmmaker mode is selectable when Dolby Vision content is on screen and Filmmaker mode is also selectable when Dolby Vision content is NOT on the screen. When DV content is on the screen, WebOS calls Filmmaker mode “dolbyHdrCinema” without quotes. When DV content is not on the screen, I have no idea what WebOS calls Filmmaker mode. So that part is still a mystery. But this mystery is now half solved.
===
@daffyduck42 Thanks for your input. While that is true in general, I don’t believe that explains my issue.
I can manually change to Filmmaker Mode with the TV remote while testing, and Filmmaker mode is listed in the TV menu along side every other listed mode while testing. So, Filmmaker mode is available to be selected. I’m just unable to use the script to select Filmmaker mode because I don’t know what name to use for it. At least this is where my logic leads me.
is there a way to change the brightness setting remotely? I cant believe you cant change it with the remote just like the volume
I figured it out! Made a forum account just to chime in.
For the FILMMAKER internal WebOS picture modes (depending on the format you have on-screen):
SDR: filmMaker
HDR: hdrFilmMaker
Dolby Vision: dolbyHdrCinema
I made an automation where the action tries to run all three commands at once. That way no matter what content I have playing, it always works. The continue_on_error flag was important.
actions:
  - data:
      entity_id: media_player.bedroom_tv
      command: settings/setSystemSettings
      payload:
        category: picture
        settings:
          pictureMode: filmMaker
    action: webostv.command
    continue_on_error: true
  - data:
      entity_id: media_player.bedroom_tv
      command: settings/setSystemSettings
      payload:
        category: picture
        settings:
          pictureMode: hdrFilmMaker
    action: webostv.command
    continue_on_error: true
  - data:
      entity_id: media_player.bedroom_tv
      command: settings/setSystemSettings
      payload:
        category: picture
        settings:
          pictureMode: dolbyHdrCinema
    action: webostv.command
    continue_on_error: true
This is how I implemented the Picture Mode in my LG TV:
-
Create an Input Select in the helpers with the following values:
game, cinema, cinemaBright, filmMaker. -
Then, create the following automation:
alias: Titano Picture Mode (Automation)
description: Sets LG WebOS Picture Mode with SDR/HDR/Dolby loop
triggers:
  - entity_id: input_select.titano_picture_mode
    trigger: state
conditions: []
actions:
  - variables:
      modes_to_send: |
        {% set incoming = trigger.to_state.state %} {% set map = {
          'game': ['game', 'hdrGame', 'dolbyHdrGame'],
          'cinema': ['cinema', 'hdrCinema', 'dolbyHdrCinema'],
          'cinemaBright': ['cinemaBright', 'hdrCinemaBright', 'dolbyHdrCinemaBright'],
          'filmMaker': ['filmMaker', 'hdrFilmMaker', 'dolbyHdrCinema']
        } %} {{ map.get(incoming, [incoming]) }}
  - repeat:
      for_each: "{{ modes_to_send }}"
      sequence:
        - data:
            entity_id: media_player.titano
            command: settings/setSystemSettings
            payload:
              category: picture
              settings:
                pictureMode: "{{ repeat.item }}"
          action: webostv.command
          continue_on_error: true
mode: single
Now, every-time you change the value in the select, the automation will react and also try to set the correct mode based on the content you’re watching (SD, HD or Dolby)
Don’t know if its just me but I can only change the picture preset using the script with the luna command i cant use the lg command settings/setSystemSettings with the payload that you guys are using. I have a OLED55C14LB with Firmware 03.41.00 and the HA integration is LG webOS TV. When i try to run the command this is what i get Communication error while calling async_command for device LG webOS TV OLED55C14LB: {'type': 'error', 'id': 22, 'error': '500 Application error', 'payload': {'returnValue': False, 'errorCode': -1000, 'errorText': "category, picture doesn't support the key(s): undefined"}}
action: webostv.command
metadata: {}
data:
  entity_id: media_player.lg_webos_tv_oled55c14lb
  command: settings/setSystemSettings
  payload:
        category: picture
        settings:
          pictureMode: filmMaker
I’ve got an audio amp everything goes through, so basically 1 HDMI port. I had a Sony TV which I had a HA automation when the amp goes to the Xbox input then turn on Game mode, TV go to Cinema mode (few more, but not needed)
This switched for all of the variations, SDR, HDR and DV. The LG doesn’t seem to do that - so is there a way on the LG to read the current picture mode with “webostv.command” as I could possibly have this on a cycle, or is there going to be a way of setting it otherwise, Xbox is always in DV mode so the only other way I can think of is getting my Harmony remote to trigger something HA can detect, but bit confused what it could be right now.