Hi there guys.
Reddit removed my post because of it’s spam filter, so I’ll post it here instead.
I found there’s no up-to-date guide on how to set up Alexa on an RPi4 with Docker, so I’ve decided to make one myself. Without any further ado, let’s jump straight into it!
THIS IS FOR THE CUSTOM SKILL. THIS GUIDE WILL NOT WORK FOR FLASH BRIEFING OR SMART HOME.
DuckDNS
First, we need to make sure your HA installation is available on the internet.
If you already set up DuckDNS, you can skip this section.
- Sign in with any supported provider on DuckDNS.
- Next, you should see a page that looks like this:
- Choose a subdomain that you would like to access your HA installation from, and click
add domain. - If you get a reCaptcha error, click on the DuckDNS text at the top header, and try again.
- Your IP should automatically be filled in, but if you would like it to be a different IP, fill it in and hit
update ip. - To finish the installation, go to this page and click on
pi, then choose your domain and follow the instructions.

Port Forwarding
This is the tricky part. But don’t worry, I’ll guide you through it.
Windows:
Press the Windows button, type cmd and hit enter.
Type ipconfig and hit enter.
If you are using wireless internet, look for Wireless LAN adapter Wi-Fi: and find Default Gateway there.
If you are using Ethernet, look for Ethernet adapter or something similar and find the Default Gateway there.
Mac OS X:
Click the Apple icon on the top left corner, then click System Preferences.
Click Network.
Select your internet connection and click Advanced.
Select the TCP/IP tab and find the gateway IP next to Router.
Linux:
In the command prompt, simply type ip route show and look for default via [GATEWAY ADDRESS HERE], where [GATEWAY ADDRESS HERE], would be your gateway address.
Once you have your IP address for your router, simply type it into your browser of choice, and type the password to log in, (not the password you use to join the wifi), located on the back of your router.
Try to locate the Port Forwarding/Port Triggering section.
If you can’t find it, look under advanced, or advanced setup, and it should be there. If you are unable to locate it, search [router brand here] port forwarding guide, and a couple of guides should be there to help you out.
Once you have located the port forwarding section, follow these general instructions. Every router is different. If you’re having trouble, please leave a comment below, and I and others will help you out.
Create a new port forwarding rule, locate your Raspberry Pi’s IP address and make the external and internal port the number 80.
And that’s it, but don’t close the port forwarding section yet! We’re not done.
Getting a certificate
This is the part in the official HA guide where things start to get old. The HA guide recommends to install certbot-auto which is deprecated and is no longer recommended. Here’s an updated version that will work for 2021.
On your Raspberry Pi, type sudo apt install certbot, and when it prompts you, type y and hit enter.
This will install certbot which will generate a certificate for you.
Once it is installed, run sudo certbot certonly.
When it prompts for 1 or 2, type 1 and hit enter.
When it prompts for your domain name, enter your domain name you created earlier in DuckDNS. It should be like hass-example.duckdns.org, with no trailing slash.
Soon, you should see a message saying Congratulations!, which means you have successfully generated a certificate.
If you do not see a message like that, and see something like Challenge failed, check your port forwarding settings, and if it still doesn’t work, leave a comment below.
We’re almost there!
Configuring HA with your new certificate
- Open your port forwarding page again, and make sure the external port is
443and the internal port is8123, with your Raspberry Pi selected. - Stop your HA install with
docker stop homeassistant. - Remove your HA container with
docker rm homeassistant. (take note that this will not remove your config, it is still stored on your pi) - Create a new docker container, with a new symbolic link to your cert folder.
docker run -d --name homeassistant --privileged -e TZ=YOUR_TIME_ZONE --restart=unless-stopped
-v /PATH_TO_YOUR_CONFIG:/config
-v /etc/letsencrypt:/etc/letsencrypt
--network=host ghcr.io/home-assistant/raspberrypi4-homeassistant:stable
- Then, change your directory to your config folder with
cd /PATH_TO_YOUR_CONFIG. - Change to root with
sudo suand runln -s -T /etc/letsencrypt/live/mydomain /PATH_TO_YOUR_CONFIG/ssl. - Go into your
configuration.yamlfile and add the following:http: server_port: 8123 ssl_certificate: ./ssl/fullchain.pem ssl_key: ./ssl/privkey.pem - Restart Home Assistant from the web controls.
YOUR HA INSTALL WILL NO LONGER BE AVAILABLE THRU LOCAL IP. FROM NOW ON, USE YOUR DOMAIN FROM DUCKDNS.
Creating the Alexa skill
- Click here and click
Create Skill. - Fill out the information as follows:
Skill name: Whatever you like!
Primary locale: your preferred language
Sync locales: Off
Choose Custom, and choose Alexa-hosted (Python).
-
Then click
Create skillat the top right. -
Choose
Start from Scratchand clickContinue with template. -
Amazon will now build a voice model and create your skill. This will not take long.
-
Soon, you will reach a dashboard that looks like this:
[
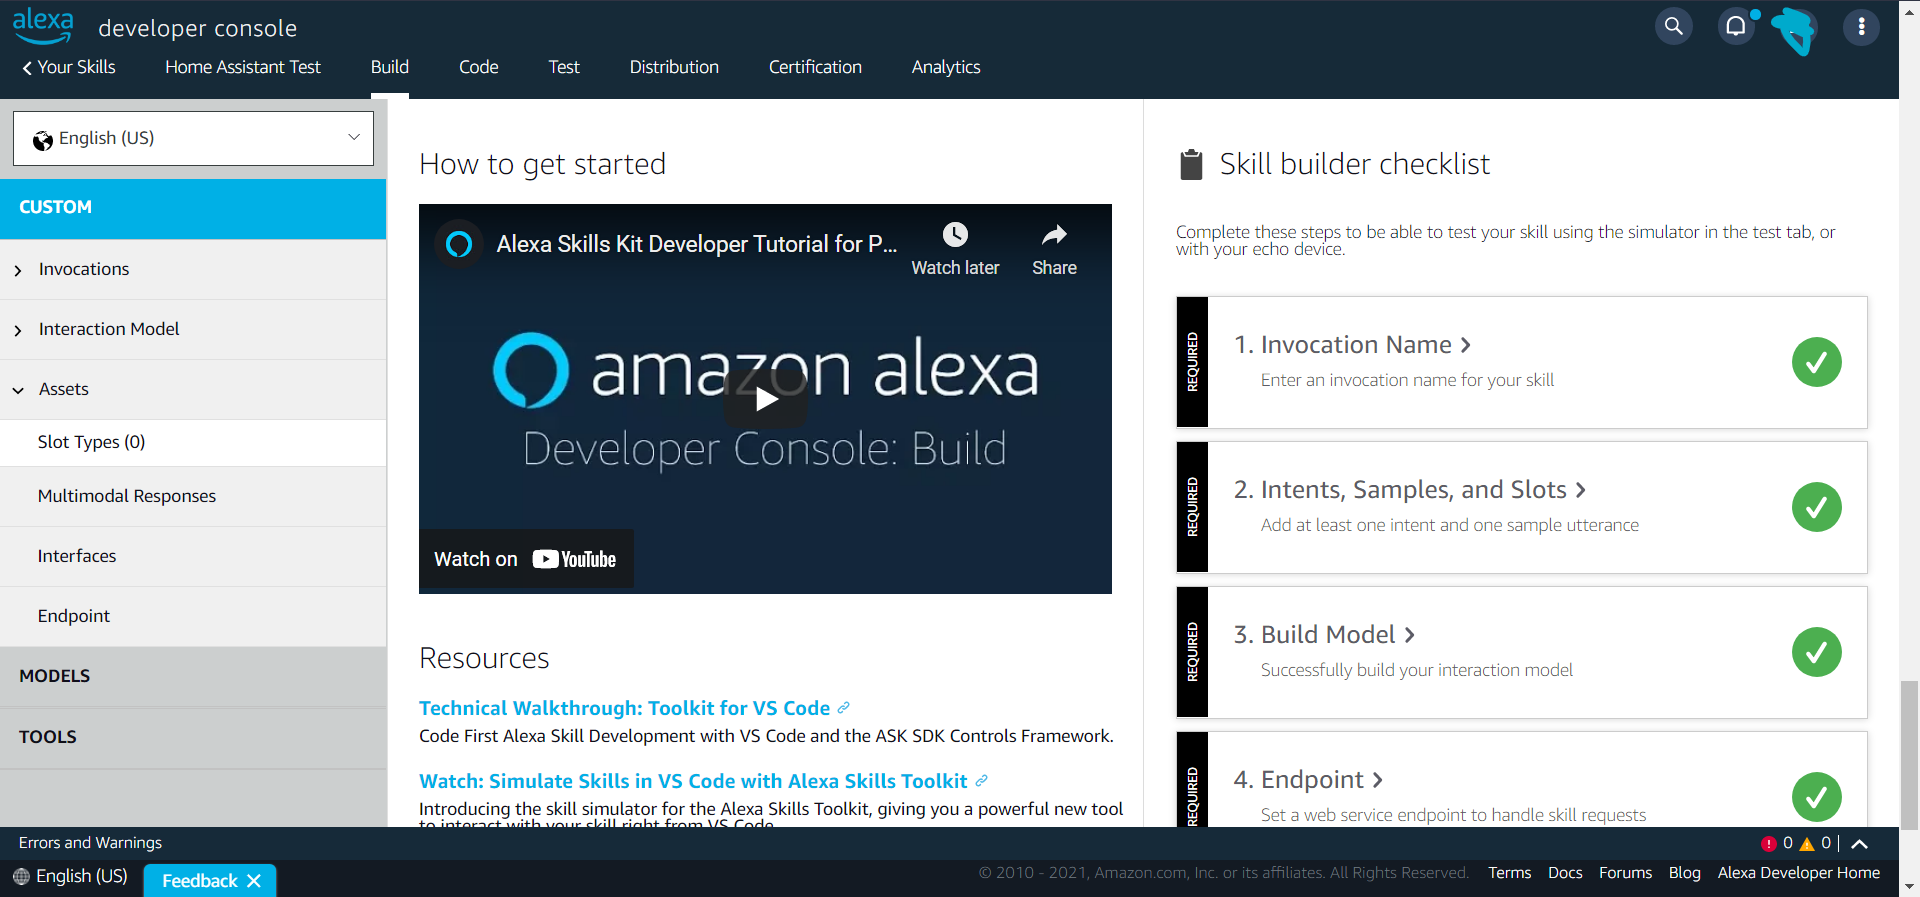
-
Open the invocations tab on the left, and then click
Skill Invocation Name. Change it to whatever you like, this is what you will invoke the skill with. Then clickSave modelat the top. -
Now open up the
Interaction Modeltab and open theIntentstab, and click on theIntentstab as well to open theIntentsdashboard. -
Delete the default
HelloWorldIntent, and then click+ Add Intentand the top. And type a name for your intent. It should describe what your command will do. For my example, it will beLocateIntent, then clickCreate custom intent. -
If you want to put input into Home Assistant, you will use variables called “slots”. If you don’t want to use slots, skip to step 13. Scroll down and look for
Intent Slots. Type a name for your slot. For my example, I will write “User”, then click the + sign. -
Once you have your slot, choose a type of slot. There are plenty available, you shouldn’t have to create your own. I will use
AMAZON.FirstName. -
Type some things you would say like
- where is {User}
- i need to know where {User}
- where {User} is
- etc. etc.
When you type a { symbol, a popup will show up asking what slot you would like to use. You can click your newly created slot.
-
Once you are done writing example utterances, click
Save modeland then clickBuild model. This should save your changes and put them into effect. -
Click on the
Codetab at the top, and paste the code below, replacing the sample code.
# -*- coding: utf-8 -*-
import os
import json
import logging
import urllib3

_debug = bool(os.environ.get('DEBUG'))

_logger = logging.getLogger('HomeAssistant-Intents')
_logger.setLevel(logging.DEBUG if _debug else logging.INFO)


def lambda_handler(event, context):
    """Handle incoming Alexa directive."""

    _logger.debug('Event: %s', event)

    base_url = "[[[YOUR DOMAIN HERE]]]"
    assert base_url is not None, 'Please set BASE_URL environment variable'

    try:
        token = event.get('session', {}).get('user', {}).get('accessToken')
    except AttributeError:
        token = None

    if token is None and _debug:
        token = os.environ.get('LONG_LIVED_ACCESS_TOKEN')

    assert token, 'Could not get access token'

    verify_ssl = not bool(os.environ.get('NOT_VERIFY_SSL'))

    http = urllib3.PoolManager(
        cert_reqs='CERT_REQUIRED' if verify_ssl else 'CERT_NONE',
        timeout=urllib3.Timeout(connect=2.0, read=10.0)
    )

    response = http.request(
        'POST',
        '{}/api/alexa'.format(base_url),
        headers={
            'Authorization': 'Bearer {}'.format(token),
            'Content-Type': 'application/json',
        },
        body=json.dumps(event).encode('utf-8'),
    )
    if response.status >= 400:
        return {
            'event': {
                'payload': {
                    'type': 'INVALID_AUTHORIZATION_CREDENTIAL'
                    if response.status in (401, 403) else 'INTERNAL_ERROR',
                    'message': response.data.decode("utf-8"),
                }
            }
        }
    return json.loads(response.data.decode('utf-8'))
And replace [[[YOUR DOMAIN HERE]]] with your HA domain, with no trailing slash.
- Once you are done, hit
Save, and then hitDeploy. This will deploy your skill code to your devices.
Configuring account linking
We’re on the home stretch! We just need to set up account linking now.
- Head back over to the
Buildtab and then select theTOOLStab, then select theAccount linkingtab, and fill out the following info.
Do you allow users to create an account or link to an existing account with you? (On)
Allow users to enable skill without account linking (Recommended). (Off)
Allow users to link their account to your skill from within your application or website (Off)
Allow users to authenticate using your mobile application (Off)
Make sure Auth Code Grant is selected.
Your Web Authorization URI should be [[YOUR HA DOMAIN]]/auth/authorize.
Access Token URI should be [[YOUR HA DOMAIN]]/auth/token.
Your Client ID should be:
https://pitangui.amazon.com/
if you are in US
https://layla.amazon.com/
if you are in EU
https://alexa.amazon.co.jp/
if you are in JP or AU
Your Secret should be nothing.
Your Authentication Scheme should be HTTP Basic (Recommended).
Your Scope should be intent.
Then scroll up and hit Save.
-
Open up your Alexa app on your phone and navigate to
More -> Skills & Games -> Your Skills -> Dev -
Locate your Home Assistant skill and tap on it. It should say something like
Account linking required. -
Link your account from there, and using your HA username and password.
The last section is coming right up!
Setting up the Alexa integration
- Go back to here and find your skill. Under it, click
Copy Skill ID. This will be useful later. - Open up your
configuration.yamland type the following lines:
alexa:

intent_script:
  [[YOUR SKILL ID]]:
    speech:
      type: plain
      text: "Hello, World!"
  LocateIntent:
    speech:
      type: plain
      text: "{{ states.person[User].attributes.friendly_name }} is currently at {{ states.zone[states.person[User].state].name | default('a place away from home') }}"
- Replace
[[YOUR SKILL ID]]with the skill ID you copied earlier. - Save it, and restart your home assistant installation.
Congratulations! You have successfully set up Alexa with your HA installation. If you ever run into any issues, please feel free to comment below, and I will try to help you out.
To test out your skill, try saying Alexa, open [[YOUR SKILL INVOCATION NAME]]. It should say “Hello, World!”
For more information on how to configure HA with the intent_script config variable, click here.
If this was helpful, please give this post an upvote, it’s greatly appreciated.
