Maybe someone can help, I’m struggling to get this right. I want to use Adafruit’s MAX17048 LiPo battery gauge:
I tried to take inspiration from this thread:
Maybe someone can help, I’m struggling to get this right. I want to use Adafruit’s MAX17048 LiPo battery gauge:
I tried to take inspiration from this thread:
Ok so I tried modifying a-marcel’s code and got it to at least produce some output but the numbers seem wildly wrong:
[18:28:14][D][sensor:127]: 'Voltage': Sending state 3616.25000  with 0 decimals of accuracy
[18:28:14][D][sensor:127]: 'Percentage': Sending state 3.10937  with 0 decimals of accuracy
I confess that I really don’t understand what this is doing or why we need all these bit shift operators.
  void update() override {
    float voltage = 1.25f * (float)(read16(MAX17043_VCELL) >> 4);
    voltage_sensor->publish_state(voltage);

    uint16_t percentage_tmp = read16(MAX17043_SOC);
    float percentage = (float)((percentage_tmp >> 8) + 0.003906f * (percentage_tmp & 0x00ff));

    percentage_sensor->publish_state(percentage);
  }
Why all the complicated formulas? Does the sensor not produce a simple voltage number and percentage so the data has to be massaged like this?
Ok…so I think I have this solved but maybe someone else can check my work. I copied these formulas from the source code of the Adafruit driver:
So now my code looks like this:
  void update() override {
    //float voltage = 1.25f * (float)(read16(MAX17048_VCELL) >> 4);
    float voltage = (float)(read16(MAX17048_VCELL)) * 78.125 / 1000000;
    voltage_sensor->publish_state(voltage);

    uint16_t percentage_tmp = read16(MAX17048_SOC);
    //float percentage = (float)((percentage_tmp >> 8) + 0.003906f * (percentage_tmp & 0x00ff));
    float percentage = (float)(percentage_tmp) / 256;
    percentage_sensor->publish_state(percentage);
  }
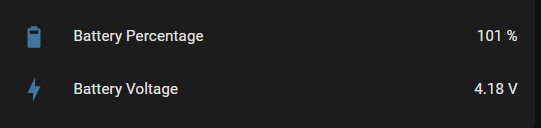
Now it produces outputs that look like a voltage and percentage:
[06:24:58][D][sensor:127]: 'Voltage': Sending state 3.56000  with 0 decimals of accuracy
[06:24:58][D][sensor:127]: 'Percentage': Sending state 93.23047  with 0 decimals of accuracy
Does it look right to you? Am I missing anything?
The values are a bit odd, a fully charged battery started at 103% and 4.2V. Methinks my formulas aren’t quite optimized correctly.
but at least I can watch the values change as the battery discharges.
This is working great, if anyone else needs a solution for monitoring battery life. Here’s the full code in case anyone else needs it.
MAX17048_component.h - put this file in your esphome folder:
#include "esphome.h"

#define MAX17048_ADDRESS        0x36
#define MAX17048_VCELL          0x02 // voltage
#define MAX17048_SOC            0x04 // percentage
#define MAX17048_MODE           0x06
#define MAX17048_VERSION        0x08
#define MAX17048_CONFIG         0x0c
#define MAX17048_COMMAND        0xfe

class MAX17048Sensor : public PollingComponent, public Sensor {
 public:
  Sensor *voltage_sensor = new Sensor();
  Sensor *percentage_sensor = new Sensor();

  MAX17048Sensor() : PollingComponent(10000) {}

  void setup() override {
    // Initialize the device here. Usually Wire.begin() will be called in here,
    // though that call is unnecessary if you have an 'i2c:' entry in your config
    ESP_LOGD("custom", "Starting up MAX17048 sensor");

    Wire.begin();
  }

  uint16_t read16(uint8_t reg) {
      uint16_t temp;
      Wire.begin();
      Wire.beginTransmission(MAX17048_ADDRESS);
      Wire.write(reg);
      Wire.endTransmission();
      Wire.requestFrom(MAX17048_ADDRESS, 2);
      temp = (uint16_t)Wire.read() << 8;
      temp |= (uint16_t)Wire.read();
      Wire.endTransmission();
      return temp;
  }

  void update() override {
    float voltage = (float)(read16(MAX17048_VCELL)) * 78.125 / 1000000;
    voltage_sensor->publish_state(voltage);

    uint16_t percentage_tmp = read16(MAX17048_SOC);
    float percentage = (float)(percentage_tmp) / 256;
    percentage_sensor->publish_state(percentage);
  }
};
Put this in your ‘includes’:
esphome:
  includes:
    - MAX17048_component.h
and this in your sensor section:
  - platform: custom
    lambda: |-
      auto max17048_sensor = new MAX17048Sensor();
      App.register_component(max17048_sensor);
      return {max17048_sensor->voltage_sensor, max17048_sensor->percentage_sensor};
    sensors:
      - name: "Voltage"
        unit_of_measurement: V
        accuracy_decimals: 2
      - name: "Percentage"
        unit_of_measurement: '%'
Thanks, @greenleaf Appreciate you providing this code.
I tried it with my setup and the voltage is fine, but I need a way to adjust the percent range. In my case I’m using 3 AA batteries, so 100% is 4.75 V. Is there a place to adjust this in the code or is this hard coded into the sensor?
hmm, best guess would be to try tweaking this line and see if your readings line up closer to 4.75 on a full charge
float voltage = (float)(read16(MAX17048_VCELL)) * 78.125 / 1000000;
Has anyone done anything similar for the LC709203F
Hello,
I trying to build this ESPHome 2024.3.0 and I am facing an issue. Is that the case for you too?
INFO ESPHome 2024.3.0
INFO Reading configuration /config/esphome/adafruit-qualia-esp32-s3.yaml...
INFO Generating C++ source...
INFO Compiling app...
Processing adafruit-qualia-esp32-s3 (board: esp32-s3-devkitc-1; framework: espidf; platform: platformio/[email protected])
--------------------------------------------------------------------------------
HARDWARE: ESP32S3 240MHz, 320KB RAM, 8MB Flash
 - framework-espidf @ 3.40406.240122 (4.4.6)
 - tool-cmake @ 3.16.4
 - tool-ninja @ 1.7.1
 - toolchain-esp32ulp @ 2.35.0-20220830
 - toolchain-riscv32-esp @ 8.4.0+2021r2-patch5
 - toolchain-xtensa-esp32s3 @ 8.4.0+2021r2-patch5
Reading CMake configuration...
Dependency Graph
|-- noise-c @ 0.1.4
Compiling .pioenvs/adafruit-qualia-esp32-s3/src/main.o
/config/esphome/adafruit-qualia-esp32-s3.yaml: In lambda function:
/config/esphome/adafruit-qualia-esp32-s3.yaml:94:34: error: expected type-specifier before 'MAX17048Sensor'
       auto max17048_sensor = new MAX17048Sensor();
                                  ^~~~~~~~~~~~~~
/config/esphome/adafruit-qualia-esp32-s3.yaml:96:82: error: could not convert '{<expression error>, <expression error>}' from '<brace-enclosed initializer list>' to 'std::vector<esphome::sensor::Sensor*>'
       return {max17048_sensor->voltage_sensor, max17048_sensor->percentage_sensor};
                                                                                  ^
*** [.pioenvs/adafruit-qualia-esp32-s3/src/main.o] Error 1
When I try to use @greenleaf 's code I get the error: src/MAX17048_component.h:23:5: error: 'Wire' was not declared in this scope. Some poking around showed me that most ESPHome components are not using Wire. Any thoughts, anyone?
Apparently custom components like this one are now deprecated: Custom I²C Device — ESPHome
So maybe one of us will get a chance to create an external component for the max17048 and share it here!
If anyone returns to this thread, I threw together a new version of the driver, which seems to work currently. I used it in this recipe:
https://community.home-assistant.io/t/recipe-esphome-adafruit-feather-esp32-s2-thinkink-e-paper-display-battery-monitor/
tl;dr:
external_components:
  - source: github://Option-Zero/esphome-components@max17048
    components: [max17048]

sensor:
  - platform: max17048
    battery_voltage:
      name: Battery voltage
    battery_level:
      name: Battery level
    rate:
      name: Battery discharge rate
Lmk if you have success with this @lboue .
This works perfectly, thanks! Do you have plans to make a PR and get it natively integrated on ESPHome?
Thanks for this. Seems to be working! I’m getting readings, will have to see how accurate they are.
Thanks, this works perfectly.
I have this working on a multi sensor that senses presence, temp and light. I can get battery level and voltage, but I can’t seem to get discharge rate. When I try:
rate:
name: discharge rate
i get a message that rate is not valid. Any idea what i am missing?
Works! Thank you
If you find this topic by searching for Adafruit ESP32-S3 TFT Feather and wonder how to use the MAX17048 LiPoly Battery Monitor available over I2C on address 0x36 with ESPHome:
The MAX17048 is a more advanced version of the MAX17043, which is already available as a sensor in ESPHome. If you just want to see the battery level, it will suffice.
Example configuration:
esphome:
  name: adafruit-esp32-s3-tft-feather
  friendly_name: Adafruit ESP32-S3 TFT Feather

esp32:
  board: adafruit_feather_esp32s3
  variant: esp32s3
  framework:
    type: esp-idf

logger:

status_led:
  pin:
    number: GPIO13

i2c:
  sda: GPIO42
  scl: GPIO41
  scan: false # Will fail and delay 2 seconds on Feather design

sensor:
  - platform: max17043 # max17048
    id: battery
    address: 0x36
    battery_voltage:
      id: batt_voltage
      name: "Battery Voltage"
    battery_level:
      id: batt_percent
      name: "Battery Percentage"

spi:
  clk_pin: GPIO36
  mosi_pin: GPIO35
  miso_pin: GPIO37

power_supply:
  - id: tft_pwr_en
    enable_time: 0ms
    enable_on_boot: true
    pin: GPIO21

display:
  - platform: st7789v
    model: TTGO TDisplay 135x240
    backlight_pin: GPIO45
    cs_pin: GPIO7
    dc_pin: GPIO39
    reset_pin: GPIO40
    power_supply: tft_pwr_en
    rotation: 90
    update_interval: 1s
    lambda: |-
      auto blue = Color(0, 0, 255);
      auto yellow = Color(255, 255, 0);
      it.printf(10, 10, id(font1), yellow, "Battery:");
      it.printf(10, 30, id(font1),
                id(batt_voltage).has_state() ? "V: %.2f V" : "V: ---",
                id(batt_voltage).state);
      it.printf(10, 50, id(font1),
                id(batt_percent).has_state() ? "SOC: %.0f %%" : "SoC: ---",
                id(batt_percent).state);

font:
  - file: "gfonts://Roboto"
    id: robo14
    size: 14
It seems you cannot detect I2C during boot because the Feather is not designed with the ESPHome boot sequence in mind. But I2C devices still work after the boot sequence is complete, as long as you know the address.
I seem to get the ‘wire’ problem also. Has there been a solution for this yet?
This is my code:
esphome:
  name: laundry-leak
  friendly_name: laundry-leak
  includes:
    - MAX17048_component.h

esp32:
  board: esp32dev
  framework:
    type: esp-idf

# Enable logging
logger:

# Enable Home Assistant API
api:
  encryption:
    key: "...."

ota:
  - platform: esphome
    password: "...."

wifi:
  manual_ip:
    static_ip: 192.168.1.xyz
    gateway: 192.168.1.1
    subnet: 255.255.255.0
    dns1: 192.168.1.lmn
  ssid: "xxx"
  password: "yyy"

  # Enable fallback hotspot (captive portal) in case wifi connection fails
  ap:
    ssid: "laundry-leak-AP"
    password: "rst"

captive_portal:

web_server:
  port: 80

binary_sensor:
  - platform: gpio
    pin:
      number: GPIO19
      mode:
        input: true
        pullup: true
      inverted: true
    name: leak-sensor3
    filters:
        - delayed_on_off: 20ms
    icon: mdi:water  # Static icon (default)

# Configure I2C bus (required for MAX17048)
i2c:
  id: charger_bus
  sda: GPIO22
  scl: GPIO23
  scan: true

external_components:
  - source: github://Option-Zero/esphome-components@max17048
    components: [max17048]

sensor:
  - platform: max17048
    battery_voltage:
      name: Battery voltage
      id: batt_v
    battery_level:
      name: Battery level
    rate:
      name: Battery discharge rate
      id: batt_pct

text_sensor:
  - platform: version
    name: "ESPHome Version"
    id: laundry_leak_version
These are the errors I get:
In file included from src/main.cpp:36:
src/MAX17048_component.h: In member function 'virtual void MAX17048Sensor::setup()':
src/MAX17048_component.h:23:5: error: 'Wire' was not declared in this scope
   23 |     Wire.begin();
      |     ^~~~
src/MAX17048_component.h: In member function 'uint16_t MAX17048Sensor::read16(uint8_t)':
src/MAX17048_component.h:28:7: error: 'Wire' was not declared in this scope
   28 |       Wire.begin();
      |       ^~~~
*** [.pioenvs/laundry-leak/src/main.cpp.o] Error 1
Hi,
did you took a look at: [max17048] Add MAX17048 Li+ Cell Fuel Gauge IC by B48D81EFCC · Pull Request #13585 · esphome/esphome · GitHub
A few weeks ago I created a PR to add support for MAX17048.
external_components:
  - source: github://pr#13585
    components: [max17048]
    refresh: 1h

# Example config.yaml
sensor:
  - platform: max17048
    address: 0x36
    update_interval: 60s
    battery_voltage:
      name: "Battery Voltage"
    battery_level:
      name: "Battery Level"
    rate:
      name: "Battery Rate"
Feedback highly appreaciated