Full guide here: https://smarthomepursuits.com/add-a-blinking-leak-sensor-card-to-home-assistant/
In this guide, I’m going to show you a few ways you can add a water sensor leak detector card to Home Assistant in a Lovelace card. You can either go simple with an basic entities card, display it as a icon, or my personal favorite – a conditional card only displays if water is detected.
You can definitely re-use this guide as inspiration for battery level cards as well, if you’d like.
For reference, I am using a SmartThings Leak Sensor and an Aqara water leak sensor.
Let’s get started!
Find your Water Sensor Entity ID Names
To find your water sensor entity ID names, go to Configuration > Devices and either scroll through to find them, or search for “water”.

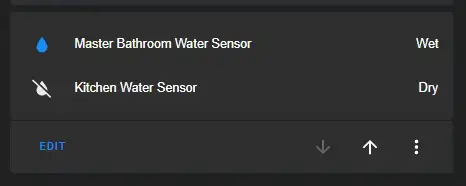
Basic Leak Sensor Card Home Assistant
If you want a simple card that displays whether it is Dry or Wet, your best best is to use a basic Entities card.
Just click into a view > Add Card > Entities.
Icon Leak Sensor Card
If you’d like to display them as an icon, you could do a Lovelace card as an icon instead. I am using the HACS addon called Custom-Button-Card for this one.
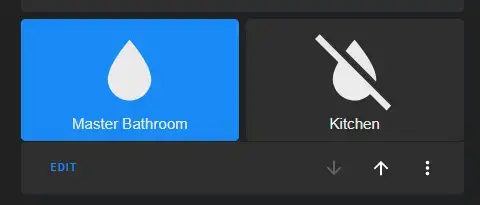
If you have more than 1 sensor, I recommend adding them as a Grid to save space on your dashboard.
Add Card> Grid. Choose 2 columns and uncheck “Render as squares”. Then, paste in this code block for the first sensor and replace the entity with your own. Then, click the + button to add the 2nd leak sensor.

type: custom:button-card
entity: switch.securifi_ltd_unk_model_3198790a_on_off
color: auto
color_type: card
name: Master Lights
Leak Sensor Glance Card
Another great option for showing multiple water sensors in Home Assistant is using a Glance card, like this:
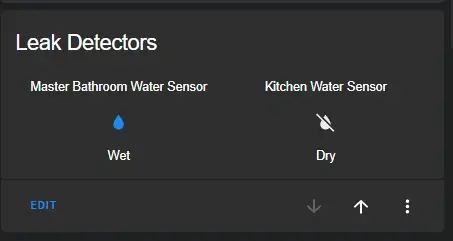
I don’t recommend this route if you have more than 2 sensors, as the entity names will probably get cut off when viewing on mobile devices, but for 1-3 sensors, it works great.
Add Card > Glance. Then search for your water sensors and make sure to toggle the different options such as “color icons by state”.
Or, you can just paste this is in as a Manual Lovelace card:
type: glance
entities:
  - entity: binary_sensor.lumi_lumi_sensor_wleak_aq1_ias_zone
  - entity: binary_sensor.water_sensor_ias_zone
title: Leak Detectors
state_color: true
Blinking Water Sensor Card
This is one of my personal favorites, also using the Custom Button Card HACS frontend integration.
These icons show up on your dashboard all the time. When water is detected, the card will flash red alerting you that a sensor has been triggered, like this:

I added a 2-column grid, and then pasted this into each card (by clicking the + button to add a new card) and changed out the entities.
type: custom:button-card
entity: binary_sensor.lumi_lumi_sensor_wleak_aq1_ias_zone
state:
  - color: red
    icon: mdi:pipe-leak
    styles:
      card:
        - animation: blink 2s ease infinite
    value: 'on'
color: auto
color_type: card
name: Master Bathroom
Conditional Card (Only Show when Water is detected)
Chances are that 99.99% of the time you don’t need to have a static Lovelace card that shows whether your water sensors are wet or dry. You just need to need to see WHEN they detect water, right? That’s where Conditional cards come in.
Here’s an example of it running. For the first few seconds, you’ll see that the card doesn’t show up at all until I put my water sensor in water.

For this card, I’m using the Custom Button Card again, but this time adding it to a conditional card. I recommend adding this conditional card to your main Lovelace view since it’s one of those things you want to know about right away (aside from creating an automation to notify you when water is detected, which is a must have).
Add Card > Conditional. On the Card tab, choose Manual.
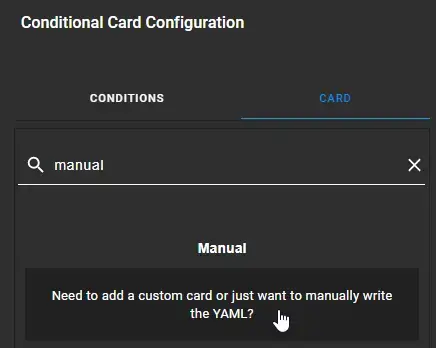
Then, paste in this code and change out the entity name with your own.
type: custom:button-card
entity: binary_sensor.lumi_lumi_sensor_wleak_aq1_ias_zone
state:
  - color: red
    icon: mdi:pipe-leak
    styles:
      card:
        - animation: blink 2s ease infinite
    value: 'on'
color: auto
color_type: card
name: Master Bathroom
Then, switch over the Conditions tab. Change the “state is equal to” to “on”.
Or, you can paste this leak sensor conditional code as a Manual card with this yaml:
type: conditional
conditions:
  - entity: binary_sensor.lumi_lumi_sensor_wleak_aq1_ias_zone
    state: 'on'
card:
  type: custom:button-card
  entity: binary_sensor.lumi_lumi_sensor_wleak_aq1_ias_zone
  state:
    - color: red
      icon: mdi:pipe-leak
      styles:
        card:
          - animation: blink 2s ease infinite
      value: 'on'
  color: auto
  color_type: card
  name: Master Bathroom
Wrapping Up
Hopefully you guys found this tutorial useful! I showed you a few different ways you can display your leak sensors depending on how you want your data displayed. I recommend going the Conditional Card route since you really only need to see if water has been detected, but you don’t need it wasting precious space on your Lovelace dashboards.
Ideally, you need to create an automation for this as well. But, it’s also a good idea to have a visual reminder on your dashboard just in case your notifications fail or in case you swipe away the notification and can’t remember which sensor was triggered. And plus, if you’re a Home Assistant tinkerer like myself, it’s just plain cool to see animated icons only when needed.