Hello Home Assistant Community!
We are thrilled to announce the release of the official Domintell integration for Home Assistant! ![]()
After much anticipation, the integration has been submitted and is now available through HACS (Home Assistant Community Store). This marks a significant milestone for both existing and future Domintell users, offering a seamless way to integrate and automate your Domintell devices within Home Assistant.
What does this mean for you?
- Full integration of Domintell devices into your Home Assistant setup.
- Take advantage of Home Assistant’s powerful automation and control capabilities.
- Easily manage your Domintell system alongside other smart home devices.
- Expand your smart home possibilities with new and creative use cases!
You can find the repository and all the necessary information here:
[![]() [GitHub Repository - Domintell for Home Assistant]]
[GitHub Repository - Domintell for Home Assistant]]
We would love to hear your feedback and suggestions! Feel free to share your experiences and ideas in the comments.
Let’s make smart living even smarter with Domintell and Home Assistant!
Best,
The Domintell Team
Domintell Integration for Home Assistant
This integration allows Home Assistant to connect and interact with Domintell home automation installations. It provides control and monitoring of various Domintell devices, enabling seamless integration into your smart home ecosystem.
High-Level Description
Domintell is a robust and flexible home automation system known for its reliable wired technology. This integration bridges the gap between your Domintell installation and Home Assistant, allowing you to control lights, switches, sensors, and more through the Home Assistant interface.
Installation
Prerequisites
- A functioning Domintell installation with a network interface (e.g., a Master or a DNET).
- Home Assistant installation.
- Knowledge of your Domintell system’s configuration, including module addresses.
Enable the API
You have to enable the local API to allow Home Assistant to communicate with your Domintell installation. Do this in GoldenGate application:
- DGQG01 + DNET01: Domintell Pilot (LightProtocol) on WebSocket (17481/tcp) must be enable in the parameter dialog of the DNET01 module.
- NewGen DGQG without DNET02 (DGQG02/04/…): Domintell Pilot/LightProtocol on WebSocket (17481/tcp) must be enable in the parameter dialog of the DGQG02/04/… module.
- NewGen DGQG with DNET02 (DGQG02/04/…): Domintell Pilot/LightProtocol on WebSocket (17481/tcp) must be enable in the parameter dialog of the DNET02 module
Installation Steps
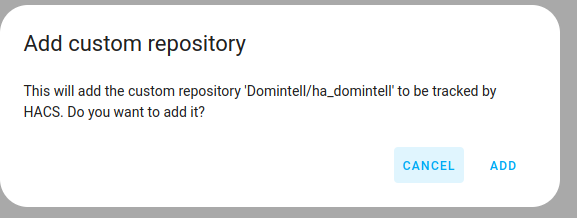
- Using HACS (Home Assistant Community Store - Recommended):
- Search for “Domintell” in the Integrations section of HACS.
- Click “Install.”
- Manual Installation:
- Download the latest release from the GitHub repository.
- Copy the
domintellfolder into your Home Assistant’scustom_componentsdirectory. - Restart Home Assistant.
Configuration
To add the Domintell integration to your Home Assistant instance, use this My button:
Domintell bridges can be auto-discovered by Home Assistant. If an instance was found, it will be shown as Discovered. You can then set it up right away.
Manual configuration steps
If it wasn’t discovered automatically, don’t worry! You can set up a manual integration entry:
- Browse to your Home Assistant instance.
- Go to Settings > Devices & Services.
- In the bottom right corner, select the Add Integration button.
- From the list, select Domintell.
- Follow the instructions on screen to complete the setup.
Installation Parameters
During installation, you will be prompted for:
- Host: The IP address or hostname of your Domintell bridge (Master or DNET).
- Username: (Optional) The username to connect to your Domintell system.
- Password: (Optional) The password to connect to your Domintell system.
If your Domintell installation is configured with a password, you will need to provide the correct username and password during the installation process.
Supported Devices and Features
This integration supports the following Domintell modules:
- Masters:
- DGQG01 (In association with a DNET01)
- DGQG02
- DGQG04
- Network interface:
- DNET01
- DNET02
- Power supply:
- DALI04
- DALI05
- Inputs:
- DDIR01
- DISM04/08/20
- DAXPB01/02/04/06
- DAXPBLCD01/02
- DNIPB01/02/04/06
- DNKPB04/06
- DPBC01/02/04/06
- DPBL01/02/04
- DPBR02/04/06
- DPBRLCD02
- DPBRT02/04/06
- DPBTLCD01/02
- DPBU01/02/04/06
- Outputs:
- DBIR01
- DMR01
- DMR02
- DTRP01
- DMV01
- DLED01
- Dimmers:
- DDIM01
- DOUT10V02
- DRGBW01
- Shutters:
- DTRP02
- DTRV01
- DTRVBT01
- Output interface:
- DLB01
- DDIMLV01
- DDMX02
- DINTDALI01
- Airco ModBus module
- Generic ModBus module
- Sensors:
- DTEM01/02
- DIN10V02
- DMOV01/02/05
- DMOV06
- DMOV07
- DWIND01
- DFAN01
- DPBRTHERMO01
- DELEC01
- Screens:
- DTSC02/04
- DTSC05
- Others:
- DOORSTATION
- Features:
- Scene
- Group
- Variable
- System Variable
- Thermostat
- Comming soon:
- DMONOELEC01
- DAMPLI01
- DDMX01
Unsupported Devices and features
- Devices never supported:
- DVIP01
- DVIP02
- DINTMB01
- MBDEV01
- DETH02
- DRS23201
- DRS23202
- DLCD01
- DLCD03
- DTSC01/03
- DIREMIT01
- DTRIELEC01
- Features:
- Camera
- Clock
- Zone
- Radio
- Temperature profile
Known limitations
- Doorstations: Only Doorbird devices are supported, Ring Bell events and electric strike control are functional. Video and audio streaming support are outside the scope of this integration.
- Airco ModBus modules: Control of the vanes is not currently supported.
- Shutter modules: The position information showed in Home Assistant is not accurate. Currently, modules do not provide this information. When the shutter is moving, the position is 50%. If the shutter is stopped, after an upward movement, the position will be 90%, after a downward movement the position will be 10%.
- Variables: Variables defined as “Master Only” are not exposed in Home Assistant.
- System variables: Presence simulation is currently only available for installations equipped with a DGQG01 master.
- Push buttons: Depending on the configuration of your Domintell system within the GoldenGate software and the overall installation setup, not all press types are available.
- Example: If the installation does not have a DNET02 and the push button module is a legacy module, it is not possible to distinguish between a long press and a short press. Only device event “push” is usable.
- Thermostat: For legacy modules, the status update may occur in two steps.
Troubleshooting
You can’t find your bridge or there is an error during inclusion. This can be caused by the following:
- Connection Issues:
- Verify the IP address/hostname of your Domintell bridge. Check your network connectivity.
- If the bridge and the Home Assistant instance are on different networks, ensure that the network configuration allows communication between them. This may involve configuring port forwarding, firewall rules, or VPN settings.
- If your bridge is a Master, only two simultaneous connections are allowed, check that there are no other applications currently connected to your installation
It may happen that a module they won’t show up in the integration setup. This can be caused by the following:
- Module not appearing in the list:
- The module has not been added to the Domintell installation. Add the module via the GoldenGate configuration software.
- The module is not properly powered or connected to the communication bus.
- The module is currently not supported by this version of the integration.
- The module is not supported by your current master OS version. Updating to the latest version is required.
- An error occurred while retrieving the module list. Check the Home Assistant log file.
Remove integration
This integration follows standard integration removal.
TO REMOVE AN INTEGRATION INSTANCE FROM HOME ASSISTANT
- Go to Settings > Devices & services and select the integration card.
- From the list of bridges, select the integration instance you want to remove.
- Next to the entry, select the three-dot menu. Then, select Delete.