I was having the same issue, and thoughts yesterday… Don’t really know if it can be done from browser, but in the end what saved me lots of time was the ‘scan text’ feature. It’s not perfect, had to correct quite a few chars but at least I didn’t have to type 'm all. Once you have one, you can copy/paste to other fields
2 Likes
Excellent video, helped me with complications and also how to open my garage door with actions on my watch.
But I have to ask, have you found a way to only show text in a complication for the Modular watch faces, the only one working for me is the Circular complication and it requires a gauge with range. If I want to display kW price or temperature I just want a digit to show.
I’ve tried just about everything I can think of to get a Complication to show up on my Apple Watch. I’m using WatchOS 10.3. iOS 17.3. HA Companion app 2024.1. I’m using a Modular watch face. I’ve created a whole bunch of HA complications with different configurations just to see if I can make one appear in place of “Placeholder.” So far, that’s all I’m seeing:
I’ve turned on Airplane Mode on the phone and watch. I’ve force quit all apps. I’ve manually refreshed the complications in the HA Companion app. I’ve tried editing the watch face in the Watch and on the iPhone via the Watch app. I see nothing other than “Placeholder.”
Any ideas?
I’ve had some success, although I have found not all Complications templates work.
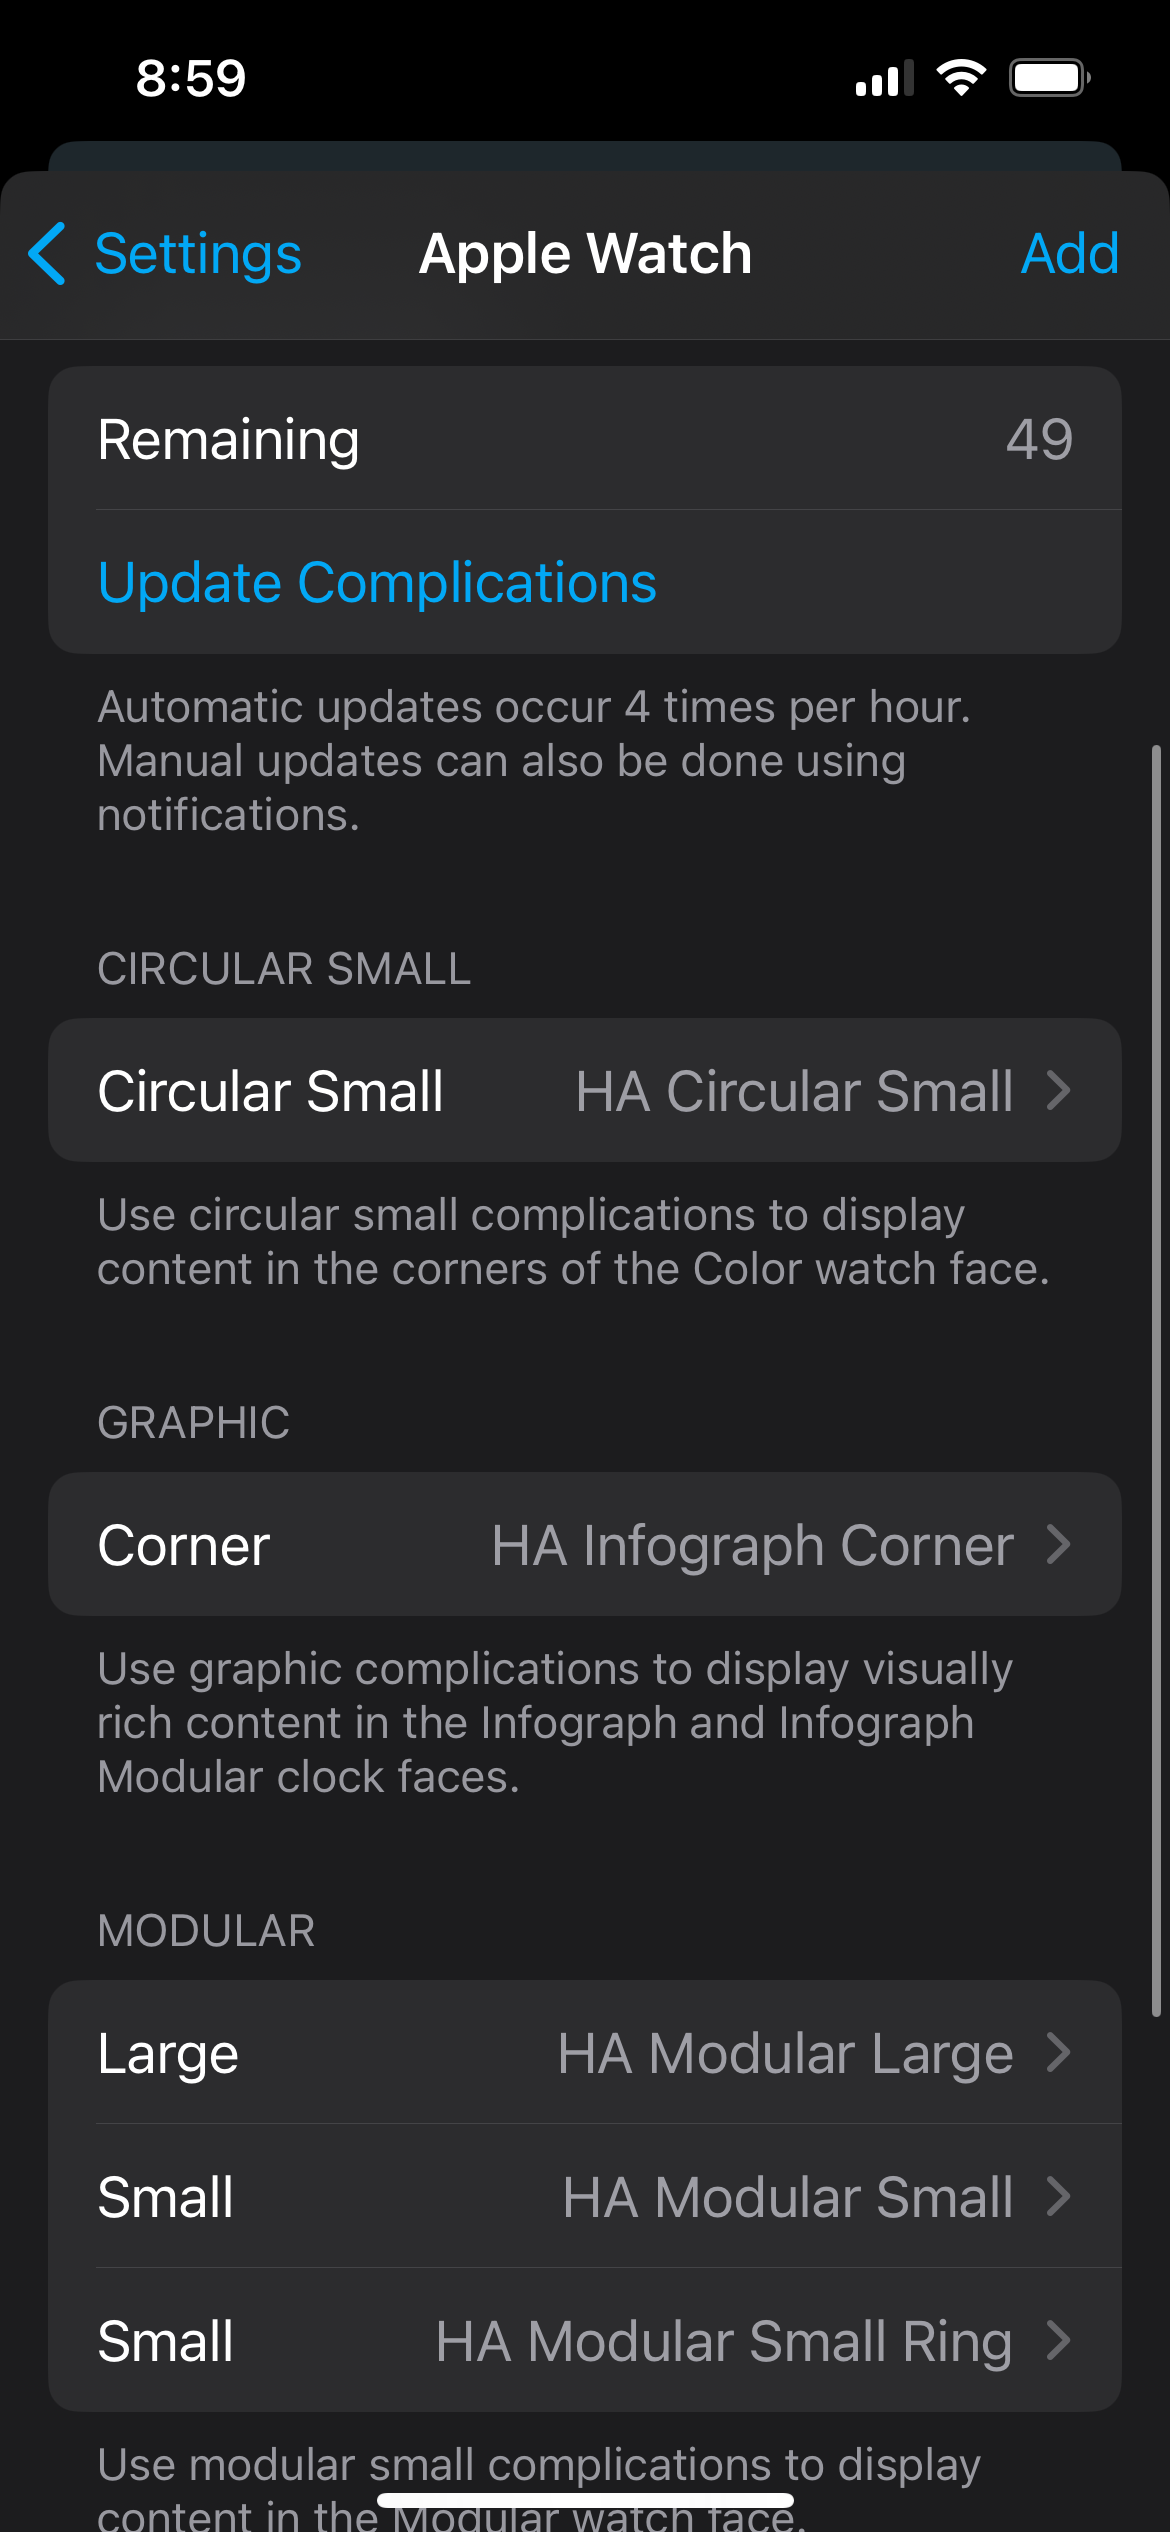
Complications only work if they are created on the iPhone that is paired to the Apple watch. Use the HA app on the iPhone to access: settings> companion app> Apple Watch.
For the Modular watch face, only a couple complications work, and these only work in certain locations on the watchface.
Demo for the Modular face, a circular complication in Top Left location on the face.
From the HA app on the iPhone (as above) choose Apple Watch menu, choose Add (text in the top right), then for a New Complication choose Graphic> Circular> then template ‘Open gauge simple text’. Create a unique name for the Complication. I have found this Complication will only work if input is in BOTH the Centre and Bottom input fields (plain text or some simple code e.g. to show a sensor value). A preview of the output (which shows in light grey colour) will be displayed directly under each input box, it shows a sort of spinning icon if the info in the input box is not able to be resolved. [Note also the colour selection available under each input field doesn’t work on the Apple Watch]
Save the edits, and exit from the Apple Watch menu in the HA app.
Use the official Apple Watch app on the iPhone paired to the watch to edit the watchface; (it’s easier than editing the face directly on the watch). Open the app & scroll down to ‘Installed on Apple Watch’ to check HA is installed on the watch. If not, install it.
Scroll back to the top and Edit the Modular watchface by press & longhold on Modular face. Scroll down and choose Complications>Top Left menu, scroll down to ‘Home Assistant’; the default Complication shown is ‘Placeholder’, sometimes you need to wait 5 mins for the newly created complication to be available to select.
The other complication I have found that works is: Graphic>Rectangular>Standard Body - requires input in BOTH Header & Body input fields (text or code for sensor values). This Complication is only available to select under Complications>Middle when editing the Modular face.
3 Likes
Thank you - this one worked. I don’t know what I’m going to do with a circular graphic yet, but it’s better than “placeholder.”

Late to this but if you are using a Mac and both your mac and IPhone are connected to the same Wifi & you are logged on with same Apple id, you can copy text on your Mac and then go to your IPhone and paste (hard press → select paste) and magic. So I use the developer tools → Template section in home assistant to write the templates, copy it and then paste on the phone.
Correct me if I’m wrong but there is no way to display the temperature without having the bar/meter/ring or whatever it is called?
At the bottom right I have the temperature but would like to have only the temp and not the ring around it.

Hi @Stu1, I have just purchased an Ultra 2 and have the Modular Ultra watch face. Is it possible to achieve the look of Apple’s temperature complication and use different sensors? I have tried just about every combination using example script from HA article and I’m having zero success.
My first thought is Complications only work if they are created on the iPhone that is paired to the Apple watch. I have not tested Modular Ultra watchface, Im using just Modular.
Im using HA to show a different sensor (blood glucose sensor) in a complication- GRAPHIC Circular>Template: open gauge simple text. I’m not sure whether this is the “temperature complication” you refer to, this complication looks as per my above post picture.
The code in CENTER: {{ states (‘sensor.glucose_measurement’ * 1) | round }}
The code in BOTTOM: BGL
The code in GAUGE: {% set original = states(“sensor.glucose_measurement”) | float %} {% set minimum = 3.5 %} {% set maximum = 8.5 %} {% set adjusted = min(maximum, max(minimum, original)) %} {{ (adjusted - minimum) / (maximum - minimum) }}
1 Like
Hi @Stu1 Thanks for the additional information. The Apple Weather complication is the bottom left of screenshot. Do you think that’s achievable?

I have not tried to use the weather complication. I have used Circular> Open gauge Range Text template, which is structured similar to weather complication but doesn’t vary the colour. There is the option in this to style as fill or a ring.
Code to enter in CENTER: {{ states (‘sensor.glucose_measurement’ * 1) | round }}
Label to enter in LEADING: 4
Lebel to enter TRAILING: 8
Code to enter in GAUGE: {% set original = states(“sensor.glucose_measurement”) | float %} {% set minimum = 4 %} {% set maximum = 8 %} {% set adjusted = min(maximum, max(minimum, original)) %} {{ (adjusted - minimum) / (maximum - minimum) }}
STYLE: select fill or ring
1 Like
Thanks for the additional code. I will have a fiddle and see what I can achieve. If successful I’ll share for others.
Thanks for the help here. It encouraged me to keep trying to get different combinations to work. I have a Graphic Circular complication with Open Gauge Simple Text.
I’ve seen it mentioned but not seen a solution: a complication with state-dependent icon color.
I’ve been using a Graphic Circular complication on a Modular watch face to show home occupancy. It’s clunky. I’d prefer an icon displayed in one of a few configurable colors to show that.
EDIT: I didn’t realize I could put emojis into template sensors. So, here’s my workaround:
state: >
{% if is_state('person.person1', 'home') and is_state('person.person2', 'home') and is_state('person.kid', 'home') %}
👨👩👦
{% elif is_state('person.person2', 'home') and is_state('person.kid', 'home') %}
👩👦
{% elif is_state('person.person1', 'home') and is_state('person.person2', 'home') %}
👫
{% elif is_state('person.person1', 'home') and is_state('person.kid', 'home') %}
👨👦
{% elif is_state('person.person1', 'home') %}
🤬
{% elif is_state('person.person2', 'home') %}
👩🏫
{% elif is_state('person.kid', 'home') %}
👦
{% elif is_state('zone.home','0') and (is_state('cover.garage_door_1','open') or is_state('cover.garage_door_2','open') or is_state('lock.front_door','unlocked')) %}
🔓
{% elif is_state('zone.home','0') %}
🔐
{% else %}
{% endif %}