AFAIK, there isn’t a way to do it directly in the UI.
One workaround:
- You can apply a label to multiple entities in the Entities menu by clicking the selection mode button:

Once you have selected your entities use the “Add Label” dropdown at the top right of the page to select and apply a label:

- Use the
homeassistant.add_entity_to_areaavailable from the Spook custom integration to apply the area programmatically to all entities with your special Label.
Spook also provides an action to remove Labels from entities, so a two action script with an input field for the Area could change the area then clear the label so you’re ready to go for the next round:
sequence:
- alias: Assign the chosen Area to all entities with the "Label to Area" label.
action: homeassistant.add_entity_to_area
metadata: {}
data:
area_id: "{{my_area}}"
entity_id: |
{{ label_entities('label_to_area') }}
- alias: Remove the "Label to Area" Label from all entities
action: homeassistant.remove_label_from_entity
metadata: {}
data:
label_id:
- label_to_area
entity_id: |
{{ label_entities('label_to_area') }}
fields:
my_area:
selector:
area:
multiple: false
name: Area
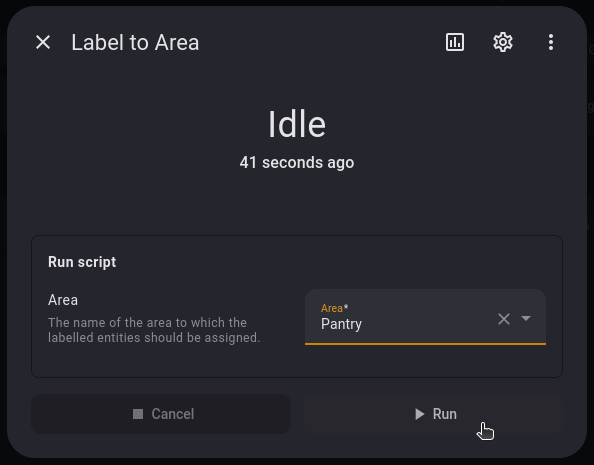
description: The name of the area to which the labelled entities should be assigned.
required: true
alias: Label to Area
description: "Assign an Area to all entities with the 'Label to Area' label attached to them"
* This script uses custom actions from the Spook integration and will not work without them. See the link above for more information about Spook.
Script input fields can now be filled, and the scripts can be run, from their UI “More Info” popup menu. So, the sample script above makes bulk area changes a pretty simple two-step process.
Be aware that you can get access to that “More Info” popup menu without fully leaving the Entities menu by using the “e” hotkey to open the Entity quickbar and type the script’s name after you’ve labelled your entities.