Automating outdoor Coolaroo shades

I found a small seller who used to sell an all in one kit which would automate outdoor Coolaroo shades. Unfortunately, seller no longer sells the kits.

Seller was nice enough to still leave the manuals and instructions up. I am going to try and build my own. Seller did not use ESPHome but instead had a manual controller for the shades.

Someone else did create their own with different hardware (I think his shades use a different crank mechanism)

The code from youtube should work with the hardware from instructables. I will have to try and find my own way to solar power the hardware.

Update: I made a list of all the hardware I will need. I think I may have a problem finding a way to connect the stepper motor to the Coolaroo shades.

Stepper Motor
https://www.omc-stepperonline.com/nema-23-bipolar-1-8deg-1-9nm-269oz-in-2-8a-3-2v-57x57x76mm-4-wires-23hs30-2804s

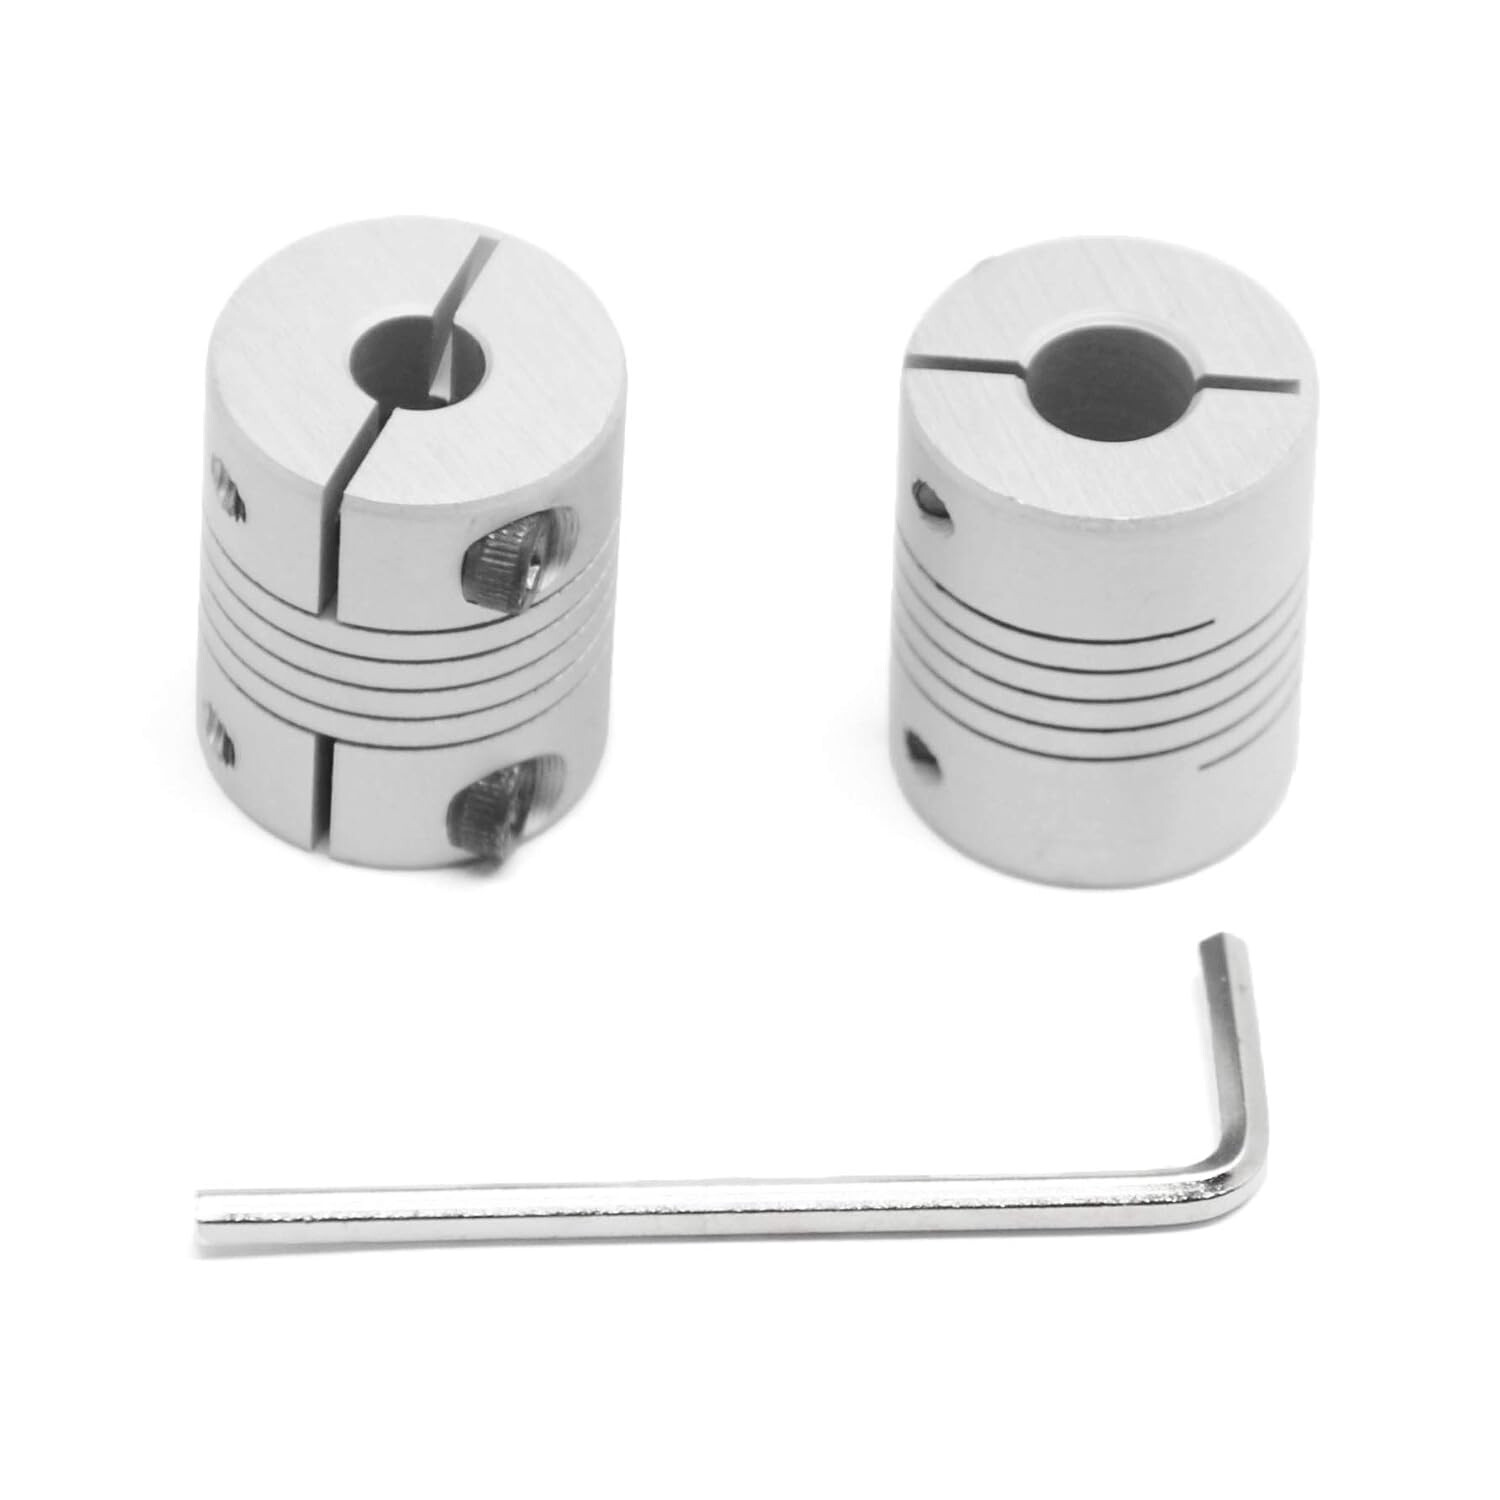
Need to find a coupling to the Coolaroo

Need to choose a stepper motor driver

Need to choose a ESP32 board

Need to figure out how to solar power the ESP32 board

And:
Measure the torque needed.
Add limit switches.
Figure out how to waterproof every component.

This is going to be mounted behind a wooden board, I might just use a few pieces of wood to cover the stepper motor, a conduit for the wires and another box for the board.

I managed to get everything wired except for the solar part and attaching to the worm gear of the shade.

Have to do more testing to see how well HA controls the motor (hard to see right now)

My motor is specific to the size of my shade, you can probably go smaller if needed.

Should be good for anything over 7ft.
Stepper motor StepperOnline 23HS30-2804S
Driver TB6600

Seeed XIAO ESP32C6 (pre-soldered) (surprised at how tiny this is)
choose this since the board is supposed to be able to deep sleep since I want solar power and will be using Wi-Fi
ESP supports Zigbee now (didn’t realize before I purchased this board)

Flex coupling, 6.35mm (motor shaft) to 0.325" ± 0.005"
Not sure if all Coolaroo outdoor shades are the same size worm gear

Driver DIP switch settings

Switch Setting Function
SW1 ON Microstep = 4
SW2 OFF Microstep = 4
SW3 OFF Microstep = 4
SW4 OFF Current = 2.8A
SW5 OFF Current = 2.8A
SW6 ON Current = 2.8A

Wiring

Motor → TB6600:

  • Black → A+
  • Green → A-
  • Red → B+
  • Blue → B-

12V power supply → TB6600:

  • 12V+ → VCC
  • 12V- → GND

XIAO ESP32C6 → TB6600:

  • GPIO1 (D1) → PUL-
  • GPIO2 (D2) → DIR-
  • GPIO21 (D3) → ENA-
  • GND → driver GND
  • 3V3 → PUL+, DIR+, ENA+ (daisy-chained: one wire from 3V3 to PUL+, then short bridge wires PUL+→DIR+ and DIR+→ENA+)
esphome:
  name: shade

esp32:
  board: seeed_xiao_esp32c6
  variant: esp32c6
  framework:
    type: esp-idf

wifi:
  ssid: !secret wifi_ssid
  password: !secret wifi_password

api:
ota:
  platform: esphome
logger:

stepper:
  - platform: a4988
    id: shade_stepper
    step_pin: GPIO1
    dir_pin: GPIO2
    sleep_pin: GPIO21
    max_speed: 1600 steps/s
    acceleration: 1600 steps/s^2

number:
  - platform: template
    name: "Shade Position"
    id: shade_target_ft
    min_value: 0
    max_value: 9
    step: 0.25
    optimistic: true
    on_value:
      then:
        - stepper.set_target:
            id: shade_stepper
            target: !lambda "return x * 8496;"

not final since I haven’t tested actually rolling up and down the shade

Here is my final setup. Next is solar power and connecting to the Coolaroo worm gear.

TB6600 DIP switches

Switch Position Function
SW1 ON Microstep = 4
SW2 OFF Microstep = 4
SW3 OFF Microstep = 4
SW4 OFF Current = 2.8A
SW5 OFF Current = 2.8A
SW6 ON Current = 2.8A

(Down = ON on this board.)

Motor → TB6600 (High Voltage block)

  • Black → A+
  • Green → A-
  • Red → B+
  • Blue → B-

12V power supply → TB6600

  • 12V+ → VCC
  • 12V- → GND

XIAO ESP32C6 → TB6600 (Signal block)

  • GPIO1 → PUL-
  • GPIO2 → DIR-
  • GPIO21 → ENA-
  • GND → driver GND (confirmed 0.01Ω continuity)
  • 3V3 → PUL+, DIR+, ENA+ (daisy-chained: one wire from 3V3 to PUL+, then bridge wires PUL+→DIR+ and DIR+→ENA+)
esphome:
  name: front-porch-shade

esp32:
  board: seeed_xiao_esp32c6
  variant: esp32c6
  framework:
    type: esp-idf

wifi:
  ssid: !secret wifi_ssid
  password: !secret wifi_password

api:
ota:
  platform: esphome
logger:

stepper:
  - platform: a4988
    id: shade_stepper
    step_pin: GPIO1
    dir_pin: GPIO2
    sleep_pin: GPIO21
    max_speed: 200 steps/s
    acceleration: 200 steps/s^2

sensor:
  - platform: template
    name: "Stepper Current Position"
    lambda: |-
      return id(shade_stepper).current_position;
    update_interval: 1s

number:
  - platform: template
    name: "Shade Position"
    id: shade_target_ft
    min_value: 0
    max_value: 9
    step: 0.25
    optimistic: true
    on_value:
      then:
        - stepper.set_target:
            id: shade_stepper
            target: !lambda "return x * 8496;"

button:
  - platform: template
    name: "Set Shade Zero (fully up)"
    on_press:
      - stepper.report_position:
          id: shade_stepper
          position: 0
      - stepper.set_target:
          id: shade_stepper
          target: 0
      - number.set:
          id: shade_target_ft
          value: 0

  - platform: template
    name: "Stop Shade"
    on_press:
      - stepper.set_target:
          id: shade_stepper
          target: !lambda "return id(shade_stepper).current_position;"
      - number.set:
          id: shade_target_ft
          value: !lambda "return id(shade_stepper).current_position / 8496.0;"

was recommended to use this by the seller and to modify with a Q drill bit to fit the worm gear
6.35mm to 8mm Flexible Shaft Coupling

I used Claude to write this because I’m tired.

Next steps are making sure solar panel maintains the battery. Figuring out how to connect the motor to the Coolaro winding mechanism. Easy to roll down, requires more power to roll up.

Parts list

Motor & drive:

  • StepperOnline 23HS30-2804S — NEMA 23, 1.8°/step, 2.8A/phase (same class of motor AutoShade’s own manual specifies — theirs is the 23HX30-2804S)
  • TB6600 stepper driver
  • Flex coupling: 6.35mm (motor shaft) to 0.325" ± 0.005" (Coolaroo worm gear shaft) — this is a nonstandard bore size; I used an 8mm-bore coupling and reamed it out slightly

Controller:

  • Seeed XIAO ESP32C6 (pre-soldered), running ESPHome

Power system:

  • SOLPERK 30W solar panel + MPPT controller kit
  • 12V 7Ah SLA battery
  • MOSFET switching module (opto-isolated, 3.3V-logic compatible) — gates power to the TB6600 so it’s only energized during actual moves, not sitting idle 24/7
  • 12V-to-5V USB-C buck converter, powering the XIAO off the same battery

Enclosure:

  • IP65 weatherproof junction box, cable glands, step drill bit for gland holes

Wiring

Motor → TB6600: Black→A+, Green→A-, Red→B+, Blue→B- (confirmed via multimeter continuity: Black-Green and Red-Blue are the two winding pairs)

TB6600 DIP switches: SW1=ON/SW2=OFF/SW3=OFF (4 microstep), SW4=OFF/SW5=OFF/SW6=ON (2.8A current)

XIAO → TB6600 signal side: GPIO1→PUL-, GPIO2→DIR-, GPIO21→ENA-, XIAO 3V3→PUL+/DIR+/ENA+ (common-anode driver — confirmed against the driver’s own silkscreen labels, which read “+5V” next to each + signal pin)

Power chain: Solar panel → MPPT controller → SLA battery → splits to (1) MOSFET module → TB6600 VCC, and (2) buck converter → XIAO USB-C. MOSFET’s negative side and the XIAO/driver signal ground all tie to one common ground network.

MOSFET control: XIAO GPIO23 → module’s control input, XIAO GND → module’s control ground (originally used GPIO4, which triggered an ESPHome strapping-pin warning and was moved to GPIO23)

ESPHome config

yaml

esphome:
  name: front-porch-shade

esp32:
  board: seeed_xiao_esp32c6
  variant: esp32c6
  framework:
    type: esp-idf

wifi:
  ssid: !secret wifi_ssid
  password: !secret wifi_password

api:
ota:
  platform: esphome
logger:

stepper:
  - platform: a4988
    id: shade_stepper
    step_pin: GPIO1
    dir_pin: GPIO2
    sleep_pin: GPIO21
    max_speed: 200 steps/s
    acceleration: 200 steps/s^2

sensor:
  - platform: template
    name: "Stepper Current Position"
    lambda: |-
      return id(shade_stepper).current_position;
    update_interval: 1s

number:
  - platform: template
    name: "Shade Position"
    id: shade_target_ft
    min_value: 0
    max_value: 9
    step: 0.25
    optimistic: true
    on_value:
      then:
        - script.execute:
            id: move_shade
            target_ft: !lambda "return x;"

button:
  - platform: template
    name: "Set Shade Zero (fully up)"
    on_press:
      - stepper.report_position:
          id: shade_stepper
          position: 0
      - stepper.set_target:
          id: shade_stepper
          target: 0
      - number.set:
          id: shade_target_ft
          value: 0
  - platform: template
    name: "Stop Shade"
    on_press:
      - stepper.set_target:
          id: shade_stepper
          target: !lambda "return id(shade_stepper).current_position;"
      - number.set:
          id: shade_target_ft
          value: !lambda "return id(shade_stepper).current_position / 8496.0;"

switch:
  - platform: gpio
    pin: GPIO23
    id: driver_power
    name: "Driver Power"

script:
  - id: move_shade
    parameters:
      target_ft: float
    then:
      - switch.turn_on: driver_power
      - delay: 300ms
      - stepper.set_target:
          id: shade_stepper
          target: !lambda "return target_ft * 8496;"
      - wait_until:
          condition:
            lambda: "return id(shade_stepper).current_position == id(shade_stepper).target_position;"
          timeout: 90s
      - delay: 200ms
      - switch.turn_off: driver_power

Position scaling: AutoShade’s own firmware (dug out of an old .ino they still host) uses 2124 full steps per foot of shade travel for this worm gear mechanism. At 4x microstepping that’s 8496 microsteps/ft, which is what the number entity’s lambda uses.

Current status

The battery powers the XIAO continuously (via buck converter) and the TB6600 on-demand (via the MOSFET switch, only energized during a move), and the shade responds correctly to position commands from Home Assistant.

I wonder how it will work without limit switches…?

Not sure why limit switches would be needed. I can set where to stop when shade is down and where to stop when shade is up with ESPHome

And if your setup looses steps? Or reboots?
I have never seen stepper motor setup without at least homing switch… Or encoders.

YouTube video didn’t have any of those you mentioned?

I will have to think about this and see if I need what you mentioned

Haven’t found anything else on the web with what you mentioned

Weird if you didn’t. Never seen stepper setup without switch.