Basic guidance on how to set up a trend sensor

I’m a very novice user of HA and I’m trying to set up a trend sensor, that detects a rapid humidity increase, to be used to turn a bathroom fan on. I’m confused on how the “helper” and the config.yaml code work together and what each should contain. I can’t find any simple documentation on this - how the config.yaml part and the helper part work with each other and how to set each up. There are examples of what I want to achieve in other topics, but not a step-by-step explanation of how to do all the various parts of the setup. I have a humidity sensor in the bathroom and I want to switch a fan on when the humidity rises at a certain (high) rate - a common use of the “trend” sensor. I added a “trend” helper and selected the humidity entity of the temp/humidity sensor as the entity to be tracked. Then it asks for the attribute to be tracked. None of the options make sense to me, but I chose “state class” If I open that helper (view settings) it gives me other configuration options including “trend options” which have settings to define a humidity gradient. So I have a binary_sensor. But it looks to me like people put those settings in a code in config.yaml like this

binary_sensor:
  - platform: trend
    sensors:
      start_showering:
        entity_id: sensor.nrg_itho_c1f4_humidity
        sample_duration: 60
        max_samples: 20
        min_gradient: 0.083
  • surely they don’t go in two places? In the above example, which line refers to the binary sensor and which line refers to the entity tracked by the binary sensor - lines 4 and 5 respectively?

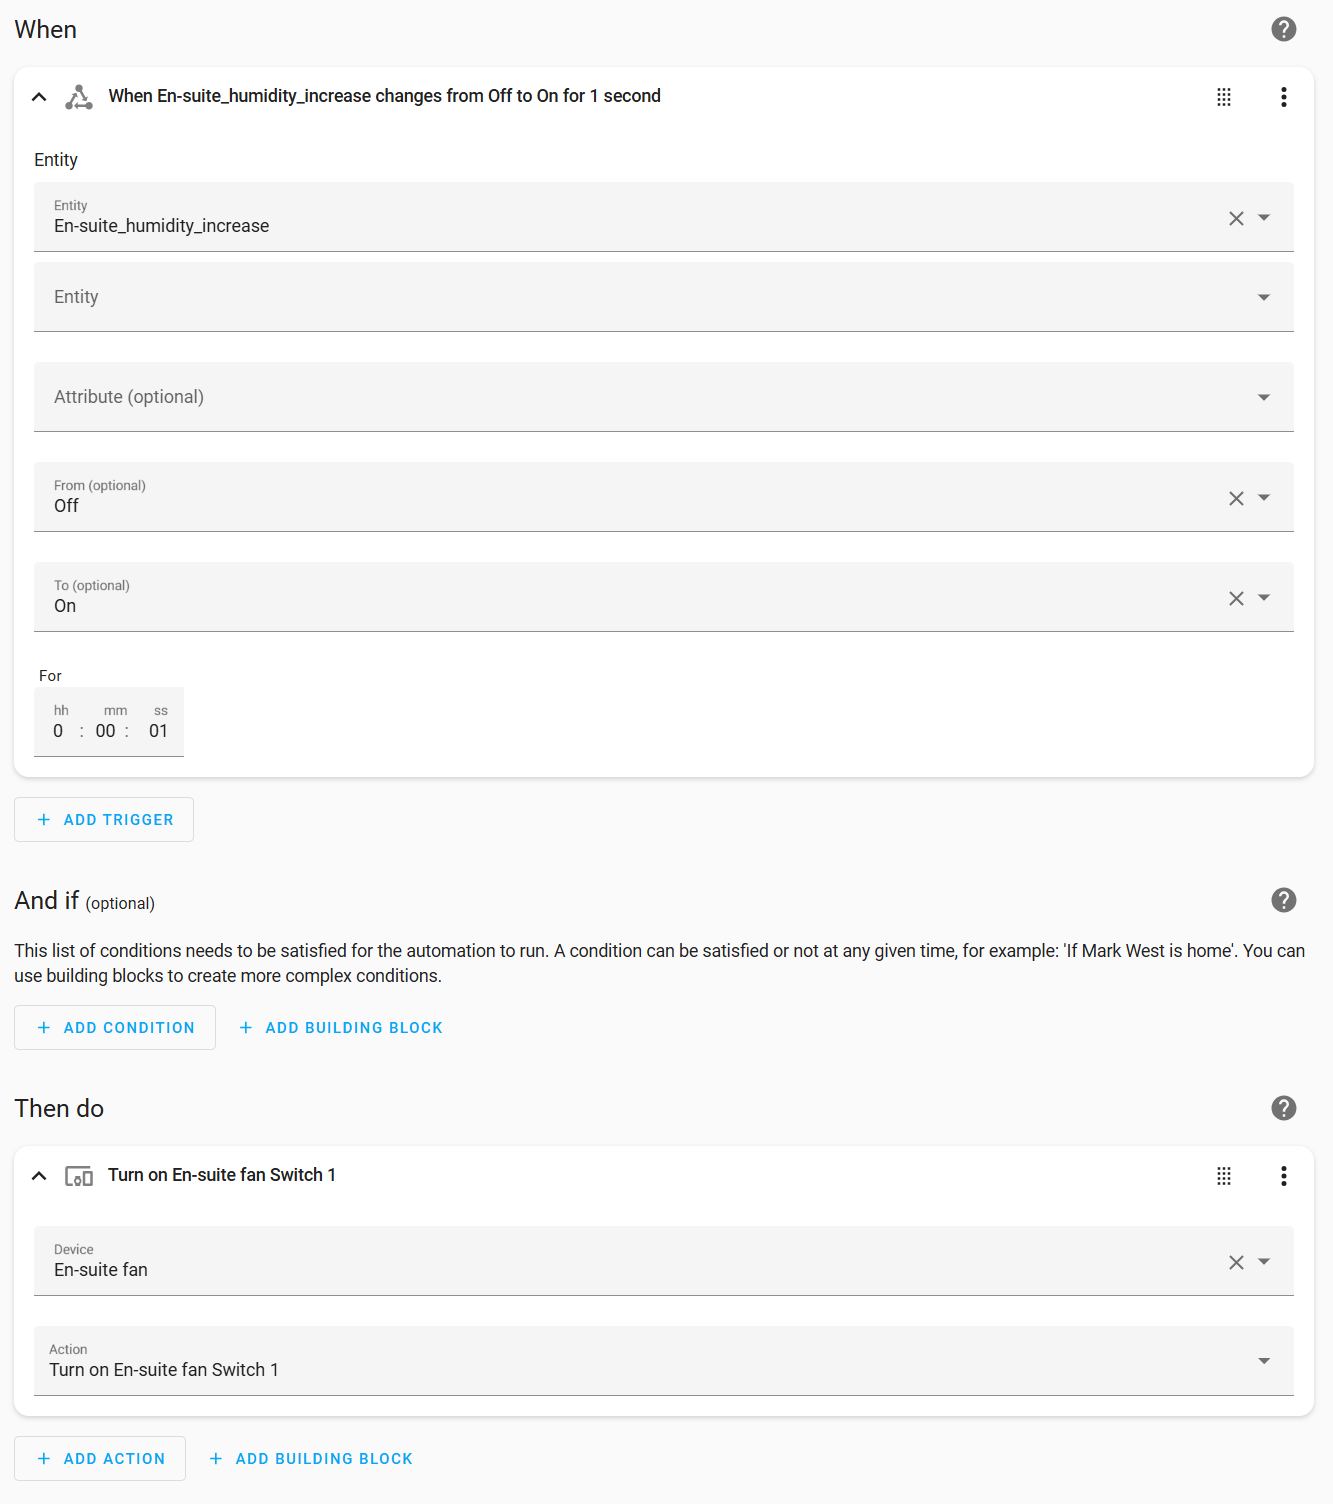
I assume that once I have the binary sensor working I should be able to plot a history graph that shows “on” when the humidity gradient is above the trigger point, and “off” when it is below. Then I would just call this binary sensor in an automation and use its “on” state to trigger the fan.

I long for some more basic HA documentation for less IT-savvy people like myself. There are so many parts to the whole and I find it difficult to get a clear picture of how they interact, and the names of components of these parts aren’t necessarily obvious at face value (e.g. to me, a “sensor” is something physical that detects stuff, but in HA it has a virtual meaning too - these sorts of things trip me up often, all a matter of practice, I guess).

Hi, it is easy to get overwhelmed because HA can do so much. Don’t hesitate to ask for help if you get confused.

Home Assistant evolves quickly. Yaml is hard on beginning users. That is why a lot of things get support through the UI. Most of the time, that means the UI can replace yaml, but the yaml configuration remains for existing users. Also yaml is still possible because sometimes more advanced features are available in yaml but are not yet possible in the UI.

So the takeway from this is: you can either make a trend sensor in the UI or in yaml, but you do not need both. They do not work together, they do the same thing. So indeed, you are right that you should not do things twice. Pick the one you prefer.

When you create a trend sensor in the GUI, it asks for the name of the trend sensor and the entity to track. Entities have a state, and sometimes they have attributes too. By the sound of it your humidity sensor has the humidity value as its state. In that case, you leave the attribute blank. The attributes you saw where other properties of the sensor. If you save, you have a trend sensor.

The UI version for the trend helper is a bit strange.Normally the other configuration options can be set from the start while creating the helper. But not so for the trend helper. It is created with default settings. Those could be fine. But you can change the configurations settings afterward if you open the settings dialog for the trend helper and then pick the trend settings.

To decide if you need the state or an attribute: If you want to see what the state of an entity is and what its attributes hold, you can see that in the developer tools, on the state tab. I often visit it before I build an automation or add helpers or other template sensors.

It will take a little time for the trend helper to collect enogh samples and start working. When it does work like you want it to, you can create an automation for it. For instance, You can add a state trigger for when it turns on. If that trigger fires, you can turn on the fan.

For Home Assistant by the way, a sensor is an entity that gets a value from somewhere (sometimes a physical sensor, sometimes an integration such as for instance a weather service, or from a calculation). But the key thing is, you cannot operate it. It just provides information. It is read only.

1 Like

Thanks for the quick reply and some clear explanations. So, I’ve set up the trend sensor in the GUI (I assume that’s the “add helper” button under helpers in the settings>devices and services menu. I left the attribute blank, as you suggest

I’ve added an entity card and a history graph card on my dashboard for that sensor, and they both show “unknown”. I was expecting “off” (and “on” when the gradient is above the threshold value). Something I’ve done wrong or missed out?

You are doing fine. Most likely, the humididy has not changed for a while, which means the trend helper does not have the number of samples required. It only updates when a change happens. So maybe breathe in the humidity sensor to see if it starts working. Once it works, it will keep working.


OK, I’ll wait for a bit. It’s in a separate guest house so I can’t go in. Once they have a shower I should know. I might try it with a sensor in my house, for temperature, and see what I get


showing entity cards and history graphs for two fans I set up a while ago to turn on at set humidity levels (semi-effective) and the new binary sensor which I’ve just set up.

Personally, I never used the trend sensor, I use a derivative sensor. That gives you the direction of change. I then use a numerical state trigger to react on a certain value, that I get from looking at the the graph. The result is the same, but the derivative is much more informative.

Time for bed for me now. No more quick responses for a bit :slight_smile:

Really appreciate how you’ve helped me so far. Sleep well :sleeping: I’ll let you know how I go, and hopefully get the automation working

1 Like

Excellent idea, thanks. Plot the output of the derivative sensor on the same plot as the output of the tracked sensor, and choose values of the derivative that will trigger the automation. Much easier to tweak than the trend sensor. I’ve set a couple up and will monitor them and set up the automations when I’ve got a feel for the optimum values. It should work well to turn off the fan too, after a delay or below a set humidity. Excellent progress, thanks to your help

1 Like

The derivative sensor works well - plotting humidity (pale green) against derivative. So that part is running - thanks! There is a lag in the derivative - I guess when change is small the humidity sensor only sends values infrequently, and the derivative is plotted with a one-reading lag

I will see if the automation works as expected