Check this post again.
When restriction-card is used for Entities card - mod-card is used.
How can I remove the blue pin and text over the knob?
type: custom:slider-entity-row
entity: light.kitchen_all
full_row: true
name: hide_state

I’ve tried a for some hours and did get the background gone with the following but there must be a better way to just disable it all together? I did not find a way to change the text color to transparent though.
style:
  slider-entity-row:
    $:
      ha-slider:
        $:
          '#sliderKnob': >
            .slider-knob-inner::after  {background-color: rgba(0, 0,0,0.0)}
            .slider-knob-inner::before  {background-color: rgba(0, 0,0,0)}
            .slider-knob-inner::before  {border: 0px)}
Thanks very much for this, that’s very clever!
However although the row height changes, I can’t get it to change the area available for the text, and it’s cutting off the descenders:-
type: vertical-stack
cards:
  - type: entities
    entities:
      - entity: sun.sun
      - entity: sensor.wupws_temp
    card_mod:
      style:
        hui-text-entity-row $: |
          hui-generic-entity-row {
            color: red;
            font-size: 26px;
            height: 50px;
          }
        hui-sensor-entity-row $: |
          hui-generic-entity-row {
            font-size: 26px;
            height: 60px;
          }
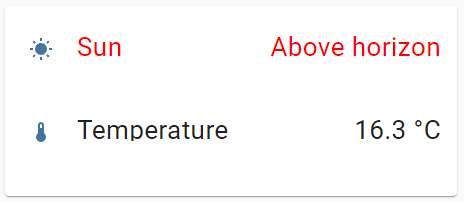
Is there a way to get it to give the text more vertical space? Or do I have to change the icon size or something as well?
I will simulate your case on Monday-Tuesday and come back with results.
@Ildar_Gabdullin do you have an idea how to achieve this with card-mod?
Once I wanted to add a post dedicated to the great flex-table-card.
But was not sure about it since this card has it’s own styling options.
A bit later (probably coming week) I will do it, also will check what is possible to to with your issue.
This flex-table-card does deserve her own dedicated thread.
1 Like
Thanks a lot in advance Ildar! ![]()
![]()
Absolutely. It is great, so happy I finally found it, it really outperforms the one I used before.
As I understand the Dashboards & Frontend - Home Assistant Community section, usually the author of a piece of software starts a thread. Not sure if @daringer here is the same user as on GitHub.
Thanks for your reply. I have figured out the height issue - it should be ‘line-height’ not row-height or just height.
However now only the first entity of each type gets the required style.

What do I need to add to get all of the entities to get the new style please?
The question asked here is more of a card_mod question so linking it here as I have the same question if someone has the style change figured out? Removing the tabs from the glance cards that were add in the last HA release?
Card-mod is not working inside an auto-entity card? Am I right or doing something wrong
Any idea why this is not working?
The “wind” icon always jumps to the next line when the view narrows. I would like to put the chevron in a very narrow “container” so there’s always enough space for the 3 chips on the left side.

card_mod:
  style:
    hui-horizontal-stack-card $: |
      div#root > :first-child {
        width: 80%;
        flex: auto;
      }
      div#root > :last-child {
        width: 20%;
        flex: auto;
      }
    .: ''
cards:
  - type: custom:mushroom-chips-card
    chips:
      - type: template
        content: Kamertemp {{state_attr(entity, 'current_temperature')}} °C
        entity: climate.zolder
        icon: |-
          {% set state=states(entity) %}
          {% if state=='cool' %}
          mdi:snowflake
          {% elif state=='heat' %}
          mdi:heat-wave
          {% else %}
          mdi:power-off
          {% endif %}
        tap_action:
          action: none
        icon_color: |-
          {% set state=states(entity) %}
          {% if state=='cool' %}
          blue
          {% elif state=='heat' %}
          red
          {% else %}
          grey
          {% endif %}
        double_tap_action:
          action: none
        hold_action:
          action: none
      - type: template
        entity: climate.zolder
        icon: |
          {% set speed=state_attr(entity,'fan_mode') %}
          {% if speed=='Auto' %}
          mdi:refresh-auto
          {% elif speed=='Silence' %}
          mdi:volume-low
          {% elif speed=='1' %}
          mdi:numeric-1-circle-outline
          {% elif speed=='2' %}
          mdi:numeric-2-circle-outline
          {% elif speed=='3' %}
          mdi:numeric-3-circle-outline
          {% elif speed=='4' %}
          mdi:numeric-4-circle-outline
          {% elif speed=='5' %}
          mdi:numeric-5-circle-outline
          {% endif %}
        double_tap_action:
          action: none
        tap_action:
          action: none
        hold_action:
          action: none
      - type: template
        entity: climate.zolder
        icon: mdi:weather-windy
        icon_color: |-
          {% set mode=state_attr(entity,'preset_mode') %}
          {% if mode=='boost' %}
          red
          {% else %}
          grey
          {% endif %}
        tap_action:
          action: call-service
          service: script.turn_on
          target:
            entity_id: script.1662983926933
          data:
            variables:
              airco_entity: climate.zolder
  - type: custom:mushroom-chips-card
    chips:
      - type: template
        tap_action:
          action: toggle
        entity: input_boolean.dummy_living
        icon: |-
          {% if is_state(entity, 'on') %}
            mdi:chevron-down
          {% elif is_state(entity, 'off') %}
            mdi:chevron-up
          {% endif %}
    alignment: end
Would anybody here know how to use card mod with browser mod so when I get my pop-up window it does NOT open full screen on my iPhone. I asked in the browser mode forum and I have got no response Except for one person with card mod coding that didn’t work
Because you specified a path for the 1st element (of some type) only.
Read this.
If your are using rows of different types (sensor-entity, text-entity, number-entity, …) - then probably easier to specify card-mod for each row - see example below.
But if you want to specify styles on the card-level (like you tried) - then you paths should be changed.
Your code:
        hui-text-entity-row $: |
          hui-generic-entity-row {
creates a “card-mod” element in the shadowRoot of the 1st element (of this type) only.
Use this instead:
        hui-text-entity-row:
          $: |
            hui-generic-entity-row {
Correct, since you need to INCREASE the height.
Btw, there is also a difference in part of MDC input elements:

Changing
"height" - on the left, "line-height"- on the right.
type: horizontal-stack
cards:
  - type: entities
    entities:
      - entity: sun.sun
        name: Tpyq
        card_mod: &ref_0
          style: |
            hui-generic-entity-row {
              height: 50px;
              font-size: 26px;
            }
      - entity: sensor.processor_use
        name: Tpyq
        card_mod: *ref_0
      - entity: input_boolean.test_boolean
        name: Tpyq
        card_mod: *ref_0
      - entity: input_number.test_number
        name: Tpyq
        card_mod: *ref_0
      - entity: input_number.test_number_2
        name: Tpyq
        card_mod: *ref_0
      - entity: input_select.test_value
        name: Tpyq
        card_mod: *ref_0
  - type: entities
    entities:
      - entity: sun.sun
        name: Tpyq
        card_mod: &ref_1
          style: |
            hui-generic-entity-row {
              line-height: 50px;
              font-size: 26px;
            }
      - entity: sensor.processor_use
        name: Tpyq
        card_mod: *ref_1
      - entity: input_boolean.test_boolean
        name: Tpyq
        card_mod: *ref_1
      - entity: input_number.test_number
        name: Tpyq
        card_mod: *ref_1
      - entity: input_number.test_number_2
        name: Tpyq
        card_mod: *ref_1
      - entity: input_select.test_value
        name: Tpyq
        card_mod: *ref_1
1 Like
Just hide these elements:
type: horizontal-stack
cards:
  - type: entities
    entities:
      - entity: input_number.test_number
        card_mod:
          style:
            ha-slider $ div#sliderKnob .slider-knob-inner: |
              :before, :after {display: none}

1 Like
Thank you for supplying all these examples, this made it so much easier to understand the card-mod in combination with the numberbox card. I encountered one small issue with example from the section Custom secondary_info. The character \A was not behaving as expected (at least in my config). Any text after \A was still shown on the same line. The issue was solved for me by adding the following property: white-space: pre-wrap;
.grid-content.grid-left .info .secondary::before {
          color: red;
          content: "Critical\A Line 2";
          line-height: normal;
          white-space: pre-wrap;
        }
@Ildar_Gabdullin That’s perfect, thank you so much. Who would have thought that such a minor change would make such a big difference!
However I have just gone through your explanation and example and yes, I see that using the card_mod reference on each line is a better way to do it. Thanks again for taking the time to explain all this, I really appreciate it.
It depends.
Sometimes it is better to add some code in ONE place than placing it in many places.
Assume that you got some views (or dashboards) which are shown in different devices:
– your dev PC;
– mobile phone;
– wall-mount tablet - and here you need these these large fonts & row heights.
Means - sizes should be device-dependent.
Then you probably need to specify styles using “mediaquery” selector - some style is specified differently dependingly on viewport’s size.
Next, since you got several cards where you need to increase elements’ sizes - you need to repeat same code many times.
A possible solution is - specify styles for these adjustable cards (let it be Entities, Glance, etc) once in one place - card-mod theme (so called “card-mod classes”), then use these classes in views displayed on different viewports. And here you will have to specify card-mod styles on the card’s level instead on some row’s level (if talking about Entities card).
Hope this was clear. Sorry for non-native English.
P.S. Miranda, thanks a lot for buying a coffee ! )))
1 Like
The code provided here still works:
type: entities
entities:
  - type: custom:numberbox-card
    entity: input_number.test_number
    name: Threshold 1
    secondary_info: last-changed
    card_mod:
      style: |
        .grid-content.grid-left .info .secondary ha-relative-time {
          color: transparent;
          line-height: 0px !important;
        }
        .grid-content.grid-left .info .secondary::before {
          color: orange;
          content: "Warning\A";
          line-height: normal;
        }

In your case you tried to add ONE MORE LINE - i.e. to create a multiline string.
See a difference between content: "Warning\A" & content: "Critical\A Line 2".
Then you made a mistake - the “\A” is missing BEFORE the original secondary-info value (which is hidden):
        .grid-content.grid-left .info .secondary::before {
          color: red;
          content: "Critical\A Danger\A";
          line-height: normal;
          white-space: pre-wrap;
        }

Update 15.09.22: disregard all written above, see a corrected info below.
But anyway - there is an old note:

and now you do not need to use this “:before” trick (and elements are better aligned too):
  - type: custom:numberbox-card
    entity: input_number.test_number
    name: Threashold 3
    secondary_info: Critical<br/>Danger
    card_mod:
      style: |
        .grid-content.grid-left .info .secondary {
          color: red;
        }

Hi, Ildar!
Wrong indentation are distorted in the forum post, everything is fine in my configuration. Thanks for the advice on compatibility with Apple devices, but in the presented variants, without displaying the design on another card, this does not work. Maybe there will be other tips on this problem?
Not clear, elaborate. Does my code work?