Cecotec Ready Warm 2000 Thermal Connected

Hi I have Cecotec Ready Warm 2000 Thermal Connected, that connect via wifi and I use in my iPhone.
Unfortunately the apps is really bad and I would like to connect in my home assistant.

I’m not a tech guy so I will not be able to do by my self, but with the proper guidance I can try to get some information about the device.

Regards,

Jon Machado

i have this device and i try to connect it to home assistant, you can use tuya and local tuya but the parameter are very difficult to find.
I can on / off the climate but i haven’t find any device parameter …
They have left me one but I don’t see the way to connect it to ha without putting a plug in between, have you managed to advance?

I managed to get it working in Tuya local

Como lo conseguiste? me esta volviendo loco y no hay forma.

Hey @philspain,
Could you let us know how you managed to do it ? :slight_smile:
I configured it ok in Tuya and managed to import it in Home Assistant, but it gives me no information whatsoever (well, at least it know it’s a heater) nor can I turn it on or off :thinking:

Thanks in advance :slight_smile:

Hi! Would be grate if you could explain how, please! :pray:

Hi everyone!

I’ve been reading the thread and saw that many of you were stuck with this heater because no one shared the final configuration. I’ve only been using Home Assistant for a week, but I was stubborn and managed to get it 100% integrated into LocalTuya.

Since I couldn’t find the parameters anywhere, I started doing some manual testing: I changed the state, the timer, or the temperature on the heater itself and watched which value changed on the LocalTuya configuration screen when adding the device. Through trial and error, I managed to figure out what each entity corresponds to.

Here is the list of DP IDs so you can configure it without going crazy:

  • DP ID 1: Main switch. Configure it as switch (True / False values to turn the main heater on or off).

  • DP ID 2: Target temperature. Configure it as number or select (Numeric value for the desired target temperature). From 10 to 49.

  • DP ID 3: Current temperature. Configure it as climate or sensor (Numeric value of the room temperature measured by the device).

  • DP ID 5: Operation mode. Configure it as select (Values: off = Cold air, 1 = Low, 2 = High, auto = Automatic).

  • DP ID 10: Screen light. Configure it as switch (Watch out, it’s inverted! True = Light OFF, False = Light ON).

  • DP ID 11: Timer setting. Configure it as select (Values from 0 to 24 to set the hours for automatic shutdown). Friendly values: 0 = Cancel, 1 = 1 hour, 2 = 2 hours, and so on.

  • DP ID 12: Time remaining. Configure it as sensor (Shows in minutes how much time is left before the timer triggers).

  • DP ID 101: Open flap. Ignore it (It’s a True / False that doesn’t seem to do anything, probably a legacy function from another model).

  • DP ID 102: Flap swing. Configure it as switch (True = Moves/Oscillates, False = Stops).

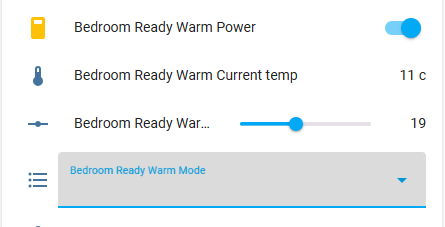
I’m attaching a screenshot of my device so you can see how it looks once all the entities are configured correctly. You can easily control all modes, the swing, the screen display, and see the remaining time without any issues.

I hope this helps you revive those heaters in your dashboards! Cheers.