First open Home Assistant, go to Settings, click on Add-ons, then click on ADD-ON STORE. Search for File editor and install this addon. After it installs, there will be a File editor link in your menu. Click on that and it will open the file editor. At the top there will be a folder icon, click that and then select configuration.yaml. Now just copy the above mentioned sensors and paste them at the bottom of the configuration.yaml file. Then save the file and reload home assistant or restart the host computer.
1 Like
I have file editor installed. I keep getting errors or it won’t create a device or sensor. Should I add something before the -platform: template?
error is
end of the stream or a document separator is expected at line 65, column 1:
- platform: template
^
OK I added sensor: on the line before and it worked. Thanks
@Ernst @bryangerlach Just following on from this 9bc8af41… It essentially is 9B decoded as an int, C8 decoded as an int, AF decoded as an int and 41 Decoded as an int.
For information, I have asked the manufacturer to have the decoding pattern.
@1technophile we already know the decoding pattern, look at Clothes Dryer Automations - #130 by bryangerlach for a full breakdown
1 Like
Thanks all, I/we made the mistake by translating the 4 bytes to a unsigned integer, but we had to translate it to a floating point number. (struct.unpack("<f").
You can move this esp32 device close to your dryer now and plug it in.
Do you install the ESP32 on a breadboard or into some other container?
Does the esp32 device need to be connected physically to Home Assistant (installed to rpi)?
Or it is powered via a 5v USB electrical connection allowing wifi sta to transmit all the necessary data?
(I’m new to HA, ESP32; thanks!)
Whatever suits you
No, it connects via wifi
Yes, although there are other power supplies you can use other than the usb connection
1 Like
First, thank you to everyone who worked on this. I had zero experience with Esphome and flashing esp32dev boards. It took me a bit to figure it out, but it’s working really well so far. I do have one question…
- platform: template
  sensors:
    dryer_on:
      value_template: "{{ states('sensor.smartdry_shake')  | float > 10.0  }}"
      friendly_name: Dryer
      delay_on:
        minutes: 1
      delay_off:
        minutes: 1
When I add the above code to my configuration.yaml, I get this config error:
Invalid config for [sensor.template]: [delay_on] is an invalid option for [sensor.template]. Check: sensor.template->sensors->dryer_on->delay_on. (See ?, line ?).
I checked in Studio Code Server and it’s showing an error message indicating that “delay_on” and “delay_off” are invalid properties.
Any idea how to fix?
Since the USB device we all have is an esp, can’t we just reflash that with esphome?
Also, I started using these power supplies for my esps as they keep them out of the way nicely https://www.amazon.com/dp/B08ZXBSXD5
It needs to be a binary sensor. Put this
binary_sensor:
above the - platform: template line.
1 Like

I’m hoping for that too. I tried connecting the device to a couple of computers directly through the USB plug to see if it would be detected: nope. I’m guessing the USB connection serves for power delivery only.
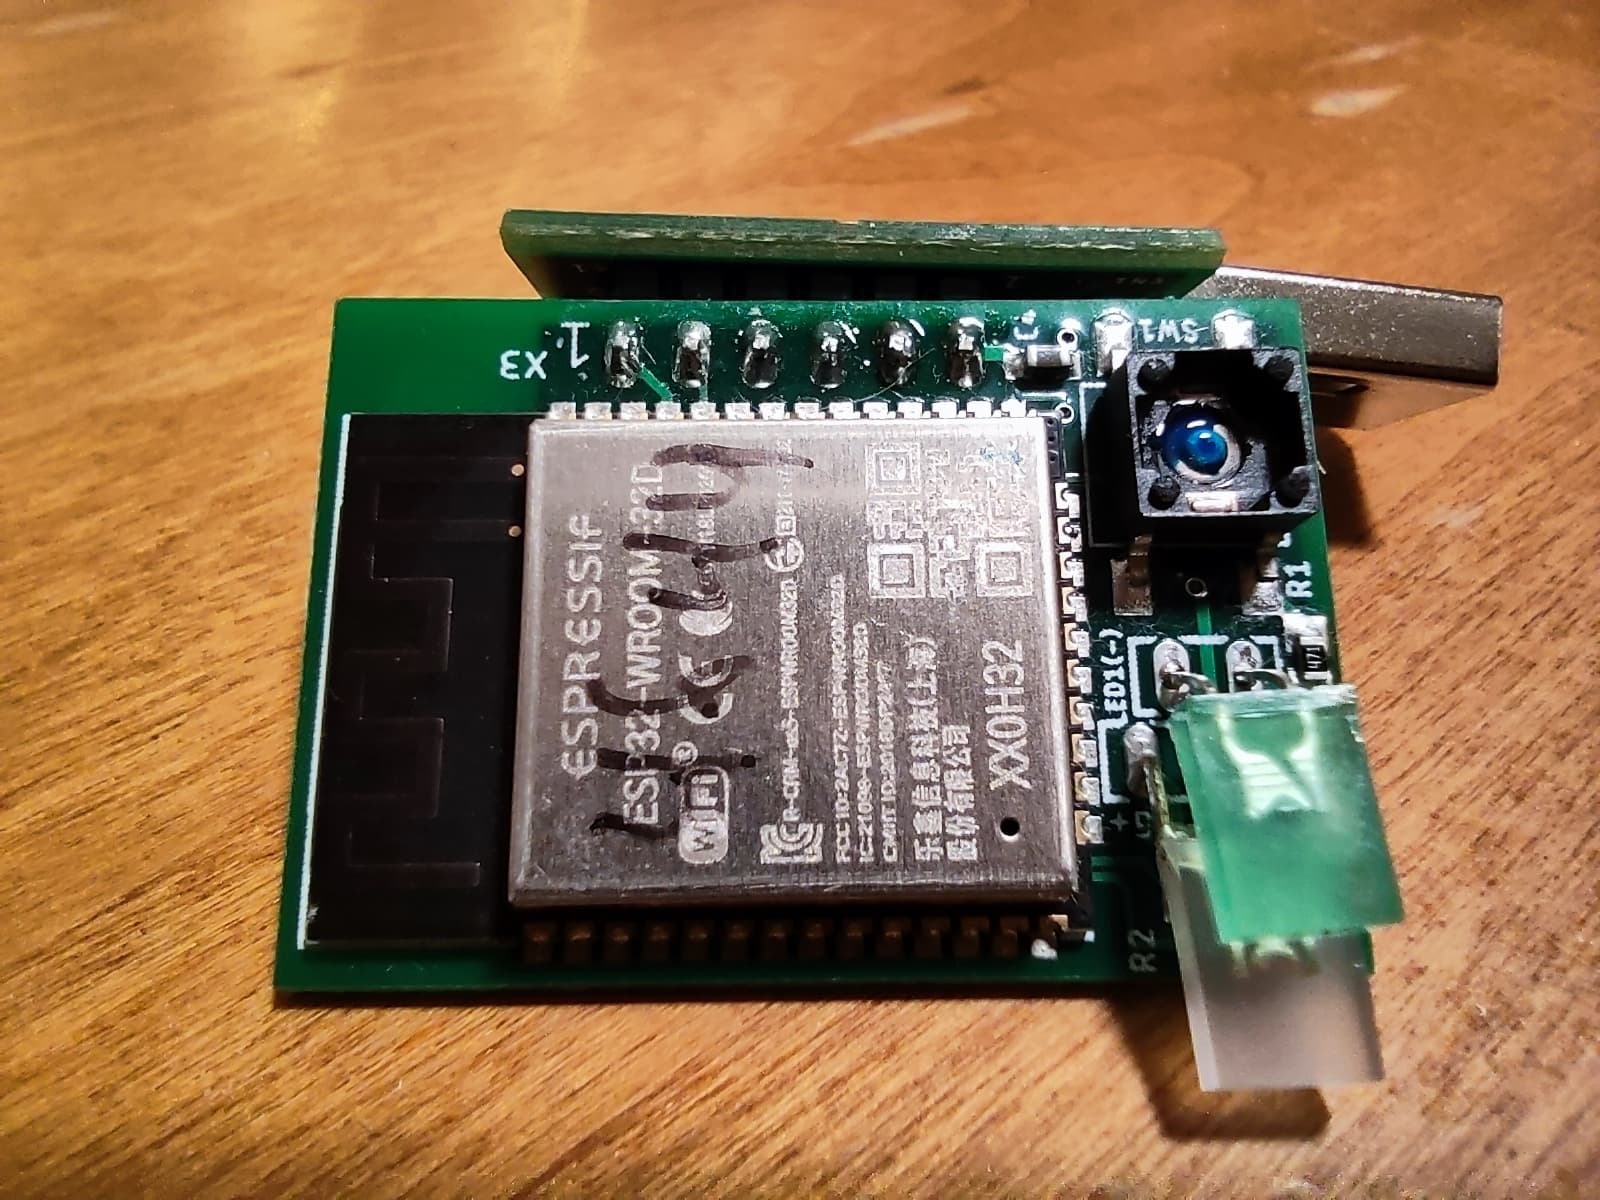
(I posted some pics of the two parts of the SmartDry board with the esp32-wroom-32 module here )
Mine looks different on the inside. I do not have a usb plug at all. It still uses the esp32-wroom-32 though.
Everyone,
I’m the OP for this thread. When I originally posted about the SmartDry back in November, 2019, I was hopeful for a device that we could integrate into Home Assistant.
I also recently marked @bryangerlach as the solution to the thread, he took a mountain of information gathered from many people in this thread and provided concise directions on how to establish local control over a SmartDry sensor and continue to operate it.
I just wanted to say “Thank You”. The fact that we found a device to solve a problem, then reverse engineered the API to make it work within Home Assistant, and then when the Cloud service died, were able to further reverse engineer it to create a permanent, locally controlled, sensor out of it; is just remarkable.
Cheers to a great group of folks!
-Rob
4 Likes
Yes, I recently purchased a second unit off of eBay and it appears they re-made the hub in the later versions into a pass-through AC plug. Pretty genius, but effectively the same.
Thanks for your initial work aswell @pickerin, you did a lot of the legwork back in 2019!
Though I think that the sentiment around here has been the same for a while, reply #3 in this thread was literally saying a cloud solution relies on the company not going bust.
@bryangerlach I had a quick question since I’ve been running this through a few dryer loads now.
I think the Battery sensor is incorrect. I have notes for Battery Level stating:
Battery Level: 1960 “New”
Battery Level: 130 “Idle”
Battery (vBat) drops to 130 when idle
I’m now seeing this behavior, as my “Low Battery Indicator” is coming on when the unit is idle, but then when I’m drying a load, it’s suddenly not “low” anymore…
Not sure what the right way to handle this is, but I don’t believe it’s a simple output level.
1 Like
Support of the SmartDry integrated into OpenMQTTGateway v0.9.15
https://docs.openmqttgateway.com/upload/web-install.html
Feel free to share your feedback
Can you give us a bit of a background on how this works?
First time I’ve heard of “OpenMQTTGateway”.