I would like to share my yaml file for the Connectix Smart Gateways Wifi Water Meter. This device measures water consumption from an analogue water meter.
The company behind this device is not willing to share any details about the board and pin setup inside and is mentioning that flashing the device with your own firmware will void the waranty. No judgement call from my side, just stating the facts as they are.
Anyhow, since the company did not share the details needed to do the conversion to esphome, I decided to crack open the casing and peek inside. It’s a NodeMCU-32S and the sensor is connected to GPIO19. Based on this information, I created the yaml config below.
The internal_filter is set to 200ms since my water meter gives one pulse per 1 liter of water usage. Given the maximum speed at which i can use water, i choose for this number to prevent false-positive pulses (observing a non-existing pulse) without creating false-negative pulses (missing a real pulse). This setting works perfect in my situation, but you can tune it if needed.
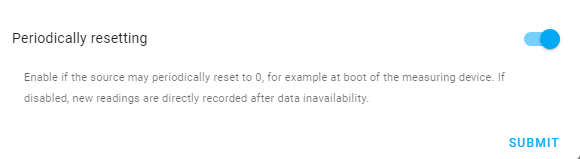
total water usage. This can be used in combination with the Home Assistant Utility meter. Don’t forget to enable “Periodically restting” in the utility meter settings since the “Total Usage” sensor will drop to 0 when disconnecting the sensor from power.
I did not want to store the sensor value internally, since this would lead to level wear of the flash memory.
All in all, this is a major improvement over the stock firmware due to 1) tighter integration to home assistant, 2) more control, 3) no more unneeded sensor updates every 5 seconds while no water was used: the esphome solution will only update the sensor value when another liter of water is used. 4) no internet connection is required to check for firmware updates, since you do this locally with esphome.
PS: flashing is really simple since the device has a usb-connection to deliver power. Don’t forget to push the reset-button at the beginning of the flash process.
if water was used while home assistant was rebooting, it will catch-up
if power to the water meter itself would be lost somehow, it would not calculate water usage anyway. So no difference there. When reconnecting power, the total meter will jump to 0, but the utility meter sensor will handle this scenario just fine.
thanks for responding! I am newish to esp32’s so when I see that yaml it looks like HA code and not something I would flash to the esp itself, so I am a little lost on the firmware flashing part is all
I did some digging around to figure out how this all works and I think I have it. for future reference for anyone that might be interested here’s what I did
install esphome! you can connect this with home assistant, but for now you don’t need to
adopt the device to your network, I did it via the Web - ESPHome wizard when it was connected to my laptop
check everything is working, that you can open the web portal for the device and/or ping it, and that is shows up in esphome as online
apply the yaml here from @pimw, make sure you edit as needed
Hi, i just flashed my connectix watermeter with ESPhome, and it works wonderfull. Better than the original firmware, and costumizable which is a real bonus.
Im wondering is since i also have a connectix “slimmemeter” P1 reader if it is possible to also flash this device with ESPhome. since on a regular basis i experience disconnects from this device which works with MQTT and by the way this was also the case with the “watermeter”.
How would i go about this?
I will have a crack at it, tonight to see ad which port the data input is connected and try somethings out.
having this device local in esphome would be very nice. next to the already stated above, I would love it to not be calling ‘home’ continuously, the stock which the device is doing (if only to check for updates, but recently added was the optional cloud storage of your data).
I do wonder if the Esphome version also has the ‘AI’ sensor for leakage.
at first believed hat to be a gimmick, but got tone honest, it is quite clever (a toilet flush that keeps running, or worse, the pond refill…)
I have managed to get the Slimmemeter P1 from Smartgateways to work with ESPhome.
The GPIO pin that is used is “GPIO18”.
Also I don’t know if it is hardware specific or that my particular electricity meter just send the telegrams in a different format but the inverted option of the uart settings needs to bet set to “TRUE”.
I have included the yaml coding for my unit of smartgateways.nl
esphome:
  name: dsmr_meter
  friendly_name: DSMR Meter
  comment: NodeMCU-32S

esp32:
  board: nodemcu-32s
#  framework:
#    type: arduino

# Enable logging
logger:

# Enable Home Assistant API
api:
  encryption:
    key: "api key here"

ota:
  password: "randompassword"

wifi:
  ssid: !secret wifi_ssid
  password: !secret wifi_password

  # Enable fallback hotspot (captive portal) in case wifi connection fails
  ap:
    ssid: "ssid"
    password: "password"

captive_portal:


uart:
  baud_rate: 115200
  rx_pin:
    number: GPIO18
    inverted: true
  rx_buffer_size: 1700

dsmr:
  id: dsmr_instance
  max_telegram_length: 1700

sensor:
  - platform: dsmr
    energy_delivered_tariff1:
      name: "Energy Consumed Tariff 1"
      filters:
        - throttle: 60s
    energy_delivered_tariff2:
      name: "Energy Consumed Tariff 2"
      filters:
        - throttle: 60s
    energy_returned_tariff1:
      name: "Energy Produced Tariff 1"
      filters:
        - throttle: 60s
    energy_returned_tariff2:
      name: "Energy Produced Tariff 2"
      filters:
        - throttle: 60s
    power_delivered:
      name: "Power Consumption"
      accuracy_decimals: 3
      filters:
        - throttle: 1s
    power_returned:
      name: "Power Produced"
      accuracy_decimals: 3
      filters:
        - throttle: 1s
    gas_delivered:
      name: "Gas Consumed"
      id: gas_consumed
      accuracy_decimals: 5
      filters:
        - throttle: 5s
  - platform: uptime
    name: "DSMR meter Uptime"
  - platform: wifi_signal
    name: "DSMR meter Wi-Fi Signal"
    update_interval: 60s
  - platform: copy
    source_id: gas_consumed
    id: gas_consumption_per_hour
    name: "Gas Consumption Per Hour"
    accuracy_decimals: 1
    device_class: ""
    state_class: "measurement"
    unit_of_measurement: "m³/hour"
    #We measure the delta between current en previous value
    #Ignore high bootup values (above 100)
    #Since we measure per 60 seconds, we need to multiply by 60 to get the hourly consumption value
    filters:
      - lambda: !lambda |-
          static float last_value = 0;
          float change = 0;
          change = x - last_value;
          last_value = x;
          if (change > 100) return {};
          return change*60;

text_sensor:
  - platform: dsmr
    identification:
      name: "DSMR Identification"
    p1_version:
      name: "DSMR Version"
  - platform: wifi_info
    ip_address:
      name: "DSMR meter IP Address"
    ssid:
      name: "DSMR meter Wi-Fi SSID"
    bssid:
      name: "DSMR meter Wi-Fi BSSID"
  - platform: version
    name: "ESPHome Version"
    hide_timestamp: false
Hi all,
I’m not that familliar with ESPhome, could someone point me in the right direction.
I would like to led the blue light that’s on my board connected to GPIO2 to blink every time a something gets published to the API of home assistant, or when de ESP read a telegram. Is this possible?
The official software stores the watermeter value and adds to that with each pulse. This allows for adding water usage easily if the sensor was not working for a while for example.
This implementation only seems to count pulses. How would I go about setting and adjusting the total water usage?