I feel like this should be a simple one but I’m struggling with it and would love advice!
I have a motion sensor that contains a “binary sensor” entity that indicates motion status. I would like to create a second entity that contains the time and date of last motion detected (i.e., the last time that the binary sensor changed state to “Detected”). I’m assuming this will require creating a “helper” of type “template” and then entering the appropriate formula for the template’s state but I can’t seem to figure out what that is.
FWIW, I found this 2yr old thread from someone who seems to have had a similar problem, and it looks like there is YAML code for a solution, but I’m not actually sure where to paste in this YAML code (and do I also need to create a helper to represent the “variable” that is being updated every time there is a state change, etc.) I’d rather just create a helper using the GUI if there’s a straightforward way to do that…
Thanks @Nick4 and @vic4news, but I think I’m struggling with something a little more basic. I totally understand the concept of having an action triggered by a state change and that action sets a variable to a value equal to the current time… I just don’t know how to create a “variable” in home assistant or how to set its value as part of an automation.
@vic4news : I don’t know where to type in that code you’ve given me.
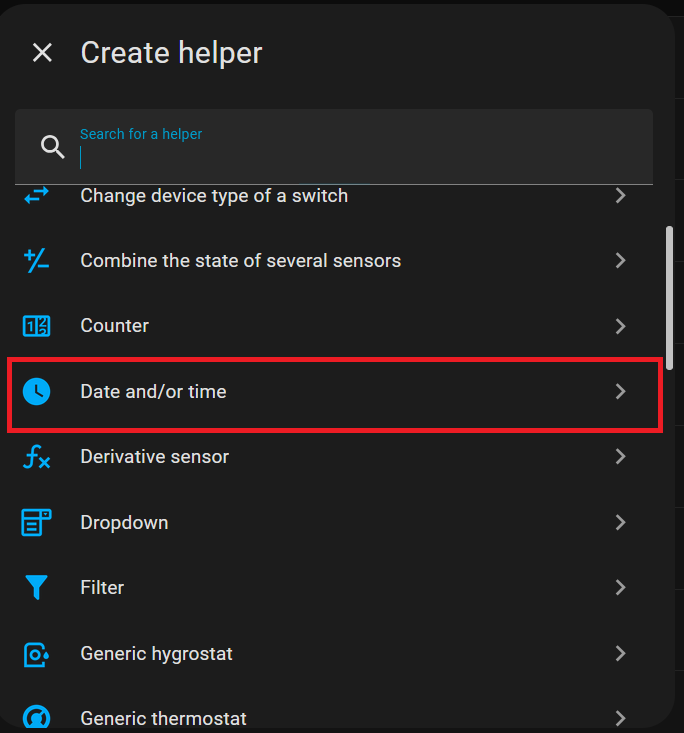
@Nick4 : which of the many different types of “helpers” should I create in order to have what is effectively a variable of type time (and date)? And where in the “create new automation” GUI is the action type that is set the value of a variable (and where do I enter the formula that looks something like “now()”)?
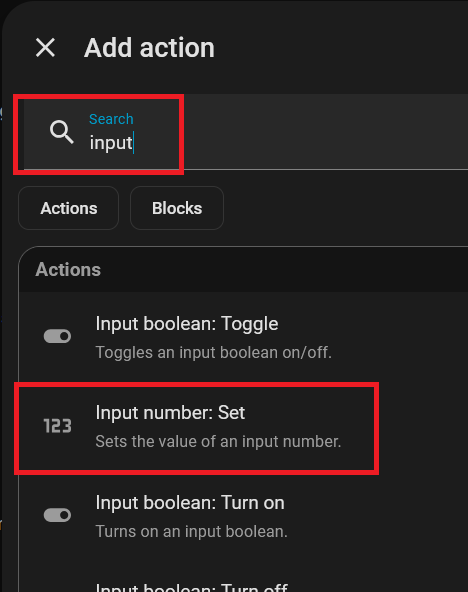
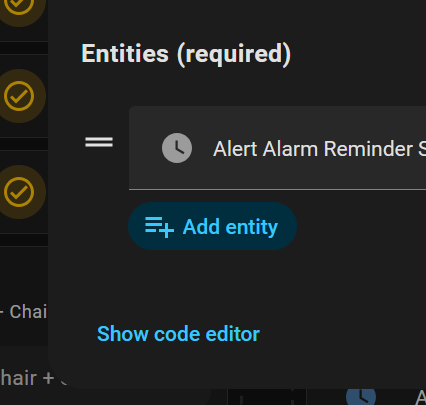
I’ve created the helper, and it looks like I need to use action of type “input datetime: set”. But when I entered “{{ now() }}” as the value, it seems to be working
However, when I try to display this helper in a dashboard it shows an interactive form to enter a date and time, rather than the convenient “19 minutes ago” that is shown on my more sophisticated motion sensors (or, rather, motion sensors with more-sophisticated Home Assistant integrations) that have this behavior built in. Is there something I can do to easily mimic that behavior?
If you are using the entities card to show your helper, set the entity type to simple-entity and that should force it to show the state rather than the special row format of a time/date entry form.
You could also try experimenting with the format key to display the value in different ways, but I’m not 100% sure it works for helpers - the docs mention timestamp sensors only, so possibly not.
Thanks. I have a bunch of other sensors (different brand, different integration) that come with a prebuilt “last motion” sensor entity that appears by default as uneditable, continuously-increasing text like “17 minutes ago” or “3 weeks ago” etc. I have these listed in an entity card in a dashboard. I’d just like to add a row for this new motion sensor that looks like all the others.
I could not find options in the dashboard editor interface to change the “format” for a row… The only options it gives me are to override the name or to show secondary data.
As I suspected the format key does not work for a date/time helper. If you absolutely want the relative time displayed, you will probably need to make a trigger template timestamp sensor. This will involve using YAML to configure it though.
There’s a few options. The most common would be in whatever file you have configured for templates, for example in my configuration.yaml I have this, which is probably the same as yours:
And in that case you can see that the template: value is brought in from template_sensors.yaml and in that file:
- triggers:
    - trigger: state
      entity_id: binary_sensor.hall_motion
      to: "on"
  sensor:
    - name: Last Hall Motion two
      unique_id: last_hall_motion_two_id
      device_class: timestamp
      state: "{{ now() }}"
@busman Thanks… I have created my templates by going the Settings section of the Home Assistant UI, then choosing Helpers, then clicking the button to create a new helper…
As you can imagine, there are configuration files in HA and some you can edit in the UI but others you need to edit using a file editor (there’s an Add-on (“App”) for that) or you need to have shell access to HA core.
Do you have experience with the using the shell, editors and SSH?
There’s an endless amount of info online about how to edit files in HA. The first link on a google search was this video, but you can find something that works for you, I’m sure. This is also an area where AI won’t completely suck at providing some basic understanding.
Ask questions here if things are still not clear after researching this.
Thanks! Yep, I’m quite familiar with using shells, SSH, etc… and I’m able to browse the directory structure on my HA device and edit files.
I just don’t know where in the HA directory structure the relevant file(s) is/are to add this sort of thing – or where in those files to do so. … or the correspondence between any of this and the options in the Home Assistant GUI.
I’ve found references to the YAML format (though maddeningly they only cover syntax – kind of like trying to figure out how to host a website by memorizing HTML attributes), but I’d be very grateful for any written primer on this side of Home Assistant that you could point me to…
Install the “Advanced SSH & Web Terminal” Add-on/App and poke around.
$ ssh ha

       ▄██▄           _   _
     ▄██████▄        | | | | ___  _ __ ___   ___
   ▄████▀▀████▄      | |_| |/ _ \| '_ ` _ \ / _ \
 ▄█████    █████▄    |  _  | (_) | | | | | |  __/
▄██████▄  ▄██████▄   |_| |_|\___/|_| |_| |_|\___|          _
████████  ██▀  ▀██      / \   ___ ___(_)___| |_ __ _ _ __ | |_
███▀▀███  ██   ▄██     / _ \ / __/ __| / __| __/ _` | '_ \| __|
██    ██  ▀ ▄█████    / ___ \\__ \__ \ \__ \ || (_| | | | | |_
███▄▄ ▀█  ▄███████   /_/   \_\___/___/_|___/\__\__,_|_| |_|\__|
▀█████▄   ███████▀

Welcome to the Home Assistant command line interface.

Home Assistant Supervisor is running!
System information:
  IPv4 addresses for enp6s18: 192.168.0.70/24
  IPv6 addresses for enp6s18: fe80::35ae:e8b8:6425:a2b/64

  OS Version:               Home Assistant OS 17.0
  Home Assistant Core:      2026.2.0

  Home Assistant URL:       http://homeassistant.local:8123
  Observer URL:             http://homeassistant.local:4357

System is ready! Use browser or app to configure.
➜  ~ cd config
➜  config ls *.yaml
automations.yaml           input_number.yaml          scripts.yaml               template_sensors.yaml
configuration.yaml         irrigation_unlimited.yaml  secrets.yaml               test_auto.yaml
customize.yaml             scenes.yaml                sensors.yaml

➜  config head -18 template_sensors.yaml
# Device Classes: https://www.home-assistant.io/integrations/homeassistant/#device-class
# https://www.home-assistant.io/integrations/binary_sensor/#device-class
# Remember, you can either have multiple "^-sensor" or a list of sensors below a single one.
#
# These are more of a one-off, so in this file. Once there's a few template sensors
# that are related to a give function (irrigation, heating, etc.) then maybe put those
# into packages.

- triggers:
    - trigger: state
      entity_id: binary_sensor.hall_motion
      to: "on"
  sensor:
    - name: Last Hall Motion TWO
      unique_id: last_hall_motion_two_id
      device_class: timestamp
      state: "{{ now() }}"
Seriously, there’s a ton of stuff online if you poke around.
YAML is just syntax. It’s just, eh, yet another markup language. Is JSON more familiar to you? If so there’s YAML-JSON converters online for playing with to see how the format works. It’s just a way to represent scalars, lists and dictionaries. The specifics for how it is used with HA is in the template sensor docs I posted.
Again, just dive in and poke at it. It’s hard at first then it’s not. When you have a specific question about something then this is the place to ask.
Thanks, but that’s kind of unhelpful. If you want a specific question could you please simply tell me which file you intended me to add this code to? Or, again, if there is any reasonable primer on this part of Home Assistant you can point me to, which I could read and then have a good chance of answering the question, I’d take that as well…
- triggers:
    - trigger: state
      entity_id: binary_sensor.hall_motion
      to: "on"
  sensor:
    - name: Last Hall Motion two
      unique_id: last_hall_motion_two_id
      device_class: timestamp
      state: "{{ now() }}"