Delayed Action Home Assistant Integration
![]()

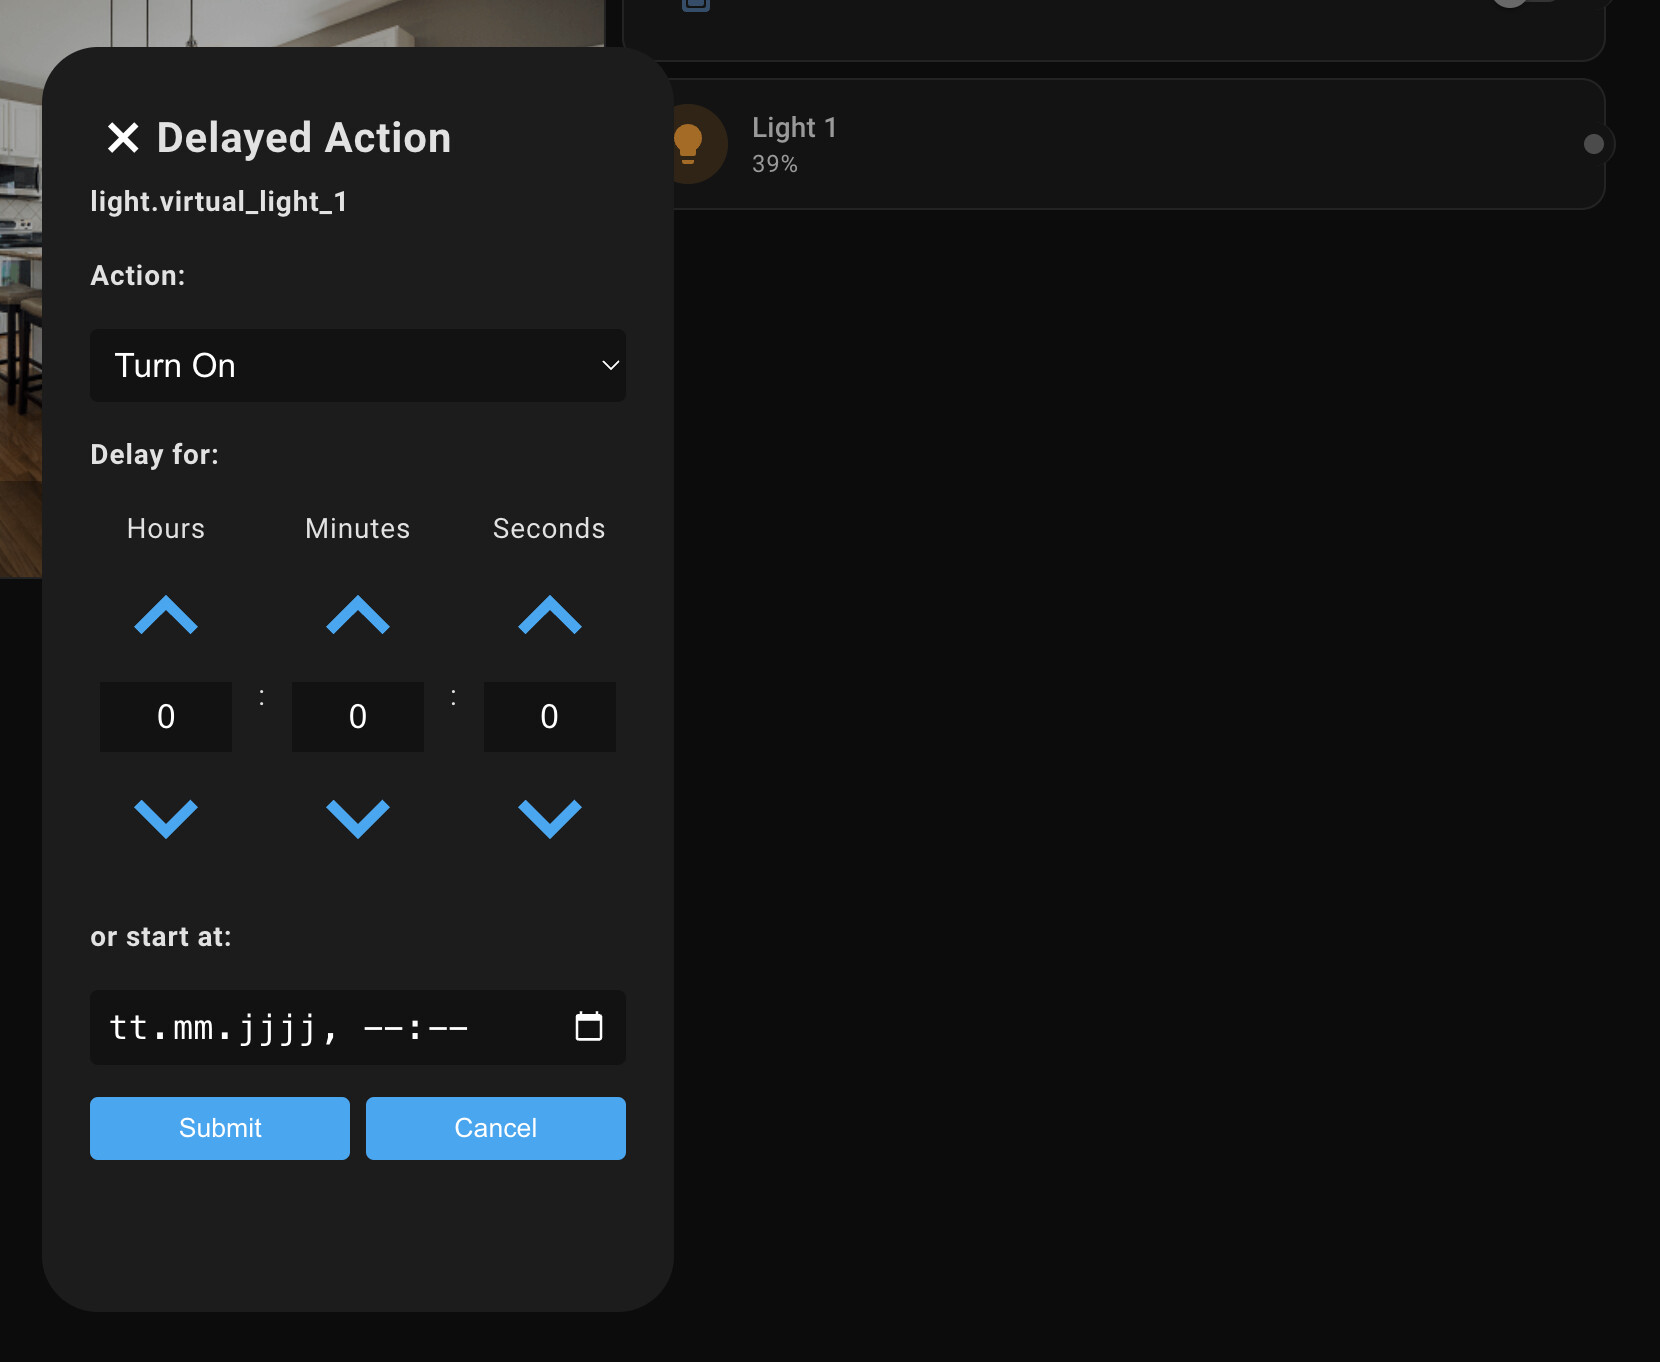
The delayed_action integration allows you to schedule actions for Home Assistant entities with a delay or at a specific time. This integration supports various entities and actions, providing flexibility in controlling your devices.
Features
- Schedule actions with a delay (in seconds).
- Schedule actions at a specific date and time (ISO 8601 format).
- Pass additional data to the actions.
Installation:
HACS (Home Assistant Community Store)
- Go to HACS page on your Home Assistant instance
- Add this repository (GitHub - bhuebschen/delayed_action) via HACS Custom repositories How to add Custom Repositories
- Select
Integration - Press add icon and search for
Delayed Action - Select Delayed Action repo and install
- Restart Home Assistant
- Add delayed_action to your page

Manual
- Ensure your Home Assistant configuration directory has the following structure:
/config/custom_components/delayed_action/
├── init.py
├── manifest.json
├── config_flow.py
├── const.py
└── services.yaml
  ├── translations/de.json
  └── translations/en.json
- Copy the provided files into the
custom_components/delayed_action/directory. - Restart Home Assistant to load the new custom component.
Configuration
- Go to Configuration → Devices & Services.
- Click on the “+” button and add the “Delayed Action” integration.
Usage
You can use the delayed_action.execute service to schedule actions with a delay or at a specific time.
Service Data Attributes
entity_id(required): The entity ID of the device to control.action(required): The action to perform (e.g.,turn_on,turn_off,set_brightness,set_temperature).delay(optional): The delay in seconds before performing the action.datetime(optional): The specific date and time to perform the action (ISO 8601 format).additional_data(optional): Any additional data to be passed to the service call.
Examples
Script: Turn On with Delay
script:
  turn_on_with_delay:
    sequence:
      - service: delayed_action.execute
        data:
          entity_id: switch.any_switch
          delay: 10  # Delay in seconds
          action: turn_on
Script: Set Brightness with Delay
script:
  set_brightness_with_delay:
    sequence:
      - service: delayed_action.execute
        data:
          entity_id: light.any_light
          delay: 15  # Delay in seconds
          action: turn_on
          brightness: 128
Development
To develop and test this integration:
- Clone the repository into your Home Assistant
custom_componentsdirectory. - Make changes to the code as needed.
- Restart Home Assistant to apply the changes.
Troubleshooting
If you encounter issues, check the Home Assistant logs for error messages. Common issues include:
- Ensuring the
entity_idis correct and exists. - Verifying the
actionis supported for the specified entity. - Confirming the date and time are in the correct format.
For more information on Home Assistant custom components, visit the Home Assistant Developer Documentation.
Contributing
Contributions are welcome! Please submit a pull request with your changes.
License
This project is licensed under the MIT License. See the LICENSE file for details.