UPDATE: I selected @Troom answer as the answer to this post, both methods work. One as the original post suggests uses the UI 100%. The other utilizes the UI in a less work sort of way, however breaks the UI elements by utilizing an unsupported template sensor. @Troom way also utilizes a Monday - Sunday week, vs my way which would allow you to use a Sunday - Saturday week.
Both ways are correct, and both ways work. If you want to learn and understand YAML @Troom way is great, if you don’t want to know anything about yaml, now or later, my way uses the abilities provided in the UI, up to you to decide.
For the 100% UI supported method keep reading. For the @Troom method, see the selected answer post.
I’ve seen a lot of people who asked over the years how to have a day of the week sensor to trigger automations, or show and hide items using the conditional card.
Every answer I’ve seen points back to a yaml config file of sorts, binary sensors, sensor templates, and a bunch of more advanced setups that alot of people cannot/do not want to understand.
Here is the solution I came up with that 100% uses the GUI to create a day of week sensor.
The first step is to create a helper Number, I called mine "Day of Week’ with a minimum value of 1 and a max of 7.
The initial value I set to the number for the day of the week, in my case being in the US with a week beginning of Sunday (1), ending on Saturday (7), you may adjust accordingly though the automation will need to be tweaked to match.

Next after this sensor is created we need to create an automation.
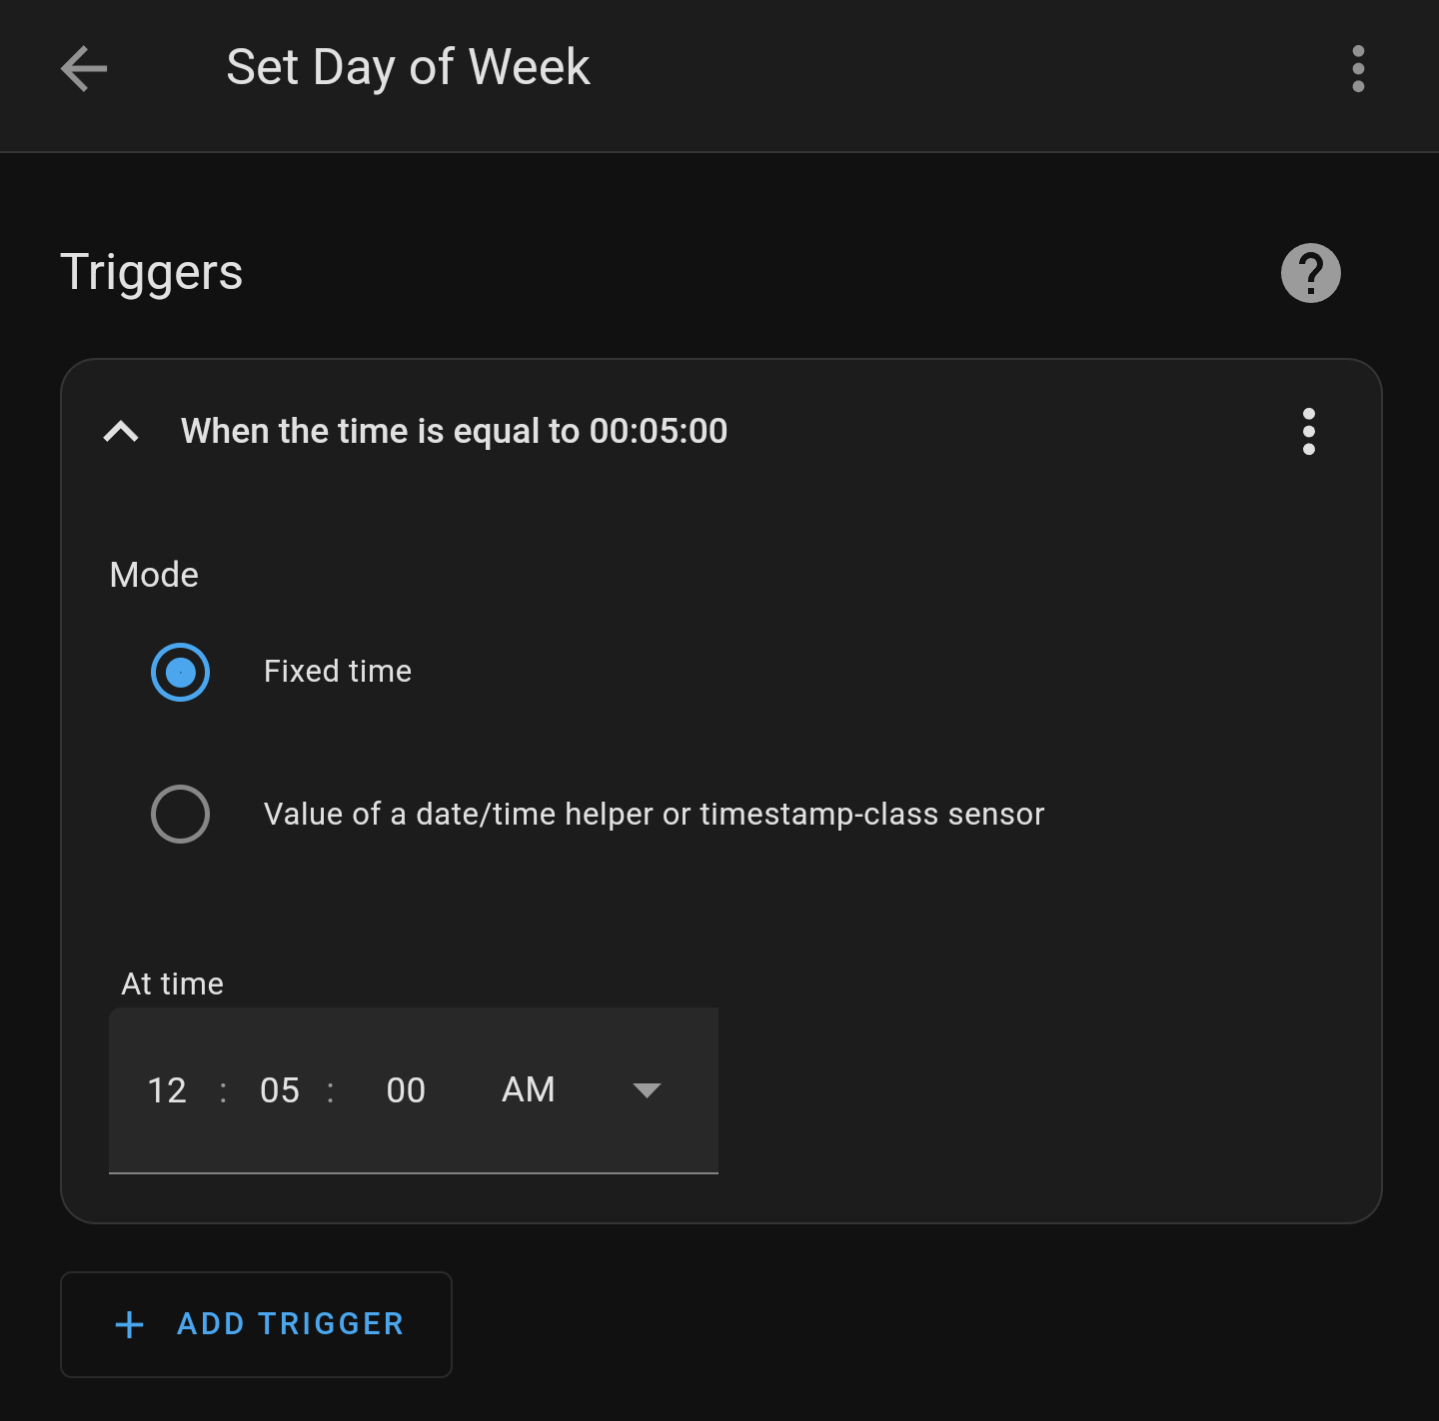
This automation will be a time automation with the time trigger being 00:05:00 - or 5 minutes after midnight.
Then in actions we will create a bunch of if/then actions.
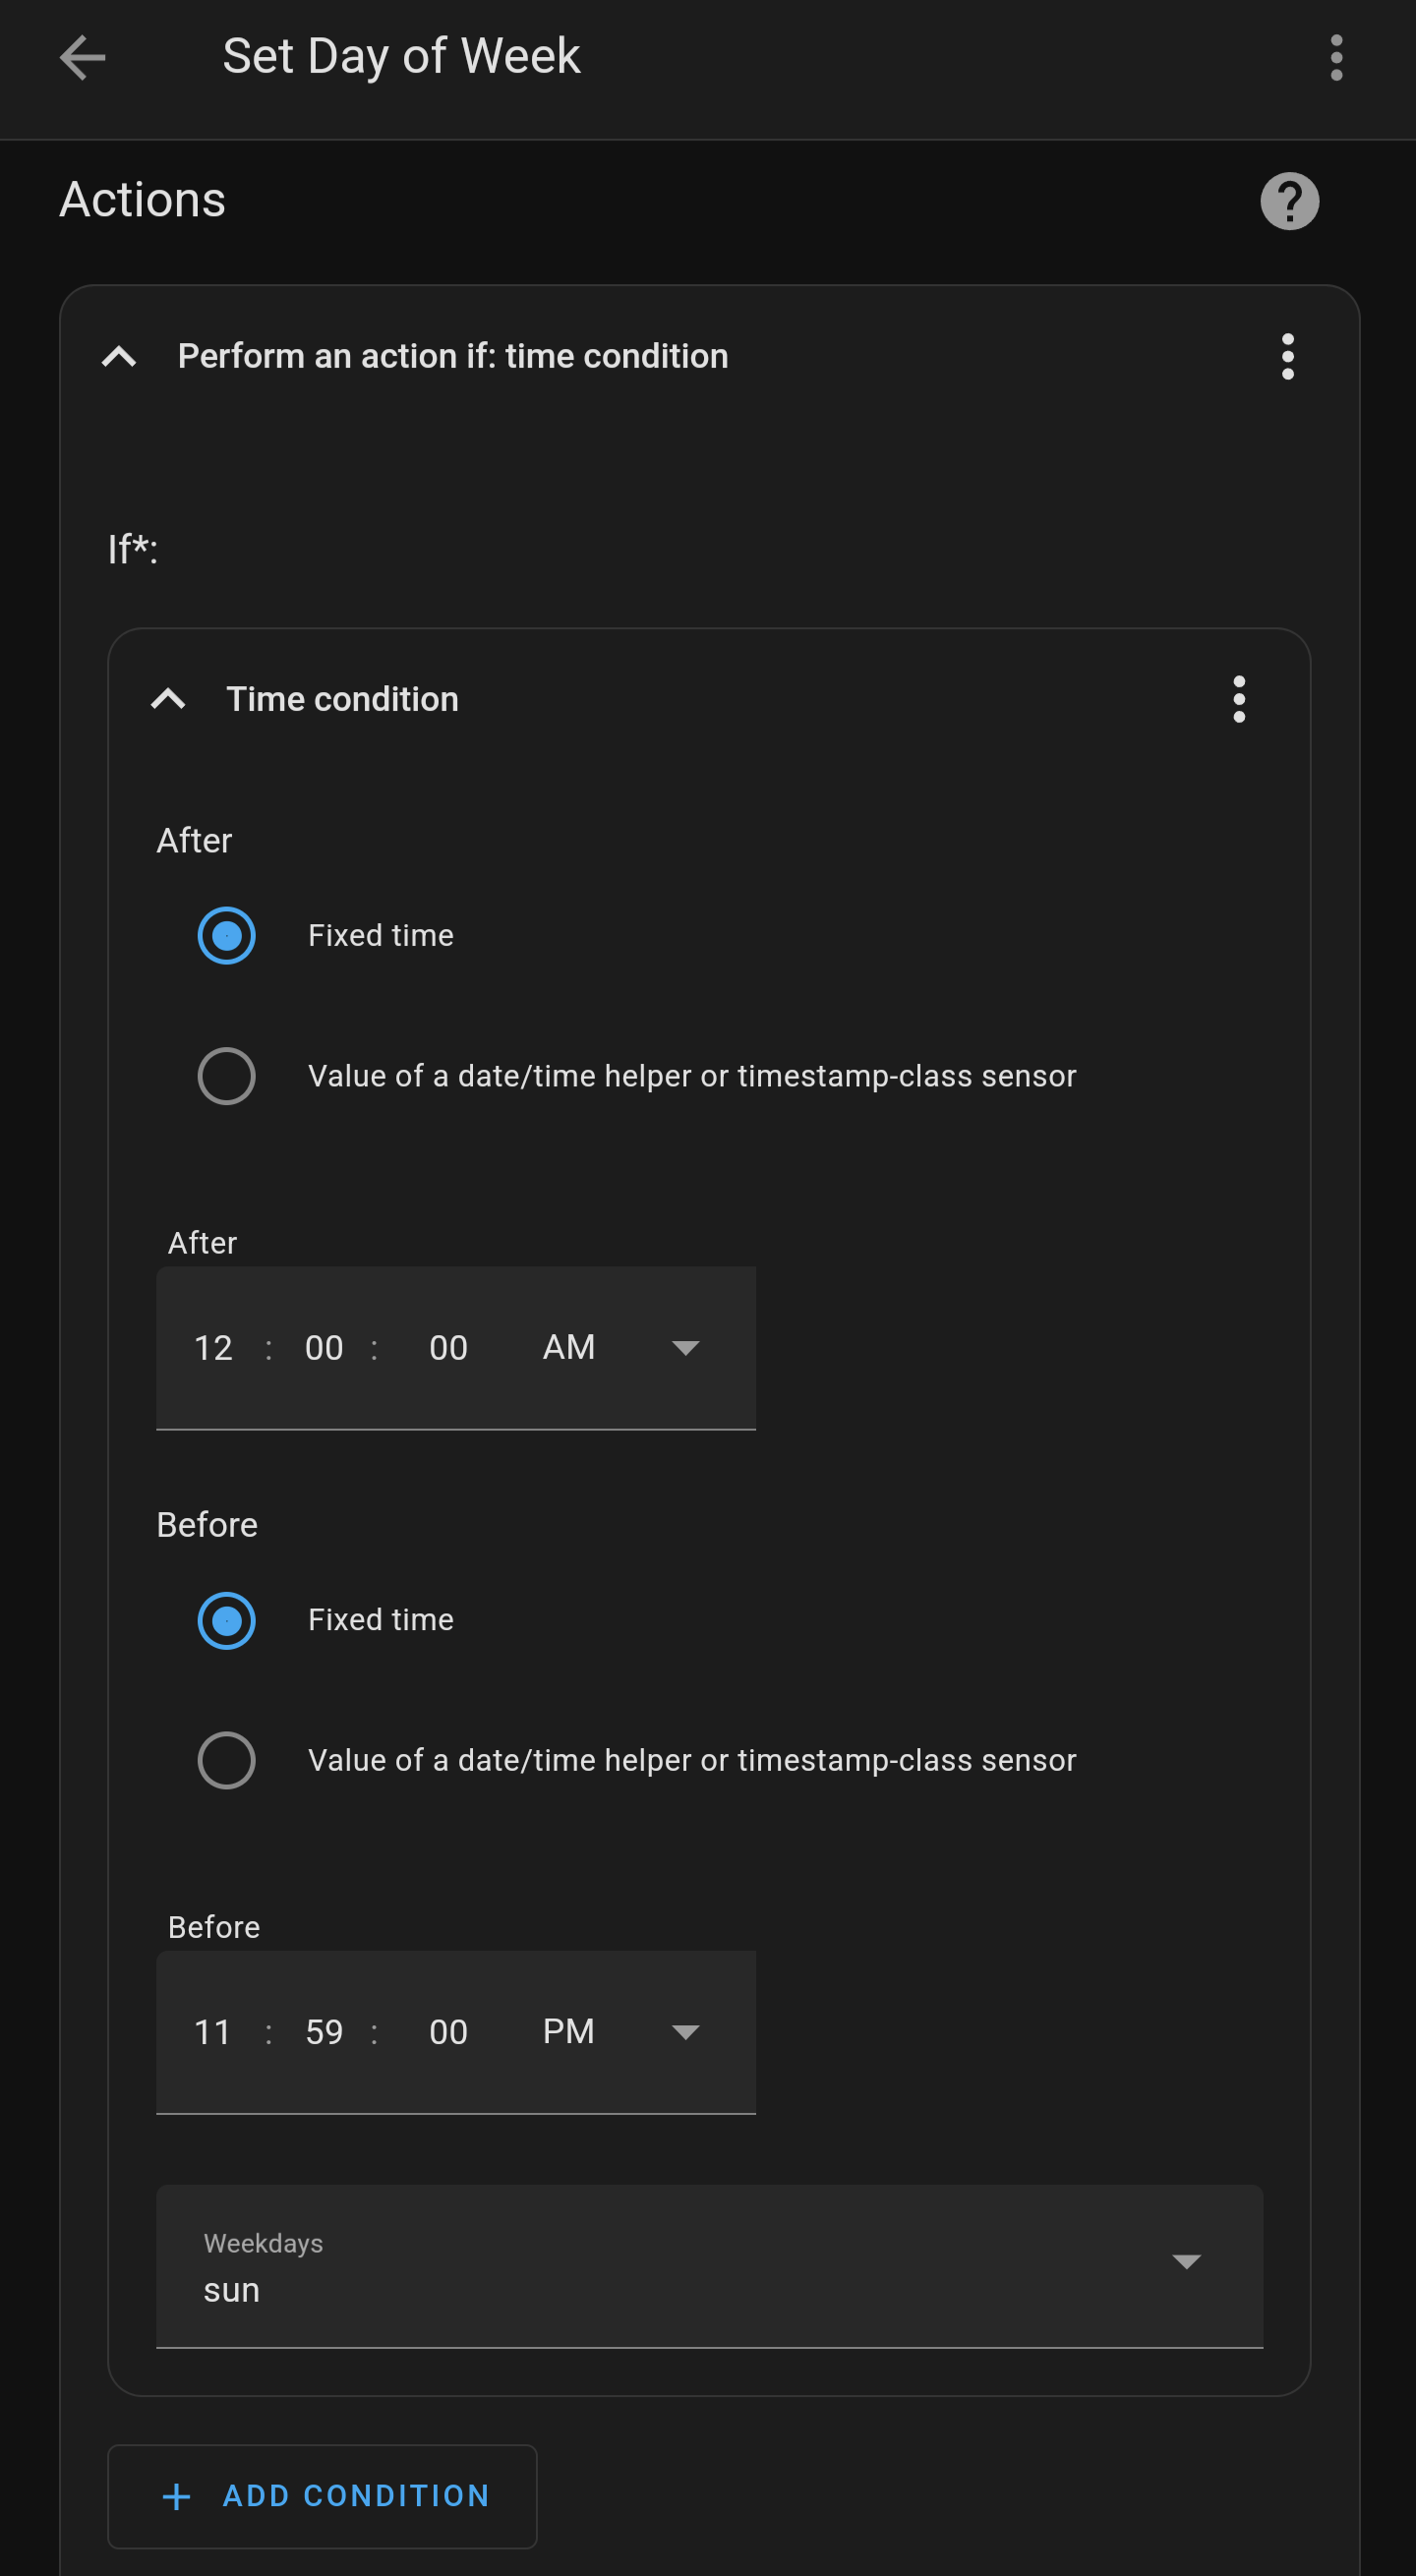
These will use the time again as an if statement, however this time we will be presented with a before and after, as well as day of the week. I entered the following:
After: 00:00:00
Before: 23:59:00
Weekday: Sun
Then:
Call service: Input number: Set
Target: Day of Week
Value: 1 (for Sunday)
You will need to create 7 of these one for each day of the week.
Once this is done, you can now use this in any other automation or condition. Just use a state number is equal to which ever corresponding number for the day of the week, 1-7.
For those who want it easy, here is my yaml editor config to copy and paste.
alias: Set Day of Week
description: ""
trigger:
  - platform: time
    at: "00:05:00"
condition: []
action:
  - if:
      - condition: time
        weekday:
          - sun
        after: "00:00:00"
        before: "23:59:00"
    then:
      - service: input_number.set_value
        data:
          value: 1
        target:
          entity_id: input_number.day_of_week
  - if:
      - condition: time
        weekday:
          - mon
        after: "00:00:00"
        before: "23:59:00"
    then:
      - service: input_number.set_value
        data:
          value: 2
        target:
          entity_id: input_number.day_of_week
  - if:
      - condition: time
        weekday:
          - tue
        after: "00:00:00"
        before: "23:59:00"
    then:
      - service: input_number.set_value
        data:
          value: 3
        target:
          entity_id: input_number.day_of_week
  - if:
      - condition: time
        weekday:
          - wed
        after: "00:00:00"
        before: "23:59:00"
    then:
      - service: input_number.set_value
        data:
          value: 4
        target:
          entity_id: input_number.day_of_week
  - if:
      - condition: time
        weekday:
          - thu
        after: "00:00:00"
        before: "23:59:00"
    then:
      - service: input_number.set_value
        data:
          value: 5
        target:
          entity_id: input_number.day_of_week
  - if:
      - condition: time
        weekday:
          - fri
        after: "00:00:00"
        before: "23:59:00"
    then:
      - service: input_number.set_value
        data:
          value: 6
        target:
          entity_id: input_number.day_of_week
  - if:
      - condition: time
        weekday:
          - sat
        after: "00:00:00"
        before: "23:59:00"
    then:
      - service: input_number.set_value
        data:
          value: 7
        target:
          entity_id: input_number.day_of_week
mode: single


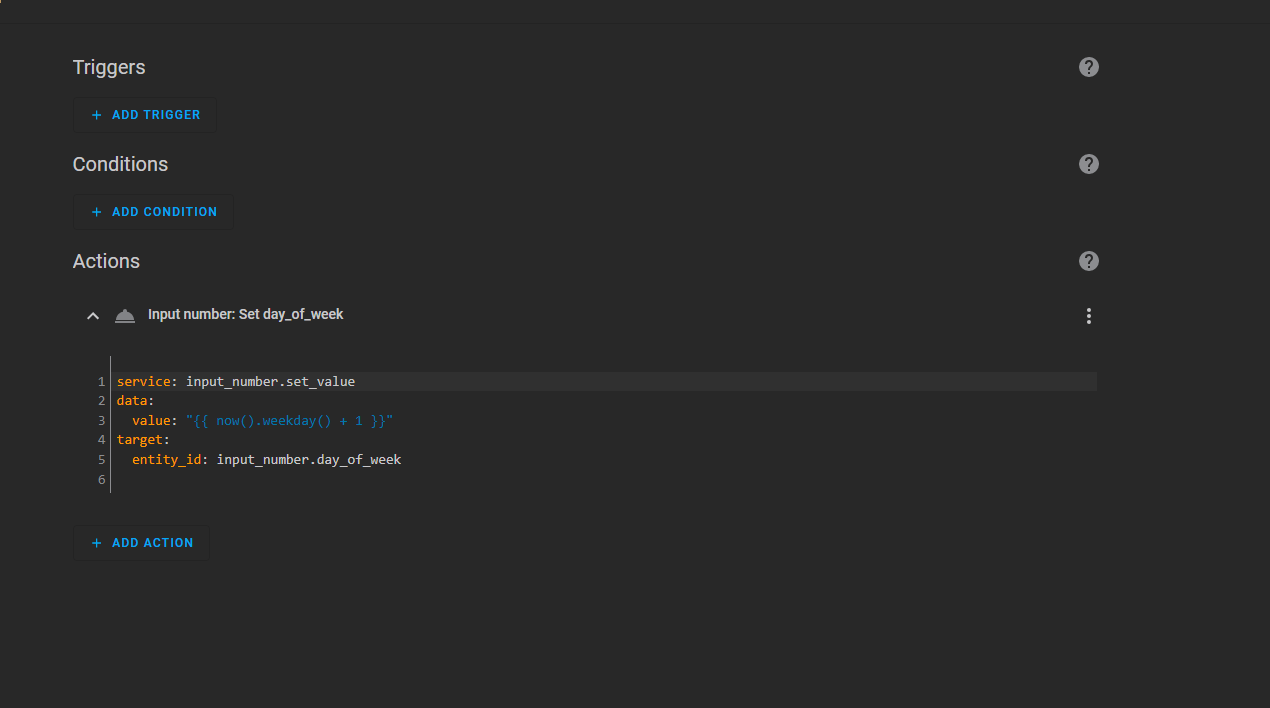
 See what I mean by a simple mistype