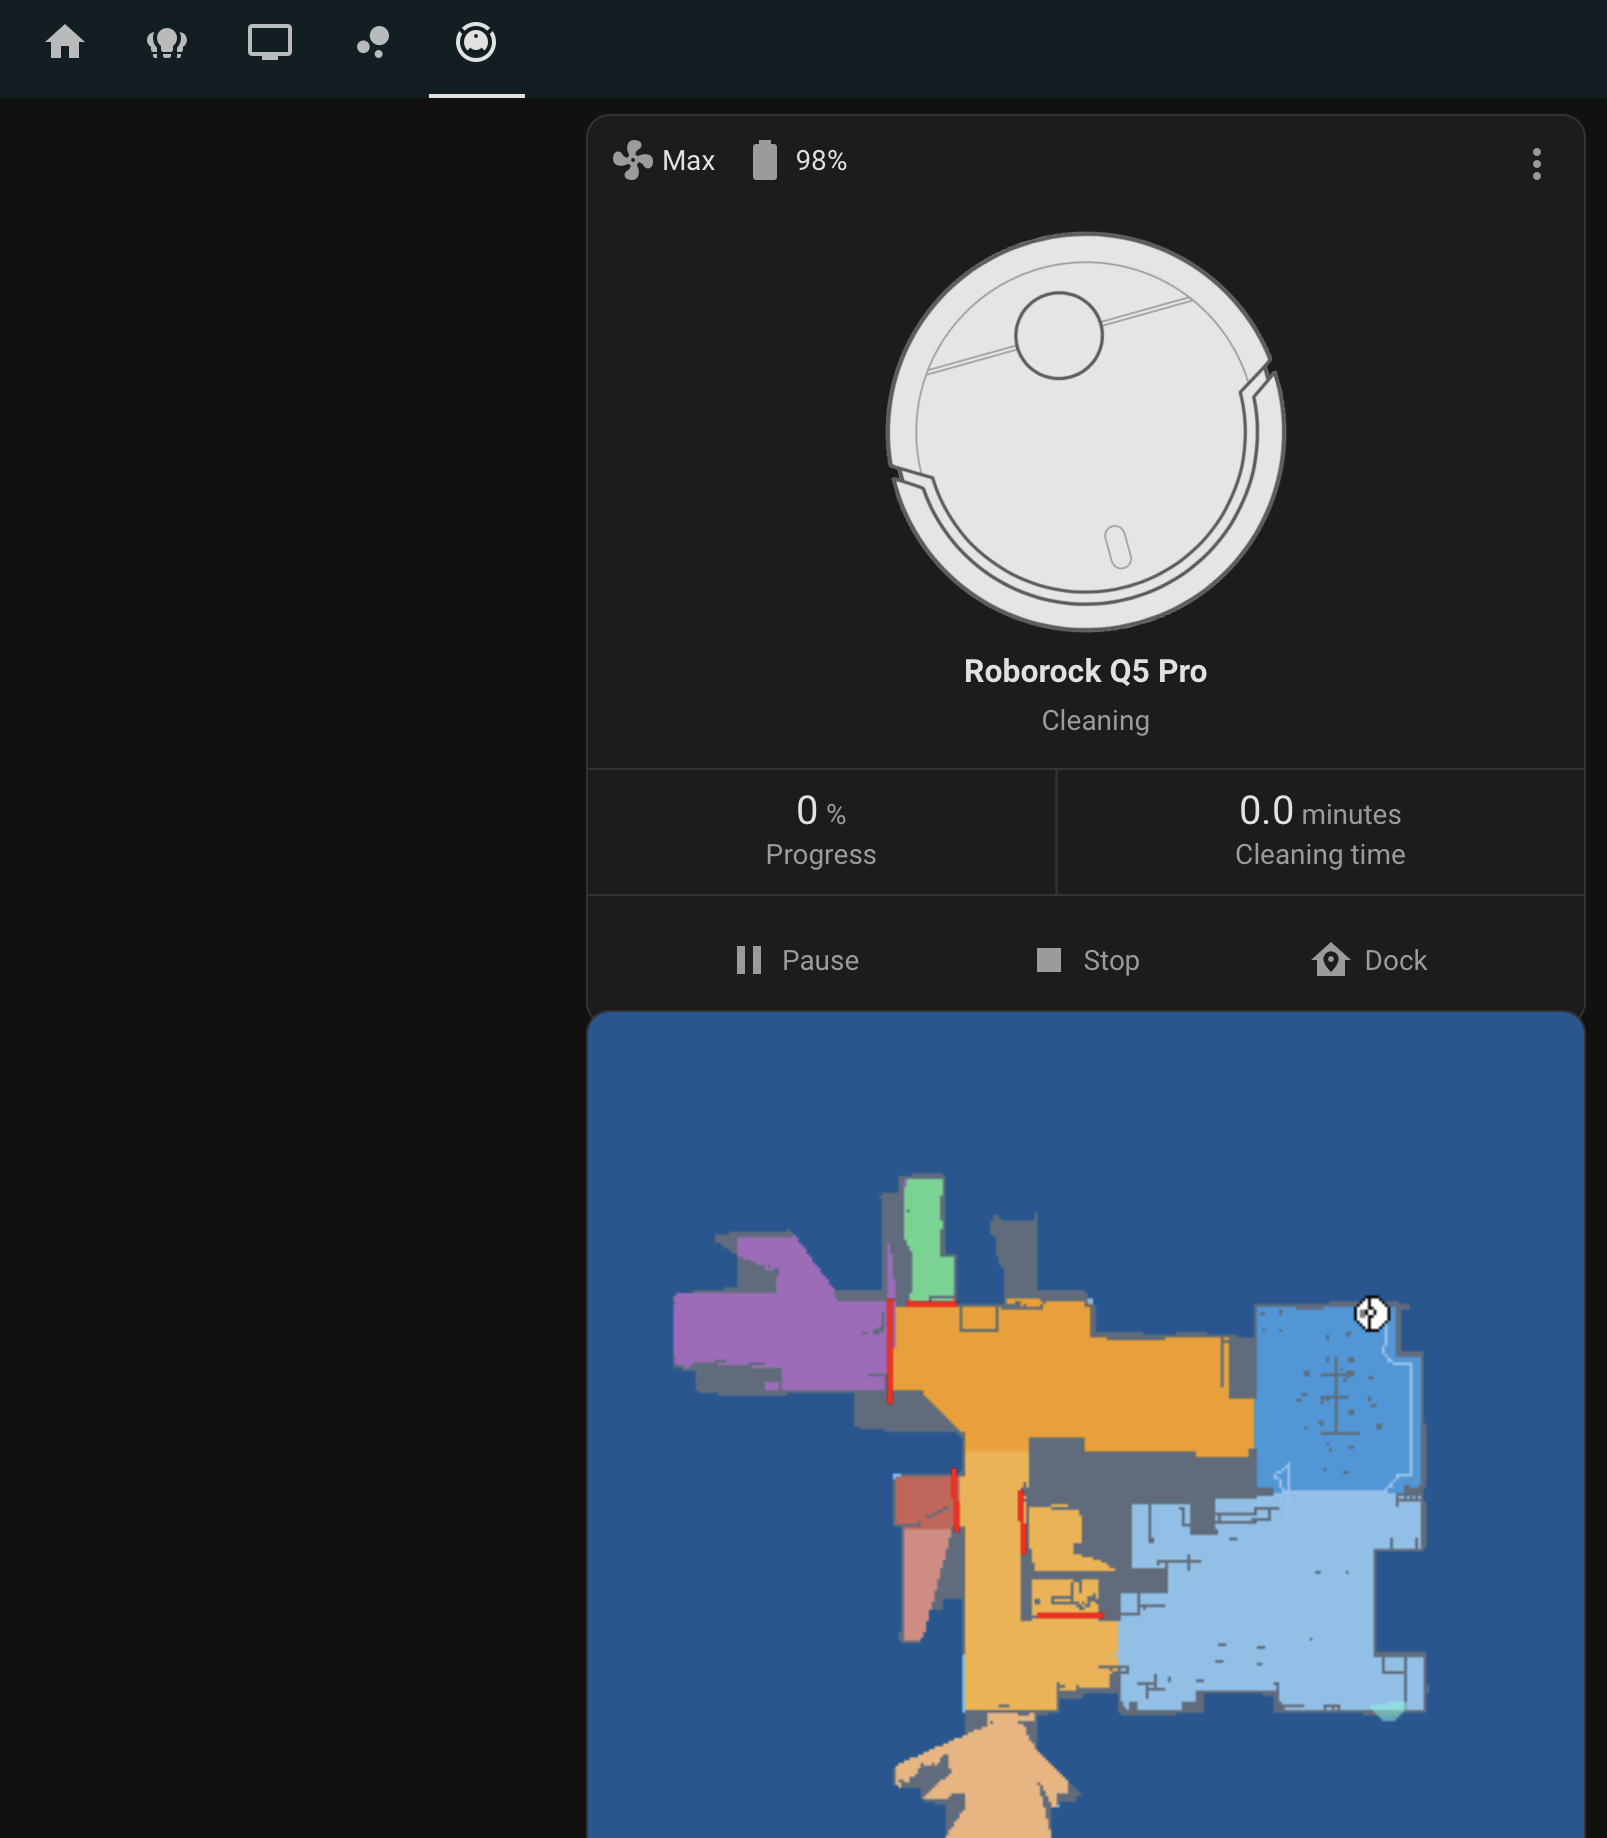
Worked this out with chatGPT, but a pretty easy way to display the selected/active map while vacuuming. Works well, especially if you have multiple floors. Only displays while cleaning, and updates to show cleaning path.
Step 1: Create a Template Sensor for the Dynamic Image URL
Add the following to your configuration.yaml to create a sensor that dynamically resolves the correct image URL based on the selected map:
yaml
template:
  - sensor:
      - name: "Roborock Current Map URL"
        state: >
          {% set selected_map = states('select.roborock_q5_pro_selected_map') | trim | lower %}
          {% if selected_map == 'main floor' %}
            {{ state_attr('image.roborock_q5_pro_main_floor', 'entity_picture') }}
          {% elif selected_map == 'basement' %}
            {{ state_attr('image.roborock_q5_pro_basement', 'entity_picture') }}
          {% elif selected_map == 'tv room' %}
            {{ state_attr('image.roborock_q5_pro_tv_room', 'entity_picture') }}
          {% elif selected_map == 'upstairs' %}
            {{ state_attr('image.roborock_q5_pro_upstairs', 'entity_picture') }}
          {% else %}
            /local/default_image.png
          {% endif %}
After saving, restart Home Assistant.
Step 2: Use the Template Sensor in the Generic Camera Integration
Now, configure the Generic Camera integration in the UI:
- Go to Settings > Devices & Services.
- Click + Add Integration and search for Generic Camera.
- Set up the integration with the following:
- Still Image URL: Reference the template sensor’s state in the format:
http://<your-home-assistant-url>{{ states('sensor.roborock_current_map_url') }}
Replace <your-home-assistant-url> with your Home Assistant instance’s base URL (e.g., http://192.168.1.100:8123).
- Content Type:
image/png.
Step 3: Update the Dashboard
Use the new camera entity (e.g., camera.roborock_current_map_camera) in your dashboard:
yaml
type: conditional
conditions:
  - entity: vacuum.roborock_q5_pro
    state: cleaning
card:
  type: picture-entity
  entity: camera.roborock_current_map_camera
  show_state: false
  show_name: false
  camera_view: auto