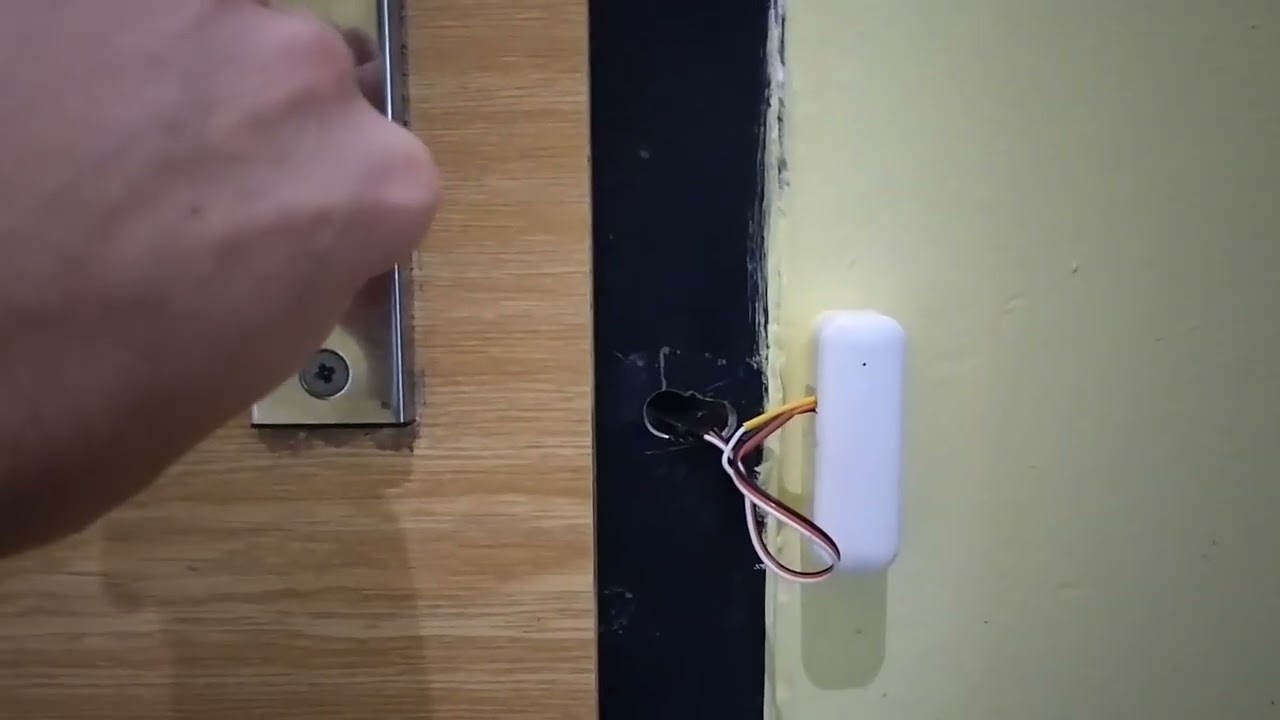
Door lock sensor for traditional key lock

So I’ve been looking for door lock sensors for a while now but nothing really suits my needs. I don’t want to use smart locks just yet as I feel like they are not secure enough right now.

I used a cheap Aqara door contact sensor and soldered a couple of wires with springs on the end to the reed switch inside, these springs sit in the strike plate and close the circuit when the deadbolt is inserted.

Luckily i have a pretty large cavity behind the strike plate so space wasnt an issue and the install was completly invisible too.

In home assistant I have changed the domain for the switch to be lock instead and it shows the correct state for “Locked” and “Unlocked”. For now I have my Google Nest Hub tell me the state of the lock, but I will be triggering notifications to the household if the house is empty and the door isnt locked.

Demo (with sound): VID_20210610_132235.mp4 - Google Drive

(Yes, i cut up an old bank card for my plastic inserts, I ended up taking the top insert out because there wasn’t enough space for the deadbolt to fully close.)

Cool idea. Well done.
Question, by any chance have a picture as to where you soldered those wires inside the aqara?

I was supposed to but got carried away whilst working on it!

Inside there is a reed switch that looks like a green glass tube with two metal legs on either end. You solder a wire to each end to bypass the switch. You can then attach springs like I did or add a micro switch, proximity switch or even another reed switch.

I am doing another for my back door so will post a photo soon.

Thanks! I will try, but would appreciate some photos on your second door lock sensor :slight_smile:

For me an ordinary push to close/open switch mounted behind the keep (with a hole that the plunger pokes through) has worked really well.

I tested with springs like OP but found it unreliable, was probably my install/ door etc

Moved to a Micro Switch today can tell a difference already will test for the next few days

Proper job. For reliability I would turn the micro switch the other way up. That way any debris that accumulates will not get stuck in the micro switch. Great effort.

How do you change the batteries in the in the aquara?

Reviving an old thread to add my solution to this as someone with a UPVC UK door with very little room in the keep side of the frame. Unlike many solutions that means I’m unable to fit a decent switch in there or extend the back to make more depth like on a wooden door.

I must have printed the 3d mount about 20 times before I got one that fit perfectly and didn’t obstruct the lock but this is my solution. Aqara contact sensor with the reed switch desoldered and re-placed on the mount. Magnet epoxy’d to end of bolt.

Goals for me are:

  • UK smart locks are still pretty poor and bulky, especially if you have a lift to lock multipoint system. I don’t need to lock the door, I just want to know it’s locked when out/going to bed.
  • Easy access to replace the battery in the device.
  • Longevity and reliability. Springs lose their “spring” and switches have finite lifespans (although we’d unlikely reach it).
  • No alterations to the door and the device must not be visible when the door is closed. You shouldn’t really know it’s there. So battery powered and no cables/boxes sticking out from the door frame.
  • No magnets drilled into the locking bolt. I don’t think my home insurance would think much of weakening the bolt.

Been running a few months now and very reliable. Time will tell but as there’s no parts to wear apart from the battery I’m not expecting any failures. Since I already have a 3D printer total cost was about a tenner. There’s a couple small tweaks to the mount that I’ll do before fitting the frontdoor one.

Neat! Would you share the 3D print file? You have my exact use case - uPVC door without much space. I’ve been trying to get a working sensor for this stubborn door for years!

Enjoy! Aqara contact door lock sensor by burg93 - Thingiverse

Thank you!

Hi, I like your idea. Could you tell me what the 2 blue wires are for?

"Desolder the reed sensor from the board, place it within the sheath on the 3d print and solder the ends back via cables. "

Here is my DIY solution, maybe it helps someone.

DIY Zigbee door lock sensor using external Hall sensor + magnets

I’d like to share my solution for detecting the locked state of a traditional key lock using a cheap Zigbee door sensor.

I was looking for a simple and reliable way to detect whether the lock bolt is extended (locked), without replacing the whole lock with a smart one.


Hardware used

  • Zigbee door/window sensor (AliExpress):
  • External Hall sensor (44E):
  • Small neodymium magnets
  • Epoxy (metal repair type)
  • Hot glue gun

Concept

Instead of using the original built-in sensor, I replaced it with an external Hall sensor and placed magnets directly into the lock bolt.

This allows detecting the actual position of the bolt – not just whether the door is closed.


Steps

1. Modify the Zigbee sensor

I opened the Zigbee sensor and desoldered the original Hall sensor.

Then I soldered wires and connected the 44E Hall sensor externally, so it can be placed anywhere.


2. Install the Hall sensor

I fixed the Hall sensor inside the door frame (futer) using hot glue, aligned with the path of the lock bolt.

Positioning is important – a few millimeters make a difference.


3. Modify the lock bolt

I removed the lock and:

  • cut a small slot into the bolt
  • inserted multiple neodymium magnets
  • fixed them using epoxy (metal repair glue)

Important:

  • All magnets must have the same polarity/orientation
  • Otherwise the Hall sensor will behave inconsistently

4. Multi-turn lock detection

By placing magnets along the bolt, the system works for:

  • unlocked
  • locked (1 turn)
  • locked (2 turns)

So even with multiple turns of the key, detection still works reliably.


Result

  • Fully hidden solution
  • Works with standard mechanical locks
  • Detects actual lock state (not just door open/close)
  • Very cheap and simple

I also recorded a short video where you can see the lock being turned and the Zigbee sensor reacting (LED blinking).


Tips

  • Test magnet polarity before gluing
  • Use strong magnets (weak ones won’t trigger reliably)
  • Epoxy is much better than standard glue for metal
  • Precise alignment is critical

If anyone is trying to detect lock state without installing a smart lock, this worked really well for me.