Get ready to start building: The ESPHome Starter Kit is here! - ESPHome - Smart Home Made Simple

Back in April during State of the Open Home 2026, we gave you a sneak peek of ESPHome’s very first official product… And after months of hard work alongside the community, the ESPHome Starter Kit is here! 🎉

Designed and produced by Apollo Automation, the Open Home Foundation’s second commercial partner, the kit is the easiest way to start building your own smart home devices. Affordable and packed with all the components you need, the Starter Kit invites everyone, not just seasoned tinkerers, to begin building.
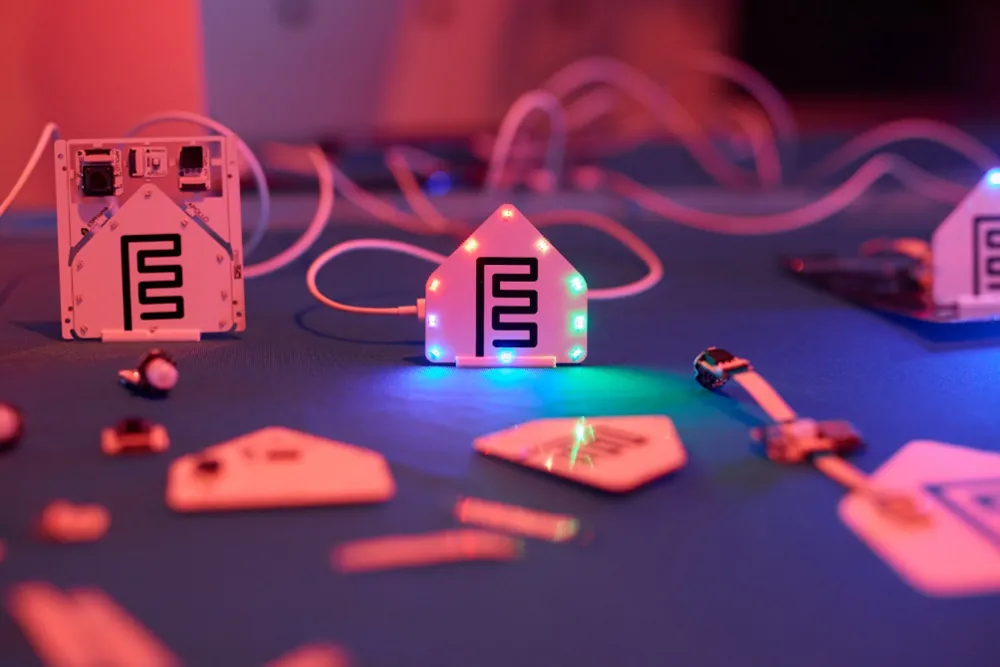
A tiny house for big ideas.

Ever wanted to build your own smart home device, but didn’t know where to begin? Between chips, pins, soldering irons, and breadboards – sourcing the right hardware can stop a project getting off the ground. Not to mention time spent ensuring the parts are compatible, and working out how to wire them together.

That’s where the Starter Kit comes in. With no soldering, breadboarding, or coding experience needed, the kit equips you with all you need to stop just using smart home tech, and start creating it.
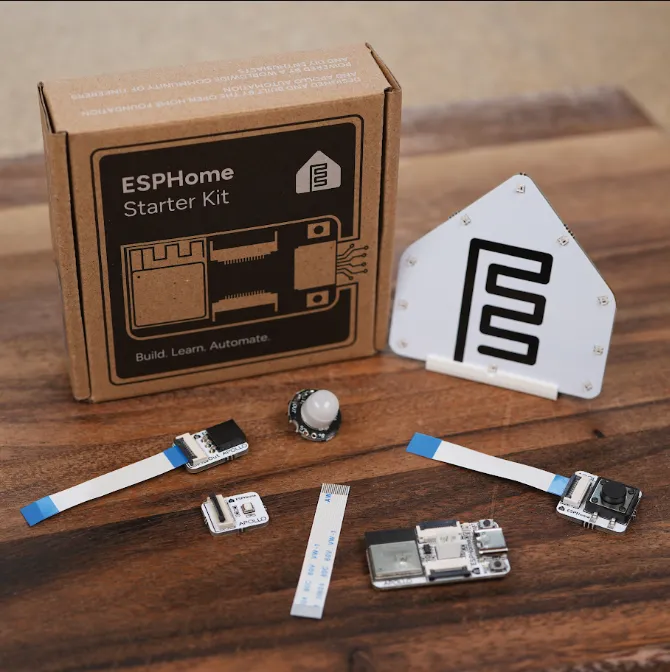
A box packed with possibilities.

The ESPHome Starter Kit arrives with four modules to build with:

  1. Motion sensor – to detect movement, making a perfect first automation
  2. Temperature and humidity sensor – to reliably track a room’s comfort level
  3. Notification module – to provide alerts via a buzzer and ten individually controllable RGB LEDs that glow through the ESPHome logo
  4. Button module – to trigger any automation you like

Powering it all is an ESP32-C6 microcontroller, which, for anyone new to electronics, is the programmable chip that acts as the “brain” of your project. ESPHome builds the software that runs on this chip, letting it control the four modules and talk to Home Assistant or any other smart home platform that supports it.

You’ll also find everything you need to put it all together: the flat ribbon cables that connect each module to the board (with a spare in the box, so you’re covered if one goes astray), and a stand to show off the notification module and its glowing ESPHome logo. It runs on a standard USB-C cable, and uses the same open standards as the rest of your smart home, so there’s nothing special to buy before you get started: it works with your existing Home Assistant setup straight out of the box.

The kit arrives with a snap-apart panel, with each module attached by small breakaway tabs. Instead of soldering joints and wiring breadboards, you simply snap a module off the panel and connect it to the main board via the flat ribbon cable.
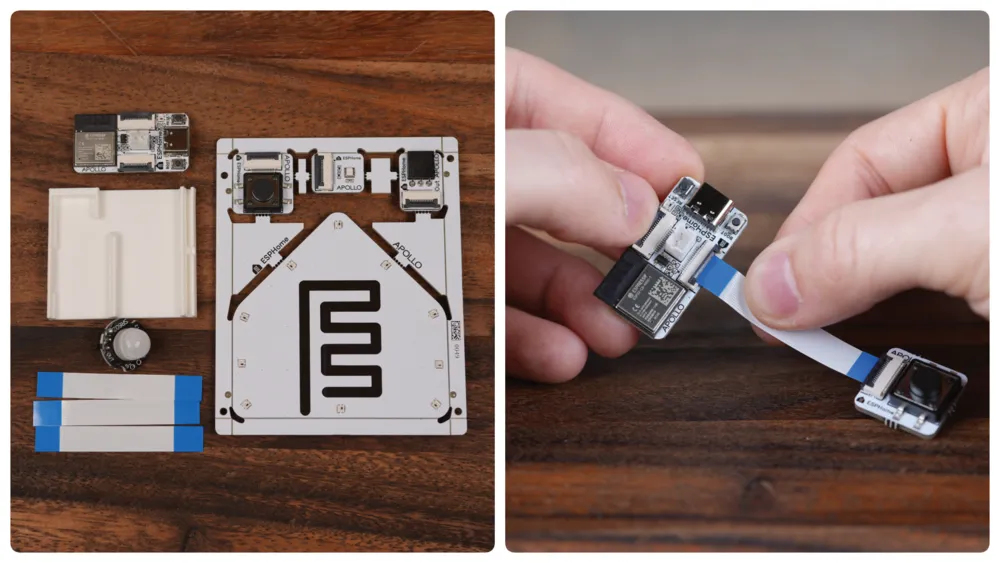
The kit’s pieces (left) and how they come together.

And because every module connects the same way, they’re completely interchangeable: pop one off, snap the next one on, install new software on your ESP microcontroller, and you’ve got a different device.

This kit is designed to be experimented with. You can reconfigure it as your ideas grow, and adapt it as you learn, so the same hardware carries you from your very first project to your tenth. Each build works as a standalone device right away, and if you find yourself ready to explore more complex automations, it drops straight into Home Assistant.

Most learning kits end up the same way: forgotten in a drawer. But Apollo Automation co-founders Trevor Schirmer and Justin Bunton had other ideas: they wanted to create something sustainable that helped more people experience the joy of building, and left them with devices that remained useful long after the basics had clicked.

That’s why every module in the ESPHome Starter Kit becomes a custom, working smart home device: the kind you can’t buy off the shelf. Shaped by you to fit your home and habits, each device becomes yours in every sense – run locally with no cloud dependency, so your data stays in your home instead of on someone else’s server. And it’s easier than you might think…

One of the core requirements for the kit was that you had something useful at the end. One of the foundation’s principles is sustainability. So, this isn’t something that you just buy, learn, and then put in a drawer or the trash never to be seen again. You can make real usable products out of this at the end. … For example, you could use the motion module to turn on the lights when somebody walks into your room, or you could use the ESPHome-shaped LEDs to turn red when you’re in a meeting, letting others in your home know…

— Trevor Schirmer, Co-Founder of Apollo Automation

The Starter Kit comes with two tools that guide you every step of the way, from your very first setup to your most ambitious projects.

The first is the Learning Wiki: more than assembly instructions, it explains the why behind each step, showing how your components connect to the code that runs them. This means you’re not just following a recipe – you’re picking up the fundamentals of electronics and device building, one project at a time. By the end, you’ll have the skills and the confidence to take on bigger builds of your own.

The second is our ESPHome Device Builder, recently updated to help make ESPHome more approachable for all – no matter if you’ve been with us for years or if this is the first time you hear about ESPHome. Its intuitive interface lets you configure everything without writing a line of code, though the YAML’s always there underneath, should you want it.

Best of all, it runs right on your desktop through our app, so you can start building with whatever you already have. And once you’ve nailed the basics, you can still use the Device Builder to help you go further – whatever you decide to build next.

As its name suggests, the Starter Kit is just the beginning. Once you’ve made your modules, you can connect them to just about any automation you like – for example:

  • Set your button to close the blinds: Press the button and your blinds glide shut, no hunting for a remote. Perfect for movie nights or shutting out the afternoon glare.
  • Set your motion sensor to detect visitors: Place it by the front door or driveway and be notified the moment it senses movement, so you’re never caught off guard.
  • Set your temperature monitor to manage the heating: Choose your ideal range and let the sensor keep watch, adjusting automatically if a room gets too warm or cool.

The possibilities are almost endless, with plenty more to discover as your ideas grow, and a community of experienced ESPHome users to talk to for inspiration.

On the subject of community, half the fun of building something is sharing it with others. When you start using the kit, you join thousands of other makers using ESPHome. Come say hello on the ESPHome Discord server to swap ideas and show off what you’ve built, or drop into our ESPHome forum to ask questions and find your feet. And if you have thoughts about what Apollo Automation should build next, you can share them on the Apollo Automation Discord server!

Keen to get your kit? Head to the ESPHome Starter Kit site to grab your gear today. The majority of profit from every kit goes straight to the Open Home Foundation, meaning every purchase helps fund the future of ESPHome, Home Assistant, and Music Assistant, and the other projects working to make smart home tech accessible to all. We can’t wait to see what you create!


This is a companion discussion topic for the original entry at https://esphome.io/blog/2026/08/12/the-esphome-starter-kit-is-here/
11 Likes

I understand that creating hardware for the masses is super complicated, so congratulations on this piece of hardware.

That price is just too much. I see the quality in the pictures and I assume that the margin benefit is not the issue, it’s just difficult to lower the price. However, 40$ is expensive for the components you get.

I see the simplicity of the FPC, but 16 pins per component when majority of them will take just 3-5 pins… Perhaps I’m missing the full picture here.

I think m5stack and others similar were already in the market and yeah, more choice, but I don’t see the real value here.

When I started, I had no idea about soldering, and Dupont cables was all I needed. Possibilities are just infinite and you don’t need to be an expert to create small or big things with components that are already in the market.

In my opinion this is a perfect piece of hardware to try esphome as a software, but very limited to understand anything about hardware or more powerful stuff, and super expensive to expand to something useful for the use cases that the people that is learning could have. I don’t know, a toy they can play with and then forgetting (I hope to be wrong on this).

Again, I see the effort on this, and I hope it can bring more people to the esphome ecosystem, but I think I’m missing something with this one.

1 Like

You are missing the fact you are not a beginner and have already explored a ton, clearly. This isn’t for you.

5 Likes

Agree. But my thoughts was more thinking on beginners, as I have exposed. I was a beginner once…

But you’re probably right, perhaps my perception is already contaminated.

3 Likes

Thanks for taking the time to write this out. This is exactly the kind of feedback we want! We build in the open on our Apollo Discord, so feel free to hop over there if you would like to be a part of the development process!

The kit is aimed at beginners, and we tried to remove as many “why isn’t this working” moments as possible for someone’s first time with ESPHome. However, there is something here for experienced folks too! The ESPHome Casita LED and buzzer module is a fun build and makes for fun desk swag.

As for the 14 pins, that was intentional and for future proofing. It lets you connect just about any sensor out there, gives you multiple power pins for battery and deep sleep setups, and keeps everything backwards compatible (less e-waste or stuff in drawers) with the module packs and sensors we have coming. More pins means room for more advanced sensors, e-paper and OLED screens, and things we haven’t built yet. Also, the FPC cable is very simple and eliminates any accidental wrong pin placement.

A starter kit was always the start, with more advanced kits and eventually full sensor build kits after it. We have a “What’s Next” survey with the Open Home Foundation right now so the community can tell us what to build next, so please take it: ESPHome Starter Kit - What's Next?

The forgetting/drawer problem is something we thought about a lot. The goal is that you finish with two sensors you’ll actually use in your smart home, standalone or connected to Home Assistant.

We know we won’t be the right fit for everyone, especially folks already comfortable with breadboards and Dupont cables. BUT we’re hoping this lowers the barrier of entry for newcomers to ESPHome, and we plan to keep growing with them, as well as help grow ESPHome!

Hope this helps answer some questions, and thanks again for the honest feedback!

3 Likes

Say Hi to all the esphome guys over on discord for us, I haven’t started a new project since they left

Yeah, my first thought was that seemed expensive. But, when first starting out one needs someone (or some thing) to hold your hand along the way and that is worth something. My first few Raspberry Pis were full-blown kits as it was too much work to figure out what were the correct components.

Once the kit users pass the complete beginner stage then what? Is there an upgrade path? Will you have a kit with Dupont cables and a few breadboards that can integrate with the parts from this kit?

It’s just not that advanced to press an esp32 dev board onto a breadboard and use the Dupont cables. A kit like that with a relay board, reed switch, Dallas temp sensor, PIR and/or LD2450 and a CC1101 would be an amazing starter kit. Heck, with enough Dupont Y-cables you don’t even need a breadboard. (I have a bunch of “production” things built that way…)

I hope the kit does well and it helps people move into using ESPHome. I sometimes feel like we underestimate new users a bit. Once you are ready to dive into ESPHome I don’t think the breadboard and Dupont cables are the blocking issue. And AI has gotten really good at buidling out ESPHome YAML and showing pinouts, so the “coding” part isn’t a big block, either.

I’m no advanced ESPHome user. I have about 25 devices deployed. Hardest part for me is finding a project box to stuff all the components into and having connectors to get in and out of the box.

Please let us know how it goes.

1 Like

A 3D printer will change your life… :laughing:

2 Likes

Great gift for someone you want to tip over the edge to come with you on your ESPHome death spiral involving flashing your fruit and vegetables with custom firmware you control.

2 Likes

There’s already an accessory breakout module that includes Dupont headers as well as a few other connector types that are pre-routed to connect to the correct GPIO via the FPC connection. Included among those connectors is the same TRS-style jack that works with the Dallas-based probes Apollo already offers for their TEMP-1 and PLT-1 devices.

That said, there are relatively few GPIO exposed via the FPC, so even with the breakout module it’s not going to be the best option for every project you could ever think of… but remember, it’s a “Starter” kit.

That looks pretty nice. Might be worth trying – especially if its easily expandable.

I mean, I really need to find a better way than my hack wiring I just did...

Doesn’t look so terrible, just keep esp/rf wiring distanced from relay and buck converter.

Hi :slight_smile: I really love the idea of a beginners kit, and i like the overall selection of “building blocks”. And for what it is I also find the price really okay. Nobody is going to keep buying set after set after set to extend their smarthome, and as a one-off entry point package i find the pricing fair.

About the beginner aspect: which “types” of beginners do you see as your main “target groups”? I could think of various ones, and depending on who you are aiming for my additional feedback would be different as well.

  • Kids who get to build their first own smarthome thing?
  • non-techies that used one-click-install devices so far?
  • experienced software people that never played around with the hardware side of things?
  • …?

I understand that you have that ONE group in mind, but i would guess you have an idea of the most likely buyers/users, right? Would be curious to hear :slight_smile:

I hope this thing will sell like sliced bread :slight_smile:
Cheers!

@ApolloAutomation maybe make adapter modules to connect to other educational electronic learning component kits for kids, like for Microbit (BBC micro:bit) and LittleBits that are common in schools and STEM courses for young/beginners and STEAM education for slightly older students classes and some maker space training?

Different beginner-friendly physical sets of modular electronics with microcontrollers that snap-together using pogo-pins and magnets or other connectors. Usually with no-code options when starting out.

Thanks for the nice comment!

The main goal was to make ESPHome more approachable by making it easier to get started learning to build your own devices. It can be hard to start as someone new, not knowing what parts to buy, what guide to follow, what level to start at. The Starter Kit is supposed to help solve that as a set place for people to start. It wasn’t kid focused but kids and parents can use the kit to learn. So I don’t think it was as granular as the list you gave, I think all of those could have fun and learn with the kit. We are very interested in education kits for schools so if anyone has insight there we would love to talk!

Thanks again! If you have any ideas for future ESPHome products please please let us know!

-Trevor

Great idea! Thanks! I don’t have those kits but something we can check out!

-Trevor

Yes please do consider buying kits from all those other ecosystems to see if you can make and sell bridging modular adapters for them (many of them also already have bridge adapter modules for other ecosystems too).

Personally I really like the LittleBits “bits”, though also plan to buy a kit for Micro-bit since learned they are good to be using them in my kids school next year.

  • LittleBits have “bits” thqt use pogo-pins plus magnets with modular components that snap-together like Lego and they are more focused on the physical electronics than on the programming part, so perfect for younger kids, but they are relatively on the expensive side and today seems to be primarily focused on selling larger education kits to schools then smaller kits directly to home users. There is an official LittleBits adapter module for the Microbit.

  • Microbit (BBC micro:bit) on the other hand is mostly focused on programming and more or less make use of standard Arduino electronic, however there are also many different custom made kits from third-parties which include everything needed to build something specific.

  • Snap Circuits (which are somewhat similar LittleBits) uses plastic modular base grids and snap-together colored blocks to teach basic circuitry safely without needing code. They do have specialized Snap Circuits micro:bit integration kits to bridge physical snap blocks with micro:bit programming.

  • Chibitronics use conductive tapes, stickers, and paper circuits to make paper-thin, craft-based electronics and lights.

  • Piicodev / CrowPi / Grove ecosystems @ApolloAutomation as you probably already know (with the Home Assistant Voice Preview Edition having a Grove port), those are popular moduler sensor plug-and-play systems that use the same standard cable connectors instead of soldering or messy breadboard wiring, plugging easily into micro:bits, Raspberry Pi and Raspberry Pi Pico GPIO, or Arduinos.

If you want to make the modulars compatible with the Home Assistant Voice Preview Edition then at least look into making a Grove bridge adapter or the vice versa?

Got it :slight_smile: Then let me just list a few things in no particular order:

  • the FPC cables might become an issue for kids under a certain age. Especially with something as simple as a button kids could be super creative in where to put it (or which type of button to connect, like mechanical door contacts, …), but the FPC might need help of an adult, could break easily, and cannot just be extended with any kind of wire laying around. Example: my model toy train when I was a kid came with spring-loaded connectors where I could just shove anything in myself. I couldnt find the exact same ones, but e.g. the ones used for speakers are a good example (https://hubtronics.in/2-way-spring-loaded-terminal-conntector). The ones used in professional electronics on the other side are usually way harder to press and rather small.
  • slightly related, but not specific for kids: with the starter kit as it comes in the box I think it’s not possible to have the button in front of or at least left/right of the buzzer/LED module, right? (FPC bending radius…?)
  • and slightly related to that: you could offer longer FPC cables :slight_smile: (or recommend a maximum length people should buy when they search somewhere else)
  • do you have 3d files/models of the led/buzzer board and the esp32 module? I saw that you have a housing file in the wiki, but for people who want to build their own holders/housings it would be awesome to have models of the modules to “build around”.
  • I have to admit I didn’t read every single line of the wiki (or other resources around it), so this might be covered somewhere already: I would find it helpful to specifically highlight the difference in the approach between “esphome listens to the button and does something on the same device” and “esphome only exposes button, LED etc to HA and the logic part happens there”. HA Integration - Apollo Docs goes in the right direction, but especially for people new to software principles a little “nudge” might be helpful :slight_smile:

That’s it for now, will add more when things pop up :slight_smile:

1 Like

LED/Buzzer board

ESP32 board

1 Like

Nice, thanks!