Introduction
In this guide, I will show you how to template a RGB+CCT light, so that the template light can be used to set brightness, colour, colour temperature, and also correctly show the current state of the light. If you, like me, are having difficulties templating a RGB+CCT light, I hope this guide will be of use.
Background
The ‘issue’ I was dealing with was simple enough: one of my lights had a very large range for colour temperature (from 1000K all the way up to 20000K), which is a cool feature to have, but it also made it harder to pick the desired colour temperature using the slider, and hard to accurately determine what the light was currently set to. The solution seemed simple enough: template the light and limit the template to a range of 2000K up to 6535K.
I quickly ran into an issue: setting the colour temperature of the real light using the template was simple enough, but setting the colour temperature of the template light so it reflects that of the real light? That turned out to be much harder than expected.
Guide
In this guide I will be referring to the real light as light.real, and to the template light as light.template. So to be clear:
light.real= the real light, the actual physical light, not the templatelight.template= the template, a helper, not the physical light
You will need to replace light.real with the device id of your real light. You are free to name the template to whatever you wish.
In addition, it should be noted that I’m running home assistant 2026.4.1 with the " Purpose-specific automation triggers & conditions" feature in Home Assistant Labs enabled. Things may look slightly different if you are using a different version or do not have the feature enabled.
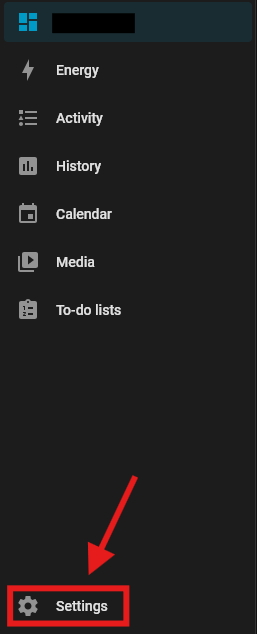
- First we go to Settings
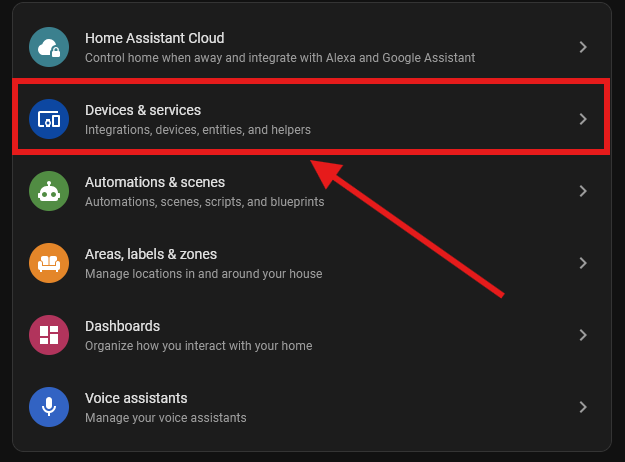
- Next we click “Devices & services”
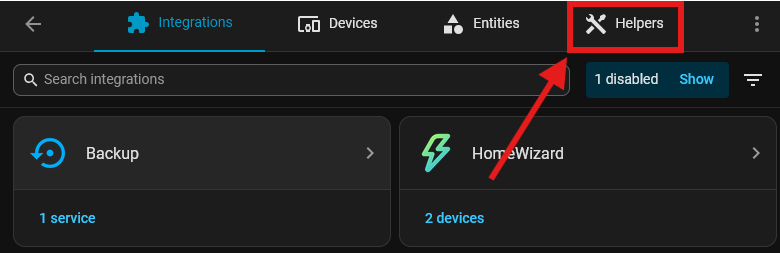
- Next click on “Helpers” (depending on your window/screen size, this could be located on the bottom).
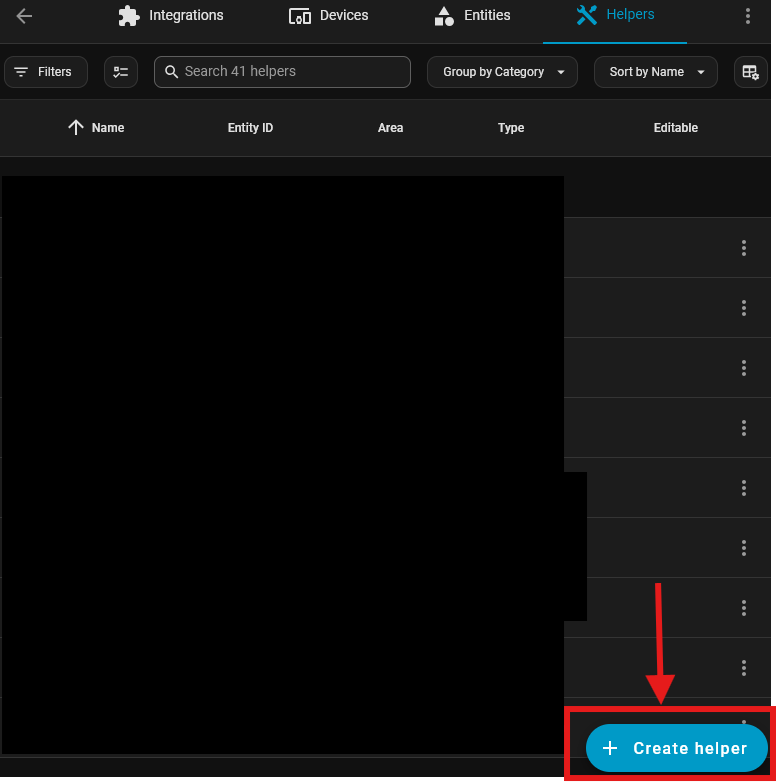
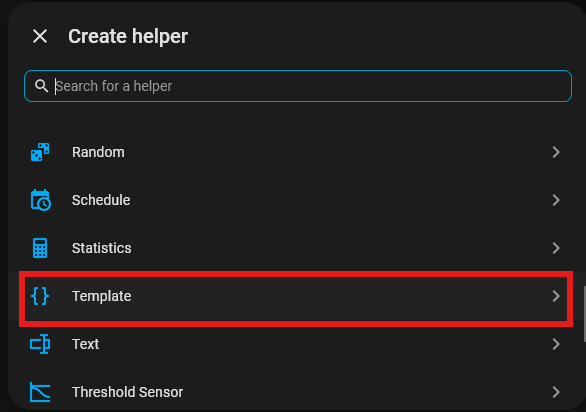
- Press “Create helper”.
- Pick the “Template” option.
- Pick the “Light” option.
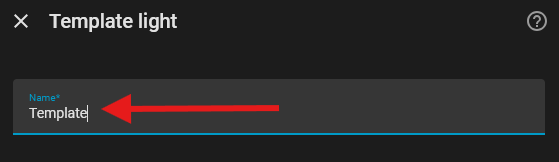
- Enter the name for your template light. In this example, we entered “template” so the id will be
light.template, but you are free to pick whatever name.
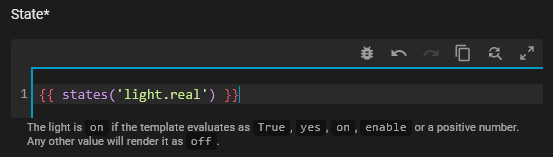
- For state, we enter
{{ states('light.real') }}. Replace light.real with the ID of your real light.
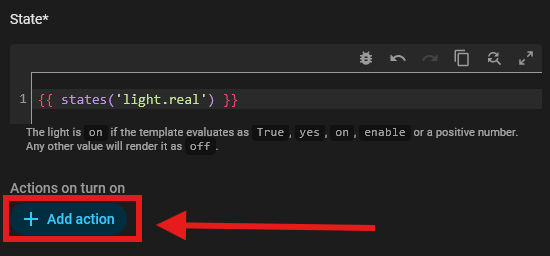
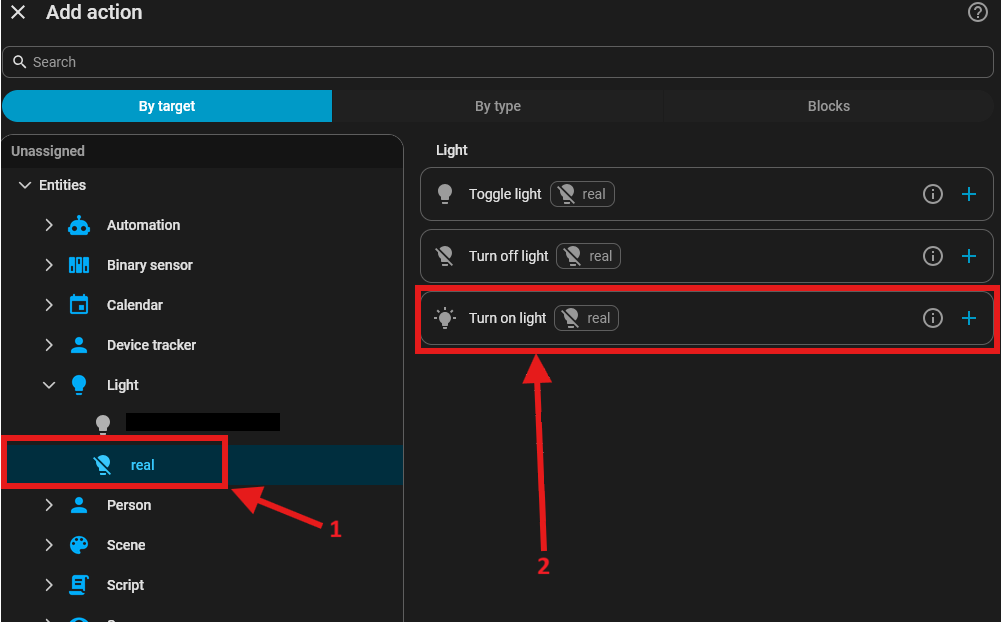
- Next we will add an action that will trigger when we turn on the template light. Press “Add action” below “Actions to turn on”
- Search for your real light, and select the “Turn on light” option. Depending on whether you assigned an area for the light or not, yours may be in a different location. If you assigned an area to your real light, check that area first to see if you can find it there. If you did not assign an area, you will likely find it in the “Unassigned” section as shown in this example. Off course this assumes that you have the " Purpose-specific automation triggers & conditions" enabled.
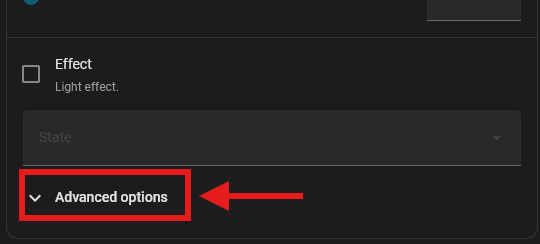
- Next scroll down until you find “Advanced options” and click it so the advanced options are expanded.
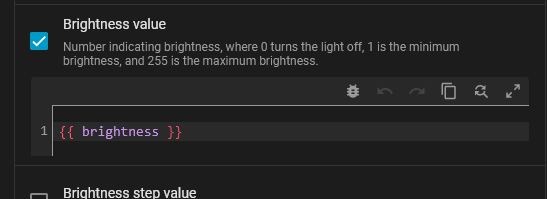
- Scroll down until you see the option “Brightness value”. Check the box and enter a random value - it is not important what value you pick, as it is a dummy value and we will be changing this in the next steps.
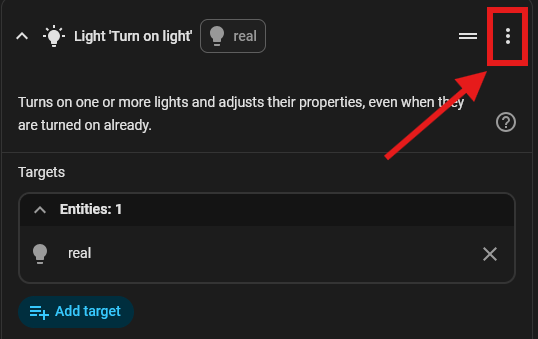
- Scroll alllllllll the way back up and press the three dots.
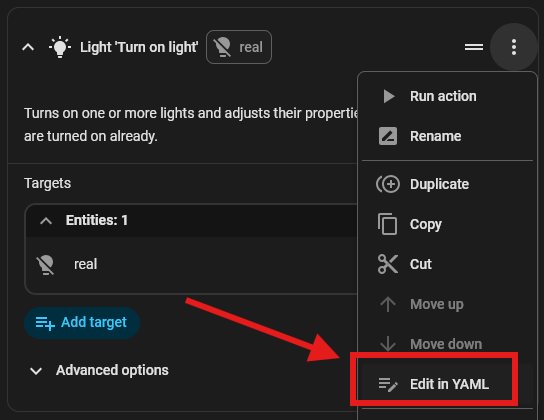
- Next, click “Edit in YAML”.
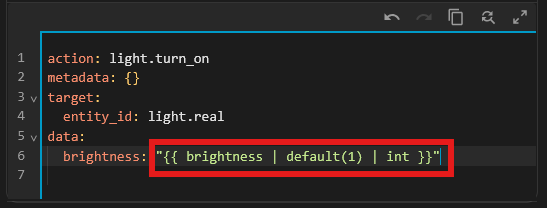
- Replace the value in step 12 with the following:
"{{ brightness | default(1) | int }}". By doing this, if the light is turned on by using the brightness slider, it will set it to the desired brightness. If no brightness is set and the light is turned on in a different manner, it will default to 1 - the lowest brightness. You can replace default(1) with any number between 1 (lowest) and 254 (highest) if you want it to default to another value.
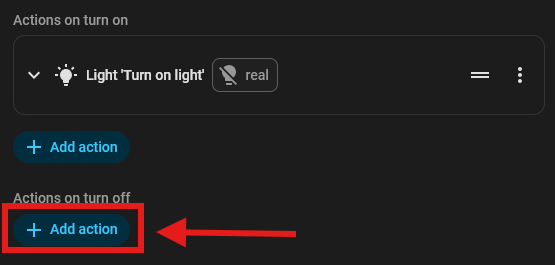
- Next we will add an action that will trigger when we turn OFF the template light. Press “Add action” below “Actions to turn off”.
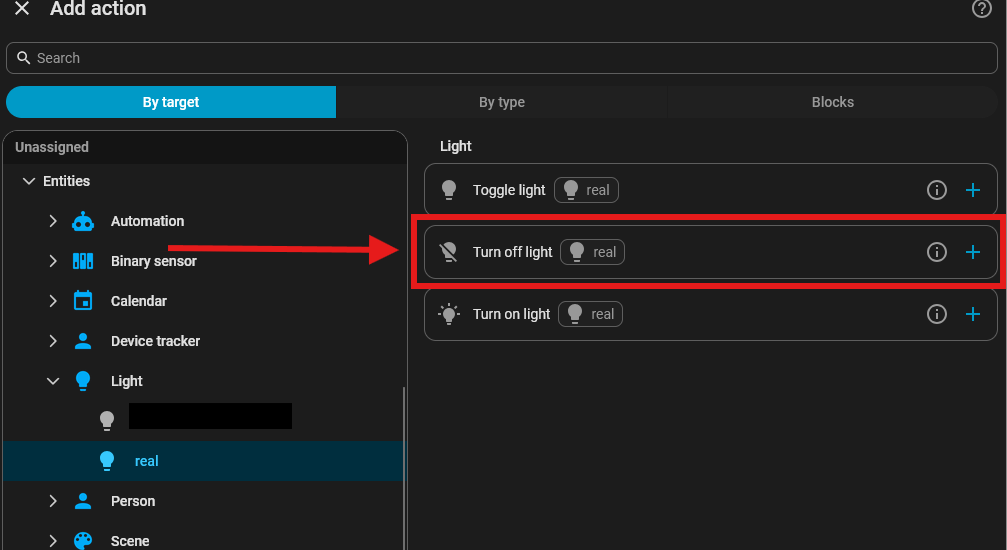
- Similar to step 10, we search for the real light, but now we pick the “Turn off light” option instead.
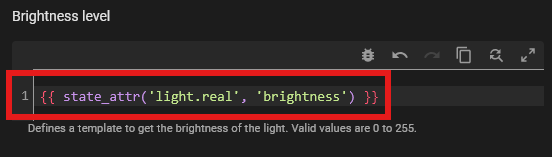
- Next, we need to make sure that the template light shows the brightness the real light is set to. Enter
{{ state_attr('light.real', 'brightness') }}in the text box located under “Brightness level”. Make sure to replacelight.realwith the ID of your real light.
- Next we will add an action that changes the brightness of the real light if we change the brightness of the template light. Press “Add action” below “Actions on set level”.
- Next, repeat steps 10 to 14, and replace the dummy value for brightness with
"{{ brightness }}". If you did it correctly and you switch back to “Edit in Visual editor” (see steps 13 and 14 but click visual editor instead), you should see the following:
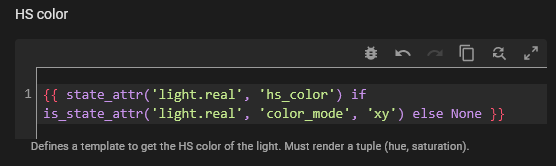
- Next, in the text box below “HS color” we enter
{{ state_attr('light.real', 'hs_color') if is_state_attr('light.real', 'color_mode', 'xy') else None }}. You may need to replace ‘xy’ by ‘hs’ depending on your light. Alternatively, you can enter{{ state_attr('light.real', 'hs_color') if is_state_attr('light.real', 'color_mode', 'xy') or is_state_attr('light.real', 'color_mode', 'hs') else None }}which should work for both, but I have not tested this to verify it works. This step is critical to making sure colour temperature display works. Without checking for the colour mode of the real light, home assistant will always default to hs colour mode for the template light, which breaks colour temperature display for our template light.
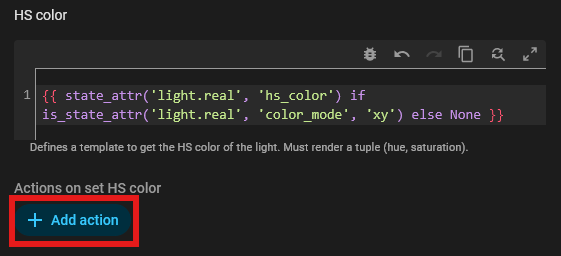
- Now we will pick an action that triggers when we set a colour for the light. Press “Add action” below “Actions on set HS color”.
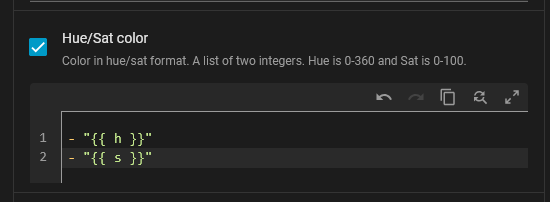
- Repeat steps 10 and 11, then scroll down until you find “Hue/Sat color”. In the text box below it, enter
- "{{ h }}"
- "{{ s }}"
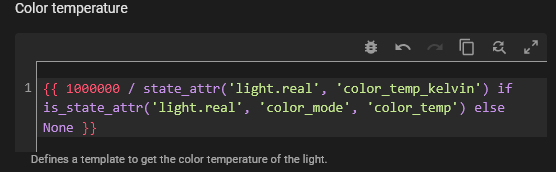
- Next we will set up colour temperature display for our template light. Below “Color temperature” enter
{{ 1000000 / state_attr('light.real', 'color_temp_kelvin') if is_state_attr('light.real', 'color_mode', 'color_temp') else None }}. This is the second ‘magical ingredient’ (step 21 being the first) to making sure colour and colour temperature work correctly. Home assistant is expecting a value in mireds, which is why we have to divide 1000000 by the colour temperature in kelvin. Similar to step 21, we check the color mode of the real light to make sure Color temperature gets set to ‘None’ for color modes other than ‘color_temp’.
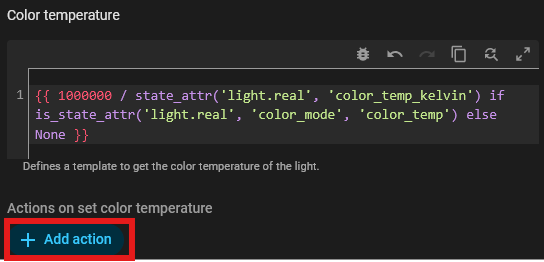
- Next, we will make sure that changing the colour temperature of the template light also changes the colour temperature of the real light. To do this we click “Add action” below “Actions on set color temperature”.
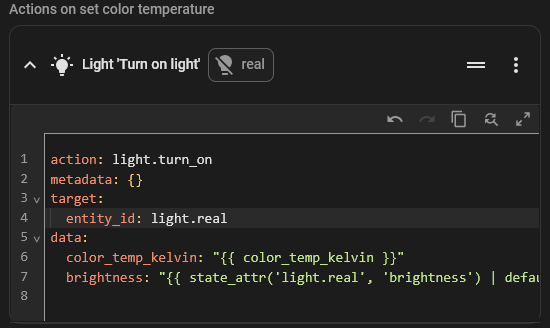
- Repeat steps 10 to 12, then make sure to check the box next to “Color temperature” and set a dummy value, then repeat steps 13 and 14. Next, replace the dummy value for “color_temp_kelvin” with
"{{ color_temp_kelvin }}"and the dummy value for “brightness” with"{{ state_attr('light.real', 'brightness') | default(1, true) | int }}". If you want to limit the colour temperature to 2000 and 6535, replace the dummy value for “color_temp_kelvin” with"{{ [2000, [6535, color_temp_kelvin | int] | min] | max }}"instead.
- We are almost done, but the final step is without a doubt the hardest. Pray to whichever god (or anything else really) you fancy, and press “Submit”. Sacrifices are optional.


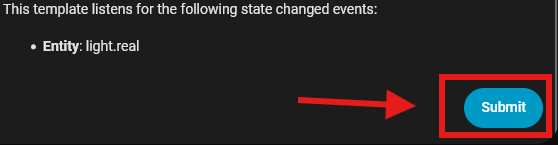
And you’re done!!! Congratulations!
Acknowledgements
I would to thank the home assistant users in the topic Light template, color temperature for helping me to discover why I couldn’t manage to set a color temperature using my template light.
I would also like to thank this discord post that helped me in figuring out that the colour temperature should be set in mireds, and how to do the conversion.
Closing thoughts
I hoped this guide proved useful to you, and that it helped you with creating a working template light. For me, it proved a frustrating journey that took many hours, and I hoped this guide spared you from this. All in all, I think templating a light this way is much more complicated then it should be, and I hope future versions of home assistant make this easier. In the meantime, hopefully this guide helps.