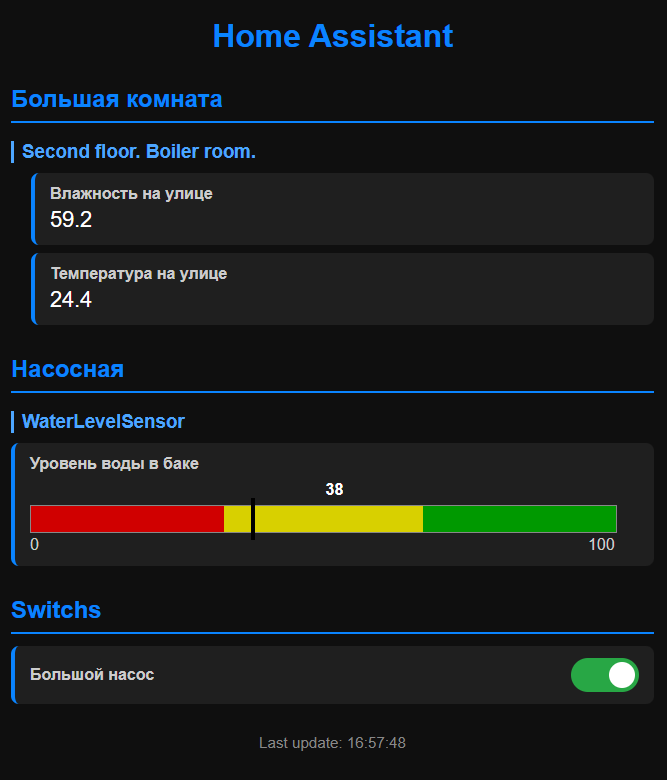
Hello everyone! I wanted to use my iPad 2 to display data from Home Assistant, but I couldn’t find an easy way to do it. So, I created my own solution called HASFOB (Home Assistant Service for Old Browsers).
It is a lightweight service that connects to your Home Assistant server via a long-lived access token, fetches data from specified sensors, and renders it on a simple web page.
Source Code (GitHub): GitHub - FaceHoof/HASFOB: Lightweight .NET 8 service for rendering Home Assistant data on legacy devices and browsers (HTML / JSON API / SSE). · GitHub
Pre-compiled Releases (Windows & Linux): Releases · FaceHoof/HASFOB · GitHub
(Note: The README file on GitHub is available in English).
How to Run the Service
Assuming you have downloaded the HASFOB_for_Windows.zip archive from the releases page and unpacked it, you will see a Token.txt file among other assets. This file stores your authorization token (it doesn’t necessarily have to stay in the root folder, but more on that below).
To generate a token:
-
Log in to your Home Assistant instance.
-
Click on your profile name in the bottom-left corner.
-
Go to the Security tab and click Create Token.
Name it whatever you like, copy the generated token, and paste it into Token.txt (replacing all previous content).
WARNING:
The service does not encrypt your token in any way! It is strictly intended for use within a local network only.
Configuration
Open the configuration.xml file. Every parameter inside is commented, but here are the key settings required to get started:
-
homeAssistantServer — IP address or domain of your Home Assistant server.
-
homeAssistantPort — Port of your Home Assistant server.
-
homeAssistantTokenFile — Full path to the Token.txt file.
-
servicePort — Port where the HASFOB web dashboard will be hosted.
Inside the <sensors> block, you must specify at least one sensor. Here is an example of a sensor entry:
<sensors>
    <sensor>
        <entityId>sensor.waterlevelsensor_ultrasonicwaterlevelsensor</entityId>
        <friendlyName>Water level</friendlyName>
        <decimalPlaces>0</decimalPlaces>
    </sensor>
</sensors>
You can find the entityId inside your Home Assistant instance, while friendlyName can be set to anything you prefer for display purposes.
Controlling Switches
In addition to displaying sensor data, the service can also toggle switches (optional). Here is an example of how to configure a switch inside the <switches> block:
<switches>
    <switch>
        <entityId>switch.powersoketforwaterpomp_socket_1</entityId>
        <friendlyName>Waterpomp</friendlyName>
    </switch>
</switches>
Running and Installing
Once you have edited the configuration file, you can test the service. To run it without installing, launch HasfobService.exe via the command line. If everything is configured correctly, you should see incoming HTTP requests logged in the console with status code 200.
Now open a browser, navigate to the IP address of the machine running the service (using the port specified in servicePort), and check your dashboard.
If you are satisfied with the setup, you can install the application as a native Windows service simply by launching the executable with the -i parameter: HasfobService.exe -i
Customizing the UI
One of the main features of HASFOB is that the dashboard web page is stored as a standalone file, making it easy to customize to your liking. Simply open WebPage.html in your favorite code editor, make your changes, and restart the service.
That’s pretty much it! I hope this service proves useful to someone else in the community. Feel free to leave feedback!