How to achieve an offset sensor reading with a custom component

I’m a bit stuck with my first ever ESPHome project and looking for a little guidance please.
My setup consists of:
Lolin D1 Mini Pro
ST Microelectronics VL53L1X Time of Flight sensor
The sensor is connected via I2C.
I am going to be using the sensor to determine the distance from the sensor to the surface of the heating oil in my oil tank.
I am powering the D1 Mini Pro on the 5V pin, the board is powering the sensor from the 3.3V pin, and the sensor board reduces this down to the required 2.8V.

As the sensor is not supported directly by ESPHome, I am using a custom component:

#include "esphome.h"

#include <Wire.h>

#include <VL53L1X.h>

VL53L1X tof_sensor;

class MyCustomSensor : public PollingComponent, public Sensor {

 public:

  // constructor

  MyCustomSensor() : PollingComponent(5000) {} // polling every 5s

  void setup() override {

    // This will be called by App.setup()

    Wire.begin();

    Wire.setClock(400000); // use 400 kHz I2C

    tof_sensor.setTimeout(500);

    tof_sensor.setAddress(0x29);

    if (!tof_sensor.init()) {

      ESP_LOGE("VL53L1X custom sensor", "Failed to detect and initialize sensor!");

      while (1);

    }

    tof_sensor.setDistanceMode(VL53L1X::Short);

    tof_sensor.setMeasurementTimingBudget(500000);

    tof_sensor.startContinuous(50);

  }

  void update() override {

    uint16_t mm = tof_sensor.read();


    if (!tof_sensor.timeoutOccurred()) {

      publish_state(mm);

    } else {

      ESP_LOGE("VL53L1X custom sensor", "Timeout during read().");

    }

  }

};

and

esphome:
  name: oiltank
  includes:
    - tof_vl53l1x.h
  libraries:
    - "Wire"
    - "VL53L1x"

esp8266:
  board: d1_mini_pro

# https://esphome.io/components/i2c.html
i2c:  
  sda:  GPIO4 
  scl:  GPIO5
  scan: True
  # VL53L1X, 0x29
  frequency: 400kHz

sensor:
- platform: custom
  lambda: |-
    auto my_sensor = new MyCustomSensor();
    App.register_component(my_sensor);
    return {my_sensor};
  sensors:
    name: "Distance"
    accuracy_decimals: 0
    unit_of_measurement: "mm"
- platform: wifi_signal
  name: "WiFi Signal Sensor"
  update_interval: 60s

# Enable logging
logger:

# Enable Home Assistant API
api:

ota:
  password: "password"

wifi:
  ssid: !secret wifi_ssid
  password: !secret wifi_password

  # Enable fallback hotspot (captive portal) in case wifi connection fails
  ap:
    ssid: "Oiltank Fallback Hotspot"
    password: "password"

captive_portal:

web_server:
  port: 80

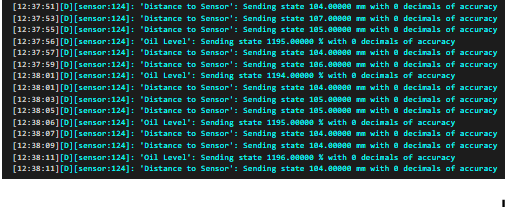
I have compiled and flashed the above onto my D1 Mini Pro and I am seeing successful WiFi communication and distance readings coming back form the sensor and showing in my Home Assistant.

The problem I have is that all the readings I am getting from the sensor are too high by around 50mm. For example, a tape measure set at 450mm and I get a sensor reading of 500mm.

The company that make the sensor do offer an API for download, which contains calibration functions that can be called, which should be able to take care of this offset, and although I have downloaded the API, I’m still very new to everything ESP/Arduino/Home Assistant related and learning as I go.
I have no idea how I would ‘use’ this downloaded API, compile it into my ESPHome code, interact with the calibration function, store the calibrated offset so that it gets read by the sensor at Boot time etc.
I have read through the API documentation, but a lot of it is a bit advanced for my level of knowledge, as I have no knowledge of coding/dev work.

The other option I wondered about was to simply set an offset of 50mm in ESPHome so that this is applied to the readings before they are displayed in my front end.
Looking at the ESPHome documentation, it seems you can create an offset ‘filter’ for a sensor, however this doesn’t seem to apply if you are using a custom component? Unless I’ve misunderstood, which is entirely possible.

The exact distance isn’t necessarily important, as once I have the oil tank brimmed, I will know the distance reading for ‘Full’ and I have the tank dimensions, so I know what would be the empty reading, so converting to litres left or % left etc should be reasonably straightforward with a little help. I just don’t know the best way to proceed and wondered if anyone could offer some advice please?
Thanks in advance!

The documentation of the custom sensor at the end mentions “All options from Sensor.” which includes filters, so I would expect that you can define a filter for your custom sensor.

Thanks for the pointer. I’ve re-read the documentation and I was misunderstanding/not fully reading the following:

" You define them by adding a filters block in the sensor configuration (at the same level as platform ; or inside each sensor block for platforms with multiple sensors)"

I was trying to enter the filter at the same level as ‘platform’, as per the instructions, however it had to be indented further, as per my other variables under my ‘sensors’ block:

sensor:
- platform: custom
  lambda: |-
    auto my_sensor = new MyCustomSensor();
    App.register_component(my_sensor);
    return {my_sensor};
  sensors:
    name: "Distance"
    accuracy_decimals: 0
    filters:
      - offset: -50
    unit_of_measurement: "mm"
- platform: wifi_signal
  name: "WiFi Signal Sensor"
  update_interval: 60s

This is now compiling fine and working as expected :slightly_smiling_face:
No I can play around with another filter for displaying an average reading from several readings to reduce varience.

This means I shouldn’t need to do anything with the API in order to calibrate, for my intended purpose at least. The API does offer other calibration functions, not just offset, to compensate for crosstalk for example, when a sensor cover is fitted, so I would still like to learn how I would interact with the API in order to call the calibration functions and store them so that the sensor loads them at boot…

1 Like

I’m struggling trying to add some extra code into my config above, and would really appreciate some guidance if possible please?
What I am trying to achieve:
Under the ‘sensors’ within my code, as well as ‘Distance’, I would like to have ‘Oil Remaining’.
I have tried adding adding to my ‘sensor’ code, creating the following:

sensor:
- platform: custom
  lambda: |-
    auto my_sensor = new MyCustomSensor();
    App.register_component(my_sensor);
    return {my_sensor->distance_sensor, my_sensor->oil_level_sensor};
  sensors:
  - name: "Distance to Sensor"
    accuracy_decimals: 0
    filters:
      - offset: -57
    unit_of_measurement: "mm"
  - name: "Oil Remaining"
    accuracy_decimals: 0
    unit_of_measurement: "%"
    lambda: |-
      if (id(oil_level).state > 1400 ) {
        return 999;
      } else if (id(oil_level).state > 1300) {
        return 0;
      } else {
        return (1300 - (int) id(oil_level).state);
      }

According to Custom Sensor Component — ESPHome you can have multiple sensor names listed under ‘sensors’, as long as you list them as an array under the initial lamda.

The problem I have is that I can’t seem to use a second lambda for the oil remaining sensor, as ESPHome shows an invalid syntax - the lamda should be indented less, but when I do that, I get a warning of ‘Duplicate key lambda’.

Can anyone guide me as to how to achieve this please?

Yes, and you have to increase the indentation underneath sensors:. The lambda is indented correctly in the above configuration.

What I don’t quite understand in the above is where sensor oil_level is coming from, because I can’t see anything configured with id: oil_level. If you want to modify the custom sensor’s value then you have to access that using variable x.

Thanks, I appreciate this is very much beginner level, and I’m still climbing the learning curve!
I’ve sorted the indentation of the second lambda which has cleared up that error. I have added an id to each sensor - do these id’s need to exactly match in my ‘return’ line in the first lambda, or have I written this correctly? Not sure if I need the _sensor on the end of each id to be returned?

sensor:
- platform: custom
  lambda: |-
    auto my_sensor = new MyCustomSensor();
    App.register_component(my_sensor);
    return {my_sensor->oil_distance_sensor, my_sensor->oil_level_sensor};
  sensors:
  - name: "Distance to Sensor"
    id: oil_distance
    accuracy_decimals: 0
    filters:
      - offset: -57
    unit_of_measurement: "mm"
  - name: "Oil Level"
    id: oil_level
    accuracy_decimals: 0
    unit_of_measurement: "%"
      lambda: |-
        if (id(oil_distance).state > 1400 ) {
          return 999;
        } else if (id(oil_distance).state > 1300) {
          return 0;
        } else {
          return (1300 - (int) id(oil_distance).state);
        }
- platform: wifi_signal
  name: "WiFi Signal"
  update_interval: 60s

With the above, there is an issue with the ‘Oil Level’ sensor code. I am getting a syntax error of 'Expected , but found ’ where my newly indented lambda starts.
What am I doing wrong here?

Alright, let’s clarify a few things:

  • Your custom sensor now returns two values, and that must correspond with two separate Sensor instances within the custom sensor code, and the names must match that code. In your very first post you showed your custom sensor code, but that does not match with the configuration in your latest post anymore. Could you please confirm how your current source code for MyCustomSensor looks like? Does it publish one or two values?
  • Now that your custom sensor returns two values, you need to have two sensor definitions in the configuration in the order defined in the initial lambda’s return statement. So you have a distance sensor and then a level sensor.
  • However, it looks like as if the sensor with the name “Oil Level” does not use the value returned from your custom sensor code, but instead you are trying to calculate a new value based on the distance? That does not make sense here, but you would normally do that in a template sensor instead.

Here an attempt to try to correct your configuration. As you can see it now clearly distinguishes the custom sensor that talks to your VL53L1X device, from the template sensor.
However, it really hinges on your custom sensor code that needs to match with the configuration.

sensor:
  - platform: custom
    lambda: |-
      auto my_sensor = new MyCustomSensor();
      App.register_component(my_sensor);
      return {my_sensor->oil_distance_sensor, my_sensor->oil_level_sensor};
    sensors:
      - name: "Distance to Sensor"
        id: oil_distance
        accuracy_decimals: 0
        filters:
          - offset: -57
        unit_of_measurement: "mm"
      - name: "Oil Level Sensor?!"
        ...
  - platform: template
    name: "Oil Level"
    accuracy_decimals: 0
    unit_of_measurement: "%"
    lambda: |-
      if (id(oil_distance).state > 1400 ) {
        return 999;
      } else if (id(oil_distance).state > 1300) {
        return 0;
      } else {
        return (1300 - (int) id(oil_distance).state);
      }
1 Like

Thanks again for your help here, I really appreciate the time you have taken to post the above.

Just reading your post through a couple of times has helped to clarify things in my head a little. In answer to your first question, the custom sensor code remains exactly as it was in my first post, so I can see now that my ESPHome config doesn’t make sense, as the custom sensor code does indeed only publish one value, which is the distance read by the sensor in mm.
This would mean, I believe, that I can change my initial lambda to:

lambda: |-
      auto my_sensor = new MyCustomSensor();
      App.register_component(my_sensor);
      return {my_sensor};

Does this then mean that I only need to have one sensor definition in my ESPHome config, so the sensor: code would be;

sensor:
- platform: custom
  lambda: |-
    auto my_sensor = new MyCustomSensor();
    App.register_component(my_sensor);
    return {my_sensor};
  sensors:
  - name: "Distance to Sensor"
    id: oil_distance
    accuracy_decimals: 0
    filters:
      - offset: -57
    unit_of_measurement: "mm"

You are correct - I am trying to calculate the Oil Level % figure, based on the one single sensor value being published by the custom sensor.
So, in order to do this using a template, I can add this template sensor to my existing list of template sensors in my main Home Assistant config yaml file?
I’ve recently tidied up my main config yaml file as I had a mix of old and new template methods. I am now just using the newer template method of

template:
  - sensor:
      - name:

rather than

sensor:
  - platform: template
    name:

Therefore am I correct in thinking I can add to my existing template block with the following?

- name: "Oil Level"
    accuracy_decimals: 0
    unit_of_measurement: "%"
    lambda: |-
      if (id(oil_distance).state > 1400 ) {
        return 999;
      } else if (id(oil_distance).state > 1300) {
        return 0;
      } else {
        return (1300 - (int) id(oil_distance).state);
      }

Thanks again

Thanks, that helped a lot.

In this case where the custom sensor only returns a single value, then indeed your latest configuration now looks correct.
And, the oil level then indeed can be a simple template sensor. Now, you can either have this template sensor in ESPHome, or move this to Home Assistant. The configuration I suggest in my previous post is meant for ESPHome. If you want to migrate this to Home Assistant then you would need to change the template quite a bit, i.e. you can’t use that configuration as-is.

Ah I see, this is making more sense now! I’ll go with the option of having the template sensor in my ESPHome config rather than putting it into Home Assistant config.

So, my new config for ESPHome is

esphome:
  name: oiltank
  includes:
    - tof_vl53l1x.h
  libraries:
    - "Wire"
    - "VL53L1x"

esp8266:
  board: d1_mini_pro

# https://esphome.io/components/i2c.html
i2c:
  sda:  GPIO4 
  scl:  GPIO5
  scan: True
  # VL53L1X, 0x29
  frequency: 400kHz

sensor:
- platform: custom
  lambda: |-
    auto my_sensor = new MyCustomSensor();
    App.register_component(my_sensor);
    return {my_sensor};
  sensors:
  - name: "Distance to Sensor"
    id: oil_distance
    accuracy_decimals: 0
    filters:
      - offset: -57
    unit_of_measurement: "mm"

- platform: template
  name: "Oil Level"
  accuracy_decimals: 0
  unit_of_measurement: "%"
  lambda: |-
    if (id(oil_distance).state > 1400 ) {
      return 999;
    } else if (id(oil_distance).state > 1300) {
      return 0;
    } else {
      return (1300 - (int) id(oil_distance).state);
    }
  update_interval: 5s

# Enable logging
logger:

# Enable Home Assistant API
api:

ota:
  password: "MyPassword"

wifi:
  ssid: !secret wifi_ssid
  password: !secret wifi_password

  # Enable fallback hotspot (captive portal) in case wifi connection fails
  ap:
    ssid: "Oiltank Fallback Hotspot"
    password: "MyPassword"

captive_portal:

web_server:
  port: 80

and now this is compiling and flashing onto my board fine :slight_smile:
image

Now that I can see the values returning, I can see that the maths is incorrect, so I’ll need to rethink that. I probably just need to use the oil_distance return value and divide that by the total distance available (1300) and multiply it by 100.

I’m so grateful for your help @exxamalte and the time you have taken to reply here. I have no coding/development experience, so Home Assistant, ESPHome, YAML, C++ etc is all completely new to me, and one heck of a learning curve! The difference it makes when community members such as yourself take the time to help is huge - sometimes it’s difficult to post up questions, that to a large number of members, are ‘Noob’ questions and not be faced with “Read the documentation” remarks. When you’ve done your best and read and re-read everything but end up stuck, it’s pretty frustrating!

Now I can move on to fixing the maths, and then creating some states with icons in the Home Assistant config file so make use of the readings. Thanks again!

1 Like

Update - I’ve reduced my lambda calculation down so that I can get the hang of the syntax. The following lambda:

- platform: template
  name: "Oil Level"
  accuracy_decimals: 0
  unit_of_measurement: "%"
  lambda: |-
    return (1300 - id(oil_distance).state) / 1300*100;

is giving me these results

[11:55:59][D][sensor:124]: ‘Distance to Sensor’: Sending state 0.00000 mm with 0 decimals of accuracy
[11:56:00][D][sensor:124]: ‘Oil Level’: Sending state 100.00000 % with 0 decimals of accuracy

This is with the sensor covered over to give a 0mm reading. The only issue with this calculation is that when the tank is actually 100% full of oil, the sensor will be reading 200mm, as that is the height that the sensor is mounted ABOVE the highest possible oil level.

Can anyone suggest how to take this ‘air gap’ into account - would I need to minus the 200mm air gap from the returned state value of the oil_distance? If so, what would the correct syntax be?
When mounted in place, if the oil_distance reads 1500mm, then the tank is empty and I need the Oil Level to show 0%
When the oil_distance reads 200mm, then the tank is full and I need the Oil Level to show 100%.