I recently decided to move my Home Assistant OS installation from a bare metal deployment on a mini PC over to a guest virtual machine hosted on a local Proxmox server.
Just like moving my Home Assistant from a container over to the bare metal install, the process was surprisingly easy. I simply used the built-in backup tool to create a backup and then restored after migrating the application onto the new infrastructure.
Although this process isn’t any different from backing up any VM onto an NAS, I thought I would set out the steps. If you have both a Proxmox host and NAS on your LAN, you can create full VM backups that can be used later if you’d like to move HAOS onto new hardware.
Part 1: Setting Up Synology Folder
Firstly, in DSM, let’s set up a shared folder called ‘Proxmox’ where we will send the backups over the LAN:

Next, we’re going to need to go into ‘NFS permissions’ and setup an NFS rule so that Proxmox can read and write to this shared folder on the storage volume:
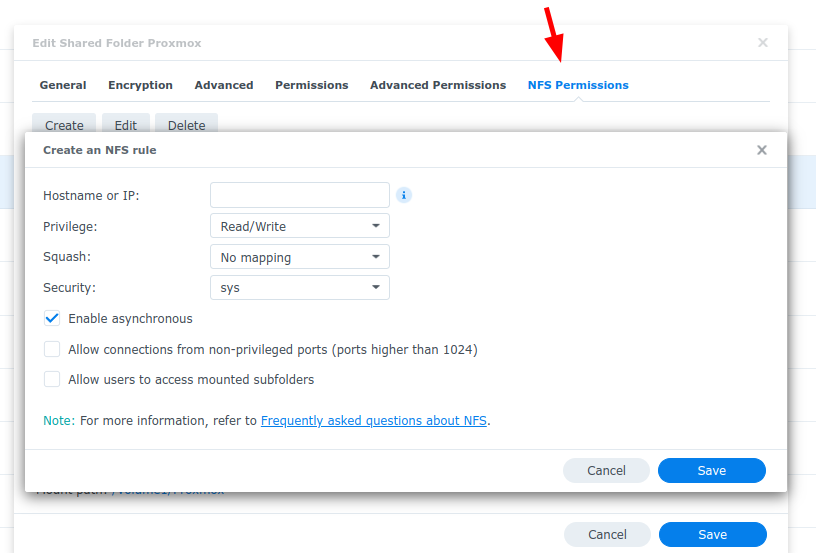
You want to set the hostname/IP to be the IP address of the Proxmox server (for this reason, double-check that your Proxmox host has a static IP from the router!).
Verify that the NFS share has been created for the target IP:

Part 2: Add NAS As Storage Pool In Proxmox
Next, we want to add the NAS NFS share as a storage pool in our home cluster.
Click on:
→ Datacenter
→ Storage
→ Add storage

Choose NFS as our storage type:

Add the NFS store adding your NAS local / LAN IP as server:

Under ‘Content’ you need to make sure that VZDump Backup File is an option:

Export should be set to /Volume1/Proxmox
Once that’s configured we should have the Synology as a storage option:

Part 3: Verify Folder Creation
It’s worth quickly verifying that Proxmox is successfully writing to the NAS.
Check the Proxmox folder and you should see something like this:

Now let’s run the backup job!
Part 4: Running VM Backup Job
Now we’re all set to backup the virtual machine hosting Home Assistant OS.
Select the VM from the left, then navigate to backup, and finally select backup now.

Make sure that the backup target is set to the Synology and not local:

Describe the backup. You can also change the compression algorithm if desired.

When everything is ready to go, click ‘backup’.
The backup is now in progress. It’s pretty quick over the LAN!

Your backup files should now be in the /dump folder in Synology:

Note that the VM will show as locked while the backup job is running.

You can delete backups from the UI in Proxmox:

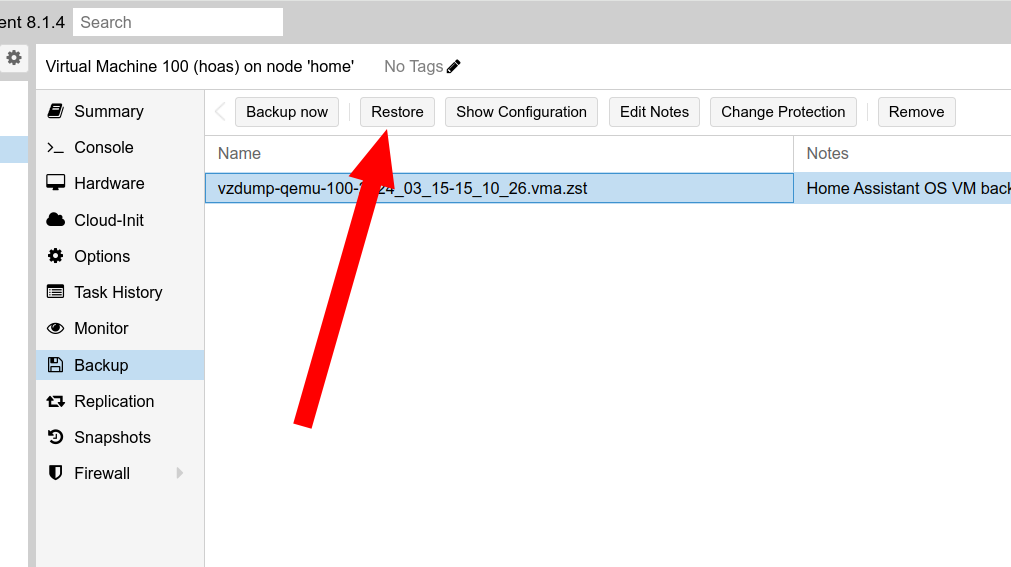
You can also restore to a backup point by clicking on the ‘Restore’ button:
Part 5: Replicating The Backup Offsite (Optional)
You can use Cloud Sync in DSM to duplicate/replicate the backup offsite (you can also do this on Proxmox but … I think Synology’s UI is a lot easier).
Choose your cloud storage provider:
Then we just need to select the path where Proxmox is putting the backups on our NAS as the source and set up a push to the cloud (make sure to retain the local copy on the NAS):

Why Backup The VM?
Doesn’t HOAS have its own backup function at the application level?
Yes, but you might wish to do both for extra peace of mind.