Hi guys,
So I am completely lost here.
I have a Homey dongle, it working fine.
I decided I want to add it to home assistant.
What I get so for:
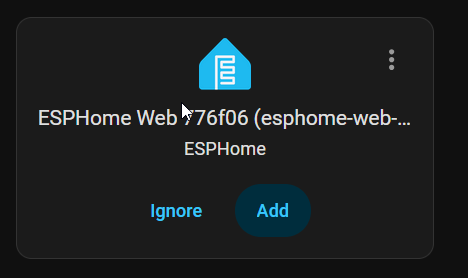
I flash it on Web - ESPHome.
I can prepare for first use. Installs fine, set up wifi with no issues.
[14:35:41][I][wifi:1149]: Connected
[14:35:41][C][wifi:897]:   Local MAC: 90:13:DA:77:6F:06
[14:35:41][C][wifi:904]:   IP Address: 192.168.2.42
[14:35:41][C][wifi:908]:   SSID: [redacted]
[14:35:41][C][wifi:908]:  BSSID: [redacted]
[14:35:41][C][wifi:908]:  Hostname: 'esphome-web-776f06'
[14:35:41][C][wifi:908]:  Signal strength: -49 dB ▂▄▆█
[14:35:41][C][wifi:908]:  Channel: 11
[14:35:41][C][wifi:908]:  Subnet: 255.255.255.0
[14:35:41][C][wifi:908]:  Gateway: 192.168.2.1
[14:35:41][C][wifi:908]:  DNS1: 62.179.104.196
[14:35:41][C][wifi:908]:  DNS2: 213.46.228.196
[14:35:41][D][wifi:1173]: Disabling AP
[14:35:41][W][component:373]: wifi cleared Warning flag
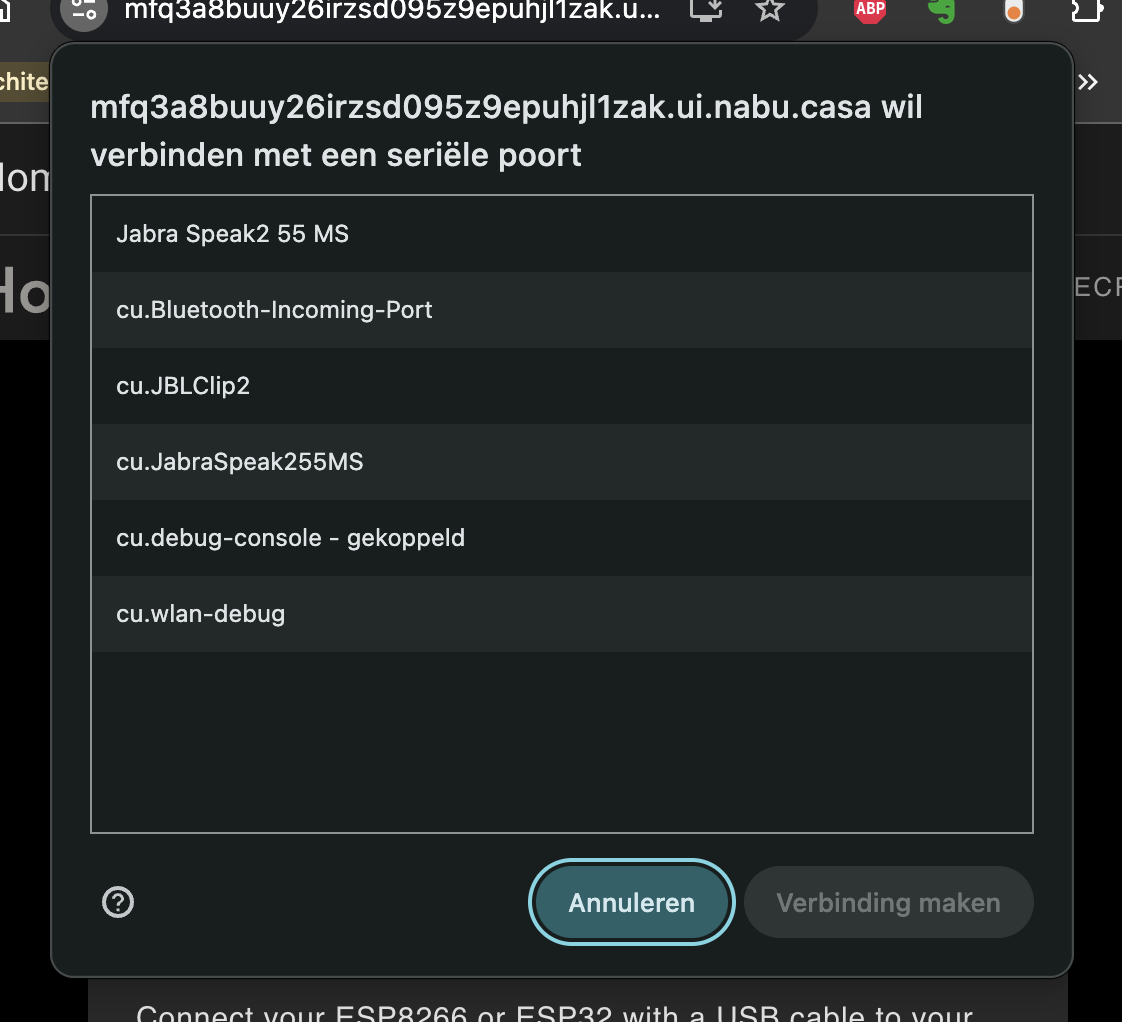
I make a new device in ESPHome builder.
Push the pin, and connect directly to USB on HA server.
Install homey-dongle.yaml
INFO ESPHome 2026.2.4
INFO Reading configuration /config/esphome/homey-dongle.yaml...
INFO Generating C++ source...
INFO Setting CONFIG_LWIP_MAX_SOCKETS to 11 (registered: api=4, captive_portal=4, mdns=2, ota=1)
INFO Compiling app... Build path: /data/build/homey-dongle
Processing homey-dongle (board: esp32-c6-devkitc-1; framework: espidf; platform: https://github.com/pioarduino/platform-espressif32/releases/download/55.03.37/platform-espressif32.zip)
--------------------------------------------------------------------------------
Library Manager: Installing esphome/noise-c @ 0.1.10
INFO Installing esphome/noise-c @ 0.1.10
Unpacking  [####################################]  100%
Library Manager: [email protected] has been installed!
INFO [email protected] has been installed!
Library Manager: Resolving dependencies...
INFO Resolving dependencies...
Library Manager: Installing esphome/libsodium @ 1.10020.7
INFO Installing esphome/libsodium @ 1.10020.7
Unpacking  [####################################]  100%
Library Manager: [email protected] has been installed!
INFO [email protected] has been installed!
HARDWARE: ESP32C6 160MHz, 320KB RAM, 4MB Flash
 - contrib-piohome @ 3.4.4
 - framework-espidf @ 3.50502.0 (5.5.2)
 - tool-cmake @ 4.0.3
 - tool-esp-rom-elfs @ 2024.10.11
 - tool-esptoolpy @ 5.1.2
 - tool-ninja @ 1.13.1
 - tool-scons @ 4.40801.0 (4.8.1)
 - toolchain-riscv32-esp @ 14.2.0+20251107
Reading CMake configuration...
Generating assembly for certificate bundle...
Dependency Graph

======================== [SUCCESS] Took 520.98 seconds ========================
INFO Build Info: config_hash=0xc91d1c68 build_time_str=2026-03-14 14:41:05 +0100
INFO Successfully compiled program.
esptool v5.1.0
Serial port /dev/ttyACM0:
Connecting...
Connected to ESP32-C6 on /dev/ttyACM0:
Chip type:          ESP32-C6FH4 (QFN32) (revision v0.1)
Features:           Wi-Fi 6, BT 5 (LE), IEEE802.15.4, Single Core + LP Core, 160MHz
Crystal frequency:  40MHz
USB mode:           USB-Serial/JTAG
MAC:                e4:b3:23:ff:fe:99:f2:1c
BASE MAC:           e4:b3:23:99:f2:1c
MAC_EXT:            ff:fe

Uploading stub flasher...
Running stub flasher...
Stub flasher running.
Changing baud rate to 460800...
Changed.

Configuring flash size...
Auto-detected flash size: 4MB
Flash will be erased from 0x00010000 to 0x000fbfff...
Flash will be erased from 0x00000000 to 0x00005fff...
Flash will be erased from 0x00008000 to 0x00008fff...
Flash will be erased from 0x00009000 to 0x0000afff...
Compressed 965984 bytes to 616092...
Writing at 0x00010000 [                              ]   0.0% 0/616092 bytes...
Writing at 0x0001bffc [                              ]   2.7% 16384/616092 bytes...
Writing at 0x00024cdc [>                             ]   5.3% 32768/616092 bytes...
Writing at 0x00029307 [=>                            ]   8.0% 49152/616092 bytes...
Writing at 0x00030302 [==>                           ]  10.6% 65536/616092 bytes...
Writing at 0x00037401 [==>                           ]  13.3% 81920/616092 bytes...
Writing at 0x0003d4ac [===>                          ]  16.0% 98304/616092 bytes...
Writing at 0x00042ea7 [====>                         ]  18.6% 114688/616092 bytes...
Writing at 0x00048e45 [=====>                        ]  21.3% 131072/616092 bytes...
Writing at 0x0004eb94 [======>                       ]  23.9% 147456/616092 bytes...
Writing at 0x00055039 [======>                       ]  26.6% 163840/616092 bytes...
Writing at 0x0005addd [=======>                      ]  29.3% 180224/616092 bytes...
Writing at 0x00060a48 [========>                     ]  31.9% 196608/616092 bytes...
Writing at 0x00066c6c [=========>                    ]  34.6% 212992/616092 bytes...
Writing at 0x0006d4de [==========>                   ]  37.2% 229376/616092 bytes...
Writing at 0x00073a21 [==========>                   ]  39.9% 245760/616092 bytes...
Writing at 0x00079b01 [===========>                  ]  42.5% 262144/616092 bytes...
Writing at 0x0007fff6 [============>                 ]  45.2% 278528/616092 bytes...
Writing at 0x00085f6b [=============>                ]  47.9% 294912/616092 bytes...
Writing at 0x0008bd82 [==============>               ]  50.5% 311296/616092 bytes...
Writing at 0x00091472 [==============>               ]  53.2% 327680/616092 bytes...
Writing at 0x00096e12 [===============>              ]  55.8% 344064/616092 bytes...
Writing at 0x0009c8be [================>             ]  58.5% 360448/616092 bytes...
Writing at 0x000a24ff [=================>            ]  61.2% 376832/616092 bytes...
Writing at 0x000a7f16 [==================>           ]  63.8% 393216/616092 bytes...
Writing at 0x000adf53 [==================>           ]  66.5% 409600/616092 bytes...
Writing at 0x000b3951 [===================>          ]  69.1% 425984/616092 bytes...
Writing at 0x000b9d7e [====================>         ]  71.8% 442368/616092 bytes...
Writing at 0x000c03fc [=====================>        ]  74.5% 458752/616092 bytes...
Writing at 0x000c6382 [======================>       ]  77.1% 475136/616092 bytes...
Writing at 0x000cc4a0 [======================>       ]  79.8% 491520/616092 bytes...
Writing at 0x000d2544 [=======================>      ]  82.4% 507904/616092 bytes...
Writing at 0x000d84e4 [========================>     ]  85.1% 524288/616092 bytes...
Writing at 0x000de4ea [=========================>    ]  87.8% 540672/616092 bytes...
Writing at 0x000e4304 [==========================>   ]  90.4% 557056/616092 bytes...
Writing at 0x000ea7bf [==========================>   ]  93.1% 573440/616092 bytes...
Writing at 0x000f0802 [===========================>  ]  95.7% 589824/616092 bytes...
Writing at 0x000f6686 [============================> ]  98.4% 606208/616092 bytes...
Writing at 0x000fbd60 [==============================] 100.0% 616092/616092 bytes...
Wrote 965984 bytes (616092 compressed) at 0x00010000 in 9.0 seconds (854.9 kbit/s).
Hash of data verified.
SHA digest in image updated.
Compressed 22720 bytes to 14031...
Writing at 0x00000000 [                              ]   0.0% 0/14031 bytes...
Writing at 0x000058c0 [==============================] 100.0% 14031/14031 bytes...
Wrote 22720 bytes (14031 compressed) at 0x00000000 in 0.5 seconds (401.4 kbit/s).
Hash of data verified.
Compressed 3072 bytes to 134...
Writing at 0x00008000 [                              ]   0.0% 0/134 bytes...
Writing at 0x00008c00 [==============================] 100.0% 134/134 bytes...
Wrote 3072 bytes (134 compressed) at 0x00008000 in 0.0 seconds (532.5 kbit/s).
Hash of data verified.
Compressed 8192 bytes to 31...
Writing at 0x00009000 [                              ]   0.0% 0/31 bytes...
Writing at 0x0000b000 [==============================] 100.0% 31/31 bytes...
Wrote 8192 bytes (31 compressed) at 0x00009000 in 0.1 seconds (702.6 kbit/s).
Hash of data verified.

Hard resetting via RTS pin...
INFO Successfully uploaded program.
INFO Starting log output from /dev/ttyACM0 with baud rate 115200
This seems good.
I paste this code:
esphome:
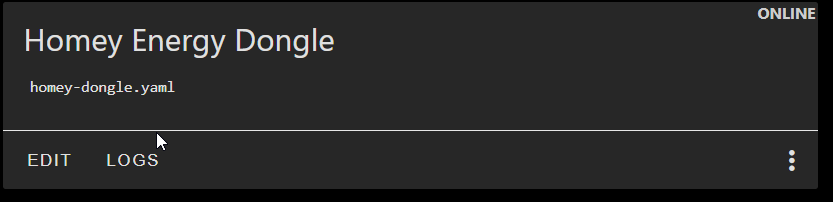
name: homey-energy-dongle
friendly_name: Homey Energy Dongle
on_boot:
- priority: -100.0
then:
- output.turn_on: p1_input_enable
- light.turn_on:
id: led
red: 0%
green: 100% < this to know its actually uploaded
blue: 0%
esp32:
board: esp32-c6-devkitc-1
flash_size: 4MB
variant: esp32c6
framework:
type: esp-idf
sdkconfig_options:
CONFIG_ESPTOOLPY_FLASHSIZE_4MB: y
ota:
- platform: esphome
password: "...." # <<< A random password for OTA
wifi:
ssid: !secret wifi_ssid
password: !secret wifi_password
external_components:
- source: github://oxan/esphome-stream-server
stream_server:
- uart_id: p1_input
port: 1234
buffer_size: 256
uart:
- id: p1_input
rx_buffer_size: 256
rx_pin:
number: GPIO4
inverted: true
baud_rate: 115200
- id: p1_output
tx_pin:
number: GPIO3
inverted: true
baud_rate: 115200
output:
- id: p1_input_enable
platform: gpio
pin:
number: GPIO23
mode: output
light:
- id: led
name: "LED"
platform: esp32_rmt_led_strip
rgb_order: GRB
pin: GPIO2
num_leds: 1
chipset: ws2812
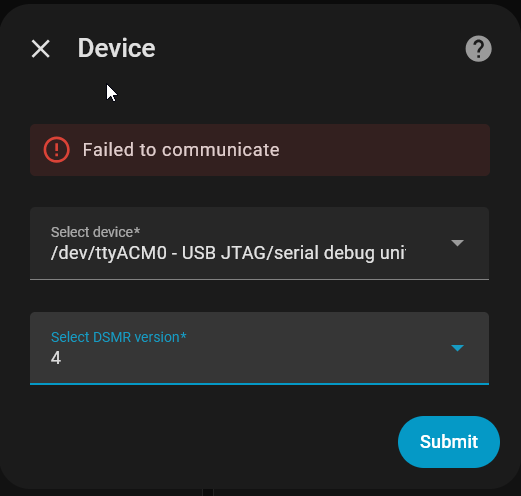
With dongle still connected to server I install *(do I need to reconnect it with pin pushed?). With this outcome:
INFO ESPHome 2026.2.4
INFO Reading configuration /config/esphome/homey-dongle.yaml...
INFO Generating C++ source...
INFO Compiling app... Build path: /data/build/homey-energy-dongle
Processing homey-energy-dongle (board: esp32-c6-devkitc-1; framework: espidf; platform: https://github.com/pioarduino/platform-espressif32/releases/download/55.03.37/platform-espressif32.zip)
--------------------------------------------------------------------------------
HARDWARE: ESP32C6 160MHz, 320KB RAM, 4MB Flash
 - contrib-piohome @ 3.4.4
 - framework-espidf @ 3.50502.0 (5.5.2)
 - tool-cmake @ 4.0.3
 - tool-esp-rom-elfs @ 2024.10.11
 - tool-esptoolpy @ 5.1.2
 - tool-ninja @ 1.13.1
 - tool-scons @ 4.40801.0 (4.8.1)
 - toolchain-riscv32-esp @ 14.2.0+20251107
Reading CMake configuration...
Generating assembly for certificate bundle...
No dependencies

======================== [SUCCESS] Took 506.04 seconds ========================
INFO Build Info: config_hash=0xc76b1d76 build_time_str=2026-03-14 14:59:58 +0100
INFO Successfully compiled program.
esptool v5.1.0
Serial port /dev/ttyACM0:
Connecting...
Connected to ESP32-C6 on /dev/ttyACM0:
Chip type:          ESP32-C6FH4 (QFN32) (revision v0.1)
Features:           Wi-Fi 6, BT 5 (LE), IEEE802.15.4, Single Core + LP Core, 160MHz
Crystal frequency:  40MHz
USB mode:           USB-Serial/JTAG
MAC:                e4:b3:23:ff:fe:99:f2:1c
BASE MAC:           e4:b3:23:99:f2:1c
MAC_EXT:            ff:fe

Uploading stub flasher...
Running stub flasher...
Stub flasher running.
Changing baud rate to 460800...
Changed.

Configuring flash size...
Auto-detected flash size: 4MB
Flash will be erased from 0x00010000 to 0x000d5fff...
Flash will be erased from 0x00000000 to 0x00005fff...
Flash will be erased from 0x00008000 to 0x00008fff...
Flash will be erased from 0x00009000 to 0x0000afff...
Compressed 810496 bytes to 505335...
Writing at 0x00010000 [                              ]   0.0% 0/505335 bytes...
Writing at 0x0001c63a [                              ]   3.2% 16384/505335 bytes...
Writing at 0x00025a0c [>                             ]   6.5% 32768/505335 bytes...
Writing at 0x0002c807 [=>                            ]   9.7% 49152/505335 bytes...
Writing at 0x0003284d [==>                           ]  13.0% 65536/505335 bytes...
Writing at 0x0003879a [===>                          ]  16.2% 81920/505335 bytes...
Writing at 0x0003e7a8 [====>                         ]  19.5% 98304/505335 bytes...
Writing at 0x00044450 [=====>                        ]  22.7% 114688/505335 bytes...
Writing at 0x0004b0a7 [======>                       ]  25.9% 131072/505335 bytes...
Writing at 0x00051963 [=======>                      ]  29.2% 147456/505335 bytes...
Writing at 0x00057c46 [========>                     ]  32.4% 163840/505335 bytes...
Writing at 0x0005e16c [=========>                    ]  35.7% 180224/505335 bytes...
Writing at 0x00064584 [==========>                   ]  38.9% 196608/505335 bytes...
Writing at 0x0006a2cb [===========>                  ]  42.1% 212992/505335 bytes...
Writing at 0x0006fb38 [============>                 ]  45.4% 229376/505335 bytes...
Writing at 0x000753f8 [=============>                ]  48.6% 245760/505335 bytes...
Writing at 0x0007b1ea [==============>               ]  51.9% 262144/505335 bytes...
Writing at 0x00080bde [===============>              ]  55.1% 278528/505335 bytes...
Writing at 0x000869ad [================>             ]  58.4% 294912/505335 bytes...
Writing at 0x0008c896 [=================>            ]  61.6% 311296/505335 bytes...
Writing at 0x00092f63 [==================>           ]  64.8% 327680/505335 bytes...
Writing at 0x00099005 [===================>          ]  68.1% 344064/505335 bytes...
Writing at 0x0009f04e [====================>         ]  71.3% 360448/505335 bytes...
Writing at 0x000a5137 [=====================>        ]  74.6% 376832/505335 bytes...
Writing at 0x000aae62 [======================>       ]  77.8% 393216/505335 bytes...
Writing at 0x000b1008 [=======================>      ]  81.1% 409600/505335 bytes...
Writing at 0x000b6d9e [========================>     ]  84.3% 425984/505335 bytes...
Writing at 0x000bd276 [=========================>    ]  87.5% 442368/505335 bytes...
Writing at 0x000c39f6 [==========================>   ]  90.8% 458752/505335 bytes...
Writing at 0x000c935c [===========================>  ]  94.0% 475136/505335 bytes...
Writing at 0x000cf0da [============================> ]  97.3% 491520/505335 bytes...
Writing at 0x000d5e00 [==============================] 100.0% 505335/505335 bytes...
Wrote 810496 bytes (505335 compressed) at 0x00010000 in 7.5 seconds (862.3 kbit/s).
Hash of data verified.
SHA digest in image updated.
Compressed 22720 bytes to 14037...
Writing at 0x00000000 [                              ]   0.0% 0/14037 bytes...
Writing at 0x000058c0 [==============================] 100.0% 14037/14037 bytes...
Wrote 22720 bytes (14037 compressed) at 0x00000000 in 0.4 seconds (405.3 kbit/s).
Hash of data verified.
Compressed 3072 bytes to 134...
Writing at 0x00008000 [                              ]   0.0% 0/134 bytes...
Writing at 0x00008c00 [==============================] 100.0% 134/134 bytes...
Wrote 3072 bytes (134 compressed) at 0x00008000 in 0.0 seconds (551.8 kbit/s).
Hash of data verified.
Compressed 8192 bytes to 31...
Writing at 0x00009000 [                              ]   0.0% 0/31 bytes...
Writing at 0x0000b000 [==============================] 100.0% 31/31 bytes...
Wrote 8192 bytes (31 compressed) at 0x00009000 in 0.1 seconds (701.7 kbit/s).
Hash of data verified.

Hard resetting via RTS pin...
INFO Successfully uploaded program.
ERROR Logger is not configured!
After all this, I disconnect the dongle and reconnect it.
Lights up green.
INFO ESPHome 2026.2.4
INFO Reading configuration /config/esphome/homey-dongle.yaml...
ERROR All specified devices ['OTA'] could not be resolved. Is the device connected to the network? If you know the IP, set 'use_address' in your network config.
Logs homey-dongle.yaml
INFO ESPHome 2026.2.4
INFO Reading configuration /config/esphome/homey-dongle.yaml...
ERROR Logger is not configured!
What can I do about the logger error?
I dont know what im doing wrong, can somebody help out?