hello,
I have just install PV system and a huawei solar inverter.
I have ask the provider to enable tcp-modbus and upgrade the firmware of the dongle.
I have installed the huawai solar integration through HACS. and connect to the dongle on port 502 and get many parameters
I guess the pv production is sensor.inverter_active_power
I guess power to grid is sensor.power_meter_active_power
cannot find household consumption
no idea how to integrate the energy dashbord.
can you help ?
Hey there, if you look at the wiki of the repo, you should find what you are looking for.
What I read from the screenshots is:
Total Yield could be set for Solar Panels.
Total charge/discharge for battery.
Exported and Consuption for the grid.
Huawei Solar Integration
I had a Huawei solar inverter installed along with 21 panels of 450W on my roof, without a battery.I found the offered integrations unpalatable and preferred to create my own simpler version. Myintegration does not include a battery and does not take electricity prices into account My inverter has a dongle that connects to my network. The address is on the router (box for theFrench); I fixed the IP address in the DHCP settings. Confirm with the installer that the TCPModbus value is enabled and that the firmware version matches the documentation(V200R022C10SPC114 for me).
Installation
Through HACS, install Huawei Solar and reboot. In settings, integration, add Huawei Solar. Enter the parameters IP, port 502, slave ID 1, elevate permissions. No need for an installer profile. Set thehidden parameters to enable. It created 7 entities: inverter, meter, and 5 inverters. I also integrated the Zappi car charger from Energi, but that’s another story.It is easy to find the following parameters:
**name sensorname myname **
Production sensor.inverter_active_power prodpv
Power togrid sensor.power_meter_active_power togrid
Additional Parameters
I also need the following additional parameters. I created 3 templates with the availability option. Ittook me a day to figure out how to do it. A simple subtraction did not work.
name sensorname myname Formule
Puissance conso sensor.energie_conso prodpv (prod - togrid)|abs
Puissance togridsold sensor.energie_togridpos togridpos togrid if togrid > 0 else 0
Puissance consomées des PV energie_consopv consopv conso if togrid > 0 else
prodpv
I love Markdown cards and made the following one
markdown card.
-## huawei solar
inverter active power = PV {{ (states(‘sensor.inverter_active_power’) | float) }}
power meter active = togrid {{(states(‘sensor.power_meter_active_power’) | float) }}
difference = homeconso {{ (states(‘sensor.inverter_active_power’) | float) -
(states(‘sensor.power_meter_active_power’) | float) }}
***variable puissance
variable energie_conso {{ (states(‘sensor.energie_conso’))}}
variable energie_prodpv {{ (states(‘sensor.energie_prodpv’))}}
variable energie_togridpos {{ (states(‘sensor.energie_togridpos’))}}
variable energie_consopv {{ (states(‘sensor.energie_consopv’))}}
variable energie_togrid {{ (states(‘sensor.energy_togrid’))}}
****energy
variable conso_energy {{ (states(‘sensor.conso_energy’))}}
variable togridpos_energy {{ (states(‘sensor.togridpos_energy’))}}
variable prodpv_energy {{ (states(‘sensor.prodpv_energy’))}}
Carte Graphique Historique
esy to do example
type: history-graph
entities:
- entity: sensor.energie_conso
- entity: sensor.energie_consopv
- entity: sensor.energie_prodpv
title: Consommation et prod maison
hours_to_show: 8
Template
-# togrid - name: “energie_togrid”
unit_of_measurement: ‘W’
state: “{{ (states(‘sensor.power_meter_active_power’) | float(0)) }}”
-# prodpv plus compréhensibe - name: “energie_prodpv”
unit_of_measurement: ‘W’
state: “{{ (states(‘sensor.inverter_active_power’) | float(0)) }}”
-# consommation totale - name: “energie_conso”
unit_of_measurement: ‘W’
device_class: power
state_class: measurement
unique_id: energie_conso
state: >
{% set prodpv = states(‘sensor.inverter_active_power’) | float(0) %}
{% set togrid = states(‘sensor.power_meter_active_power’) | float(0) %}
{{ (prodpv - togrid)|abs }}
availability: >
{{ states(‘sensor.inverter_active_power’) not in [‘unavailable’, ‘unknown’, ‘none’] and states(‘sensor.power_meter_active_power’)
not in [‘unavailable’, ‘unknown’, ‘none’] }}
-# energie vendue - name: “energie_togridpos”
unit_of_measurement: ‘W’
state: >
{% set togrid = states(‘sensor.power_meter_active_power’) | float(0) %}
{{ togrid if togrid > 0 else 0 }}
availability: >
{{ states(‘sensor.inverter_active_power’) not in [‘unavailable’, ‘unknown’, ‘none’] }}
device_class: power
unique_id: energie_togridpos
state_class: measurement
-# consopv = pv si togrid negatif - name: “energie_consopv”
unit_of_measurement: ‘W’
state: >
{% set prodpv = states(‘sensor.inverter_active_power’) | float(0) %}
{% set togrid = states(‘sensor.power_meter_active_power’) | float(0) %}
{% set conso = states(‘sensor.energie_conso’) | float(0) %}
{{ conso if togrid > 0 else prodpv }}
availability: >
{{ states(‘sensor.inverter_active_power’) not in [‘unavailable’, ‘unknown’, ‘none’] and states(‘sensor.power_meter_active_power’)
not in [‘unavailable’, ‘unknown’, ‘none’] }}
device_class: power
unique_id: energie_consopv
state_class: measurement
Sensor
-# Consommation totale - platform: integration
source: sensor.energie_conso
name: “conso_energy”
unit_prefix: k
round: 2
method: trapezoidal
-# Energie_vendue - platform: integration
source: sensor.energie_togridpos
name: “togridpos_energy”
unit_prefix: k
round: 2
unit_time: h
method: trapezoidal
-# - platform: integration
source: sensor.energie_prodpv
name: “Prodpv_energy”
unit_prefix: k
round: 2
unit_time: h
method: trapezoidal
unique_id: prodpv_energy
Energy tab can be easily done.
Hope ths help
Cheers
2 Likes
Hello guys, I join the request to understand how to implement the total household consumption per day. I can’t figure out how to configure it.
I’m not a developer, so please explain it in a simple way. ![]()
It would be helpful if you provided more information where you stand.
Did you set up the energy dashboard? Then you can see the house consumption there and get the graph with energy cards on your dashboard.
If you want a sensor install this prefferably with HACS then include this in your configuration.yaml like this:
homeassistant:
  packages:
    huawei_solar_energy_flow_card: !include huawei-solar-energy-flow-card-package.yaml
Be sure to get the file names right.
To upload or edit code use the addons File Editor or Terminal & SSH
I have done this

But the graph does not correspond related to fusion solar app (I know that there is a delay)
For instance, I have Solar production in my card = 12,15kw, but into fusion solar is 16,15kw
So you use the Cloud intergration with fusion solar?
If you want local control, better data resolution and more sensors use the setup I wrote above.
If you are wondering how to get the home consumption just add Importata and Autopdodatta. Not 100% sure what that means but it seems to add up.
Generally your house consumption is Import + Solar - Battery Input + Battery Output - Export
I’m using Huawei solar via hacs with the information retrived in real time via SDongle huawei.
How i can add " just add Importata and Autopdodatta" ?
Sorry but i’m new ![]()
Thanks
Oh yes sorry forgot to add that.
Under settings, devices, helpers add a template sensor with
Code: {{states('sensor.importata') | float + states('sensor.autopdodatta') | float}}
Unit o.M.: kWh
Device Class: Energy
State Class: total
I’ve created a card to visualiza/manage my Battery but i need an editor to manage TOU Periods
Here my card (i can send the yaml if interested)

Has anyone among you developed this type of editor?
Thanks for your help
Hi everyone,
I wasn’t able to find clear information about how to stop the battery from discharging via automation.
What I’d like to achieve:
![]() When my car is charging, I want to prevent the Huawei battery from discharging (so it doesn’t assist the charging load).
When my car is charging, I want to prevent the Huawei battery from discharging (so it doesn’t assist the charging load).
After charging, I’d like to return to the default behavior.
I asked ChatGPT, and it suggested this automation using modbus.write_register to block battery discharge:
yaml
CopiaModifica
alias: Block battery discharge when charging Tesla
trigger:
  - platform: state
    entity_id: sensor.teslamate_charging_state
    to: 'Charging'
condition: []
action:
  - service: modbus.write_register
    data:
      hub: huawei_inverter
      unit: 1
      address: 47089
      value: 1  # Charge only
mode: single
And this one to restore normal behavior:
yaml
CopiaModifica
alias: Restore battery after Tesla charging
trigger:
  - platform: state
    entity_id: sensor.teslamate_charging_state
    from: 'Charging'
    to: 'Disconnected'
condition: []
action:
  - service: modbus.write_register
    data:
      hub: huawei_inverter
      unit: 1
      address: 47089
      value: 0  # Automatic mode
mode: single
But before this, I need to add the Modbus connection in configuration.yaml:
yaml
CopiaModifica
modbus:
  - name: huawei_inverter
    type: tcp
    host: 192.168.1.xxx  # IP address of the inverter or dongle
    port: 502
    delay: 1
    timeout: 3
    retries: 10
Does this approach seem correct to you?
Or is there a better/official way to do this with the Huawei inverter?
Thanks!
1 Like
Till 29-03-2025 my Huawei solar integration worked, bud from dat date it stopped working after an update. I do not know if the home assist update or an update for the dongel or inverter was the problem, but now it is still not working anny more.
Hello,
I’m facing the same issue! Do you found a solution?
Worked again, my ip address changed of the inverter due to network updates. After reconfiguring the device in HomeAssistant and inserted the new IP, it worked again (FYI @Fofuracer )
same issues here, log says:
Timeout while waiting for connection. Reconnecting
Traceback (most recent call last):
File “/usr/local/lib/python3.13/asyncio/tasks.py”, line 507, in wait_for
return await fut
^^^^^^^^^
File “/usr/local/lib/python3.13/asyncio/locks.py”, line 213, in wait
await fut
asyncio.exceptions.CancelledErrorThe above exception was the direct cause of the following exception:
Traceback (most recent call last):
File “/usr/local/lib/python3.13/site-packages/huawei_solar/huawei_solar.py”, line 141, in _communication_lock
await asyncio.wait_for(
…<2 lines>…
)
File “/usr/local/lib/python3.13/asyncio/tasks.py”, line 506, in wait_for
async with timeouts.timeout(timeout):
~~~~~~~~~~~~~~~~^^^^^^^^^
File “/usr/local/lib/python3.13/asyncio/timeouts.py”, line 116, in aexit
raise TimeoutError from exc_val
TimeoutError
1 Like
After fighting with this integration for the last day, it has become evident that I will need some help…
In my case, I have my inverter connected to a SmartGuard with EMMA - so I am attempting to connect via the IP of the EMMA (internal IP, as seen from my WiFi).
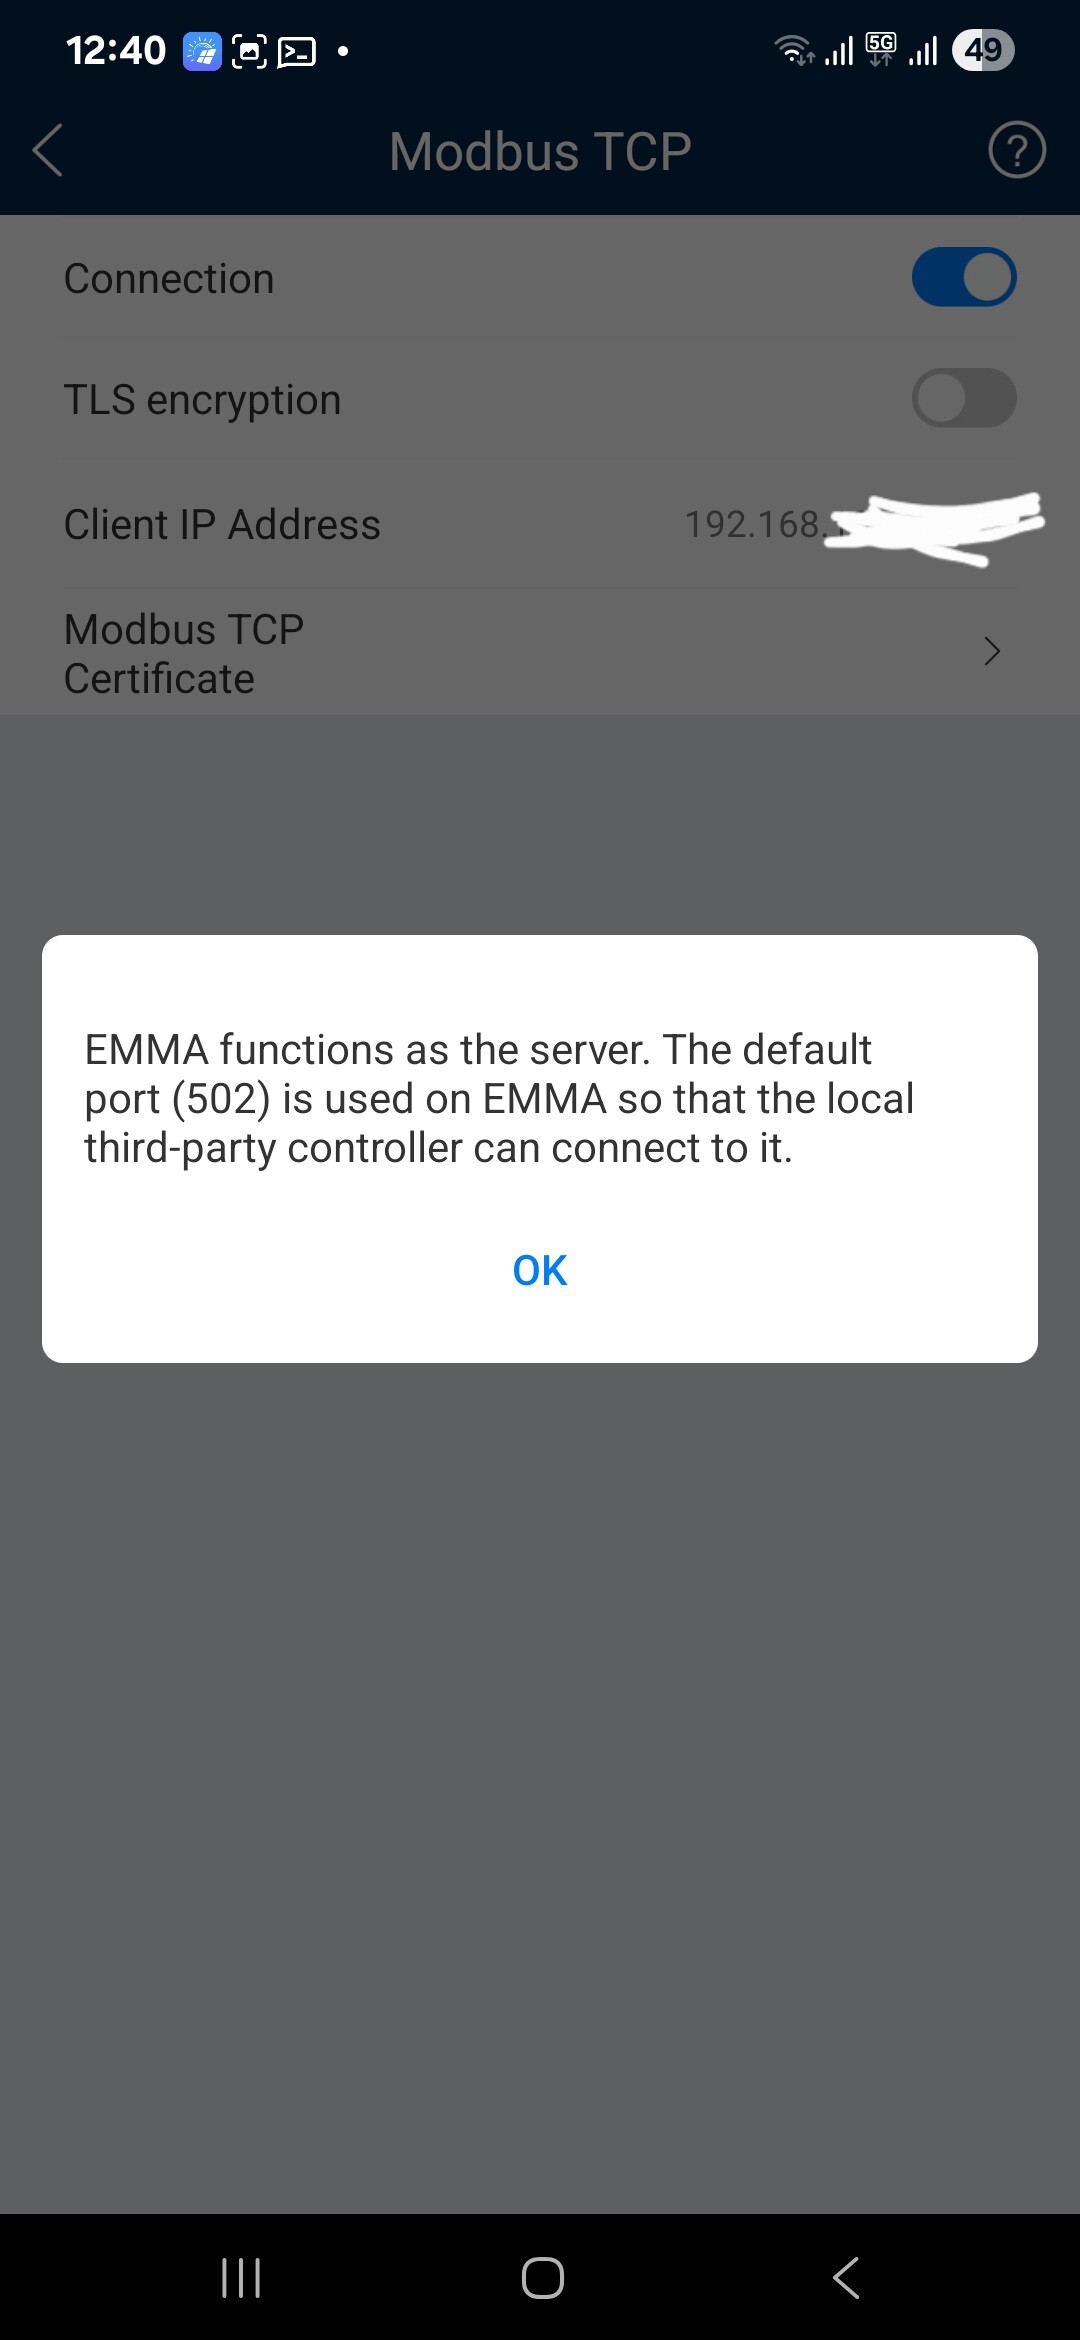
The problem is that even after enabling Modbus over TCP, all I get from the EMMA IP on port 502 is a TCP RST (basically telling me that the port is closed). The traffic is there, and reaches the EMMA - I can even see the connection requests (and the RSTs) in traffic captures collected from the EMMA. But it just refuses to respond on that port.
I have tried setting “Client IP Address” to 0.0.0.0, and tried setting it to my HAss/computer IP address. Same result.
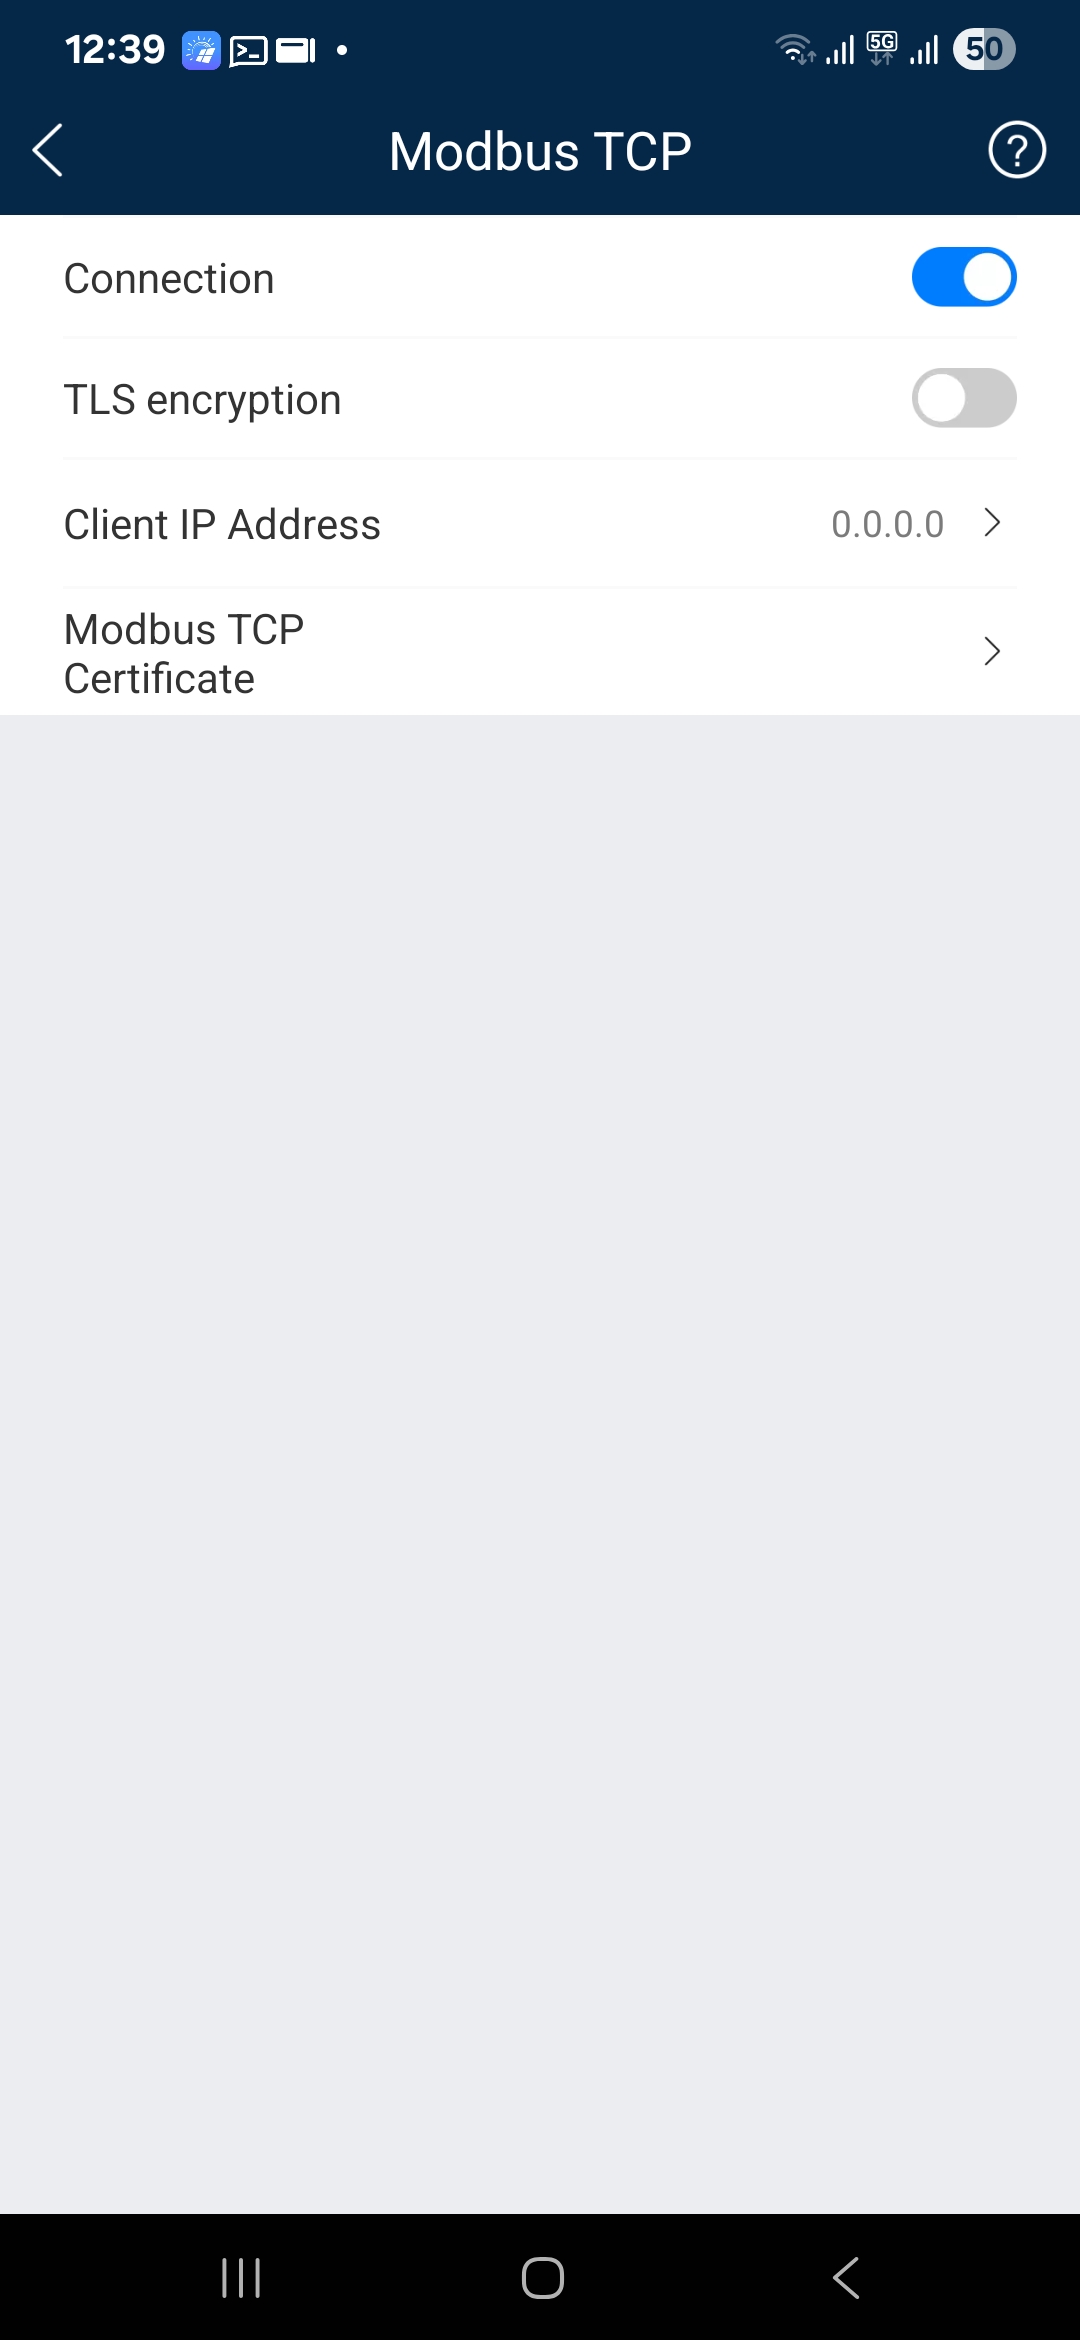
Reading through this thread, I have seen mention of the “Local O&M” setting. However, that setting seems to be missing on the EMMA - under Set/Communication Settings/Router Configuration, all I have are settings for WLAN (SSID) and Password.
There is a separate setting under Maintenance, called “O&M via WLAN connection”, but that one has been set to ‘Always ON’ from the very beginning. And the only other option is “OFF when idle”.

Is there anyone more experienced with the EMMA who can point me in the right direction?
[ Editing to clarify: I am performing the settings while connected to the EMMA WiFi, via the “Device Commissioning” section in the mobile app (I do not know another way to access the MoTCP settings). I am attempting the Modbus over TCP connection over my home WiFi, using the IP address that EMMA receives on that WiFi from my home router ]
[ One more update: Thanks to a comment on a github issue, I found out that EMMA does not treat “0.0.0.0” as “accept connections from any IP”. The issue persists, though, even when I use the correct client IP address ]
Thank you!
Well well… what do you know? There was a bug in my firmware version ![]()
I only managed to fix the issue after contacting Huawei support, from which I got the following answer:
[Problem Analysis]:
In SmartHEMS V100R024C00SPC100, the ModbusTcp function of the known problem EMMA is unavailable when the EMMA connects to a router through Wi-Fi.
[Root Cause]:
EMMA software problem
[Solution]:
Advise the customer to upgrade the EMMA to SmartHEMS V100R025C00SPC100.
Lo and behold, after a firmware upgrade, everything suddenly started working, and I could finally see the entities in HAss… ![]()
Hi Bodgan,
I’m also facing the same issue, and upon checking mine is also on V100R024C00SPC100. When i tried to upgrade through the app, it did not propose to upgrade to V100R025C00SPC100. Did you get a download link from Huawei?
I was not able to upgrade through the app either - my guess is that it’s because R025 is a very recent release (June 26). I asked my installer for assistance, and they were able to push the update via their cloud account.
Did you get it working?
Hi,
I use these automations
alias: >-
Change battery mode, stop battery discharge when Tesla is charging
description: >-
If the Tesla is charging (power > 1W), disable battery discharge
triggers:
- entity_id: sensor.tesla_charger_power
above: 1
trigger: numeric_state
conditions:
actions: - target:
entity_id: number.battery_grid_charge_maximum_power
data:
value: 0
action: number.set_value - target:
entity_id: number.battery_maximum_discharging_power
data:
value: 0
action: number.set_value
mode: single
alias: >-
Change battery mode to Automatic, re-enable grid charging and restore battery power when Tesla is not charging
description: >-
If the Tesla is NOT charging (power ≤ 1W), switch back to automatic mode, re-enable grid charging, and restore max battery power
triggers:
- entity_id: sensor.tesla_charger_power
below: 1.1
trigger: numeric_state
conditions:
actions: - target:
entity_id: number.battery_grid_charge_maximum_power
data:
value: 4000
action: number.set_value - target:
entity_id: number.battery_maximum_discharging_power
data:
value: 5000
action: number.set_value
mode: single
1 Like