HVAC - Controlling Dampers via Advantage Air Zone Station II

Hi,
I am trying to automate my ducted AC system.

System Description (current state):
It is a Fujitsu AC system, split into 4 zones.
Temperature and Flow control is done via the Fujitsu wired control panel (UTY-RNRT) https://www.fujitsugeneral.com.au/commercial-products/controllers/details/uty-rnrt

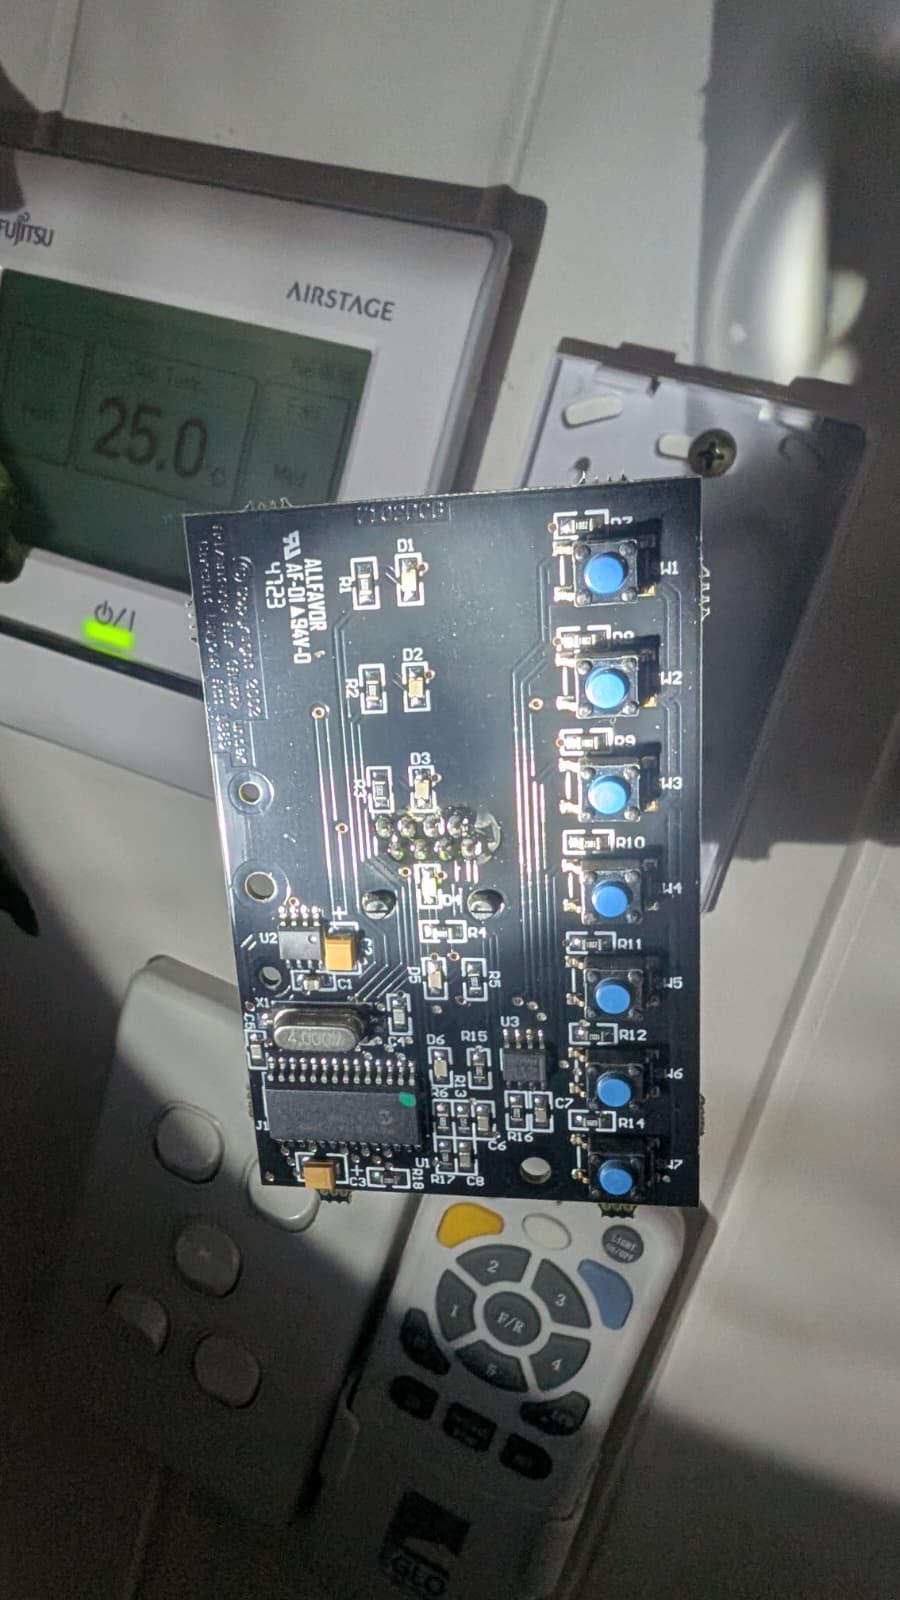
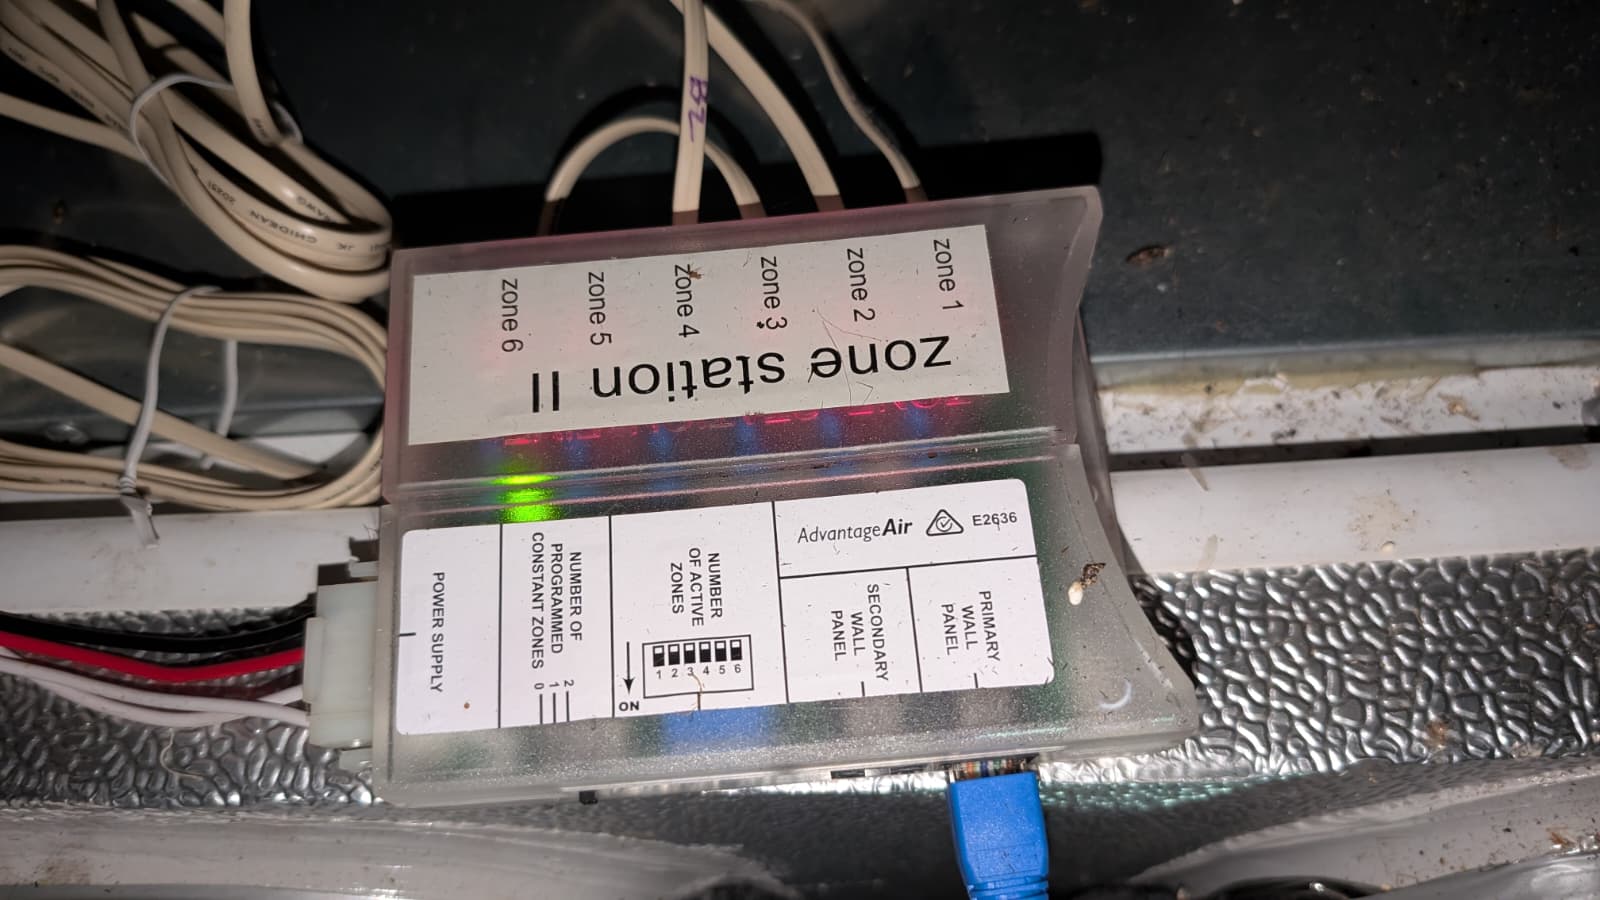
The system has 4 zones, controlled by 4 damper motors. These are controlled via an Advantage Air Zone Station II Control Box. Selection of the zones (opening/closing of the dampers) is peformed via the CSP2 control panel, which allows the zones to be actiavted/deactivated manually.
Picture of the Zone Stations II is below. Will post control panel and internals later.
Speaking to my AC guy, he has offered to sell me an Advantage Air My Air control system, including tablet touch panel for some $3000+…
Not keen on this, as I want to keep it simple and automate via HA.

Desired System
I want to use HA to automate the system in two steps. First use the Fujitsu AnywAIR WiFi interface to control the AC unit (heat/cool mode, temperature, fan speed). Second automate zone selection based on temperature in various rooms (I already have several Z-wave room thermostats).

Ideally, I would keep the wall controller for zone selection, and include a switch to toggle between auto and manual control.

Advice/Help needed
I am considering the following solutions:
Option 1:
The Zone Station II includes a second RJ45 port which can be used to connect a second zone selection panel (refer to manual https://specialisedair.com.au/wp-content/uploads/2019/12/ZONE-STATION-II-TECH-DATA.pdf.
I Would like to connect a micro-controller here, that emulates the control panel and that can be controlled from Home Assistant? (I.e. almost like a smart button pusher)

Option 2:
Replace the Zone Station II with a set of z-wave controlled general purpose relays (e.g. Zooz Universal Relay) to drive the dampers.
However, here I would loose the state indicators on the wall panel and the option for manual control.

Has anyone on here tried to emulate one of these push button control panels in order to automate a Zone Station 2?

Are there other straightfoward options that I am ovelooking?

I am keen to try and implement option 1.
However, I would need some advise on how to start reverse engineering the communication protocol to the wall panel.

Hopefully, someone on here is able to help.

Thanks
Dingo
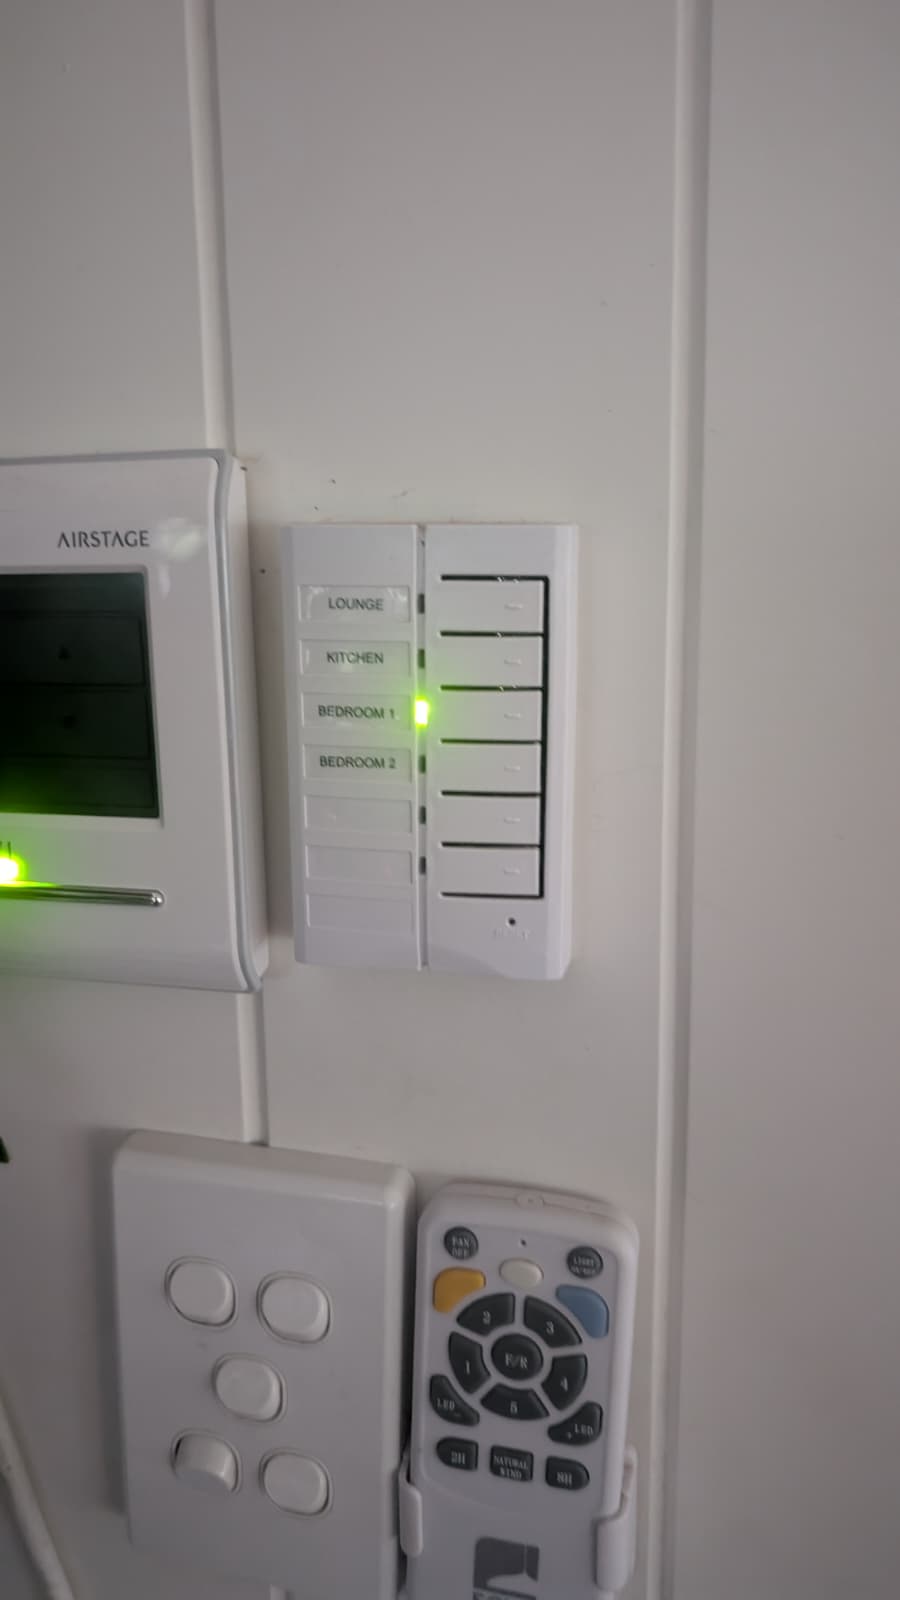
Zone controller

Zone Controller Internals:

Then you need to find out the communication protocol.

What about wiring Esp dev board to the button contacts just to emulate button presses? What’s the voltage across the button? Common on the right side is gnd?

Did you manage to reverse engineer the software? If not I think I have a solution.

I would just replace the controller with a homemade ESPhome setup. Super easy.

Not so with 24v AC Damper motors. Either way the ZSII controller is RS485 compliant. I am currently waiting on my RJ45 to RS485 adapter to arrive, and I’ll be reverse engineering the protocol. If something aint broke don’t fix it.

An ESP controlling relays which switch the 24Vac is easier.

agreed but a lot of individuals want something that is plug and play. ESPhome and relays require a buttload of wiring. I’m trying to figure something out that just plugs in :slight_smile:

I’ve managed to workout the protocol. Let me know if you’re interested and I’ll provide you the ESPHome yaml config.

looks like I’ve embarked on the same journey as Pilotboy to emulate the zone station II controller. Any chance you could share your ESPHome yaml config? would save me a lot of hassle with the RS485 sniffing!

Someone in the Facebook group for HA AU & NZ has posted an esphome replacement for this: Redirecting...

It doesn’t appear to be open hardware (so you can’t DIY beyond staring at the pictures) or to have a case (so it isn’t quite plug & play).

I ended up going with one of Jon Cianci’s 8 output units ($150.00 for the newer ones) that runs directly off 24v ac (You’ll need a new power supply if you want to go to 8 outputs, 100va is what i went with). I have the YAML if you want it.

If you’ve got that it’d be awesome.

Would you mind sharing with me as well!
Many thanks

Did you manage to get this going? I'm keen to do similar.

Hey so I'm in the same boat now too, any chance I could also get your seylt up / yml? Many thanks in advance.
Also ow hard was it to figure out? I'm tempted to still try it out for learnings sake.

Hey how did you go? I'm now setting up this exact thing myself? I see someone managed to get it in connects and I've asked to get a copy of the yaml.
What did you end up doing?

Change the Wifi SSID and Password

esphome:
  name: esphome-8zone-v2
  friendly_name: ESPHome 8-Zone Controller V2
  comment: "V2/newer 8-zone roof-space controller pinout. Do not use on V1 boards."
  compile_process_limit: 1
  on_boot:
    priority: 100
    then:
      - switch.turn_on: switch1
      - switch.turn_on: switch2
      - switch.turn_on: switch3
      - switch.turn_on: switch4
      - switch.turn_on: switch5
      - switch.turn_on: switch6
      - switch.turn_on: switch7
      - switch.turn_on: switch8

esp32:
  board: esp32dev
  framework:
    type: arduino

logger:

api:

ota:
  - platform: esphome

web_server:
  port: 80

wifi:
  ssid: "YourWiFiSSID"
  password: "YourWiFiPassword"
  output_power: 20.0
  fast_connect: true
  power_save_mode: none
  ap:
    ssid: "TekOnline 8 Zone V2"
    password: "RecoveryPassword"

captive_portal:

# V2 relay pinout:
# Zone 1 -> GPIO12, Zone 2 -> GPIO14, Zone 3 -> GPIO27, Zone 4 -> GPIO26,
# Zone 5 -> GPIO25, Zone 6 -> GPIO33, Zone 7 -> GPIO32, Zone 8 -> GPIO4.
#
# GPIO12 and GPIO4 are ESP32 boot-sensitive pins. Avoid external wiring or
# startup states that pull these lines to the wrong level during reset.
switch:
  - platform: gpio
    name: "Zone 1"
    pin: GPIO12
    id: switch1
    inverted: false
    restore_mode: ALWAYS_ON

  - platform: gpio
    name: "Zone 2"
    pin: GPIO14
    id: switch2
    inverted: true
    restore_mode: ALWAYS_ON

  - platform: gpio
    name: "Zone 3"
    pin: GPIO27
    id: switch3
    inverted: true
    restore_mode: ALWAYS_ON

  - platform: gpio
    name: "Zone 4"
    pin: GPIO26
    id: switch4
    inverted: false
    restore_mode: ALWAYS_ON

  - platform: gpio
    name: "Zone 5"
    pin: GPIO25
    id: switch5
    inverted: true
    restore_mode: ALWAYS_ON

  - platform: gpio
    name: "Zone 6"
    pin: GPIO33
    id: switch6
    inverted: true
    restore_mode: ALWAYS_ON

  - platform: gpio
    name: "Zone 7"
    pin: GPIO32
    id: switch7
    inverted: true
    restore_mode: ALWAYS_ON

  - platform: gpio
    name: "Zone 8"
    pin: GPIO4
    id: switch8
    inverted: false
    restore_mode: ALWAYS_ON

sensor:
  - platform: internal_temperature
    name: "Internal Temperature"

  - platform: wifi_signal
    name: "8-Zone V2 WiFi Signal"
    update_interval: 600s

  - platform: uptime
    name: "8-Zone V2 Uptime Seconds"
    update_interval: 60s

text_sensor:
  - platform: version
    name: "8-Zone V2 ESPHome Version"

  - platform: wifi_info
    ip_address:
      name: "8-Zone V2 IP"
    bssid:
      name: "8-Zone V2 BSSID"

  - platform: uptime
    name: "8-Zone V2 Uptime"