This blueprint is designed to unlock the full potential of the IKEA Bilresa Smart Scroll Wheel when used via Matter/Thread to control your Smart Lights.
(Note: This blueprint is optimized for Lights only. It does not support Media Player/Volume control in this version.)
Many users experience lag or “jumpy” behavior when using this device via Matter. This blueprint solves that by using a custom Hybrid Engine dedicated to smooth lighting adjustments.
 Key Features
 Hybrid Engine:
- Scrolling uses Sensors directly for butter-smooth Dimming, Color Temperature, or RGB changes.
- Buttons use Events for reliable switching.
 Atomic Control:
- Total freedom! You don’t just assign a mode to the whole remote.
- You can configure each of the 3 Scroll Zones independently (Brightness, Kelvin, RGB, or Presets).
- You can configure each of the 3 Buttons independently, with separate actions for Double Click and Hold (e.g. set specific Colors or Warm/Cold white).
 RGB & Kelvin Support: Full support for color changing (Rainbow scroll) and temperature control.
 Requirements (Crucial!)
Because this device exposes many entities via Matter, you must enable/disable specific ones in Home Assistant for this blueprint to work correctly.
- ENABLE these Sensors:
- Look for entities ending in
(1),(2)(Zone 1) - Look for entities ending in
(4),(5)(Zone 2) - Look for entities ending in
(7),(8)(Zone 3)
- ENABLE these Events:
- Look for event entities ending in
(3),(6), and(9).
- DISABLE these Sensors:
- Sensors ending in
(3),(6), and(9)are not needed and should be disabled to reduce Thread network traffic.
 Setup Tip regarding Lights
If you want to control multiple lights at once (e.g., a chandelier or a room), please create a Helper Group (Light Group) in Home Assistant and select that group in the blueprint. Targeting multiple individual entities directly via the blueprint may cause synchronization issues (“Popcorn effect”).
 Import Blueprint
![]()
Or import manually using this URL: IKEA Bilresa Scrollwheel (Matter) - Ultimate Hybrid Controller Blueprint (V1.0 Atomic Edition) · GitHub
 Mapping Guide (How to find your entities)
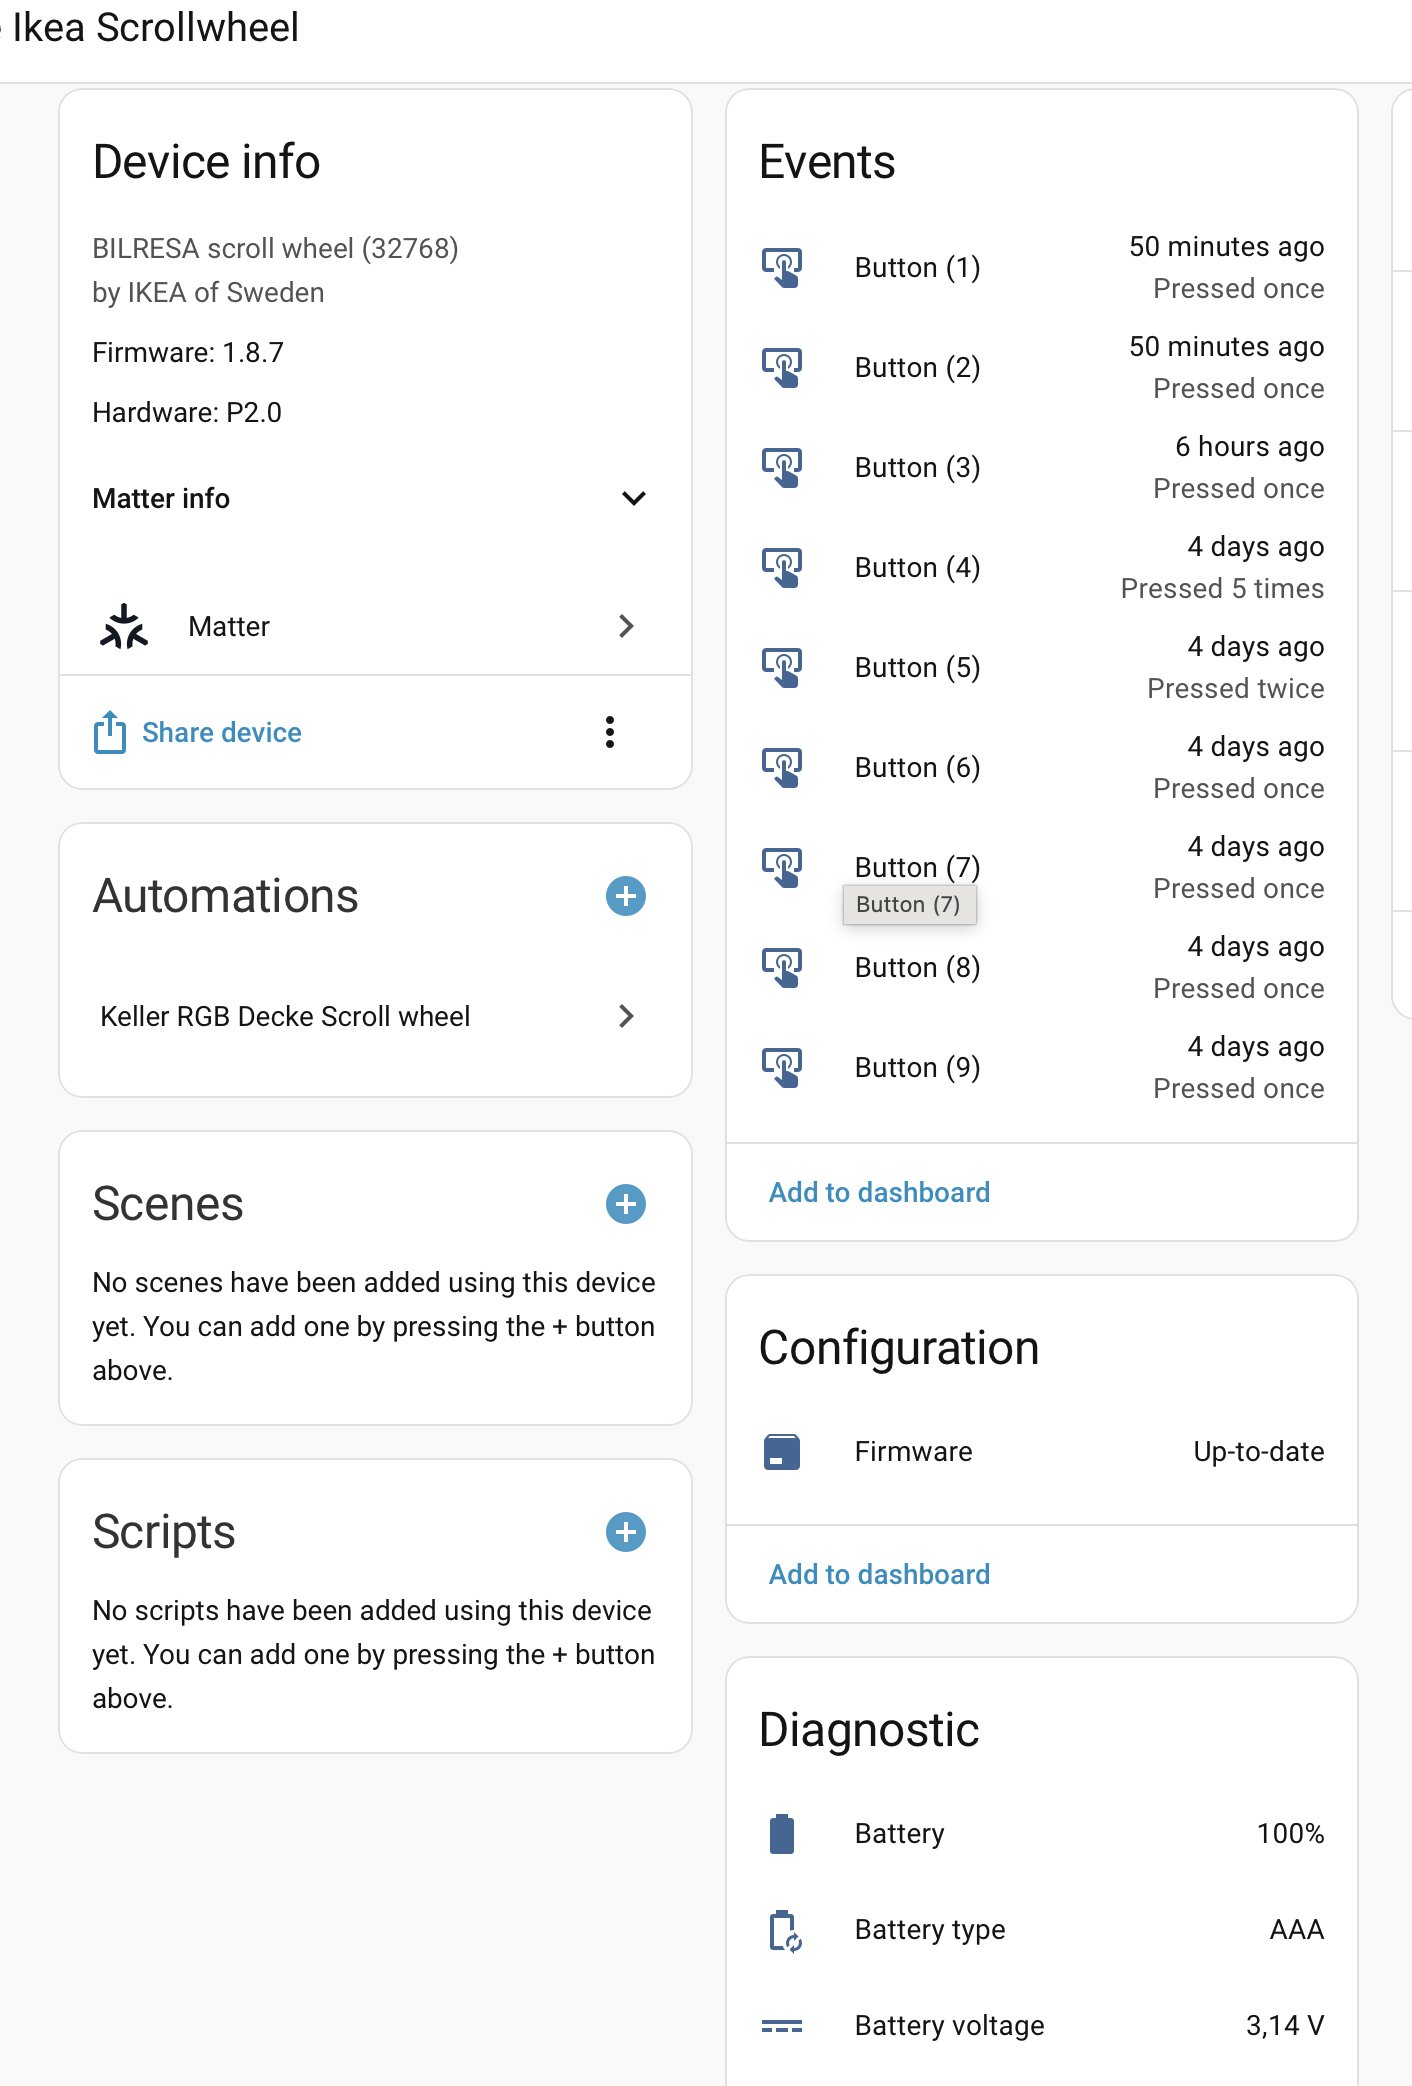
When configuring the blueprint, look at the number in parentheses at the end of your entity names:
- Scroll Zone 1: Select sensors ending in
(1)and(2). - Scroll Zone 2: Select sensors ending in
(4)and(5). - Scroll Zone 3: Select sensors ending in
(7)and(8). - Button 1 (Left/Top): Select the event ending in
(3). - Button 2 (Middle): Select the event ending in
(6). - Button 3 (Right/Bottom): Select the event ending in
(9).
Version History
- V1.0: Initial Release (Atomic Edition). Dedicated Light Control with optimized direction detection.
🇩🇪 Klicke hier für die Deutsche Beschreibung
Deutsche Beschreibung
Dieser Blueprint holt das Maximum aus dem IKEA Bilresa Smart Scrollrad heraus, wenn es über Matter/Thread genutzt wird, um deine Beleuchtung zu steuern.
(Hinweis: Dieser Blueprint ist rein auf Lichtsteuerung optimiert. Er unterstützt in dieser Version keine Media Player / Lautstärke.)
Viele Nutzer haben bei diesem Gerät über Matter mit Verzögerungen oder “ruckeligem” Verhalten zu kämpfen. Dieser Blueprint löst das Problem mit einer speziellen Hybrid Engine.
Die Highlights
- Hybrid Engine:
- Scrollen: Nutzt direkt die Sensoren. Das garantiert butterweiches Dimmen oder Farbwechsel ohne Netzwerk-Lag.
- Tasten: Nutzen Events. Das garantiert, dass jeder Klick (Einzel, Doppel, Halten) zuverlässig erkannt wird.
- Atomic Control (Totale Freiheit):
- Du legst nicht einen Modus für die ganze Fernbedienung fest.
- Du kannst jeden der 3 Scroll-Bereiche einzeln belegen (Helligkeit, Kelvin, RGB oder Presets).
- Du kannst jede der 3 Tasten einzeln konfigurieren, mit eigenen Aktionen für Doppelklick und Halten.
- RGB & Kelvin: Volle Unterstützung für Farbwechsel (Regenbogen-Scrollen) und Farbtemperatur.
Voraussetzungen (Wichtig!)
Da das Gerät über Matter extrem viele Entitäten bereitstellt, musst du in Home Assistant die richtigen aktivieren bzw. deaktivieren, damit der Blueprint funktioniert:
- AKTIVIEREN (Sensoren):
- Sensoren mit Endung
(1),(2)(Zone 1) - Sensoren mit Endung
(4),(5)(Zone 2) - Sensoren mit Endung
(7),(8)(Zone 3)
- Sensoren mit Endung
- AKTIVIEREN (Events):
- Event-Entitäten mit Endung
(3),(6)und(9).
- Event-Entitäten mit Endung
- DEAKTIVIEREN (Sensoren):
- Die Sensoren mit Endung
(3),(6)und(9)werden nicht benötigt und sollten deaktiviert bleiben, um das Thread-Netzwerk zu schonen.
- Die Sensoren mit Endung
Wichtiger Tipp für Lampen
Wenn du mehrere Lampen gleichzeitig steuern willst (z.B. eine Gruppe im Wohnzimmer), erstelle bitte unbedingt eine Helfer-Gruppe (Light Group) in Home Assistant und wähle diese im Blueprint aus.
Wenn du im Blueprint mehrere einzelne Lampen direkt anwählst, kann es zu Synchronisationsfehlern (“Popcorn-Effekt”) kommen.
Zuordnungshilfe (Mapping Guide)
Achte bei der Auswahl im Blueprint auf die Zahl in der Klammer am Ende des Entitäts-Namens:
- Scroll Zone 1: Sensoren
(1)und(2). - Scroll Zone 2: Sensoren
(4)und(5). - Scroll Zone 3: Sensoren
(7)und(8). - Taste 1 (Links/Oben): Event
(3). - Taste 2 (Mitte): Event
(6). - Taste 3 (Rechts/Unten): Event
(9).