Since Home Assistant version 8.1, HAOS is now available based on generic aarch64 architecture and with GRUB 2 bootloader natively implemented, it is now finally possible to run HAOS as a virtual machine on VMware’s Flings ESXi ARM hypervisor, currently mostly running on a Raspberry Pi 4 (mostly the 8GB version).
Here’s the how-to:
- Download the latest HAOS generic aarch64 image
haos_generic-aarch64-x.x.vmdk.zipfrom here. - Extract the .zip file.
- Rename the
haos_generic-aarch64-x.x.vmdkfile toHAOS.vmkd. - Upload the
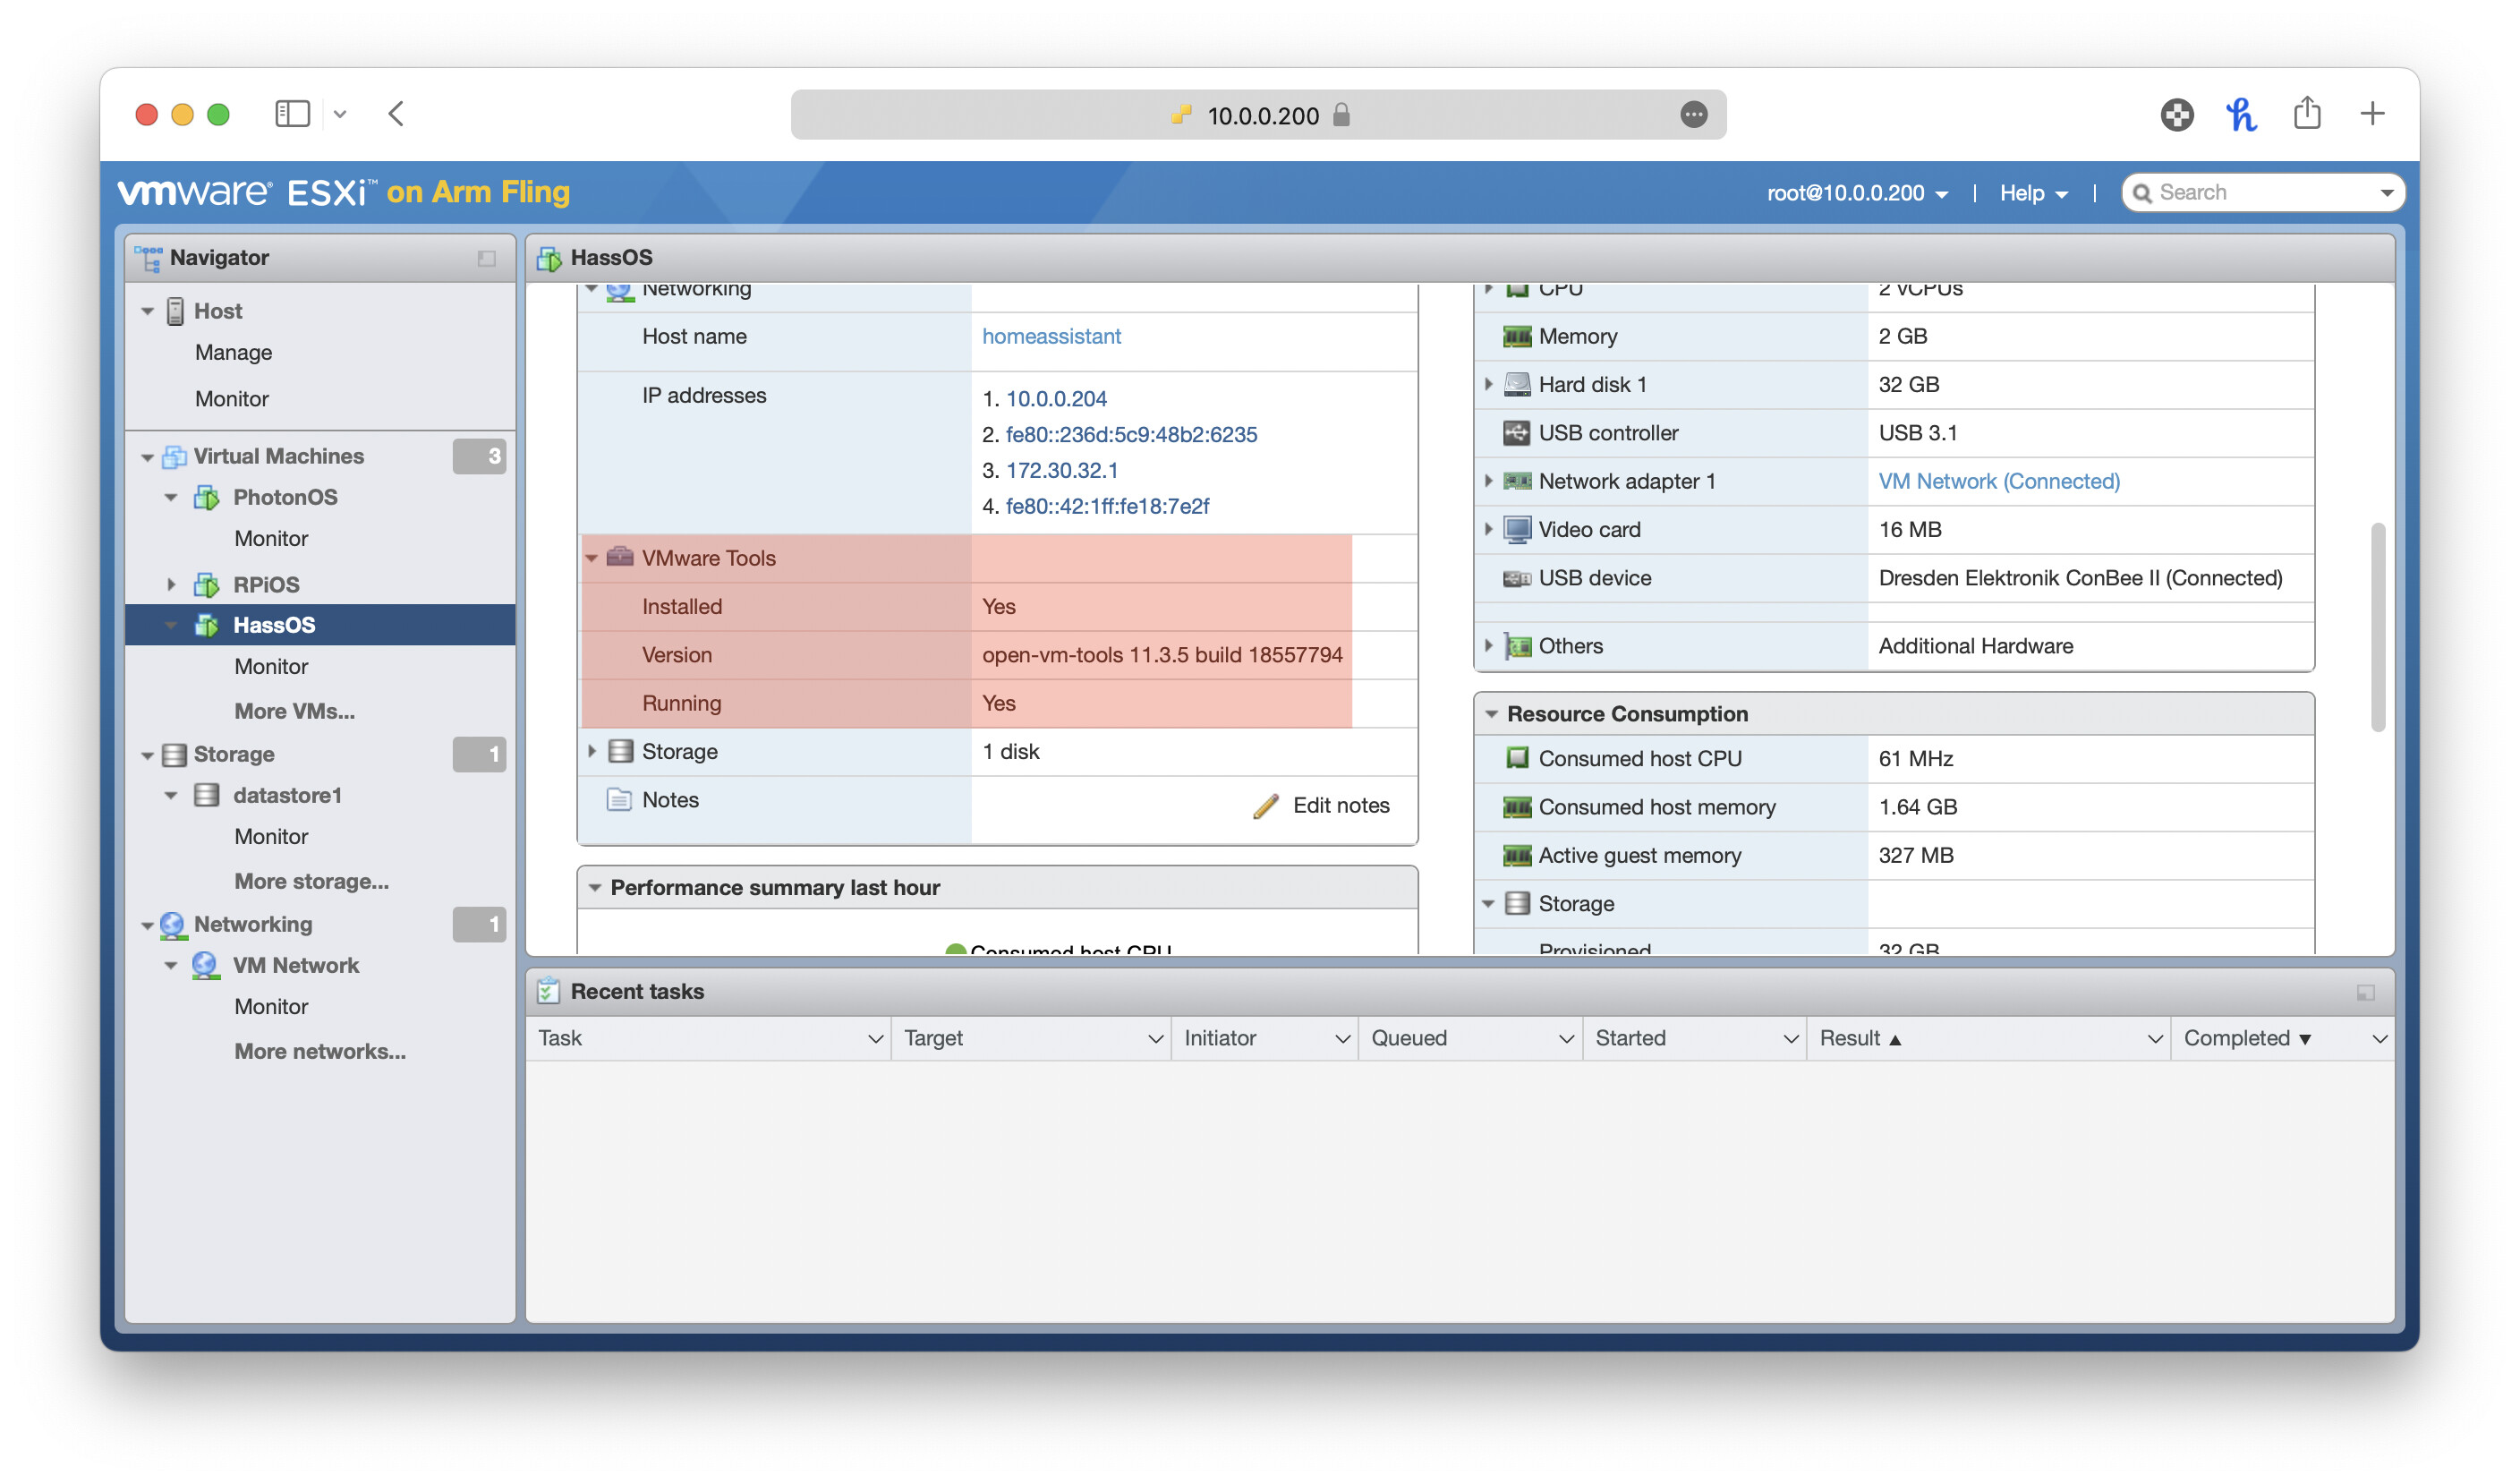
HAOS.vmdkfile to your ESXi datastore via vSphere web client:

Update (24.03.2023): Before proceeding, convert the .vmdk file accoridng to @toxadi as described here. You can run the command directly on the ESXi shell. Then continue with step 5.
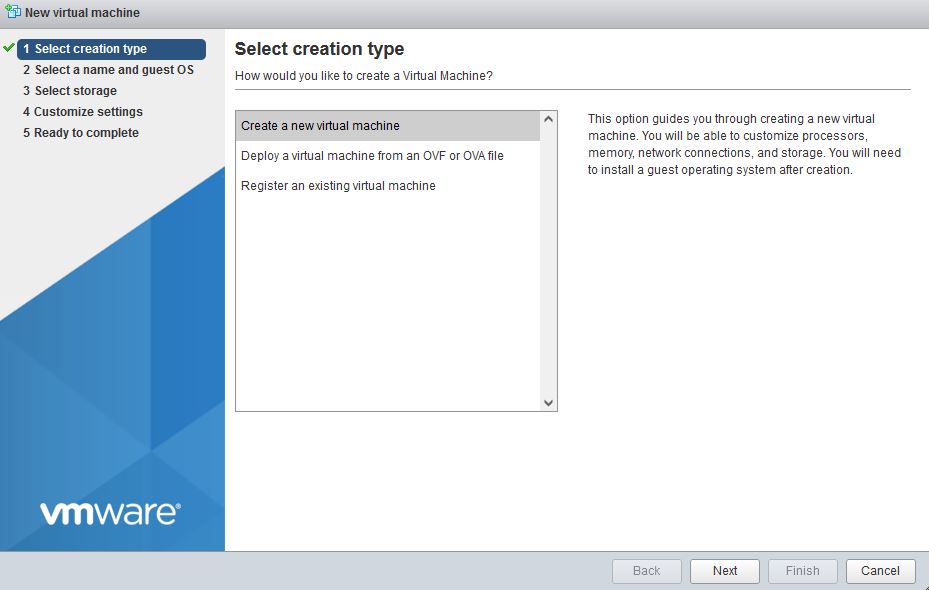
- Via vSphere web client create a new virtual machine on your ESXi host as follows:
Click onCreate/Register VM→Create a new virtual machine:
Next
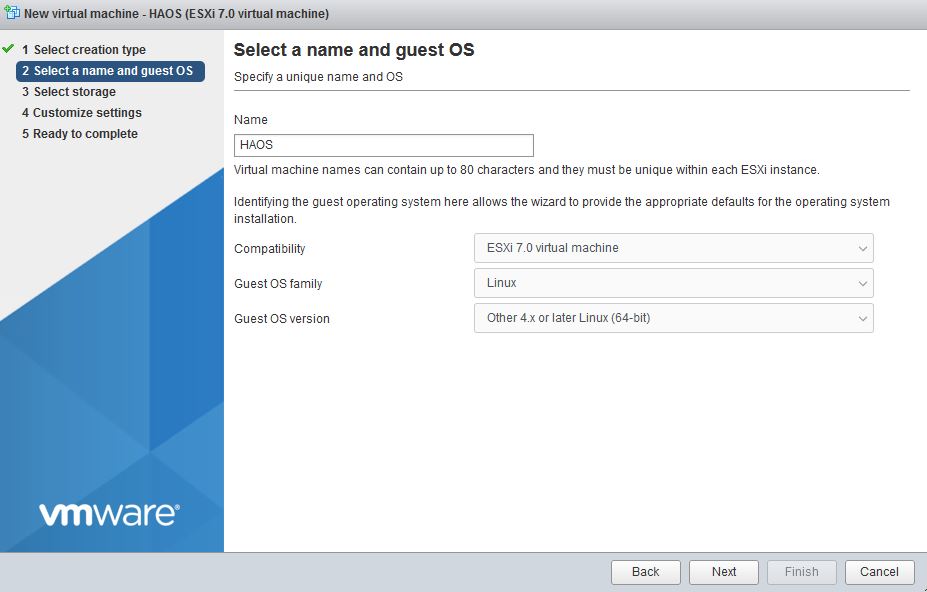
Give the VM a meaningful name (e.g.HAOS) and configure it as follows:
Next - Select the desired datastore for your VM (an iSCSI target in the following example):
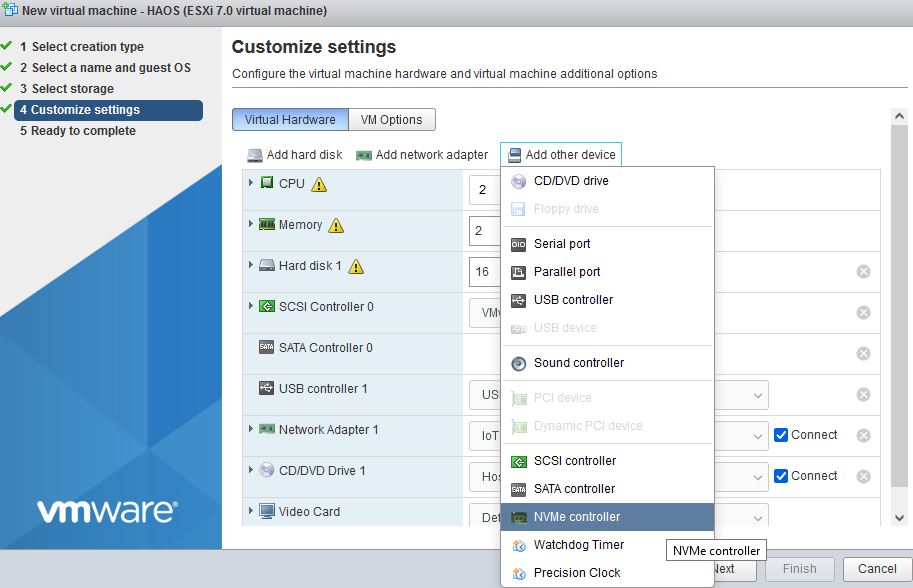
Next - Change the value for
CPUto2and forMemoryto2 GB. Then click onAdd other deviceand add anNVMe controller:
- Remove the following existing devices:
SCSI Controller 0,CD/DVD Drive 1andHard disk 1:
- Click on
Add hard disk→Existing hard disk…
…and select the accordingHAOS.vmdkfrom your ESXi datastore which you have uploaded before:
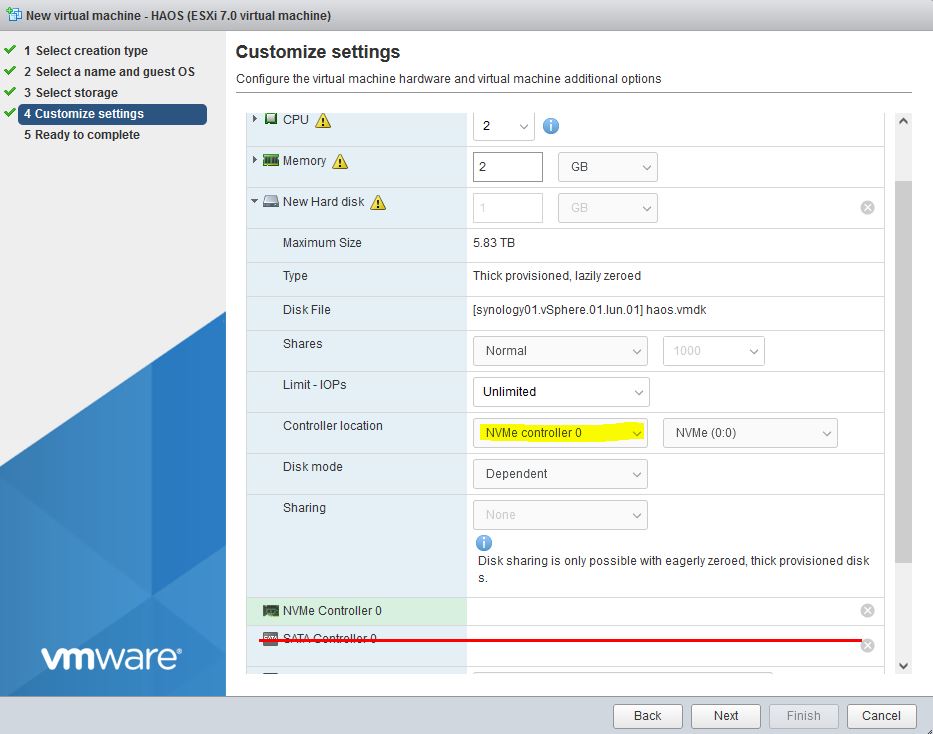
For the new hard disk change theController locationtoNVMe controller 0. Then remove the existingSATA Controller 0device (FYI: The default SATA controller would indeed work but replacing the default SATA controller with an NVMe controller reduces the software overhead of OS I/Os signficantly, which is actually what you really want, especially when running a VM on a low power Raspberry Pi based hypervisor):
- The VM setting should now look similiar to this:
Note: Leave the USB controller version onUSB 3.1and the network adapter type onE1000e. Don’t try any other settings as they won’t work!
If you have everything set up as described, clickNextand then check the settings summary again:
Click onFinish. - Now you want to increase the virtual disk size according to your requirements (especially if you are planning to migrate an existing Home Assistant instance, for example from an existing x86 installation to your new aarch64 architecture). To do so edit the VM again (Note: You could not do this step while creating the VM, you have to create the VM first before you are able to increase the disk size of the existing .vmdk via the vSphere web client):
Now change the disk size (32 GBin the following example):
Click onSave.


That’s it for the ESXi configuration part.
Before firing up your VM please doublecheck you have set the VM’s virtual network adapter to the correct portgroup of your personal/individual environment and if you are planning to migrate an existing Home Assistant instance you should also make sure that your old instance is not running anymore and that your new instance is getting the same IP address as the old instance. The easiest and most reliable way would be to set a static IP address bound to your new instance’s MAC address via your DHCP server. If you don’t have the possibility to do so you can also configure the static IP address of your new instance manually after firing up your brand new HAOS installation. Just make sure you have set the correct IP address before you start the migration process (e.g. restoring from a full backup).
FYI: The migration from HAOS x86 to HAOS aarch64 went flawlessly in my case by just restoring the full backup file. All integrations and add-ons were successfully restored without any hickups or manual steps, which in my case were:
Add-ons:
Zigbee2MQTT
Mosquitto
Samba backup
Samba share
NGNIX SSL proxy
ESPHome
Frigate NVR
Terminal & SSH
Integrations:
EmulatedRoku
Kodi
Logitech Harmony Hub
HACS
Season
That’s it, have fun with your new HAOS generic aarch64 installation on VMware Flings ESXi ARM!