I’m using a mhz19 on spome. Everything is working, I just don’t understand how to calibrate it.
mhz19.calibrate_zero Action
This action executes zero point calibration command on the sensor with the given ID.
If you want to execute zero point calibration, the MH-Z19 sensor must work in stable gas environment (400ppm) for over 20 minutes and you execute this function.
on_…: then: - mhz19.calibrate_zero: my_mhz19_id
You can provide service to call it from Home Assistant
button: #creates a button to calibrate the sensor - this will reset the zero point so use it only when it's been 20 minutes either outside or in a room you know the co2 level is at a minimum
  - platform: template
    name: "Calibrate Zero (20 minutes at 400ppm)"
    id: calibrate_zero
    entity_category: diagnostic
    on_press:
      - mhz19.calibrate_zero: mhz19

switch: # this will expose a switch to home assistant to turn on and off the ABC
  - platform: template
    name: "Automatic Baseline Calibration"
    entity_category: diagnostic
    optimistic: true
    on_turn_on:
      mhz19.abc_enable: mhz19
    on_turn_off:
      mhz19.abc_disable: mhz19
Now, a few recommendations from me that you can add to your code:
web_server: # creates a web server where you can access all this stuff without home assistant (good for debugging or working headless (no HA))
  port: 80
  include_internal: true
  ota: true

binary_sensor: # exposes online status
  - platform: status
    name: "Sensor Status"

text_sensor:
  - platform: wifi_info
    ip_address: # exposes the IP Address when connected
      internal: true
      id: wifi_ip_addr
      name: "IP Address"
    ssid: # exposes the SSID when connected
      internal: true
      id: wifi_ssid
Something to share with my experience.
I just installed the MH-Z19C to my esp8266 and was getting very high CO2 readings.
I did try the “automatic_baseline_calibration:” but did not work.
I also let the unit stay “as-is” for about 2 days, and was still geting very high CO2 readings.
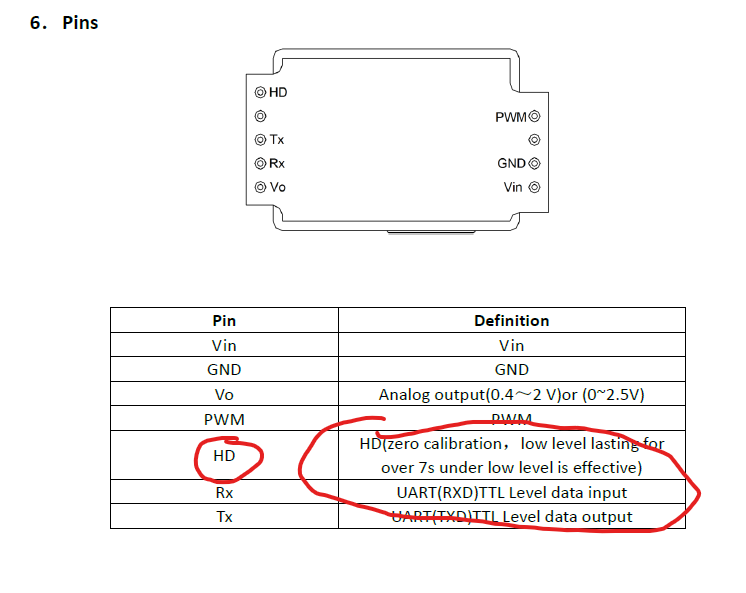
I finally tried grounding PIN 1 (terminal version) or PIN HD for 7 to 10 seconds outdoors. This will “hard calibrate” the sensor. If possible, do it in a 400 ppm environment to get best results. I did mine outdoors and it worked. My readings looks more inline with my other CO2 sensors.
My other CO2 sensors are: Netatmo Weather station, Airgradient Pro Indoor (Senseair S8).