Something like this listing? Looks like they have one that signals at 0-3.3V and is powered by 5V. I may go ahead and order one and try to build up one of these sensors. The leaded pressure sensor seems like a far more stable solution than the ultrasonic methods I’ve been seeing.
Yes that is what I was looking at (at least those same specs; I have no opinion or information on any of the different sellers).
I use an ultrasonic sensor for a different application (water softener salt tank level) and it is definitely much less accurate / has way more noise and variability. These submerged liquid sensors are pretty rock solid.
If you get one and get your sensor running please follow up with feedback on how well it works.
1 Like
Just a small update, I did order the 0-3.3V device. It is running off of the same 5V USB wall wart as the ESP and I have the output signal routed directly into the ADC. I only just configured the minimum viable config for what I needed until I have more time but it seems to be working great! The main thing I next need to tweak is some excess noise in the data and implement an alarm feature for high levels. But I can confirm the 3.3V sensor works great!
1 Like
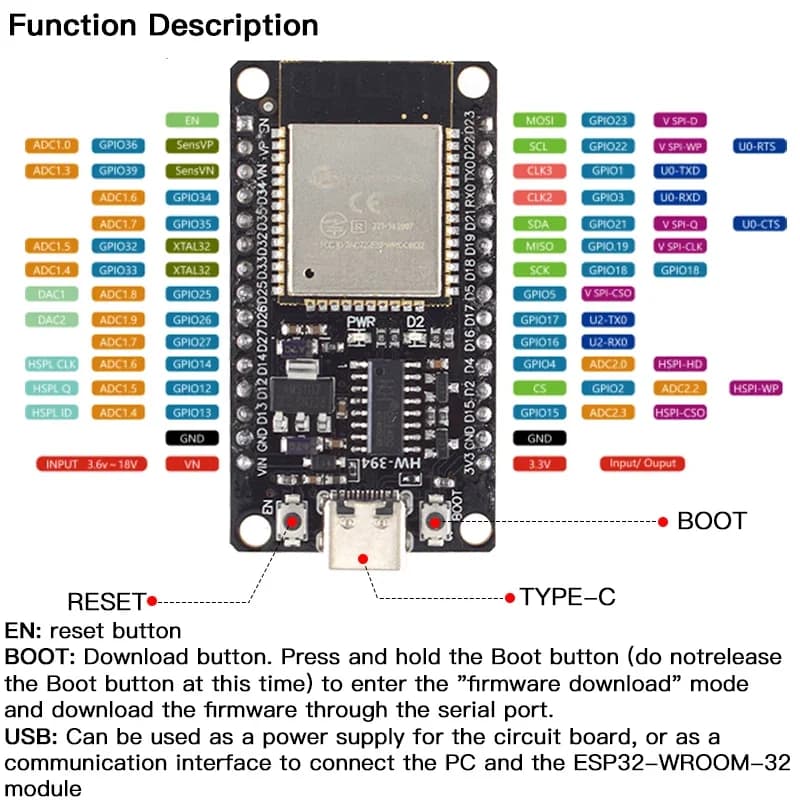
well done on the project, I’m not sure if this is old or not but have a few questions maybe anyone could answer. I’m not sure where the primary pump and the secondary pump are connected in this diagram. The ESP32 board is a ESP32-DevKitC-32 30P
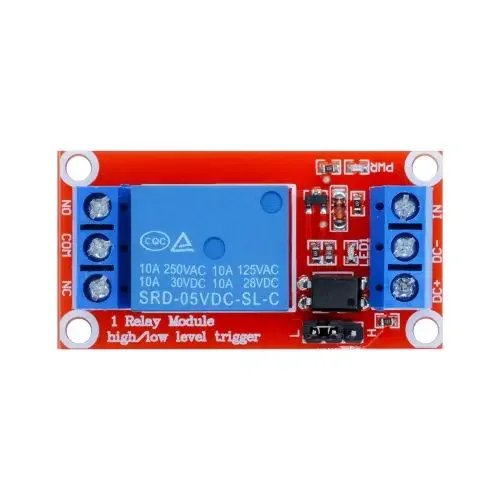
Could anyone help? I also have the following relay where do each connection of the relay go please?
Edit: also when I upload the firmware yaml file to esphome I get:
INFO Successfully compiled program.
ERROR Error resolving IP address of ['sump-pump.local']. Is it connected to WiFi?
ERROR (If this error persists, please set a static IP address: https://esphome.io/components/wifi.html#manual-ips)
ERROR Timeout resolving IP address: Timeout while resolving IP address for ['sump-pump.local']
WARNING Failed to upload to ['sump-pump.local']
I did the initial set up of it and then edited the yml file to add this config. What do I do?
Edit 2: I did a install and manual download of the bin file, then uploaded it through the esphome web interface successfully, though on the logs it tells me:
[00:20:17][W][esp-idf:000]: E (243632) i2c.master: i2c_master_execute_defined_operations(1366): I2C transaction failed
[00:20:18][W][esp-idf:000]: E (243731) i2c.master: I2C hardware timeout detected
[00:20:18][W][esp-idf:000]: E (243732) i2c.master: s_i2c_synchronous_transaction(945): I2C transaction failed
What does this mean?
Edit 3: I think software wise it’s fine, I just need to connect everything together. Can you help out with the diagram please?
I’m using a Containerised ESP Home on docker on my Synology NAS and running also Homeassistant. Not sure if I can add this device on homeassistant? I’m assuming it needs to run under the esphome interface.
Thanks!
The schematic is in the first post. There is no connection to your primary or secondary pump; this device just monitors the level sensor.
The i2c issue you are having is because you don’t have anything wired to the i2c pins on the esp.
Your HA installation method doesn’t matter here. If the esp device is successfully flashed, and then connects to WiFi upon startup, HA should see it and ask to add it.
I see ok thank you. So best is to have a normal pump connected to 240v (here in my country) Then have another connected to the 12v battery and the sensor sends feedback on the water level.
So as I understand where you have the J2 (pinouts), I’m not sure why the no1 ground is different here. I’m sorry not too tech savvy on this one.
The relay is connected as +5v to DC IN (pin 6) and then DC- is GND(pin 5).
The siren has it’s power connected to pin 2 as it’s 12v, it’s ground goes to the COM of the relay whilst the orange SIREN Relay pin 4, goes to the IN of the relay next the DC- correct?
The Snooze button is the + of the switch to pin3 (yellow wire) and - of the switch goes to ground.
Apologies for the lack of understanding in electronics, I just started with home assistant and all this month. Great project I’m looking forward to make it all work ![]()