Navigation Card for Home Assistant
![]()
![]()
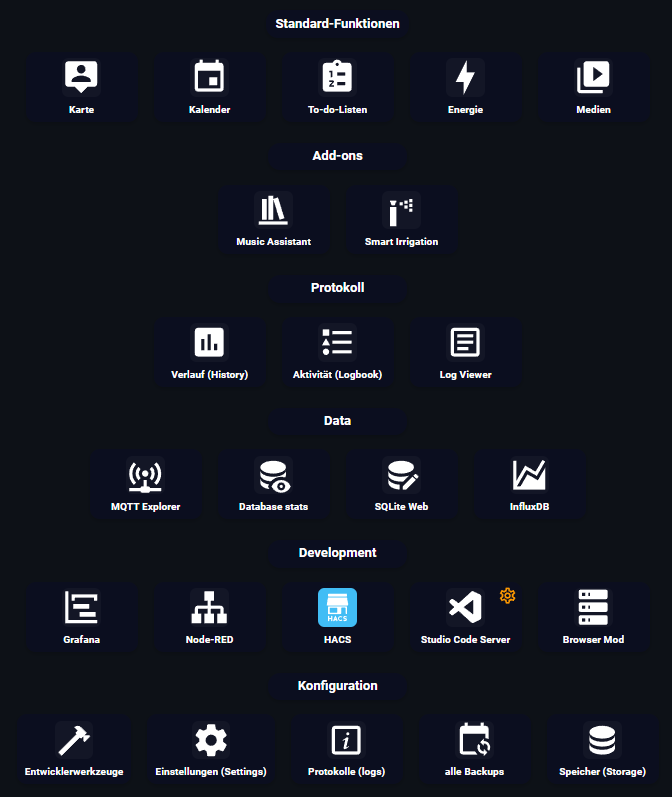
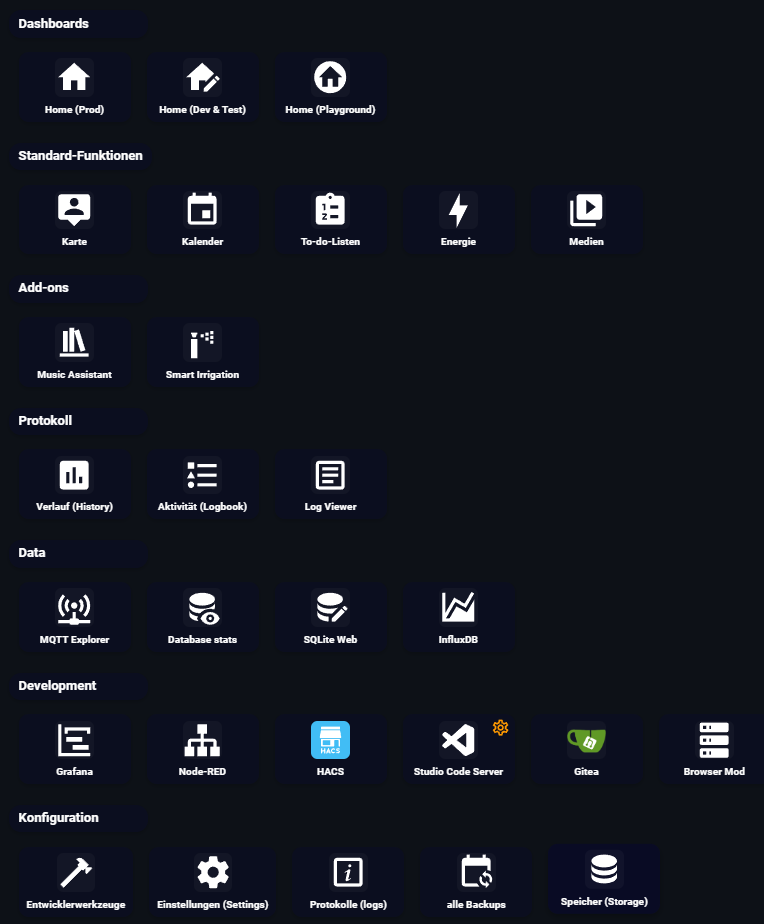
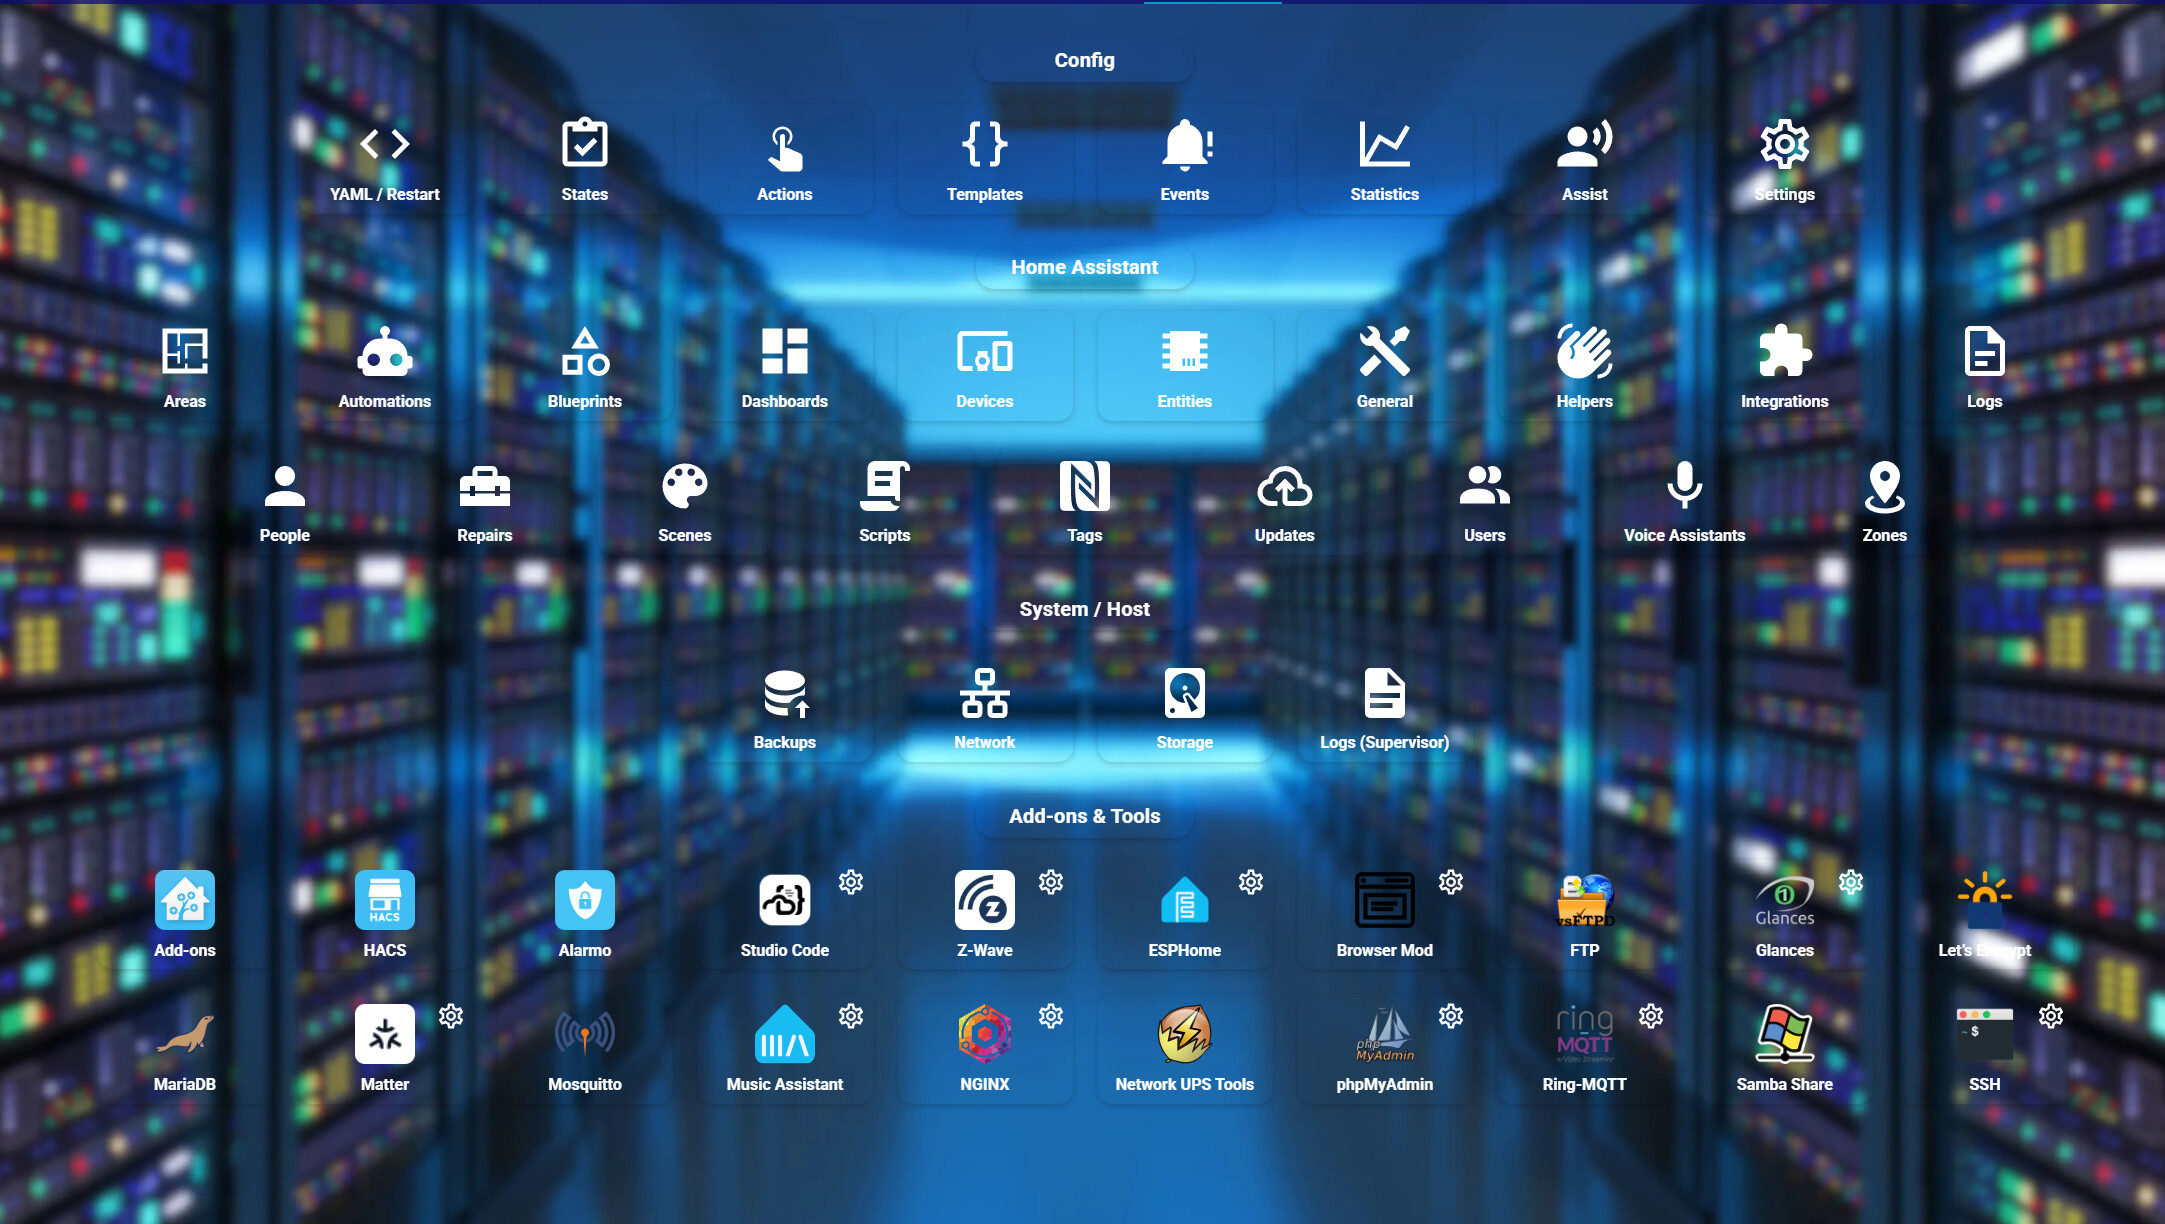
A customizable navigation card for Home Assistant that creates a launcher/dock interface for your Lovelace dashboard. Perfect for quick access to frequently used pages, add-ons, and settings.
 Features
 Multiple Sections - Organize navigation items into logical groups
 Custom Icons & Images - Use Material Design Icons or custom images
 Settings Shortcuts - Optional gear icon overlay for quick settings access
 Visual Editor - Easy-to-use UI configuration through Lovelace
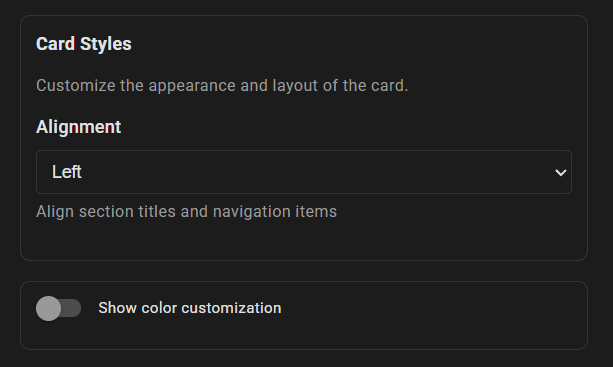
- Customizable - Adjust colors, backgrounds, and styles
 Responsive Design - Looks great on mobile and desktop
- Smooth Animations - Hover effects and smooth transitions
 Installation
HACS (Recommended)
- Open HACS in your Home Assistant instance
- Go to “Frontend”
- Click the three dots in the top right and select “Custom repositories”
- Add this repository URL:
https://github.com/JOHLC/HA-Navigation-Card - Select category “Lovelace”
- Click “Add”
- Find “Navigation Card” in the list and click “Install”
Manual Installation
- Download
ha-navigation-card.jsfrom the latest release - Copy it to your
config/wwwfolder - Add the resource to your Lovelace dashboard:
- Go to Settings → Dashboards → Resources
- Click “+ ADD RESOURCE”
- URL:
/local/ha-navigation-card.js - Resource type: JavaScript Module
- Restart Home Assistant
 Quick Start
Basic Configuration
Add the card through the UI or use YAML:
type: custom:ha-navigation-card
sections:
  - title: Configuration
    items:
      - label: Settings
        icon: mdi:cog-outline
        url: /config/dashboard
      - label: Devices
        icon: mdi:devices
        url: /config/devices/dashboard
      - label: Automations
        icon: mdi:robot
        url: /config/automation/dashboard
Configuration Options
Card Options
| Name | Type | Default | Description |
|---|---|---|---|
sections |
array | Required | Array of navigation sections |
title |
string | optional | Optional card title |
colors |
object | optional | Custom color overrides |
Section Options
| Name | Type | Description |
|---|---|---|
title |
string | Section heading text |
items |
array | Array of navigation items |
Item Options
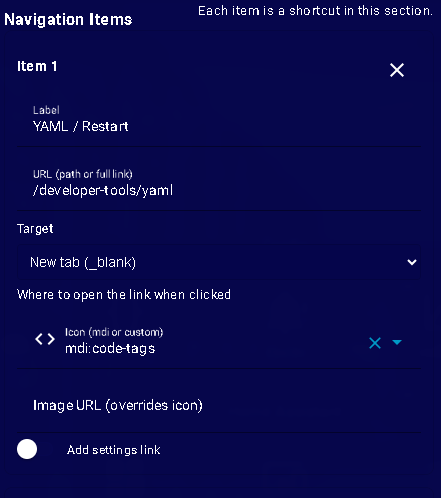
| Name | Type | Description |
|---|---|---|
label |
string | Display text for the item |
url |
string | Navigation URL (internal or external) |
icon |
string | MDI icon name (e.g., mdi:home) |
image |
string | Image URL (overrides icon if provided) |
settings |
object | Optional settings link overlay |
Settings Options
| Name | Type | Description |
|---|---|---|
label |
string | Tooltip text for settings icon |
url |
string | Settings page URL |
icon |
string | Icon for the settings button |
Color Options
| Name | Type | Description |
|---|---|---|
title_bg_color |
string | Background color for section titles |
item_bg_color |
string | Background color for items |
item_bg_color_hover |
string | Background color on hover |
icon_bg_color |
string | Background color for icon area |
text_color |
string | Text color |
settings_icon_color |
string | Color of settings icon |
settings_icon_size |
string | Size of settings icon (e.g., 24px) |
Usage Tips
Finding Add-on URLs
For Home Assistant add-ons, URLs typically follow these patterns:
- Ingress URL:
/hassio/ingress/<addon_slug> - Settings URL:
/hassio/addon/<addon_slug>/config - Logo:
/api/hassio/addons/<addon_id>/logo
To find your add-on IDs:
- Go to Settings → Add-ons
- Click on an add-on
- Check the URL in your browser
Using Custom Images
Store custom images in your config/www folder and reference them as:
image: /local/my-icon.png