Piotras Climate Info
The ultimate monitoring hub for your home climate and energy usage.


4 layout modes:
- Layout 1: Compact Row — icon | name | values arranged in a single horizontal row, perfect for sidebars
- Layout 2: Vertical Stack — adapts automatically based on icon size: horizontal (icon left, data right) for
icon_size > 30, vertical (name → icon → data) for smaller icons - Layout 3: Multi-Column Grid — each device in its own tile with name at top, icon centered, data below
- Layout 4: Energy & Percentage Monitor — vertical gauge bar per device with a moving value pointer, optimized for Watts, Amps, Volts or any numeric sensor
Key features:
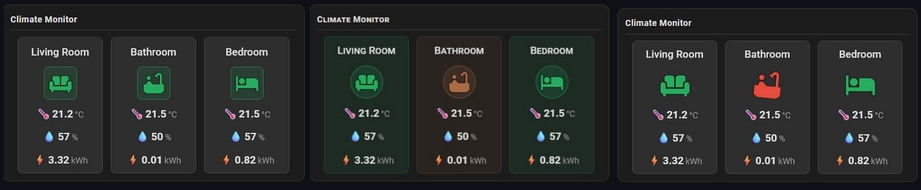
- Temperature, humidity and energy in one clean view per room
- Per-device temperature color zones — set your own Cold / Comfort / Hot thresholds and colors independently for each device
- Fluid color interpolation —
show_linear_color: trueenables smooth gradient transitions between color zones - Smart icon animations — optional bounce (cold) and shake (hot) animations activate outside threshold boundaries; enabled with
show_anim: true - Active indicator — a badge dot shows when a device is currently running (
entity_praca) - Icon shape — choose between circular (
form_icon: 1) and rounded square (form_icon: 2) icon rings - 4 font styles — default, small-caps, monospace, uppercase with letter spacing
- SVG-based rendering — pixel-perfect on any screen and resolution
- Fully responsive — automatically adapts to card width
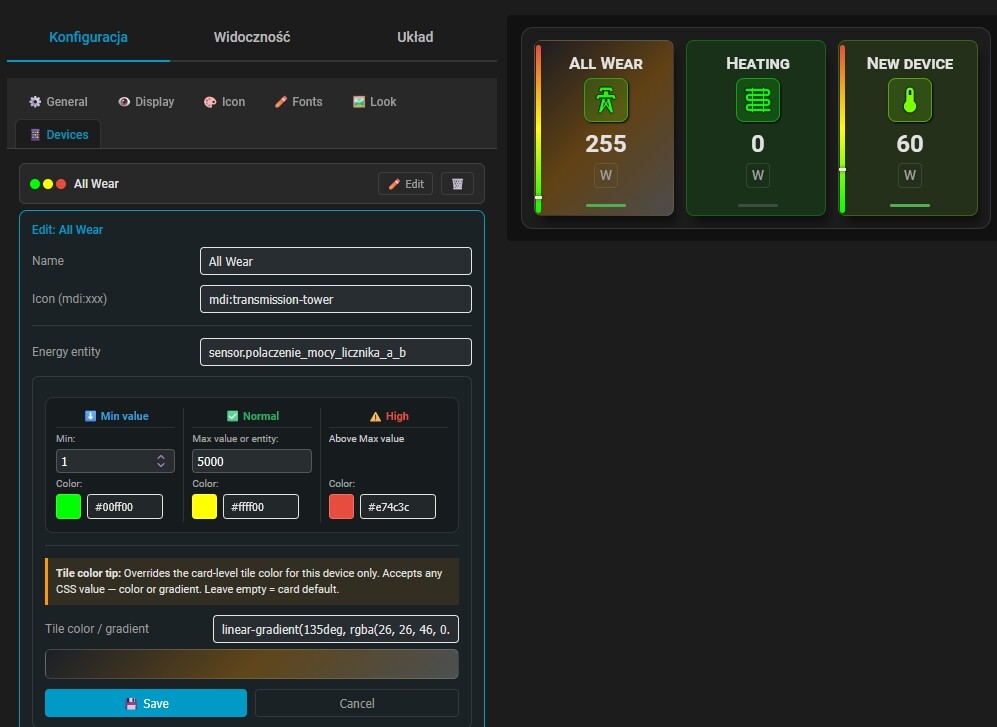
Visual Editor: Full GUI editor — add devices, configure temperature color zones with color pickers and range sliders, set icons, entities and sensors without touching YAML.
 Installation
Method 1: Via HACS (Recommended)
- Click the button below to automatically add the repository to your HACS:
- Click Add in the pop-up window.
- Once the repository page opens, click Download.
- After downloading, do a Hard reload of your browser.
Method 2: Manual Installation
- Download this repository as a ZIP file and extract it.
- Inside your Home Assistant
config/www/directory, create a new folder namedpiotras-climate-info. - Copy the compiled files (from
dist/folder) intoconfig/www/piotras-climate-info/. - Go to Settings → Dashboards → Resources.
- Click Add Resource and enter:
/local/piotras-climate-info/piotras-climate-info-loader.js?v=1.1.0
- Resource type: JavaScript Module
- Hard reload your browser (
Ctrl+Shift+R).