In our house, the electrician used only 3-wire cables (G,N,L) for providing power to the outdoor roller blinds. We could not even exchange them by 4-wire cables (G,N,L1,L2) for separated up-/down in order to connect a traditional wall-mounted indoor double push-button and operate a Zigbee, Z-Wave or WiFi based module to integrate that into HA - reason: the cables are connected via non-accessible junction boxes inside the ceiling.
We did not want to use battery-powered remote controls that lie around and get lost all the time. My solution was to use two identical Zigbee based roller shutter modules - after quite a long search and trial-error, I decided for NodOn SIN-4-RS-20 due to their relatively small form factor (we don’t have space in the concrete holes), their wide environmental temperature range and the Zigbee2MQTT compatibility due to bad WiFi coverage outdoor. Now that Shelly goes Zigbee as well with Gen4 models, they could be an even better solution.
Basically I mounted one SIN-4-RS-20 outdoor to control the roller shutter motor and another one indoor behind the wall-mounted double push button (Siemens Delta series). I integrated the two modules in Home Assistant via Zigbee2MQTT and after the initial firmware update, I configured a Zigbee binding. And that works pretty well so far.
Here’s what you need to do:
-
Turn off power in your home.
-
Mount the indoor SIN-4-RS-20 roller shutter module in the wall by connecting the (typically) blue neutral wire to the N and the (typically) black live wire to L port.
-
Connect a coloured wire (e.g. purple) to I-up and a second one (e.g. brown) to I-down. I is for for Input, these ports take the push button impulses.
-
Connect the double push button (I used Siemens 5TA2114): Another black live wire goes to L, while the purple wire for Up goes to port 1 and the brown wire for Down goes to port 2. Leave port 3 empty. I avoided an extra wire terminal for the L wires by using the second L port on the Siemens 5TA2114 to connect the NodOn module with power.
-
Turn on power in your home and put Zigbee2MQTT in Joining mode. Once the new device is listed in Zigbee2MQTT, rename it to something like “Push-Button Kitchen” or whatever you like. Navigate to the OTA menu of Zigbee2MQTT and perform a firmware update. Do not turn off power before this is finished. You may experience log messages claiming that after the update, the installed firmware is newer than the latest available one - this is a known NodOn issue. You can ignore it.
-
When done, turn off power again in your home.
-
At the outdoor roller blind, you will most probably not find an open cable, but something like a Hirschmann STAS3 female connector. So we need to produce a short 4-wire cable with the opposite Hirschmann STAK3 male plug (black wire for UP goes in the middle, brown wire for DOWN goes in the “lower” port where you have slightly more space and the grey N wire goes in the “upper” port with less space for cabling. Obviously the earth wire goes into the separated cubic port. I recommend pre-bending the wires before connecting them to the plug (see picture).
-
The open side of our short cable connects directly to the outdoor NodOn roller shutter module. You may want to use a small outdoor plastic junction box for this connection in order to protect the NodOn module from water and dust. Be sure that the box fits behind the motor and does not interfere with the roller blinds when fully opened. I used a 83 x 54 x 30 mm box from Amazon (Hmkesoteric), drew two holes for the in and the out cable and protected the sharp edges with simple O-rings (sealing rings).
-
Fit the open end of the new cable into one of the holes and inside the box, connect the neutral wire (in my case grey) via a small 3-wire terminal to NodOn’s N port. The (unfortunately black) Up wire goes directly to M-up and the brown Down wire to M-down. M is for motor. The yellow-green earth wire (GND) will be directly connected inside the box to the 3-wire cable.
-
You will need small terminals for the connections (at least one 3-wire for N and one 2-wire for GND (earth wire), but I recommend to use a second 2-wire terminal also for the L wire, in order to avoid direct connection to the NodOn module. This way you can easily disconnect the junction box from the 3-wire cable, if needed later).
-
Take the 3-wire cable coming from the outlet and connect the (typically) blue neutral wire to the N terminal and the (typically) black live wire to the L terminal, coming from the L port of the NodOn SIN-4-RS-20. Connect the yellow-green earth wire to the respective wire terminal.
-
Close the junction box, connect the Hirschmann plug and place the box inside the roller shutter compartment to a safe place that you have chosen. I used cable ties to fixate the box and the cables along the metal strip that contains the motor.
-
Turn on power again and include the NodOn device to your Zigbee2MQTT as you have done with the other module.
-
Finally, after you have renamed it to something like “Roller Shutter Kitchen” and done the OTA firmware upgrade, navigate to “Devices” menu within Zigbee2MQTT, click on the outdoor module and navigate to the “Bind” menu. Configure a new binding between endpoint 1 of both devices – so you select “1” from the source endpoint drop-down list, then the indoor push button module from the Destination drop-down list. In the third list, we chose again “1” as destination endpoint. Finally, select the “Closures” cluster and click on the blue “Bind” button. I did this both ways, so I opened the other module and did the binding the other way round as well. Maybe not needed, but it works.
-
Should you experience any Zigbee based issues, I recommend using your favourite AI chatbot to copy/paste the Zigbee2MQTT log entries and receive quite good support.
Shopping list:
-
2x NodOn SIN-4-RS-20
-
1x Siemens Delta 5TA2114 double-push button (or similar)
-
1x Siemens Delta (or BJC) 5TG6214 double-rocker with Up/Down symbols and frame (or similar)
-
1x Hmkesoteric outdoor junction box 83x54x30mm (or similar)
-
1x YIXISI YE0205WWA04 O-rings (or similar)
-
Wires for cabling (blue, black, 2x coloured, e.g. purple, brown)
-
2-4 Cable ties
-
A plug set for motor connection (e.g. Hirschmann STAK3 and STAS3)
Enjoy ![]()

Wall mount module with double push-button

Wall mounted push buttons instead of battery operated remote control

Items you will need for connecting and mounting the outdoor module

Pre-bending the wires for the Hirschmann plug (highly recommended)

Final wiring of the Hirschmann STAK3 plug

Don’t forget the cover and the correct order of its parts along the cable

Junction box with O-rings for protection

Insert the open end of the 4-wire cable via one of the holes

First step of wiring the motor sided cable to the NodOn module
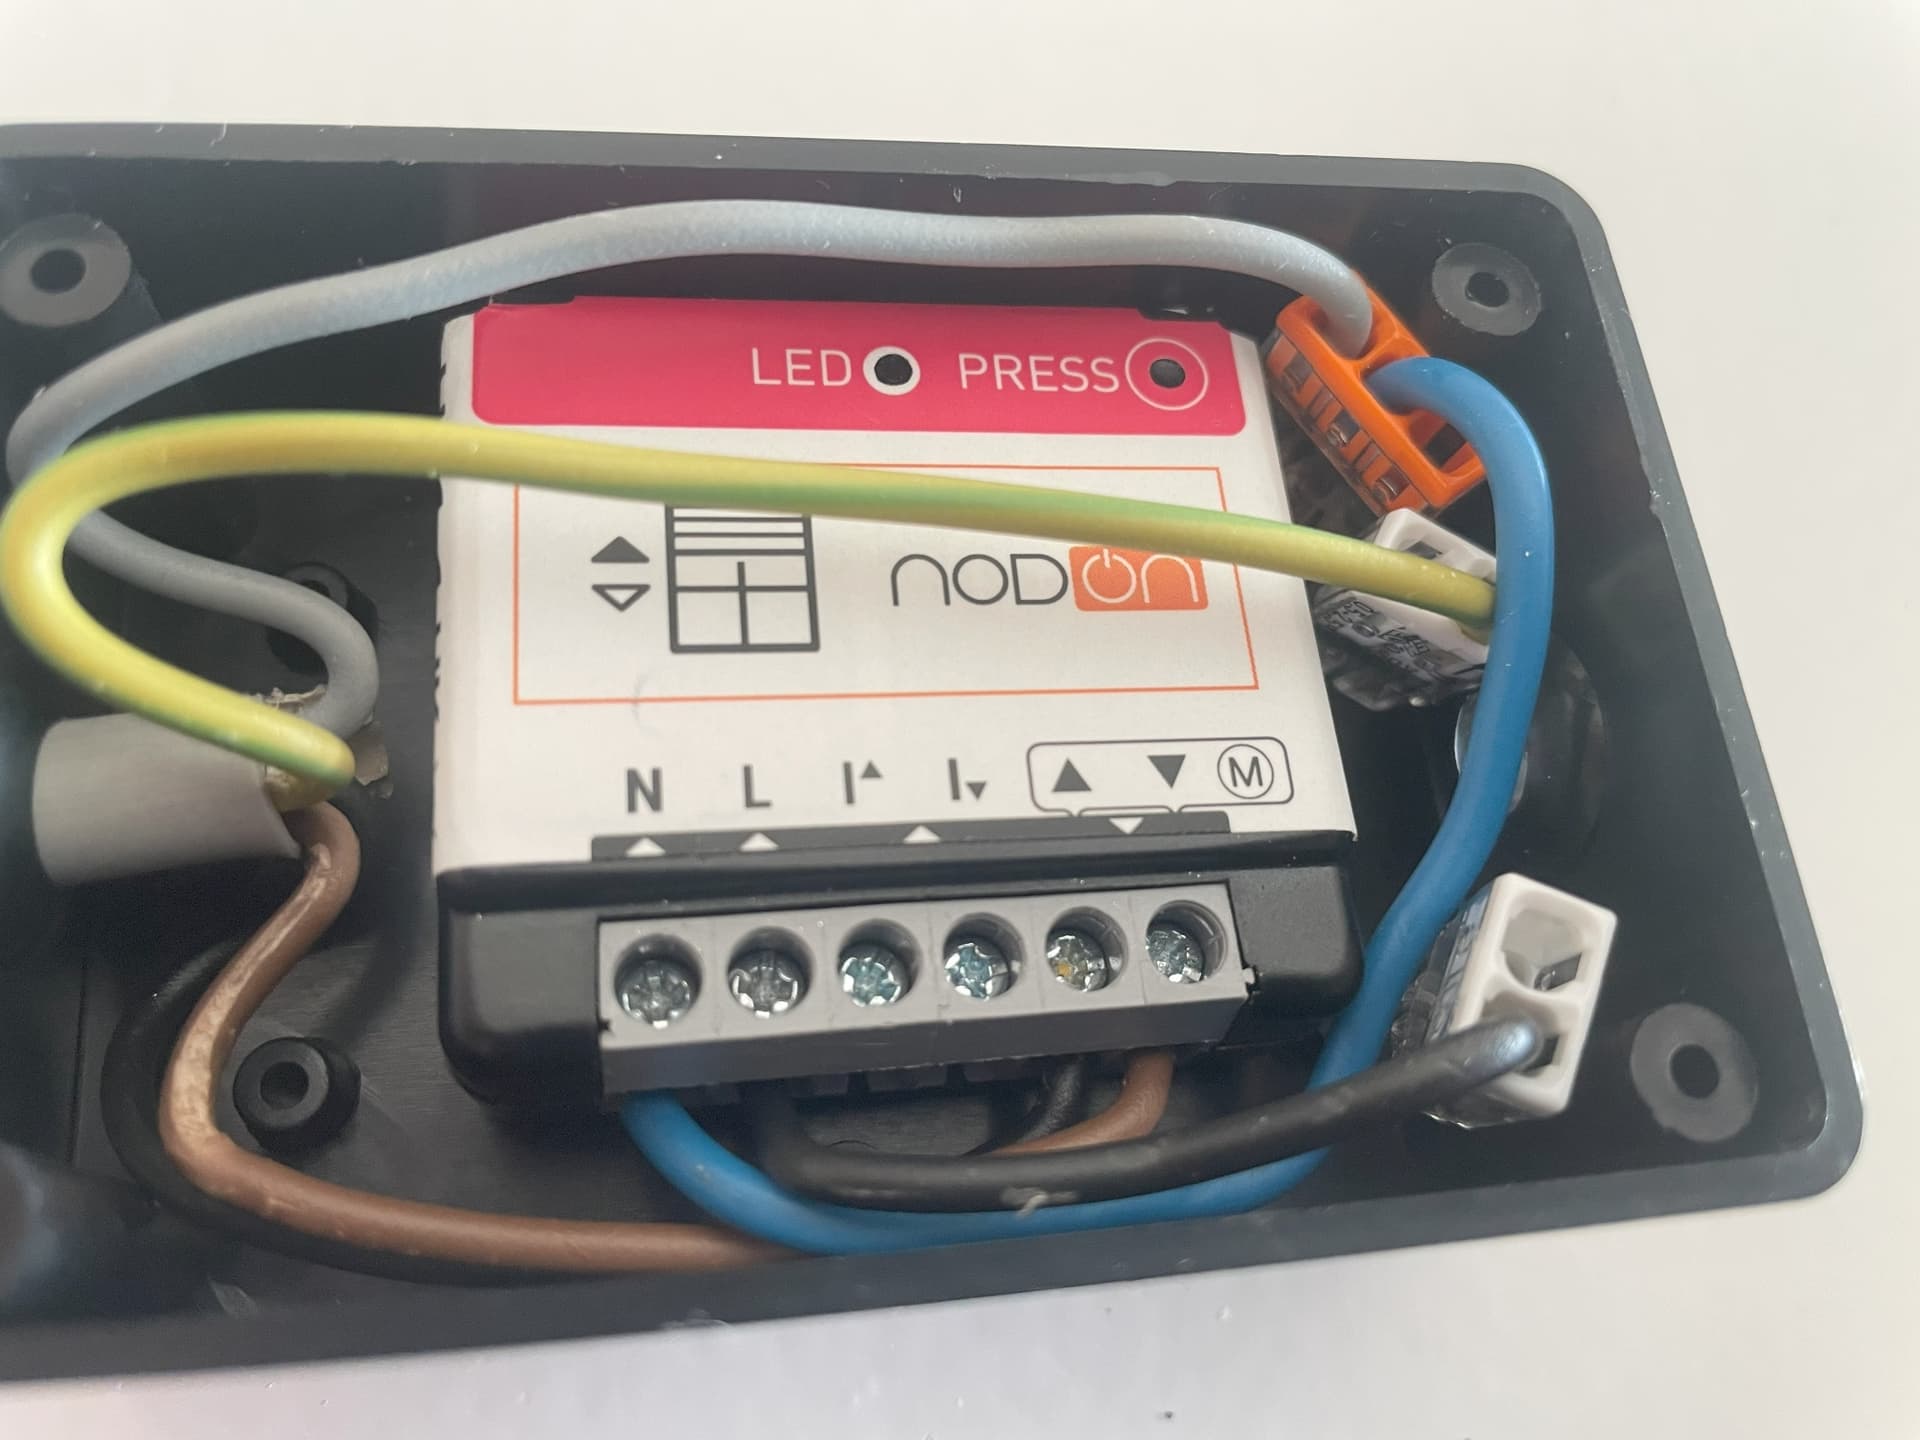
Second step of wiring the motor sided cable to the NodOn module

Final step, connect the 3-wire source cable from the outdoor wall outlet to the terminals
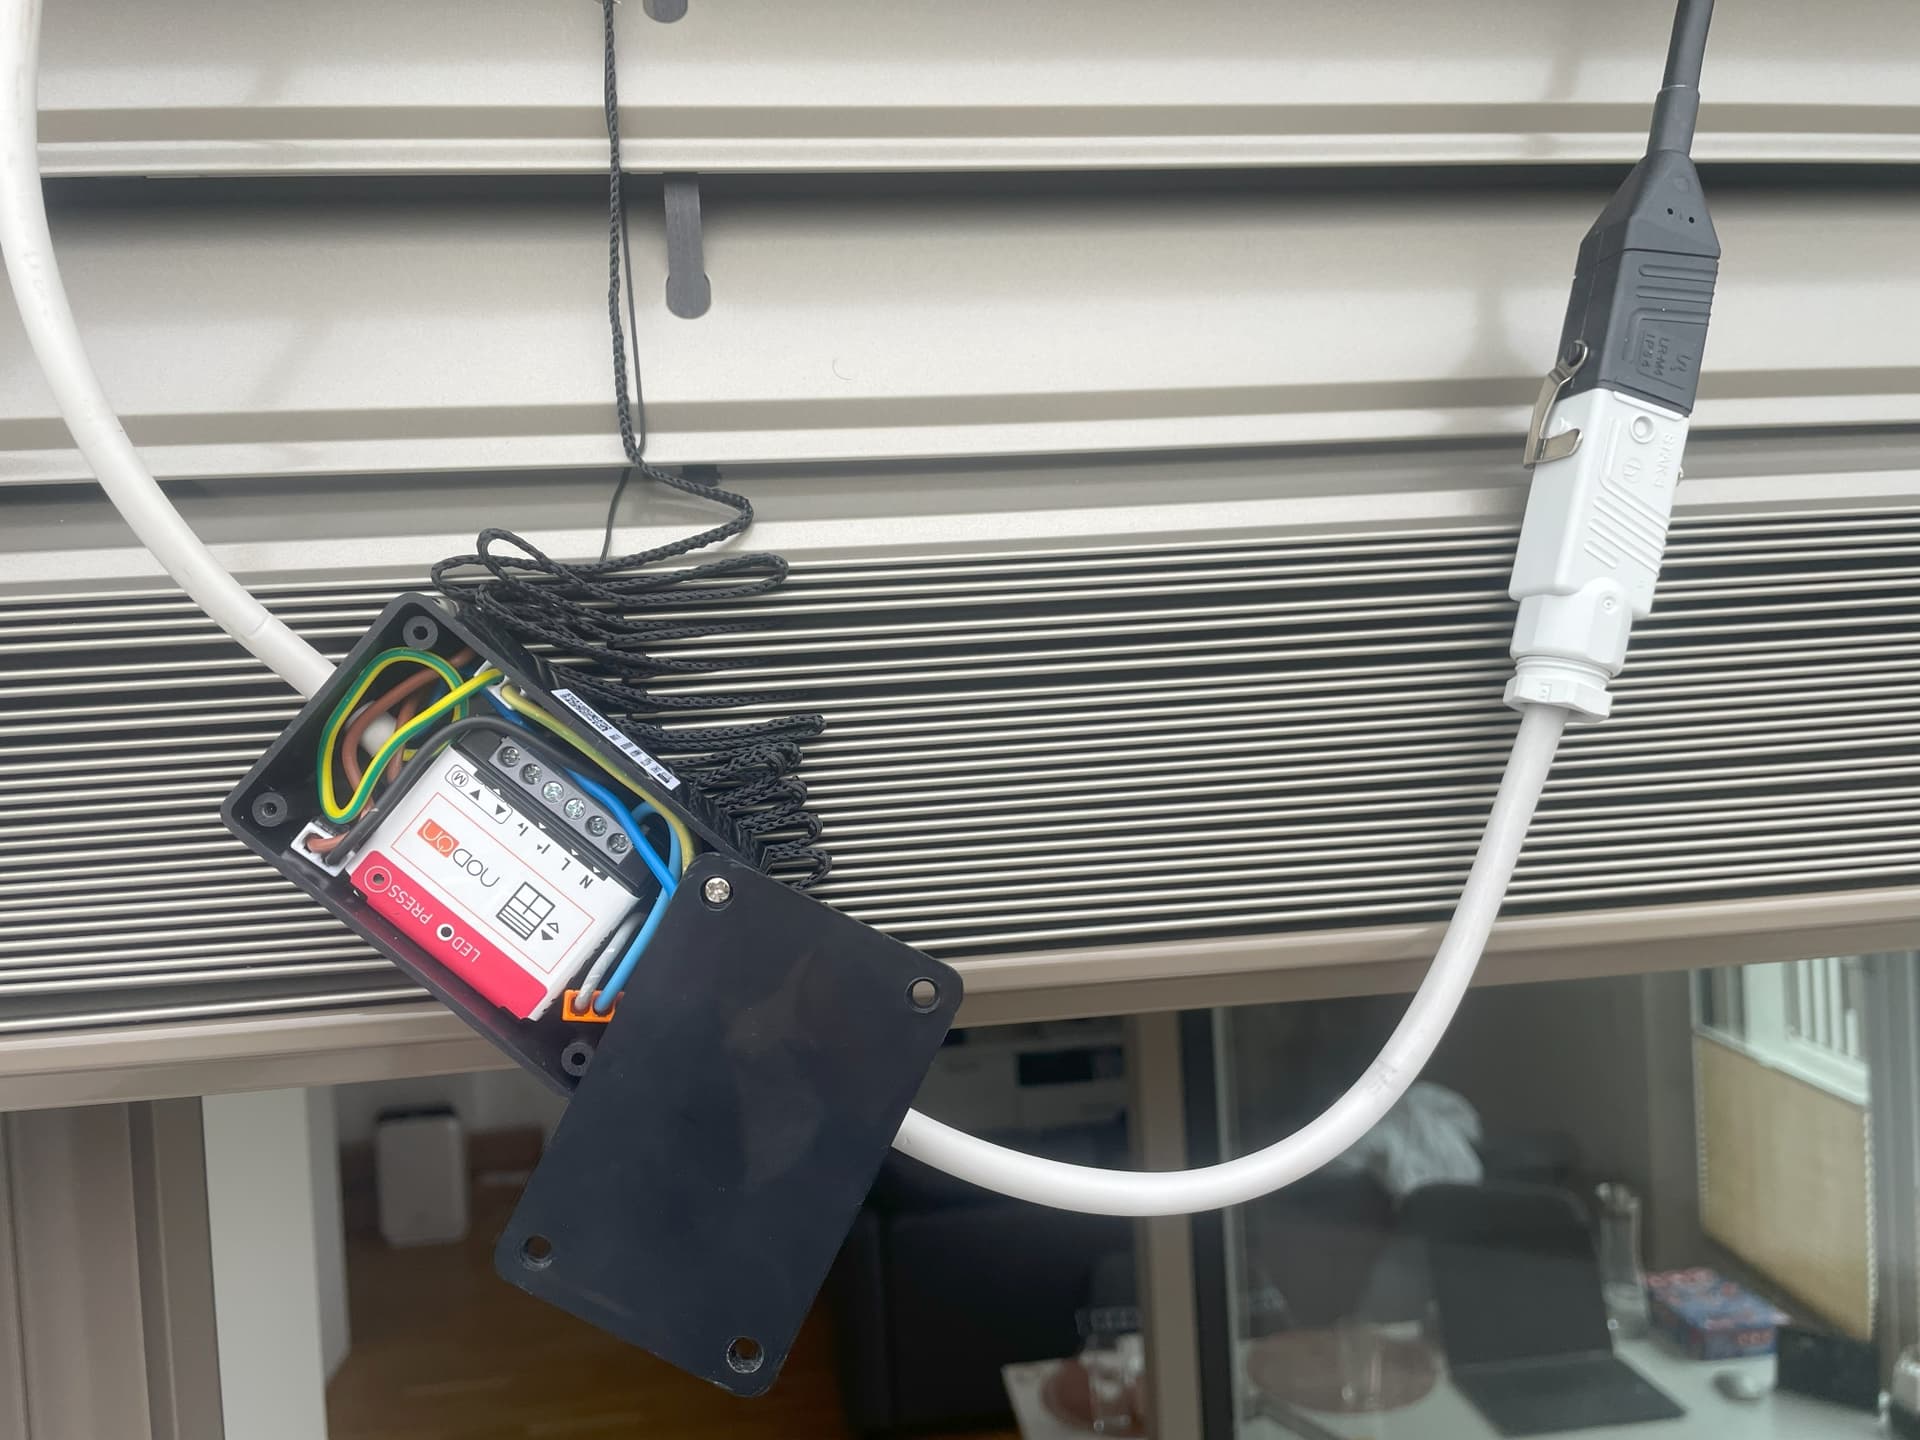
Connect the module to the motor (Hirschmann STAK3 into STAS3) and secure the plug

Final spot for mounting the junction box with cable ties

Zigbee binding in Home Assistant (Zigbee2MQTT)