💡 Sensor Light - Motion Sensor - Door Sensor - Sun Elevation - LUX Value - Scenes - Time - Light Control - Device Tracker - Night Lights

@poupaerta

You just type the value you need in and save.

Blacky :grinning:

@Stegerius

There’s a bit more to it. The best way is to use a template sensor to handle “unavailable” states. For example: if the sensor is 'off' or 'unavailable', treat it as OFF, otherwise treat it as ON.

{% if states('sensor.your_christmas_sensor') in ['off', 'unavailable'] %}
  off
{% else %}
  on
{% endif %}

Blacky :grinning:

1 Like

I’m having an issue where restarting HA triggers lights to turn on, even when they were off before the HA restart. Any idea what the underlying condition in the BP is that might trigger that given the trigger entity was only unavailable or off?

@ctml

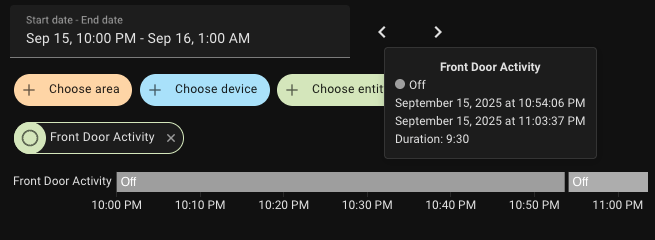
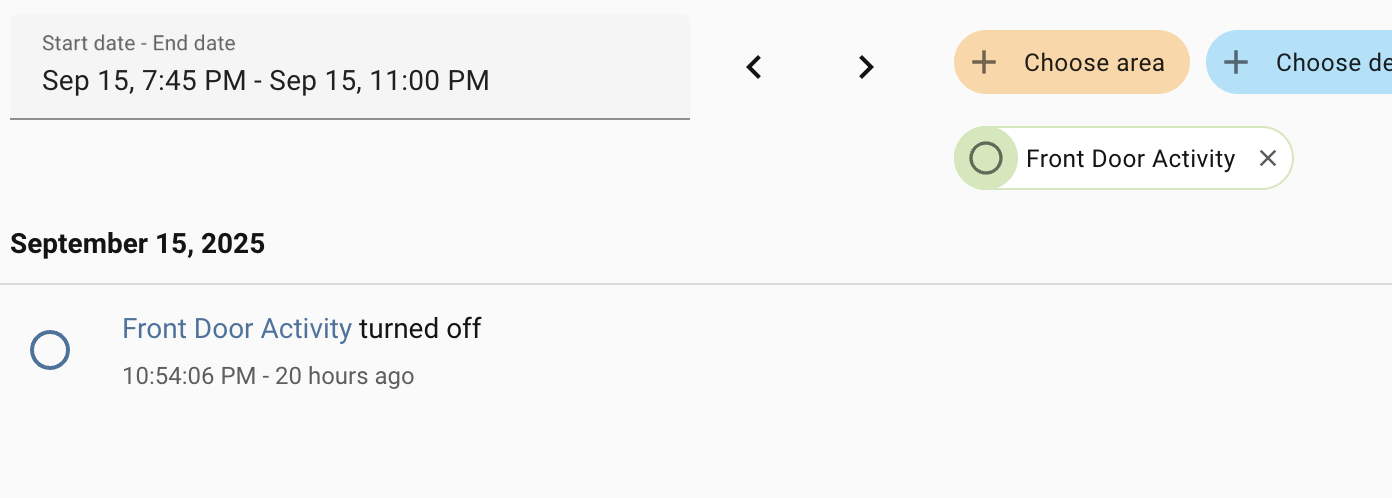
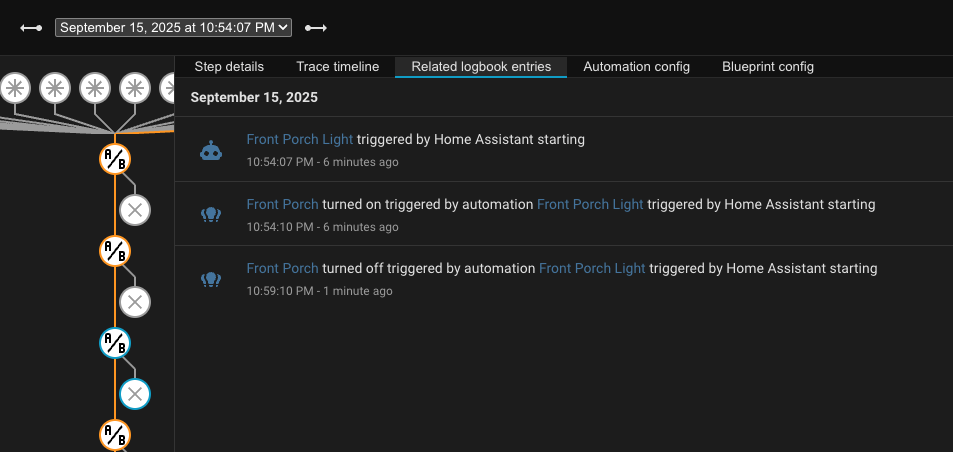
If you restart HA and the light comes ON it is because your trigger is ON. Check to see what happens to your “Front Door Activity” when you restart HA.

Blacky :grinning:

When using a script as target to turn on lights - how do I pass data? For example, I have a script to turn on a random light given a light group entity id. I want to call this script with a specific entity id from this automation.

Thanks but as you can see from the previous screenshot that is not the case. What does happen is the trigger becomes “unavailable” for a period during startup but that is it.

@Inrego

Your probably best to ask this in the forum creating a new topic or search for one similar. There are many people that can help you on that. I try to keep my blueprint posts bout the blueprint so they stays on topic.

Blacky :grinning:

@ctml

Could you please provide us your YAML of the automation? This YAML code are the settings you have selected in the automation so I can help. To do this go into your automation, top right 3 dots, Edit in YAML, copy all the code, come back to the forum and in your reply at the top tool bar click on “</>” and paste code in there.

Blacky :grinning:

Hi Blacky - since last week your blue print became unresponsive. I tried reimporting your blue print which gave an error. Then I deleted the blueprint and tried to import it again manually, but that also gave an error.
I’m using:
Installation method
Home Assistant Container
Core
2025.9.1
Frontend
20250903.3

The homeassistant/motion_light.yaml is working just fine with my devices. Any ideas on what might be causing this issue and how to fix it?

Kr,
Marco

@marco2152

I think HA fixed this. Have you tried to re-import the blueprint now?

Blacky :grinning:

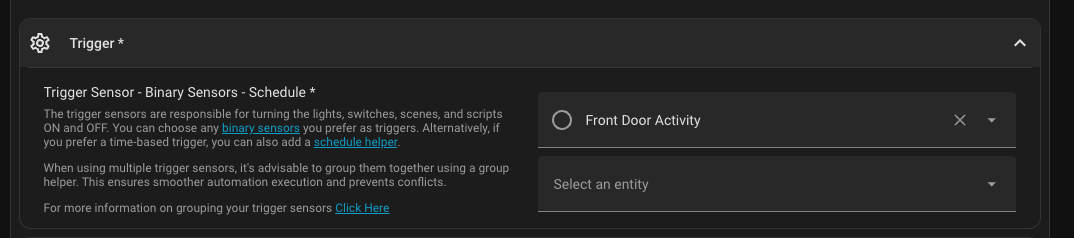
I was able to re-import the blueprint. But the blueprint still doesn’t work. The same devices do work with other blueprints. Really puzzled about this, because for now I only use the trigger and the devices and leave all other options unused.
@marco2152

Can’t use Devices, must be entity. See this FAQ click here

Blacky :grinning:

New update 8.4

Your lighting experience, your way – take control and customize it to perfection! :bulb::sparkles:

:new: Dynamic Lighting Update

We’ve listened to your feedback and made the Sun Elevation options truly dynamic.

Previously, Dynamic Lighting with sun elevation was locked to a fixed cutoff of -10°. This meant it couldn’t run below that hard-coded limit. Now, the system adapts to your input values instead of being restricted.

Dynamic Lighting will automatically use:

  • Sun Elevation Rising - Start Point when the sun is rising
  • Sun Elevation Descending - End Point when the sun is setting

This makes the feature fully flexible. Want Dynamic Lighting to run down to -30°? Just enter it in your input, and it works… no extra setup or new options required.

If you like this blueprint? Consider hitting the :heart: button in the top post :+1:

If you like my blueprints, and would like to show your support or just say thank you? Click Here :smiling_face_with_three_hearts:

Enjoy

Blacky :grinning:

1 Like

Hello everyone, and thank you to the community for any help. Specifically, to the creator of this blueprint.
I have been using it for almost all my lights for months already, and it’s working always as expected.
Except in one weird case where I can’t guess why it isn’t turning my light on.
I checked the traces, but they are so massive that I can’t get the reason why it is not working as expected. The UI for the traces is not easy to navigate, so all that I see is that at one point, one condition evaluates to false. I don’t know which one, and then the automation stops, never turning on my lights as desired.

Here is the trace in case anyone can help me:

And this is the blueprint configuration:

id: '1736698604131'
alias: 'Light pasillo Axel '
description: ''
use_blueprint:
  path: Blackshome/sensor-light.yaml
  input:
    motion_trigger:
      - binary_sensor.0x00158d0006c4b9d3_occupancy
    light_switch:
      entity_id:
        - light.kitchen_2
        - light.shellybulbduo_8caab5617286
    include_dynamic_lighting: disable_dynamic_lighting
    ambient_light_options: ambient_light_option_enabled
    include_ambient: ambient_enabled
    ambient_light_sensor: sensor.0x00158d0006c4b9d3_illuminance_lux
    include_night_light_control:
      - use_brightness
    night_time_delay: 1
    time_delay: 1
    include_night_lights: night_lights_enabled
    night_lights_conditions:
      - time_enabled
    night_lights_after_time: '22:00:00'
    night_lights:
      entity_id:
        - light.kitchen_2
        - light.shellybulbduo_8caab5617286
    ambient_light_value: 20
    include_light_control:
      - use_brightness

@danielo515

Yea it a big automation.

The only thing that can stop your automation is the lux sensor. It must be below 20 lux for the automation to trigger. If the lux sensor is unavailable due to communication issues, that will also prevent it from running. I’d suggest focusing on your lux sensor. You can also try disabling the lux condition… I bet it will work every time.

Blacky :grinning:

Thank you for your prompt reply. I will deactivate the light condition but I think it is no related to that, as the data is available and goes below the desired value:

I’ve tried the light and it also works… unless…
I have two lights there, one is working fine, the other one is giving me trouble. Can the entire automation fail because one of the lights is unavailable?

@Blacky

Ive been looking around to try and figure this out and tried to combine multiple options to get what i want, but i cant seem to make it work.

Preface this with i cam from hubitat where i used the Room Lighting app for this.

What i am trying to do:

I have a garage that is more of a workshop, i do keep a vehicle in here and i also have parrots in their cages along with a workbench etc all in this room.

I have a sensor on the door going into the house and the garage door.

I also have 2 motion sensors in this room. (used to help keep the birds from triggering the lights to come on from one of the birds moving)

I also have 3 separate light switches in this room and 1 smart bulb.

Primary light, Secondary Light and a Workbench light and the smart bulb.

The primary light is the main light i turn on when either door opens. This light is also turned on on a schedule during the day for the birds for a day light.

The secondary light i use more manually when i am already out there and want more light.

The workbench light is the same use case as the secondary light.

The smart bulb i use for a nightlight for the birds.

The way i want this to work is if a door opens or both motion sensors are active, then turn on the primary light, and if the time is X turn on.

I have managed this with a door group, schedule helper and a binary sensor group.

I want the nightlight to come on during the set time, this works fine.

I want and have the secondary and workbench lights to turn off when the primary light turns off. This also works fine with scenes.

Now on to what i need next.

I want the primary light to be on a schedule to come on during the day and stay on no matter what happens to any sensors during that set time period.

Im sure i can do this with another automation or second instance of this blueprint and then another automation that disables either automation during the set times.

But what i cant figure out how to make work is the occupancy side of things.

I go in here and have all the doors closed and will work and the lights will turn off on me since both motion sensors are not triggered, or say 6pm will come along and turn the lights off on me and i have to manually turn them back on or do the dance to get both motions to trigger.

All that to say i would like an occupancy option in this blueprint to keep the lights on while i am out there working.

But i do not want them to stay on past 6p if i am not out there and say only 1 motion is on. (this part i can deal with) But maybe it could be smart and use the other occupancy blueprint to see if it was truly occupied and not just a bird moving around.

So if there is a way to do this currently or another blueprint out there or some combination i can use, please point me to it. Or if this can be added to this blueprint i would greatly appreciate the help.

@danielo515

Okay… more than happy to work on it with you.

Never say never but it shouldn’t, I even tested it here again. What it will do is just forget about the unavailable light.

Blacky :grinning:

@mallison01

Firstly, I appreciate the level of detail you’ve shared… it really shows you’re approaching this in good faith. Normally, I try to avoid having people post their modifications here, as it can send the thread off-topic and make it harder for me to continue supporting it. That being said, I do value your effort and want to make sure you’re on the right track.

Perfect! As long as the group is treated as one entity and the schedule helper is included in the group, you’re good to go. You may already have this in place, but just to speed things up… and to help anyone else following along… here’s some example code to create a binary sensor for your schedule. This way you can group your door, schedule, motion group and later even your occupancy sensor into a single group entity. I see you understand code, so feel free to tweak it to suit your needs. Even if you’ve already done this, it might be useful for others reading this thread.

{% set now = now() %}
{% set morning_start = now.replace(hour=5, minute=30) %}
{% set morning_end = now.replace(hour=8, minute=0) %}
{% set evening_start = now.replace(hour=18, minute=0) %}
{% set evening_end = now.replace(hour=23, minute=0) %}
{{ (morning_start <= now <= morning_end) or (evening_start <= now <= evening_end) }}

Example of time window to span across midnight.

{% set now = now() %}
{% set start = now.replace(hour=22, minute=30) %}
{% set end = now.replace(hour=6, minute=0) %}

{{ now >= start or now <= end }}

There are plenty of example codes I could share for Mon–Fri and Sat–Sun schedules, but I think this is enough to get you going for now.

:warning: NOTE: For simplicity (and without needing any code), you can also use a Times of Day sensor helper instead of a Schedule helper. A Times of Day sensor is already a binary sensor, which means it can be grouped. To set one up, go to Settings > Devices & services > Helpers (tab at the top) > Create helper > Times of Day sensor.

Have a look at this blueprint :magic_wand: Manual light control with auto OFF. This will help you with your manual control of your Secondary Light and a Workbench light.

Is this not already done through the schedule helper as you indicated above? See below quote. Maybe it related to the group.


Let’s work on this part. I assume you are using the :honeybee: Bee In The Hive Sensor blueprint. This blueprint will toggle a toggle helper but you will see in the FAQ that if you would like to take full advantage of this sensor in this blueprint it best not to use the blueprint and just create a binary sensor. If you create the binary sensor we then can use it in our trigger group. This way it will keep the light ON. See this FAQ on how to create the binary sensor rather than using the blueprint click here.

Once you have this occupancy sensor working well (or whatever occupancy sensor you created) and you group this sensor with your door, schedule & motion group you will have your trigger group used in Trigger Sensor - Binary Sensors - Schedule. In the :magic_wand: Manual light control with auto OFF blueprint were you have your Secondary Light and a Workbench light create another group that suits you needs like door, motion group and occupancy sensor (maybe not the schedule in this group) then use this group in the Motion Sensor - Binary Sensors. You then will also have an added option called Grace Period so say your working in the garage and you leave to get something to eat (lunch, dinner etc), working in the garden, mowing the lawns or go to the toilet and the automation turns OFF your Secondary Light and or Workbench light, if you return within your Grace Period the lights will be turn ON for you again… nice one!

As mentioned at the start, I’d really appreciate it if you could refrain from posting modifications here, just so the thread stays on topic and I can continue supporting it. Thanks so much for understanding! If you’d like, you can always PM me directly with your changes and I’d be happy to take a look.

Just a final recap… here’s what you have:

  1. Two door sensors in a group (you won’t need this group).
  2. Two motion sensors (I believe they are grouped, and both need to be ON for the group to be ON, which works well for your birds).
  3. A schedule.

If you have these added separately as triggers, it won’t work.

What you need is to group all three + occupancy sensor into one trigger group (a binary sensor group):

  1. Add your two door sensors. (not the group)
  2. Add your motion group (if this is what works for your birds, use the group rather than the individual motion sensors). If I got this wrong whatever you have that works for your motion sensors.
  3. Add your schedule (this must be a binary sensor so it can be added to the group as shown above).
  4. The new occupancy sensor.

Once you have this single trigger group only, everything should work as expected.

:white_check_mark: Now you will find you don’t need any modifications to this blueprint and when I update it (maybe a bug or a new feature) you can do it easily. In any case you would just use the bypass option 1 that is already there, tested and working. :wink:

In any case, let us know how you go and if this works for you.

Blacky :grinning:

Never say never, indeed. Remember this part?

Well, after deactivating the light condition, it indeed works as expected. But, but Why? The data is always available, and as seen in the graphs, it goes below 20 quite soon during the day. So I can’t imagine why this is not working as expected. Only thing I can try is to copy the id from the devtools to make sure I’m using the right entity