Siemens logo 8

good afternoon, I continue with the integration of LOGO8 in HOME ASSISTANT, I can read the value in this case of the outputs and marks, but I can’t get the communication in the opposite direction, that is to say create some switches and that they be modified in this case, the value some marks in the PLC.

where can be the error?
Thank you!

To get a communication in the other direction you need a NI (network input) or NAI (network analog input). There might be another way but this is how I do for all my controls.

Hope this helps.

Really impressed with this thread and all the work! I’m almost there: I can now read the Network Output in Home Assistant. However, could someone show how to control a Network input? I would like to be able to use switches in Home Assistant that correspond to Network inputs on the Logo. My configuration.yaml now looks like this:

modbus:
  - type: tcp
    host: 192.168.1.11
    port: 502
    name: logo8
    binary_sensors:
      - name: logo_ecolution
        scan_interval: 5
        slave: 1
        address: 8192
        device_class: running
      - name: logo_vloerverwarmingsklep
        scan_interval: 5
        slave: 1
        address: 8193
        device_class: opening
      - name: logo_thermisch_element
        scan_interval: 5
        slave: 1
        address: 8194
        device_class: running
      - name: logo_test
        scan_interval: 5
        slave: 1
        address: 8195
        device_class: light

    switches:
      - name: logo_test_switch1
        address: 1
        write_type: coil
        slave: 1

In Home Assistant it looks like this:
Screenshot 2022-10-17 150627
And as a proof of concept I created this in Logo!Soft Comfort:


Can anybody explain how to control the switch from HomeAssistant? Turning the switch in HomeAssistant on and off now does nothing in my Logo.

I must be missing something. Thanks very much for some more insights!

hi i had used node red S7 plugin interface with ha. Of course modbus plugin that’s okay too. The main thing that use one converter let modbus rtu turn modbus tcp, and then work with node red, and then use homeassistant plugin work with homeassistant platform .
@ node-red-contrib- s7 / node-red-contrib-home-assistant-websocket

Hello
Try this

image

  switches:
    - name: Name1
      write_type: coil
      address: 0
      unique_id: "SiemensLOGO_1"

    - name: Name2
      write_type: coil
      address: 1
      unique_id: "SiemensLOGO_2"

    - name: Name3
      write_type: coil
      address: 2
      unique_id: "SiemensLOGO_3"

Hello all
Okay so installed HS yesterday in a raspberry as I found an old post on the internet that a person had moved over from hes mySCADA setup to HA and was very satisfied.
I’m now wanted to test this out but I’m unable to get the connection up and running to my Siemens S7-300 PLC system.
The mySCADA that I have been using (and still use) is accessing the PLC over TCP/IP using direct memory access(I believe). With that I can read everything directly from DB’s, memory bits and and outputs (basically everything)
Is there any possibility to use similar way to read with HS?
Have been reading this post now and I tested the Radizio Modbus Master Simulator, but that is not able to connect to my PLC so most probably modbus is not active now on my setup. Anyone know how I activate this(from Step 7)?
The PLC is currently reading Modbus from other devices I have setup here at home so technically it should be possible.

Br
T

Hi all,

It’s a long time since I wrote something on that topic… :slight_smile:
Back then, I had my LOGO integrated with NodeRed - which was working fine so far … the reason behind that was, that I had no Idea on how to work with Modbus - and also, I did not really had the time to dig into that “rabbit hole” then.
So, using NodeRed and a contribution that enabled the communication with the LOGO was the easiest way to go with…

But - things are changing, and nowadays, I have to improve my Modbus Skills, because there are plans to buy some Hardware for which the only way of integrating it into HA will probably be Modbus.

So - I am using the time and move my whole LOGO programming to be able to work with HomeAssistant over Modbus.
It was a bit of a way to get (nearly) everything working in a way I wanted - but finally, I am only a few small footsteps away of having ALL relevant information in HA - and also, I can controll some of the parts of my LOGO…

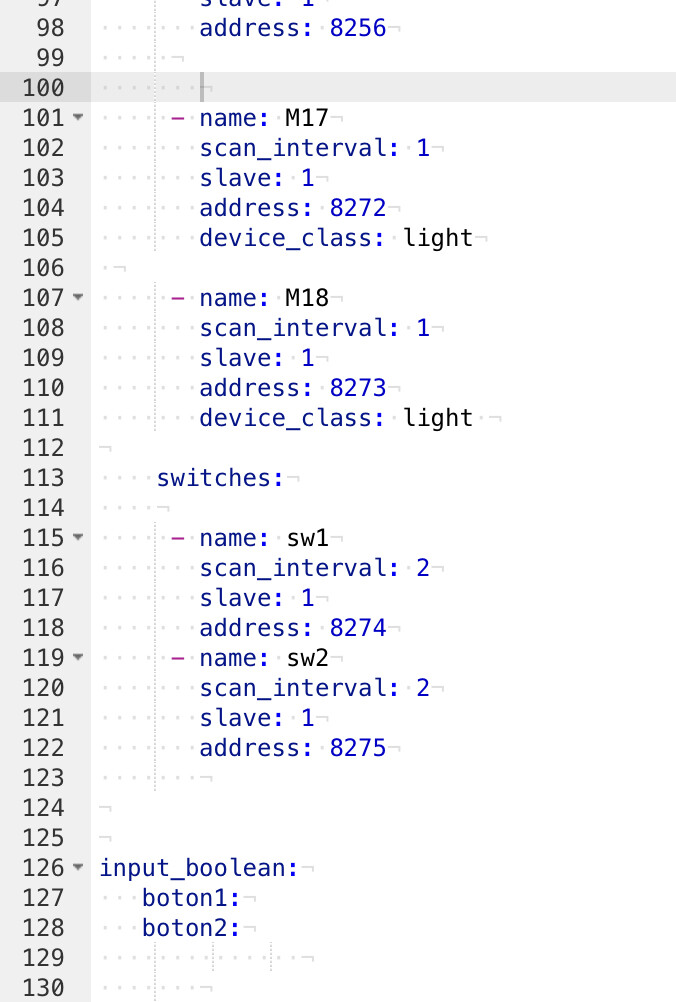
I can now read the temperature information, the humidity - I can switch on the Daylight lamp and the heating lamp and also the humidifyer - in addition to that, I can now read the values of my automation-clock (that turns on the lights when sunrise and sunset timings have been reached.

The last step I want to accomplish is to read the values of a Block which measures the operating hours of my heating lamp.

The problem here is:
The “Sunrise” and “Sunset” information are WORD type - and that’s what I can use in HomeAssistant:

modbus:
      - name: Sonnenuntergang (t1)
        unique_id: "t1_sunset"
        address: 2
        input_type: holding
        scan_interval: 10
        swap: word

template:
  - sensor:
      - name: Sonnenuntergang
        unique_id: "t1_sunset_timestamp"
        device_class: timestamp
        state: >
          {% set x = ('%04x' % states('sensor.sonnenuntergang_t1')|int(0)) %}
          {{ today_at('%s:%s' % (x[:2],x[-2:])) }}

But - the operating time will be delivered as DWORD value…
And I haven’t found an information on how to use this…
usning “swap: word” seems to provide wrong values… and according to the documentation, I can only use word or word_byte

swap string (Optional, default: none)
Swap the order of bytes/words, options are none, byte, word, word_byte.

And this is the information the LOGO does provide, when I am using these information on the Display:
grafik

MI → expected (the device needs to be replaced after this run time)
OT → how long does it run?
MN → how much time is remaining (the block will be set to high if this goes to 0)

EDIT:
I’ve tried to use Data_type: uint32, swap: word

      - name: Betriebsstundenzähler (t1 - mn)
        unique_id: "t1_betriebsstundenzähler_mn"
        data_type: uint32
        address: 3
        input_type: holding
        scan_interval: 10
        swap: word

      - name: Betriebsstundenzähler (t1 - ot)
        unique_id: "t1_betriebsstundenzähler_ot"
        data_type: uint32
        address: 5
        input_type: holding
        scan_interval: 10
        swap: word

      - name: Betriebsstundenzähler (t1 - mi)
        unique_id: "t1_betriebsstundenzähler_mi"
        data_type: uint32
        address: 7
        input_type: holding
        scan_interval: 10
        swap: word

which seems to provide an output that COULD be a correct value…

the question now is, how to convert this into a human readable information… :smiley:

solved it :slight_smile:

The key is the following setting:

      - name: Betriebsstundenzähler (t2 - mi)
        unique_id: "t2_betriebsstundenzähler_mi"
        data_type: custom
        structure: ">L"
        address: 7
        count: 2
        input_type: holding
        scan_interval: 10
        unit_of_measurement: min
        device_class: duration

data_type: custom
structure: “>L”
count: 2

count => numbers of registers (Dword => 2 vs. Word =>1)
structure “>L” => unsigned Long

With this settings, it is possible to read the variables from other Blocks, like in my case the operating hours…

2 Likes

Hello all,

I have two Logo8 FS:04 for my shutter control in my network and try to control Network Inputs via HA and Modbus TCP. Unfortunately it works only with the Logo .188.201 but not with the Logo .188.202, although both are identical models and are configured identically.
Does anyone have an idea what this could be or what else I could try to somehow narrow down the cause?
I have already tried different ports and also removed a logo from the network.
Thanks in advance!

Here are the settings of Home Assistant

without knowing the whole setup, usually, it is related with the addresses you assigned to your Network_Inputs …

here is my NI configuration as an example:

    lights:
      - name: "Tageslicht (t2)"
        unique_id: "t2_ni1"
        address: 0
        write_type: coil
        command_on: 1
        command_off: 0
        scan_interval: 5
        verify:
            input_type: coil
            address: 8192
            state_on: 1
            state_off: 0
      
      - name: "Wärme (t2)"
        unique_id: "t2_ni2"
        address: 1
        write_type: coil
        command_on: 1
        command_off: 0
        scan_interval: 5
        verify:
            input_type: coil
            address: 8193
            state_on: 1
            state_off: 0
    
    switches:
      - name: "Bewässerung (t2)"
        unique_id: "t2_ni3"
        address: 2
        write_type: coil
        command_on: 1
        command_off: 0
        scan_interval: 5
        verify:
            input_type: coil
            address: 8194
            state_on: 1
            state_off: 0

      - name: "Automatik Bypass (t2)"
        unique_id: "t2_ni4"
        address: 3
        write_type: coil
        command_on: 1
        command_off: 0
        scan_interval: 5
        verify:
          input_type: coil
          address: 8195
          state_on: 1
          state_off: 0

Within LOGO, I am using the following:

NI_1 = v0,0
NI_2 = v0,1
NI_3 = v0,2
NI_4 = v0,3

Hello guys
I’m using typical integration of LOGO 8 (with physical push buttons and lights) + HA Modbus for advanced service.
Basic case on the screenshot


But faced very annoying behavior some time ago,
when I toggle the light with a physical push button it correctly reflects the state in HA but I cannot change it via HA toggle, toggling the switch in HA home just change the state for a second and return back. At the same time if I open a Modbus light entity (HA>Settings>Devices>Entities tab) it moves the toggle to the opposite state but does not change the light actually, I have to click once again to get it really changed. See GIF
2023-07-09_10h18_17

Any ideas on how to fix it?

My config

modbus:
  - name: "LOGO8"
    type: tcp
    host: 192.168.110.193
    port: 502
#    retry_on_empty: true
    lights:
      - name: "Office main light"
        unique_id: "office_l1"
        address: 0
        write_type: coil
        command_on: 1
        command_off: 0
        scan_interval: 5
        verify:
            input_type: coil
            address: 8203
            state_on: 1
            state_off: 0
      - name: "Office additional light"
        unique_id: "office_l2"
        address: 1
        write_type: coil
        command_on: 1
        command_off: 0
        scan_interval: 5
        verify:
            input_type: coil
            address: 8202
            state_on: 1
            state_off: 0

Hello everyone, I’m desperate. I’ve tried so many things now and I just can’t get it to work. I would like to connect the Siemens Logo 8.3 with my HA via Modbus. In order to then write the weather forecast temperature into the logo so that you can then control the heating. I don’t want to control the heating with HA, I just want to transfer the weather data. I think I’m doing something wrong regarding server and client or type address.

# Example yaml: full tcp connection

modbus:

  - name: modbus_hub

    type: tcp

    host: 192.168.20.246

    port: 502

    close_comm_on_error: true

    delay: 0

    message_wait_milliseconds: 30

    retries: 3

    retry_on_empty: false

    timeout: 5

automation:

  - alias: Send Weather Data to LOGO

    trigger:

      platform: time_pattern

      minutes: 15  # Daten alle 15 Minuten aktualisieren

    action:

      - service: modbus.write_register

        data_template:

          hub: modbus_hub  # Modbus-Verbindungsinformationen in Home Assistant

          unit: 1

          address: 40001

          value: "{{ states.weather.my_weather.attributes.temperature | float * 10 }}"  # Hier wird die Temperatur mit 10 multipliziert (z.B., 25.5 °C wird zu 255).

my problem is this adress.

If i use Node Red it works. I can write a word in AM1 ( 528 ) but with HA modbus if i change it to 528 the word will not Write zu AM1. Maybe i need more to send like data_type ?? Maybe someone can help me. thx

Buongiorno a tutti,
Voglio precisare che sono abbastanza nuovo in questo mondo e quindi non ne so moltissimo. In casa mia ho fatto anni fa un sistema di gestione della casa con 3 Siemens logo8 che comunicano con loro e gestiscono luci, tapparelle, riscaldamento e irrigazione. Avevo pensato che il tutto sarebbe stato fantastico se messo in comunicazione tramite home assistant ad altri dispositivi smart che vanno oggi giorno. Non mi interessava fare cose assurde ma solo il semplice fatto di poter gestire accensioni, quindi comandare ingressi e visualizzare le uscite attive in di conseguenza. Purtroppo non riesco a fare in nessun modo questo, ho provato subito con node-red ma una volta installato su home assistant non trovo la palette Siemens s-7 e non so come integrarla. Così ho pensato di fare col protocollo modbus ma niente non ne so fuori. Creo gli switch ma non comunica con il logo e non capisco se è un problema di home assistant o del logo o che magari comunicano ma sbaglio le variabili. Se qualcuno può aiutarmi magari con un semplice schema ingresso/uscita su logo e cosa devo scrivere su home assistant nel yaml mi farebbe un grosso piacere grazie mille

Apparently you found the right chain with all the answers you need. This chain helped me a lot. If you read it, you will find it has the answers you need to get started. I also recommend communicating in English as that will give you access to a larger number of people who can help you.

Nevertheless, let me help you with a quick start for simple light switches. None of this I invented myself, it is all derived from a few helpful messages earlier in this chain.

In my configuration.yaml, I have:

modbus: !include_dir_list modbus/connections/

light: !include_dir_list lights/

In modbus/connections/logo_a1.yaml, I have:

name: logo_a1
type: tcp
host: 192.168.11.201
port: 510
binary_sensors:
- name: front_lights_floor_bs
  unique_id: front_lights_floor_bs
  address: 8194
  scan_interval: 5
  input_type: coil
  device_class: light
switches:
- name: front_lights_floor_net
  unique_id: front_lights_floor_net
  address: 2
  scan_interval: 0
  write_type: coil
  device_class: switch

The above two entities I hide from the HA dashboards. The real light switch is created using a template, which I define in lights/logo_a1.yaml:

platform: template
lights:
  front_lights_floor:
    friendly_name: Lights in floor
    unique_id: front_lights_floor
    value_template: '{{ is_state("binary_sensor.front_lights_floor_bs", "on") }}'
    turn_on:
    - service: homeassistant.update_entity
      data_template:
        entity_id: switch.front_lights_floor_net
    - service: switch.turn_off
      data_template:
        entity_id: switch.front_lights_floor_net
    - service: switch.turn_on
      data_template:
        entity_id: switch.front_lights_floor_net
    - service: homeassistant.update_entity
      data_template:
        entity_id: binary_sensor.front_lights_floor_bs
    turn_off:
    - service: homeassistant.update_entity
      data_template:
        entity_id: switch.front_lights_floor_net
    - service: switch.turn_on
      data_template:
        entity_id: switch.front_lights_floor_net
    - service: switch.turn_off
      data_template:
        entity_id: switch.front_lights_floor_net
    - service: homeassistant.update_entity
      data_template:
        entity_id: binary_sensor.front_lights_floor_bs

The corresponding diagrams being:

and:

My setup uses normal switches for switching. If you use push-buttons, then have a look in the chain above for examples how to use those.

I am not happy having had to resort to templates, but it is the best solution I found to date. My entire house uses Logos and I manage about 128 digital inputs and 80 outputs across 6 Logos. I am still struggling with some more complicated cover stuff, but the light switches have worked flawlessly for the past six months with the approach above.

I have made a cutom integration which allows sending pulses to the network input instead of just the on and off command.
This way u dont need complicated configurations to work with relay switches.

U can find the integration here

Hello All,
for anyone who is still experiencing this issue, I want to announce that I have developed a custom component for HACS that solves this issue.

According to my analysis the annoying problem is caused by the fact that switch in Home Assistant is updated based “verify” check written in the configuration file, but this update is not reported back to Network Input in PLC logic: this causes that when I click on a switch in UI, it send a command to write a command that makes no effects.

To solve this issue, I introduced a flag inside the “verify” section of the configuration that forces the write back of the actual state to PLC: this ensure that what you see in HA is exactly what is inside PLC.

More than this, I worked to make the adoption of this component super-easy, in fact it’s enough to rename the key in configuration from modbus to modbus_logo.
For sure you have to install custom-component first, but you can find the instruction directly on the GitHub project page: GitHub - nos86/hacs-modbus-logo: An implementation of modbus for PLC Logo!8
Only drawback I saw, is that HA recognize that entities comes from different domain and duplicates them. It’s a little bit annoying to clean the least, but after some housekeeping, you can have the same entities as per before.

Moreover, there you can find a basic example of logic for Logo to implement.
As per design this component have all the functionality of the standard componet, so you can move all configuration to custom component modbus_plc.

Please, be aware, that even if, I tested the code in my configuration (with 4 PLCs), there could be a possibility of some bug. In that case, please open an issue directly in GitHub and I’ll be happy to understand better the issue and fix the code.

I hope that this my work is useful to community as it was for me.