Every time I have searched the forums for a solution to a Z-Wave problem since Classic Z-Wave was replaced by ZWaveJS, the recommendation has been to replace the Z-Wave server or something with ZWaveJS2MQTT, but this is rather complicated. Since ZWaveJS2MQTT is always the solution, it should be part of the standard installation. Since losing Classic Z-Wave’s control panel, using ZWaveJS2MQTT is especially important, so let’s make it easy.
ZWaveJS2MQTT was recently renamed to Z-Wave JS UI. This is because the MQTT part is totally optional, it also supports the special websocket protocol that the Home Assistant Zwave integration (formerly called the Z-Wave JS integration) uses. It is also technically usable as a stand alone Z-Wave control solution, but it somewhat limited under that use case.
The Z-Wave integration documentation has information about migrating from the official Z-Wave JS add-on to Z-Wave JS UI community add-on. It is only 6 steps, so while not quite as easy as setting up the offical Z-Wave JS addon, it is not bad. Also for step 6, the value you need is listed earlier in the document, at the end of Installing and Configuring the Z-Wave Integration in Home Assistant section.
But I’m not really sure why switching would be needed for most users unless you like having the extra control panel (I personally do), or want to publish state info to MQTT. Most features like Firmware upgrades, re-interviewing, setting z-wave device configurating settings etc are available in Home Assistant already.
The only things I know are missing from Home Assistant are NVM backup/restore for the stick, hard and soft reset for the stick, and editing device associations. Now I will admit the last one is a pretty significant limitation!
Yes so much this. It seems like the thinking of the base one is juuuust enough to get Zwave going with HA and this one is if you want the extra dashboard. It seems like most people will have use of the dashboard at some point when trouble shooting their network, and it’s pretty simple for them to just not use it if they don’t need it.
So now I’ve got both installed and getting regular updates even though only the one with the UI is the one running
Thanks for updating me on the new names of the Z-Wave integrations and add-ons. I have not researched adding the control panel since an unhappy experience last spring which has left me gunshy about trying to migrate again. I am interested in a Z-Wave control panel just to get my HA system operating the way it was a couple years ago and to continue to maintain it.
First, I have a Leviton VRCZ4 4-button controller in my kitchen that was associated with the instant hot water boiler in the kitchen sink and some lights in adjacent rooms and the driveway. It saved me having to wip out and unlock my phone or tablet, sometimes when my hands were wet or dirty. I lost the capability in a Z-Wave update, perhaps one where I inadvertently dumped the whole configuration and had to pair all 33 devices afresh. Such a controller with button associations is a great way to create multiway switches without running new wires.
Second, the Z-Wave devices have a lot of configuration parameters that are pretty neat but need some sort of control panel to practically configure. For instance, my Leviton switches and dimmers have bright green LEDs on them that are great for finding them in a dark hall or living room but are annoying in a bedroom when I’m trying to sleep. The classic Z-Wave integration let me set the LED brigthness and the condition when it was on. It also let me set the dimming rate for on and off transitions.
Third, with an update last summer, HA stopped communicating with one of my Leviton dimmers because its firmware is old. After searching the forums I found a firmware update download but the official Z-Wave JS integration/add-on just wouldn’t complete the update. Perhaps the Z-Wave JS UI will.
I tried the 6-step procdure to migrate to the Z-Wave JS UI in the link you provided. I got stuck at the same point as when I tried migrating to ZWaveJS2MQTT last spring. Disabling the Z-Wave integration and copying the security keys was simple. However in Step 3, installing and starting the Z-Wave JS UI add-on never gave me the opportunity to enter any configuration parameters. Its configuration tab has “Options” and “Network” headings with “Show unused …” sliders underneath but these don’t show anything more when selected. I don’t see anywhere to enter security keys. By “location of your Z-Wave device” do you mean the path to my Z-Wave controller USB dongle? Mine is at /dev/ttyACM0. There was no place to enter that.
The Z-Wave JS UI log indicates that it hasn’t found a Z-Wave driver:
2022-10-15 16:23:24.732 WARN STORE: scenes.json not found
2022-10-15 16:23:24.759 INFO APP: Listening on port 44920 host 0.0.0.0 protocol HTTP
[16:23:24] INFO: Starting NGinx…
2022-10-15 16:23:24.842 INFO MQTT: MQTT is disabled
2022-10-15 16:23:24.845 WARN BACKUP: Store backup is disabled
2022-10-15 16:23:24.845 WARN BACKUP: Nvm backup is disabled
2022-10-15 16:23:24.847 WARN Z-WAVE: Z-Wave driver not inited, no port configured
In Step 4, adding the Z-Wave Integration again did ask me for a URLto the Z-Wave server but using the URL you directed me to, ws://a0d7b954-zwavejs2mqtt:3000, gave the error “Failed to connect”. Is this URL different for each installation and I don’t know how to find its value for my installation?
Using the value from my current installation of ws://core-zwave-js:3000 does connect, but this is probably the wrong Z-Wave server, right? There’s no data displayed in the Z-Wave JS UI Control Panel so it must be connected to the wrong server.
At this point it appeared too dangerous to proceed to Step 5 and remove the offical Z-Wave JS add-on. After a few attempts to back up and try again, I now have two instances of the official Z-Wave integration and can no longer talk some of my devices or all entities of some others so I’m in a fine mess that will take some work to recover from. So now you can see why I am requesting that the Z-Wave JS UI be made part of the standard, simple Z-Wave installation. Obviously, I’m missing something big so I would be grateful for your additional help.
Right, configuring associations is certainly a perfectly valid reason for needing to use Z-Wave JS UI, since the feature does not seem to be present in the Home Assistant UI. And yeah, creating a new z-wave network while re-pairing all devices will wipe out association settings.
The Z-Wave configuration parameters are available in the Home Assistant UI. If I go to “Settings”, “Devices and Services”, find the Z-Wave integration, and click on “8 devices”, then click on one of the devices, like “Bedroom Fan”, then in the Device info panel click “Configure”, it brings me to a screen with all the device’s Z-Wave configuration parameters. I won’t deny that the Z-Wave JS UI’s version might be more convenient to use.
Possibly. I have never done firmware updates through the Home Assistant UI, only through Z-Wave JS UI, but this is mostly because none of my devices have gotten new firmware since firmware updating was added in the Home Assistant UI. There was a brief time when home assistant was showing a beta update for one of my devices by mistake, and attempting to install via Home Assistant did not work, and I never tried it with Z-Wave JS UI. I have no idea why it failed. I intended to try to test it again, while watching logs from Z-Wave JS UI, but that update is now flagged as beta, and I’ve yet to determine how to enable beta updates.
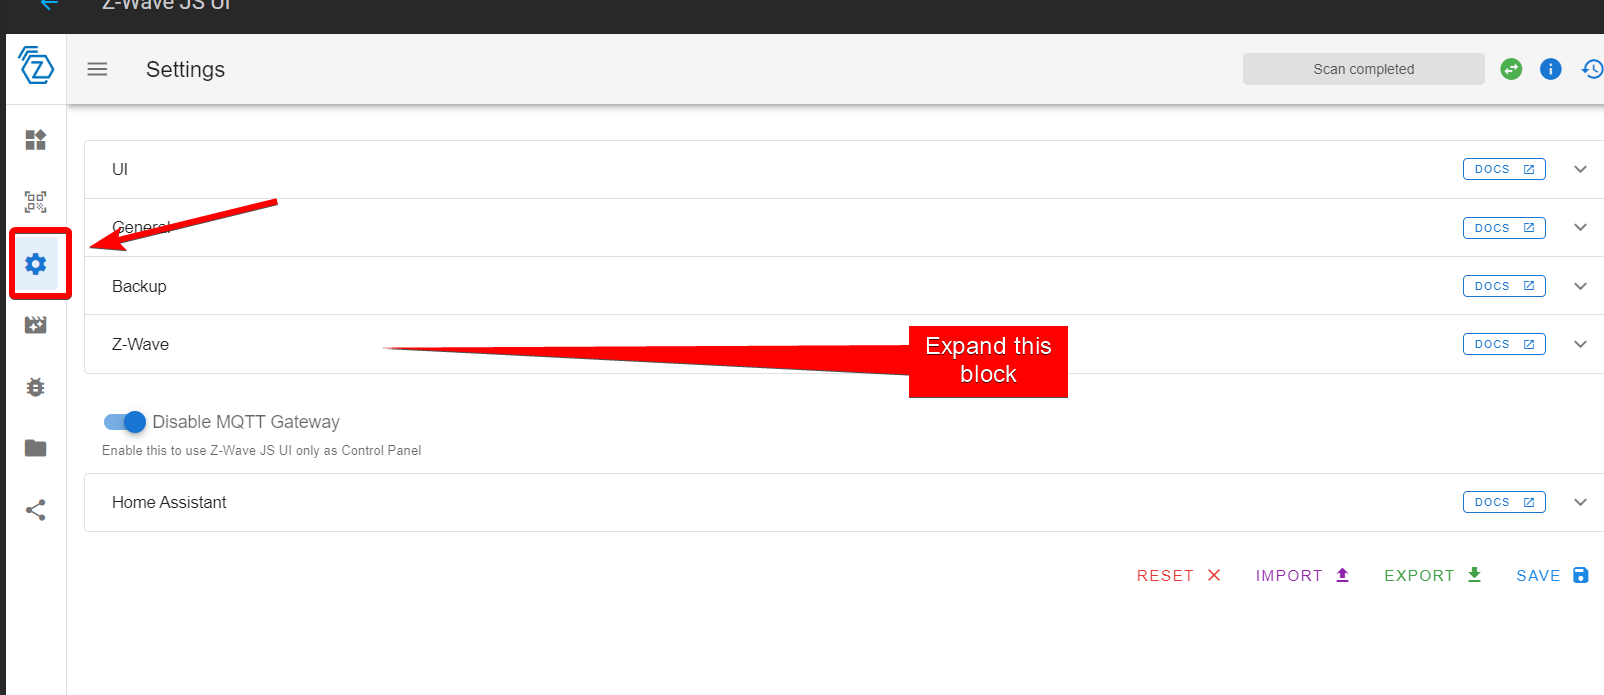
You don’t enter settings in the addon’s settings tab for Z-Wave JS UI, but instead start the addon, click “Open Web UI”, and in the UI, go to its settings screen (might need to click the hamburger menu). You enter the security keys, and path to the z-wave device within that screen, specifically the “Z-Wave” section of that screen, making sure to save the configuration.
It is saying that it cannot start up the driver, since a serial port has not yet been specified in its setting screen.
Right. core-zwave-js is the official Z-Wave addon. I’m not surprised it failed when you put in ws://a0d7b954-zwavejs2mqtt:3000, given that you did not yet successfully configure the Z-Wave JS UI. I don’t think the websocket server starts up until the Z-Wave stick is configured.
Yeah the big thing you were missing was where to put in the settings on Z-Wave JS UI.
I’ve literally no idea how you have more than one copy of the Z-Wave Integration. That is not supposed to be possible. Trying to install the Z-Wave integration a second time is supposed to be treated as reconfiguring it. You must have hit some form of bug.
He’s using the old zwave integration (OpenZwave v1.4) that no longer exists. When it was available, you could have both installed at the same time. You could actually have 3 installed, OpenZwave1.4 (legacy), OpenZwave 1.6 Beta, and Zwave JS.
Zwave JS UI (ZwaveJS2MQTT) is a custom addon, it’s not provided by HA. So this will likely not happen.
1 Like
Maybe, but it would only be possible to have that integration in an up-to-date install if it added as a custom component, no?
Also the fact that he was able to follow most of the steps of the migration guide, also suggests he was running the modern integration.
Checking the code it is possible to have multiple loaded config entries of the zwave_js integration, but it is only supposed to happen if you have more than one different Home ID (a Z Wave network id), which implies separate networks. (Normally you would also need to be running the server portion of one or more of these on a different device, as you can only have 1 copy of any given addon, and you cant run two networks with one Z-Wave JS addon.)
I think though a different way it could happen would be if a stick was swapped out or factory reset, and thus a new network created (which means a new Home ID was created), and devices added without removing and re-creating the config entry. The result of this would be the Home ID in used as the unique_id of the config entry and the Home ID actually in use no longer matching.
Then potentially much later later if the documented migration instructions were performed (which specify re-adding the integration, rather than doing the options flow), it would create a second config entry for this “new” Home ID, ending up with two config entries for the same stick.
I was under the impression that he’s still using OpenZwave1.4 (Legacy) based on all his comments made so far.
Meaning he’s still on the old integration and therefore an old version of HA.
Yes, you can. It’s a websocket connection, you can have as many as you want as long as they are separate servers.
This would still result in a single integration.
Based on what he’s said, he made 1 of 2 mistakes:
- He had 2 addons running (easy to do if you don’t uncheck a single box during the install process)
- He had the old integration and new integration running at the same time.
If he is on a newer version of HA, then he’s mistaken about having 2 integrations and he meant 2 addons. This bites everyone trying to swap between Zwave JS Addon and Zwave JS UI Addon.
1 Like
Or it could mean he is running modern ZWave integration (zwave_js), and wanted to move over to ZWaveJS2MQTT, but failed back then, and had not tried switching again since then. That was my interpretation of this comment.
If they had the old integration, then they must have had two integrations running in order to do step 1 of the switch process outlined in the documentation.
One integration with two config entries could easilly be called “two integrations”, since it is what happens normally when one integration is added twice (for different devices). The “correct” wording from the UI standpoint is instance, but the UI does not explain the instance/config-entry concept and how it differs from an integration, and I don’t expect most users to be precise in terminology.
Unless you mean it won’t end up with two config entries, in which case I would be very surprised, since as far as I can tell there is literally nothing in the config flow code to prevent the scenario I outlined from causing a second config entry.
Sure, but this differs from the other big IOT protocol integrations. ZHA: only one config entry. MQTT: only one config entry. Insteon: only one config entry. Even the Work-In-Progress Matter integration, which has a similar Websocket based design is currently limited to just one config entry. So the zwave_js integration allowing multiple config entries is both notable and relevant here.
I’m speaking from experience watching every beginner trying to install Zwave JS UI and skipping directions resulting in 2 Addons. Also, in my experience, users don’t know the difference between Addons and Integrations and they use these terms interchangeably. My comments are based on that and his overall phrasing all his posts. I don’t know if that’s true, OP will have to clarify where he is currently.
If you use the same endpoint, it will be 1 integration and it will overwrite the previous installment because the unique key used to generate the config entry would be the same. This is how you reconfigure integrations currently without losing your names & settings.
So? What does that have to do with anything? Were talking about zwave, which can have multiple servers.
In the scenario I discussed you could end up with two config entries pointed at the exact same websocket server.
In that scenario the unique ID used for the config entry (the Home ID) would change after the entry was created. Then setting up the integration again would create a new config entry.
That is not even theoretical. I just tried it by backing up my zwave stick NVM, reseting it to factory settings, and then trying to add the integration a second time pointed the exact same addon again. I ended up with two config entries and two copies the the exact same zwave stick as devices in home assistant. (If I had added new nodes to the stick before hand all would have shown up twice in home assistant, but I did not do that, as I had no spare devices handy and wanted to restore my stick back, to avoid needing to re-pair everything).
He wouldn’t have ran into that problem because he wouldn’t have been able to go to a previous backup.
After fully reading his second post (skimmed it first go around). My assumption was incorrect, serves me right for skimming. It seems he didn’t follow the directions in step 3 because he doesn’t know where to put that information. He’s looking in the configuration tab of the addon instead of looking inside the Zwave JS UI. If he continued on with the steps without configuring step 3, it would result in a second integration.
Need help restoring Z-Wave setup after failure to migrate to Z-Wave JS UI
I haven’t had the time to follow all of your discussion but I am grateful that you pointed me to Z-Wave JS UI’s configuration parameters being in its own UI instead of it’s add-on configuration page. That got me farther but not all the way to where I need to be.
With all the different Z-Wave drivers – to incorrectly use an old computer term to encompass both integrations and add-ons – Home Assistant has used over the 3 years I’ve been working with it, the naming to distinguish among them has gotten quite confusing as has knowing when and how to make the changes. The sequence I’ve used I will give the names Legacy Z-Wave (LZW), Open Z-Wave (OZW), Z-Wave JS (ZWJS), and Z-Wave JS UI with Z-Wave JS (ZWUI for short). I had everything I needed working in my system 2 years ago using LZW: device associations and setting device parameters. I only moved to OZW and ZWJS and repeatedly attempted to move to ZWUI because HA software updates and the developer no longer being able to support LZW forced me to change to be able to continue, not to extend, this functionallity. The only new feature I need now is the ability to update the firmware in a Leviton light dimmer that HA will no longer completely talk to.
Anyway, to clarify the upgrade I am trying to make now, it is from ZWJS to ZWUI. I successfully upgraded from LZW to ZWJS last year after a wasted intermediate stop at OZW that cleared the dervice associations that I’ve been struggling to re-establish ever since.
In two more attempts to install ZWUI I finally got the Z-Wave JS UI control panel to show all of my devices. But I then had 2 Z-Wave JS integrations, one with a red exclamation point by it and I had NO Z-Wave connectivity with HA UI: no names, no status!
Restarted HA and still have no Z-Wave!
Delete the flagged integration to leave the one using path to Z-Wave JS UI.
Restart computer.
Still no Z-Wave connections to Lovelace UI. Must not be connected to the Z-Wave integration since the integration shows all the Z-Wave devices and entities with the names I gave them.
Lovelace editor does not list any Z-Wave entities in its drop-downs.
It was getting late in the day and I count on HA to literally run my house so I punted and restored the full HA backup I did 2 days ago when everything was working. Unfortunately, my HA UI still has no connection to any Z-Wave devices so I obvioulsy I need to do something beyond a restore. The Z-Wave JS integration has a red exclamation point and red frame and is stuck displaying “Retrying setup: None”. Clicking Configure just reiterates that. However, it does show that I have all 33 devices and 249 entities. I guess a full backup didn’t back up my Z-Wave configuration. What do I need to do to get back into operation?
I am using Z-Wave JS, not the Legacy Z-Wave.
With Zwave JS UI being custom, by which I think you mean coming from someone other than Home Assistant/Nabu Casa, then I will modify my request to become the addition of device association capability to the current Z-Wave JS integration and add-on combo.
To my detriment, I have accepted all HA updates for the last several months so I am (or was at the time of my initial request) on the latest HA, HAOS, and Z-Wave JS. I never removed my Aeotec Z-Stick Gen 5 from its USB socket on my NUC and never attempted to reset it during this episode.
The problem is that the 6-step process to upgrade to Z-Wave JS UI is rather cursory for someone who has never seen this add-on and its UI before and doesn’t know the architecture of HA. The instructions at Z-Wave - Home Assistant leave out a lot of details as to exactly what configuration parameters to enter in what format (ws:// or no ws://) and where to enter them and then how to make them be recognized (close the UI, restart HA, reboot NUC?). I had to make multiple tries to get everything right, then who knows what temporary config files I might have left behind that maybe need to be erased but didn’t automatically on the next attempt …
Also, I do know that an add-on is not an integration but I’ve never seen a good explaination of the distinction between these. I think my confusion is furthered by some add-ons also installing integrations.
Sorry, yes, I steered the conversation in the wrong direction by making assumptions. Sorry for that.
You should follow the 6 step switching guide and put your information in step 3 inside Zwave JS UI instead of the configuration tab.


Then continue on to step 4.
1 Like
They leave out the URL because it can change. The addon documents for Zwave JS UI tell you exactly what the URL is: ws://a0d7b954-zwavejs2mqtt:3000
1 Like
The zwave JS UI has a nice diagram that shows you what’s going on.
Also, I created some nice flow charts that are pinned at the top of Community Guides to help people understand zwave and all the glossary terms.
1 Like