Prusa MK4 printers are fully compatible with Home Assistant — they have their own built-in integration that allows limited control of prints, and lets the user see the status + a preview of the printout. On that basis, I've already made a dashboard for myself, so I can monitor printing time and state.
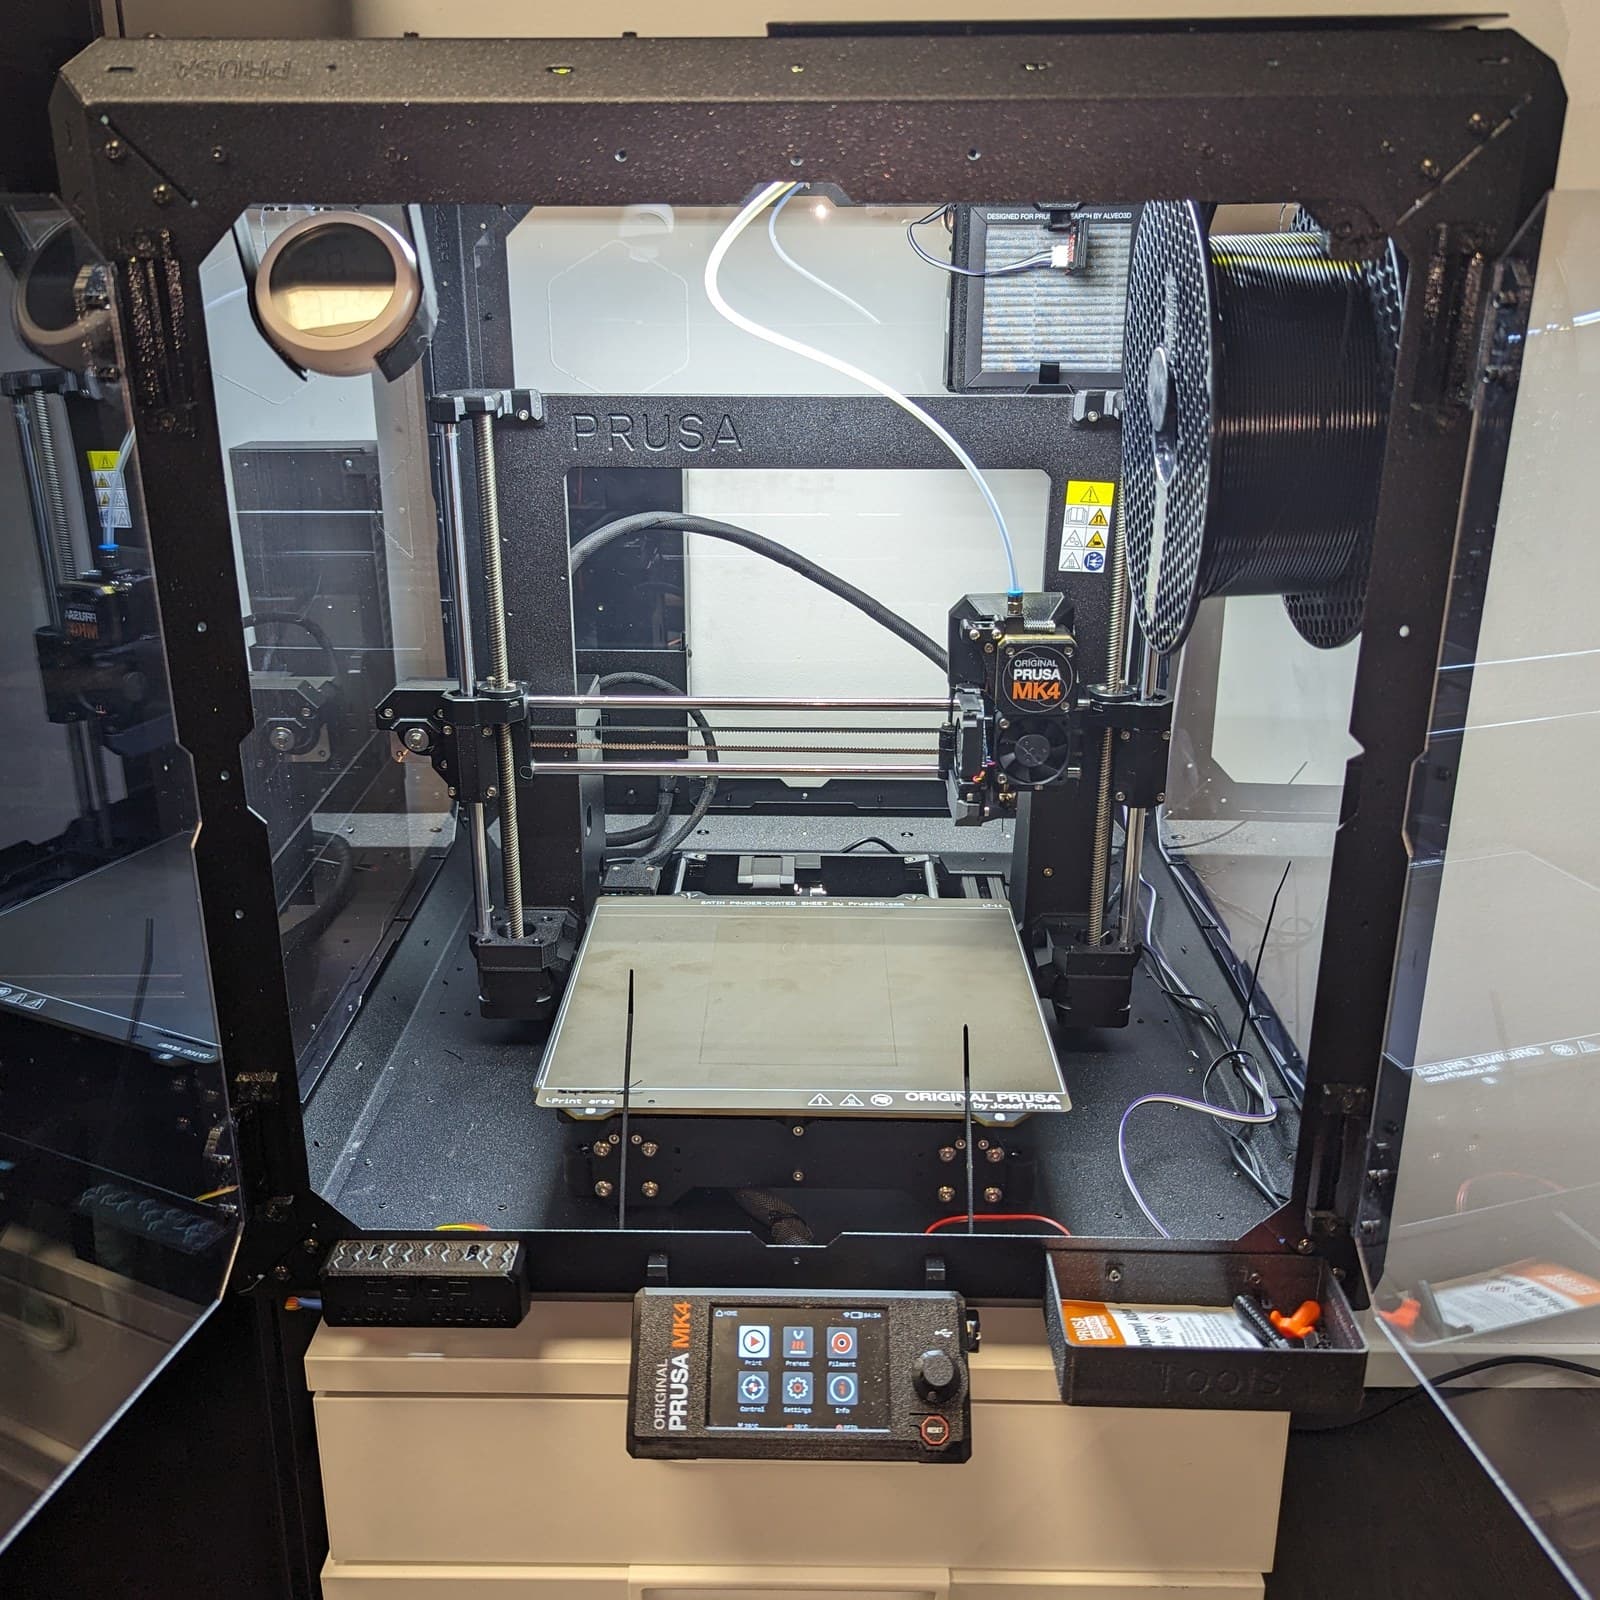
Since I'll be printing filaments that emit styrene and other noxious gases, in addition to the enclosure I also ordered the advanced filtration system (and its requisite base board + power supply). The base board and supply can also power and control an LED strip (24 volts), and the board includes a two-push-button front panel to turn the light and the fan on and off (not depicted here).
I shouldn't have to push a button to run the fan. If the filament I've set the machine to print with is not one of the known non-toxic filaments, the fan shouldn't run needlessly.
However, in any other case, the fan should run for the entire duration of the print, and keep going 15 minutes after the printer.
Then, the fan should be quiet.
Functionally and aesthetically, it should remain "stock":
"Digital buttons" notwithstanding, the push buttons on the base board (which attaches to the front panel) should operate correctly, allowing me to manually start and stop both enclosure light and filtration fan as I please.
Aesthetically, it should look as close to an unmodified Original Prusa enclosure plus the add-ons Prusa Research sells.
Stretch goal: video dashboard!
There should be a camera (ideally a device like an ESP32-CAM) filming, that allows me to view what's going on through my Home Assistant office dashboard.
When the camera is filming, the enclosure light should automatically come on. This should be pretty easy to accomplish with Home Assistant, since an automation can turn the light on when the camera begins streaming, and the light can then be turned off when streaming stops.
The technical parts can be done with an ESPHome-programmed ESP32 device. The aesthetic and functional parts can be done with a little care.
Full story goes on here!
We are already well on our way to getting the enclosure to be smart. A prototype already lights up a fake "fan" and "LED strip", using the correct input voltage and the Prusa Base Board buttons.
I’ve done some of what you’ve got here on a Prusa Mini. I have an overhead LED light, and as ESP32 cam for monitoring. I can control the light remotely so that I can check on prints, and also have a physical switch on the printer that will toggle the lights.
A few suggestions based on my experience:
You may find that 24V LEDs flicker annoyingly as the supply voltage fluctuates under printer load. I use 12V LEDs and an LM2956-based buck converter to drop the voltage. With a little bit of hacking, it’s possible to control the LM2956 directly from an ESP32 GPIO output as the LM2956 has an enable pin with a logic threshold of 1V. This avoids the need for a relay. Unfortunately, the standard cheap LM2956 boards on Amazon don’t have the enable pin broken out, so you need to cut the PCB trace and then solder directly to the regulator pin. A bit fiddly, but works very nicely.
The ESP32-Cam boards are apparently more reliable when powered off 5V. I used the 5V supply from the main board of my printer, but a separate 5V regulator would probably be sensible.
The ESP32-Cam has its own “flash” LED. I have this and the overhead lights setup as a light group in HA, and the physical switch toggles both the overhead lights and the flash LED together.
I’ll be using a separate 24 volt power supply shipped from Prusa Research to power the LED strip. The lights are 24 volts so I expect no issues. No main board or printer power supply hacking will be required, to stick with the “stock” look and functionality.
I have tried an M5Stack CAM but it overheats and gives terrible framerate. To test others out, I ordered a number of ESP32 camera devices to see which one works best and gives me the best framerate. I also ordered a separate IP camera, and I’ll see if that is more reliable / has better picture quality than the ESP CAM ones (I have the requisite regulators to step down 24 volts to USB power). We’ll see how this goes.
Ah, separate 24V supply should work fine. I was piggy-backing of the printer’s supply.
I’ll be interested to hear how you get on with other ESP32 cameras. Mine certainly gets quite warm, and the framerate is pretty lousy, but it’s good enough for checking if there are issue with the print. Most of them seem to use the same camera, so I’ll be surprised if there’s much difference.
I’ve rolled together a relay-controlled LED strip which I will be using on this project, although I am seriously mulling the use of a MOSFET module instead.
The project is complete. The fully smart, sensor-powered smart enclosure automatically cleans the air when it needs cleaning, has controllable lights via Home Assistant, and sports a camera that allows the user to observe his prints in real time.
Hey, just wanted to share my experience with this project. As soon as I found this post I knew I needed to follow the guide and implement it myself. I’ve been looking for something like this for a while as a prusa + enclosure user and HA user its the perfect combo.
The guide is very clear and easy to follow and once all the parts were ordered and arrived I had a great time putting it all together and fitting it to my enclosure. It works perfectly, and I love being able to monitor my print from HA and control my fan and LED strip. I also appreciate the additional feature of still allowing the buttons to work and sync with HA.
I did have a few issues with the ESP yaml, as I believe the configuration for the climate sensor has changed since you published the guide. I changed the following for anyone else having issues:
Notably, I had to change the source and component name of the climate sensor, then change bme68x_bsec_i2c to bme68x_bsec2_i2c throughout the file. Finally in the bme68x_bsec2_i2c section (formally bme68x_bsec_i2c) I had to add the line address: 0x77. This might be because I used the M5Stack ENV Pro, not sure.
Another change I made was to fit the electronics board to the front left of the enclosure rather than front right. I know this is where the Prusa LED strip goes, but I don’t use it (anymore), and it meant routing the power cable and buttons cable was much simpler. Also my fan cable was already routed to that corner too.
Anyway, love the project. Just wanted to ask if you have any plans to improve it in the future? Some things I’ve been thinking of adding are:
Support for RGB LEDs for visual indicators of printer status and just because its RGB
Changing the default non-smart temp/hum sensor in the enclosure door to a OLED display showing the readings from the Env sensor
Integration with the (Un)original Prusa Heated Drybox, which I am also working on for my printer, as this adds a heated enclosure for upto 5 spools with controls and display of the temperature, humidity and the heating element.
Thank you. I believe I have pushed updates to my repo that incorporate these fixes you mentioned, because ESPHome changed from under me several times in the last few months.
I love that you moved the device to the front left. Makes routing cables much, much easier indeed! The only reason I decided to go for front right is because the fan blocks the camera view a bit more on the left side than on the right side. But that is very close to no longer being a valid reason to do what I did, since MK4s has a round turbine 360 degree fan, so all sides are equally “covered”.
I would love to add support for RGB LEDs! An OLED display that fits the display mount would also be fantastic. Any improvements you contribute to get the board or the code to work with the Heated Drybox (which I’m also building myself) I will be more than happy to contribute back to the project!
Hey, quick question. Have you had any issues with the device going offline, being unresponsive or just generally being incredibly slow to respond to inputs (Opening the camera feed, turning on the light or fan etc.)?
I’m having a lot of issues with mine, I thought I’d shorted something when I installed it and damaged it, so I even bought a second ESP32 and rebuilt it from scratch (I added riser pins this time to I could easily remove the ESP if needed). But I’m still having a lot of issues with the device. Just wondering if its my end or if you have the same experience?
Yes, regrettably I have begun having the same issues myself after a couple of months printing with it. And I am not exactly sure what is causing those issues, but I apparently don’t know enough about electrical engineering to be able to diagnose and fix the issue.
I think that in the end I’m going to have to end up designing a different type of system that mounts outside of the printer so that it can be protected from the heat and also isn’t affected by the enclosure metal frame. But to be quite frank, these are just stabs in the dark because I don’t actually know the cause of the issues and I can only presume it has to do something with the heat cycling of the printer.
I have a suspicion its the camera. Or a combination of the camera and the ESP struggling to keep up.
I removed the camera, including all scripts, sensors and includes associated with it and also unplugged the camera from the board and my ESP is running significantly better now. Its only been a couple of hours as of writing this but I will monitor and see.
I also initially thought it was a heat issue from the enclosure and considered moving it outside, but I was getting stability issues when the enclosure was cold and the printer was idle. I also thought it might be a wifi issue with the metal enclosure and considered adding an ethernet to the system, but the wifi signal shown on the device should be plenty good enough when within the enclosure.
P.S. Not sure if your second comment was intended for this thread
Thanks. Not sure why the camera is creating issues but i also disconnected the camera and disabled its YAML… and bam, better stability. It’s still not perfect, it has deteriorated over time, but it’s better.
Since I rebuilt mine from scratch with new components and a new ESP32 mine has been flawless without the camera. No downtime at all. I’ve even got a screen working on the second I2C board, and started prototyping a mount for it in the place the non-smart sensor would go, though it is only compatible with the screen I used (M5Stack OLED Unit 1.3").
For now its just soldered to the necessary pins on the PCB directly (On the back of the PCB as I’ve added riser pins to easily remove the ESP now). But with the camera gone its easy to route the cable to the top left of the enclosure.
Happy to share the files and updated yaml once they’re finalised if you want to give it a go yourself
Prusa has supported flashing custom firmware onto ESP32s with cameras for a while now. It was originally a third party custom firmware, but Prusa have adopted the project and are maintaining it.
I originally tested it before Prusa adopted it, and today updated the firmware to the latest Prusa one. And its come a fair way. You can add the ESP to connect by generating a key on connect and inputting it into the ESPs webpage, and then it will send regular snapshots to connect.
However, today I also found out that part of the local API you can request a video stream and the latest snapshot amongst other things. This means we can set up a MJPEG IP Camera in home assistant and set MJPEG URL to http://ESP_IP/stream.mjpg and Still Image URL to http://ESP_IP/saved-photo.jpg to get a live feed from the camera, while also having the camera working with PrusaConnect.
I’ve gotten this working in my Home Assistant so I’m gonna be testing this further, as I’ve decoupled the camera from this project in place of a OLED screen