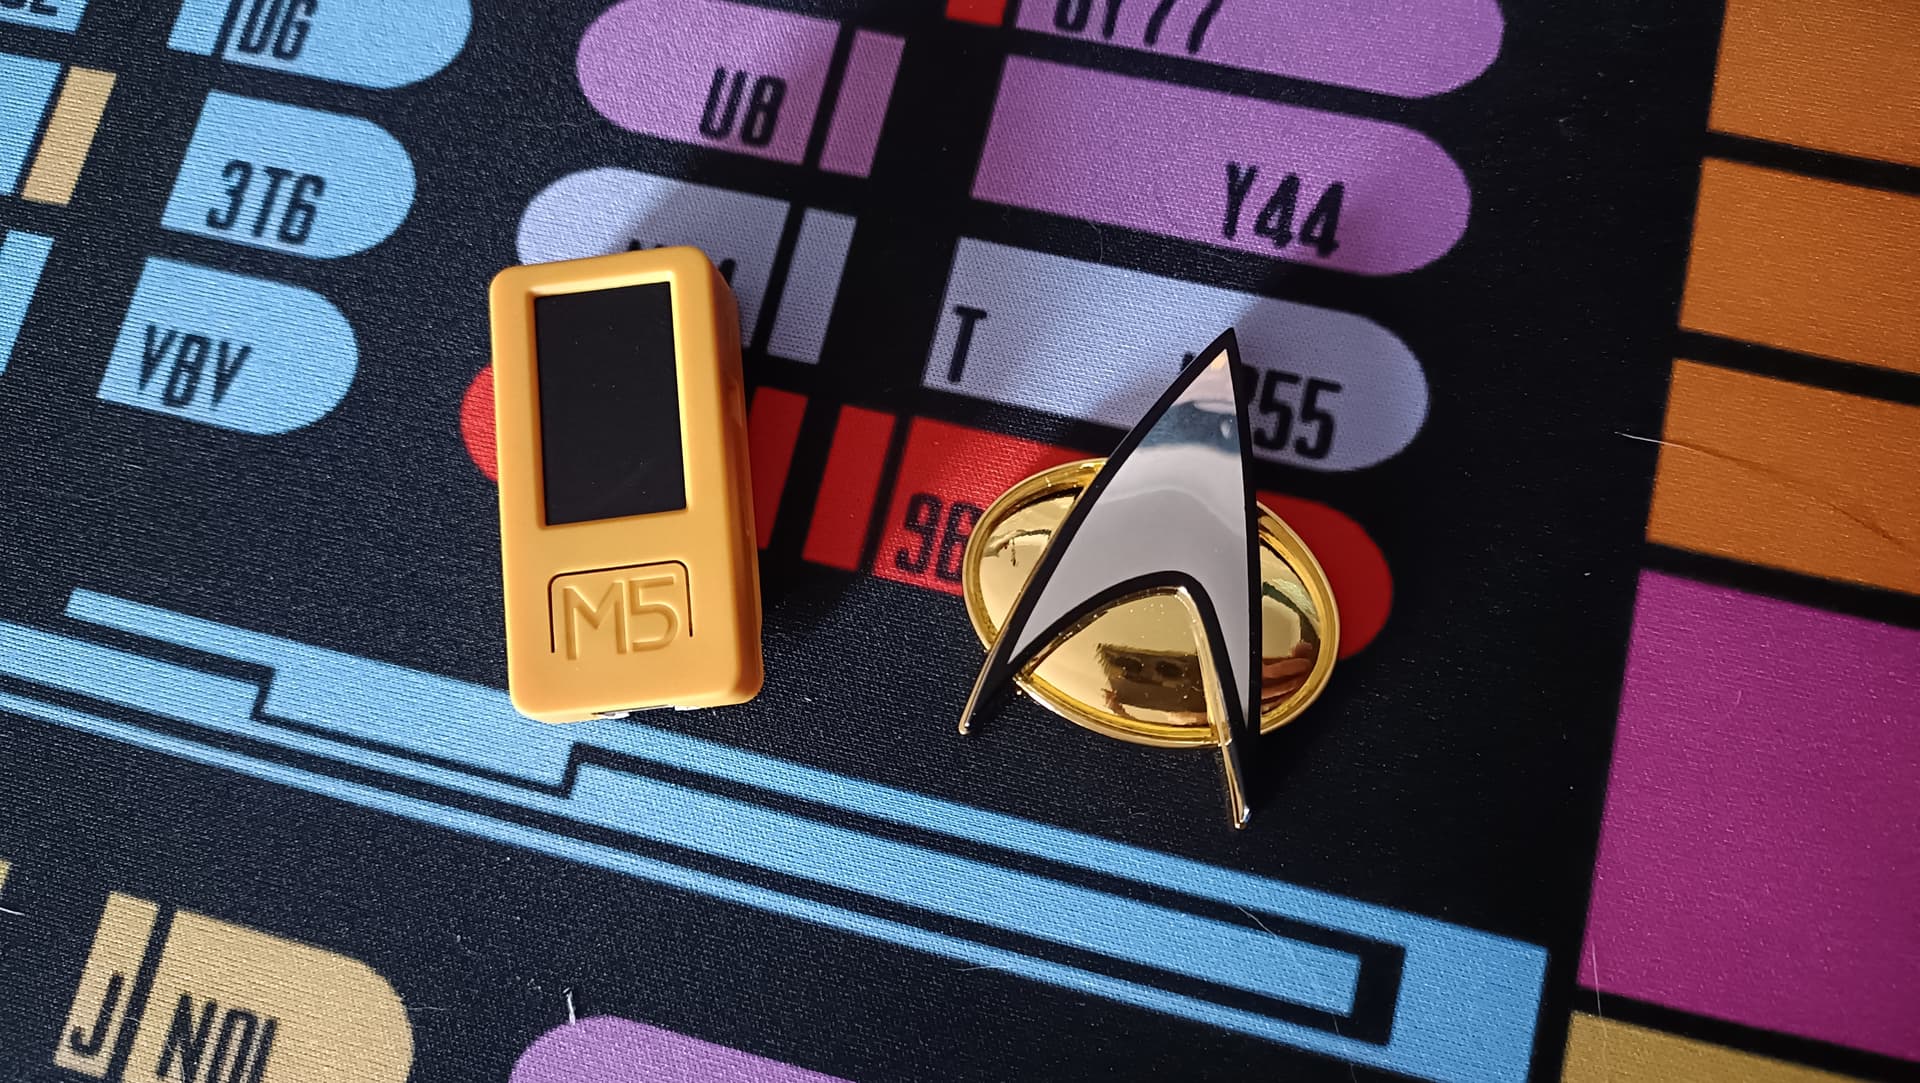
After seeing Shay Moradi’s excellent M5Stick voice control project, I realised I had a broken-screen M5StickC PLUS2 gathering dust that would be perfect for voice-only control. One thing led to another, as HA projects often do, and naturally it into a wearable Star Trek comm badge that gives you natural language voice control of Home Assistant without needing a wake word, or lots of satellites!
And it cost less than 25 quid. The Ferengi would be proud.
What It Does
Tap your chest, issue a voice command, control your home. It’s as satisfying as it sounds.
The device uses the M5StickC PLUS2’s built-in accelerometer to detect when you tap it (with configurable sensitivity), starts recording audio through its microphone, then uses Voice Activity Detection (VAD) to automatically stop recording when you’ve finished speaking.
The audio gets transcribed via Whisper (using Groq’s free API, OpenAI, or any custom Whisper-compatible endpoint), and the resulting text is sent directly to Home Assistant’s Conversation API, where Assist interprets your natural language command and executes it.
The Technical Flow
- Tap Detection: The MPU6886 accelerometer detects the tap and wakes the device from deep sleep if needed. It plays a TNG-style activation beep that’s so good I can’t stop needlessly activating it!
- Audio Recording: Starts recording.
- Voice Activity Detection: Automatically stops recording after detecting silence (configurable sensitivity, minimum 0.8 seconds to avoid cutting off slow speakers). You can also set a time limit on recordings.
- Transcription: The audio is sent to your chosen Whisper API provider via HTTP keep-alive connections for speed.
- Home Assistant Integration: The transcribed text goes straight to HA’s
/api/conversation/processendpoint where Assist interprets it as a natural language command. - Feedback: Different beep patterns tell you what’s happening (activation, success, errors, low battery warnings).
The Hardware Trick
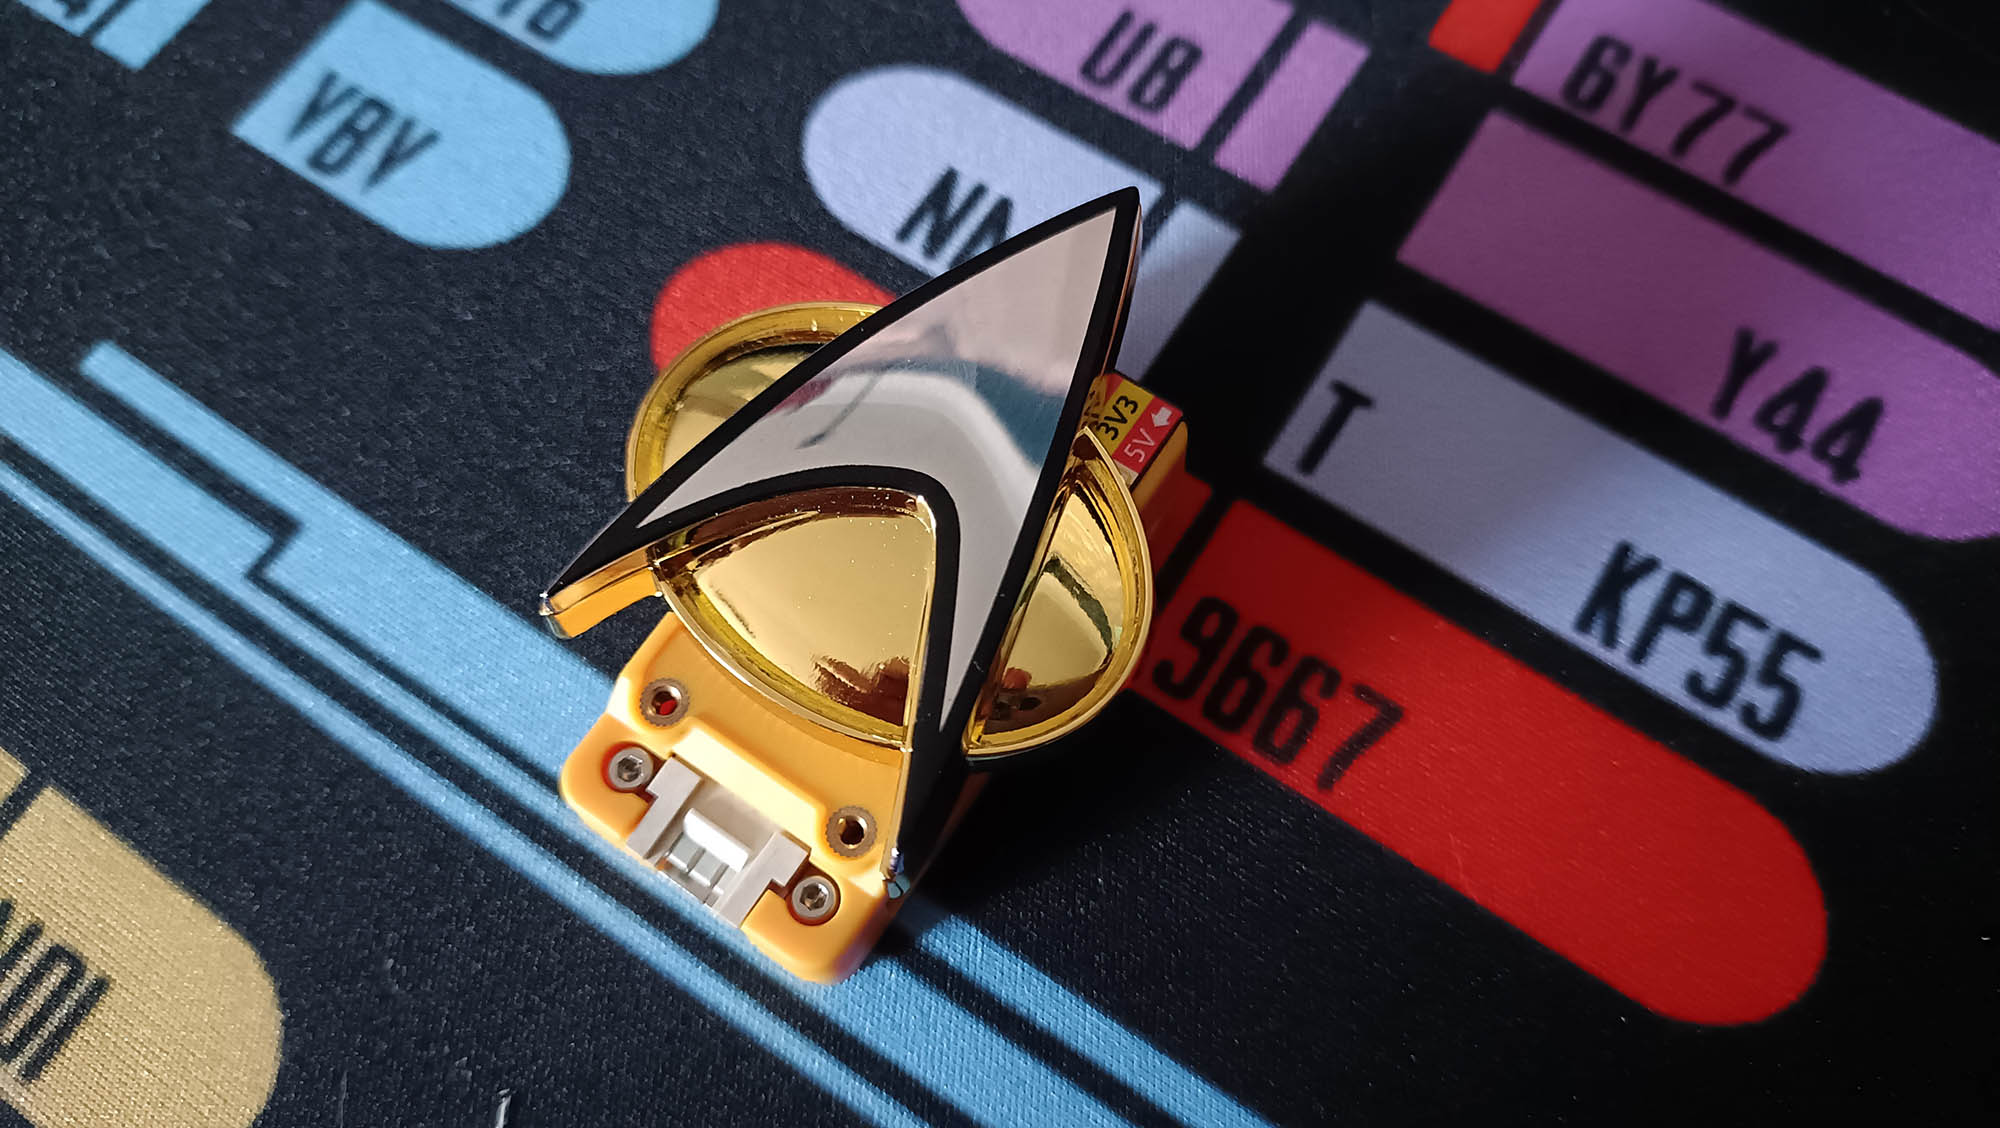
This was a portable Wyoming-style mic satellite until I noticed that the M5StickC PLUS2 has a magnet built into its case. That’s when it became a comm badge, as I had a cheap magnetic Star Trek comm badge, and the two stick together perfectly. The M5Stick sits behind your shirt with the badge on the front, and the tap detection still works brilliantly through the badge. Feels proper TNG.
Power Management
Battery life has been excellent so far. The device enters deep sleep after a configurable timeout (default 60 seconds) and uses Wake-on-Motion to instantly respond when you tap it. In deep sleep, it lasts days. During active use, probably a good day of continuous operation, depending on usage.
Configuration
Hold the front button during reset (or for 5 seconds while awake) to enter config mode. The device creates a WiFi access point called “CommBadge-Config” (password: “starfleet” - naturally), and you connect to configure everything through a web interface by connecting to the AP and sending your browser to 192.169.4.1.
I went full LCARS styling because… well, if you’re building a comm badge, what other choice is there?
You can configure:
- WiFi credentials
- Home Assistant URL and long-lived access token
- LLM provider and API key (Groq/OpenAI/Custom)
- Tap sensitivity (2.0-4.5)
- Maximum recording duration
- VAD sensitivity (how quickly it stops after silence)
- Deep sleep timeout
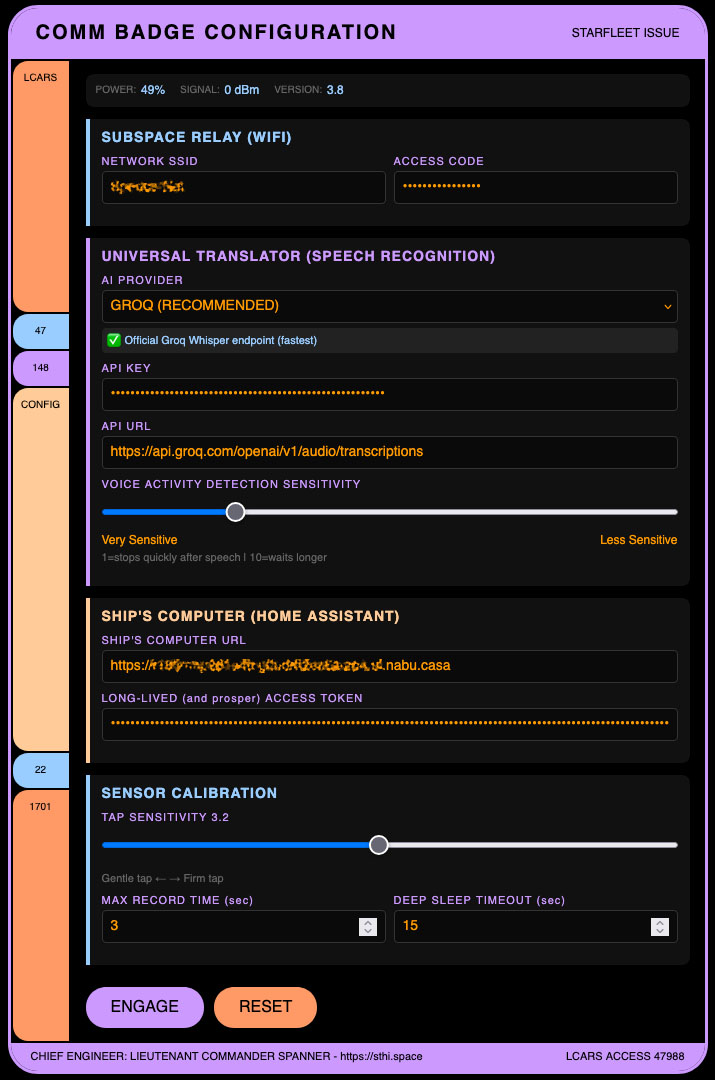
Why Groq?
The free tier on Groq for Whisper transcription is really generous. Even with heavy use, I’ve not hit any limits yet. It’s also pretty fast, which makes the whole experience feel fairly snappy.
What I’d Like to Improve
- Speed: It’s pretty quick, but I’d love to shave off another few hundred milliseconds.
- Battery vs responsiveness: Still finding the sweet spot between deep sleep battery life and instant tap response.
- Add wireless charging
- Maybe local wake word detection eventually?
The Code
Everything’s on GitHub with full setup instructions, configuration guide, and a bit of troubleshooting:
It’s Arduino-based (M5Unified library), uses a few standard libraries (WiFiClientSecure, ArduinoJson, etc.), and is pretty well commented. Should take about 30 minutes to set up once you’ve got the hardware.
Note: This only works with the M5StickC PLUS2, not the original M5StickC, due to the different microphone hardware.
The Origin Story
Huge credit to Shay Moradi (@organised) whose M5Stick with OpenAI Access project inspired this. I started from his foundation kept adding features from there (VAD, Home Assistant integration, power management, multi-provider support, etc.).
Final Thoughts
This has genuinely become my favourite way to control the house. There’s something deeply satisfying about tapping your chest and issuing commands like you’re on the Enterprise. And it’s an interesting thought, carrying the microphone satellite around with you, as opposed to having lots of stationary ones around the house. How that’ll pan out, we’ll have to see.
If you build one, I’d love to see it! Feel free to fork, modify, and improve - it’s just a hobby project born from Star Trek fandom and smart home enthusiasm.