I’m getting the feeling, you’re working with some kind of wrong documentation. I can’t find either of your used modes.
According to the documentation, see here, you can’t use supported_modes or autoconfig. And for what it’s worth, just try with the basic settings and add things like modes or fan_modes after everything else is working.
Something like this and see what happens:
esphome:
  name: midea-disimpegno
  platform: ESP8266
  board: d1_mini

# Enable logging
logger:
  baud_rate: 0

captive_portal:
# Enable Home Assistant API
api:

ota:
  password: "flying"

wifi:
  ssid: "foo"
  password: "bar"

  # Enable fallback hotspot (captive portal) in case wifi connection fails
  ap:
    ssid: "Midea-Disimpegno"
    password: ""


# UART settings for Midea dongle (required)
uart:
  tx_pin: 1
  rx_pin: 3
  baud_rate: 9600

# Optional (if you want modify settings)
midea_dongle:
  strength_icon: true

# Main settings
climate:
  - platform: midea_ac
    name: Condizionatore Disimpegno    # Use a unique name.
    beeper: true                # Beep on commands.
If this works, try adding the things you need. Normally all the things that are needed are discovered automatically, so no need to add the fan_modes. These settings are mostly, if something isn’t working out-of-the-box, but standard users as we all are won’t need these at all.
I take advantage of the opportunity to ask if the sensors name are for exposing to HA, so being editable, or used internally by ESPhome, so being unchangeable.
I find it difficult to understand the relative documentation section
Sorry, link to documentation was wrong, I corrected it in the post above, and here it is:
What you used is the development version of the documentation, this is only for developing purposes as there may be some things described, that won’t work in the stable version of ESPHome. What you found is the version that may be upload and reviewed to ESPHome, but it is not final, it just fits the code from the specific branch. For users the ESPHome documentation is the place to go.
And for the short code I posted, yes, that should work out-of-the-box. Mine isn’t longer and it’s working great. The point is, get it running, and afterwards see (in HA), what functions are missing.
Then check if they are supported (see documentation), and if they are, but not shown, set the parameters manually in the file.
If they are not supported, you can start a feature request by adding an issue on Github or you ask in the telegram group.
As I said, mine is working out-of-the-box without any additional settings. I just changed the behaviour in the frontend, because I’ll never ever use the “heating” from my A/C. So I disabled it. But otherwise it’s just the standard.
Let us know how it works out for you. Oh and while you’re at it, please add your model to the list of supported models, that you can find here.
I’m living in Germany, here normally every house has a central heating solution in place. For me, my A/C is just to cool down, if it get’s cold, I have a geothermal pump that provides us with hot water and central heating throughout the house via underfloor heating. The A/C would be more expensive and not that flexible, the geothermal pump is environmental friendly and in the worst case I can still run it with a generator.
That’s a great marketing material! I would do this here in US,MI, but I guess it will cost me kidney and half of liver. Is your implementation “on the surface”? Meaning like meter or two under ground, or real drilled hole for tens of meters? Asking, because first is DIYable, second not co much… How is it working? How much kWh per month in January? Sorry for off-topic
hallo, I generated a new ESPhome configuration (below) following the examples given by @paddy0174 and @n1k5y , installed on a nodeMCU because previus WemosD1mini got stuck, but the AC refuses to work.
esphome:
  name: midea-disimpegno
  platform: ESP8266
  board: nodemcuv2

# Enable logging
logger:
  baud_rate: 0

captive_portal:
# Enable Home Assistant API
api:

ota:
  password: "bbc16a0461939cfcaf206e4e4187cfec"

wifi:
  ssid: "Foo"
  password: "Bar"
  manual_ip:
    static_ip: 192.168.1.76
    gateway: 192.168.1.3
    subnet: 255.255.255.0


  # Enable fallback hotspot (captive portal) in case wifi connection fails
  ap:
    ssid: "Midea-Disimpegno"
    password: ""


# UART settings for Midea dongle (required)
uart:
  tx_pin: 1
  rx_pin: 3
  baud_rate: 9600

# Optional (if you want modify settings)
midea_dongle:
  strength_icon: true

# Main settings
climate:
  - platform: midea_ac
    name: Condizionatore Disimpegno    # Use a unique name.
    beeper: true                # Beep on commands.


    visual:                     # Optional. Example of visual settings override.
      min_temperature: 16 °C    # min: 16
      max_temperature: 30 °C    # max: 30
      temperature_step: 0.5 °C  # min: 0.5

    swing_horizontal: true
    swing_both: true
    outdoor_temperature:
      name: "Temperatura Unità Esterna"
    power_usage:
      name: "Consumo Condizionatore Disimpegno"
    humidity_setpoint:
      name: "Umidità Condizionatore Disimpegno"
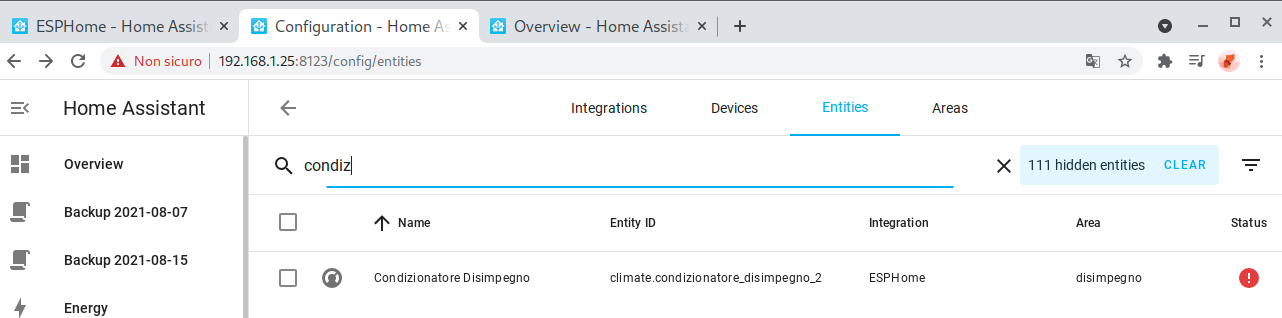
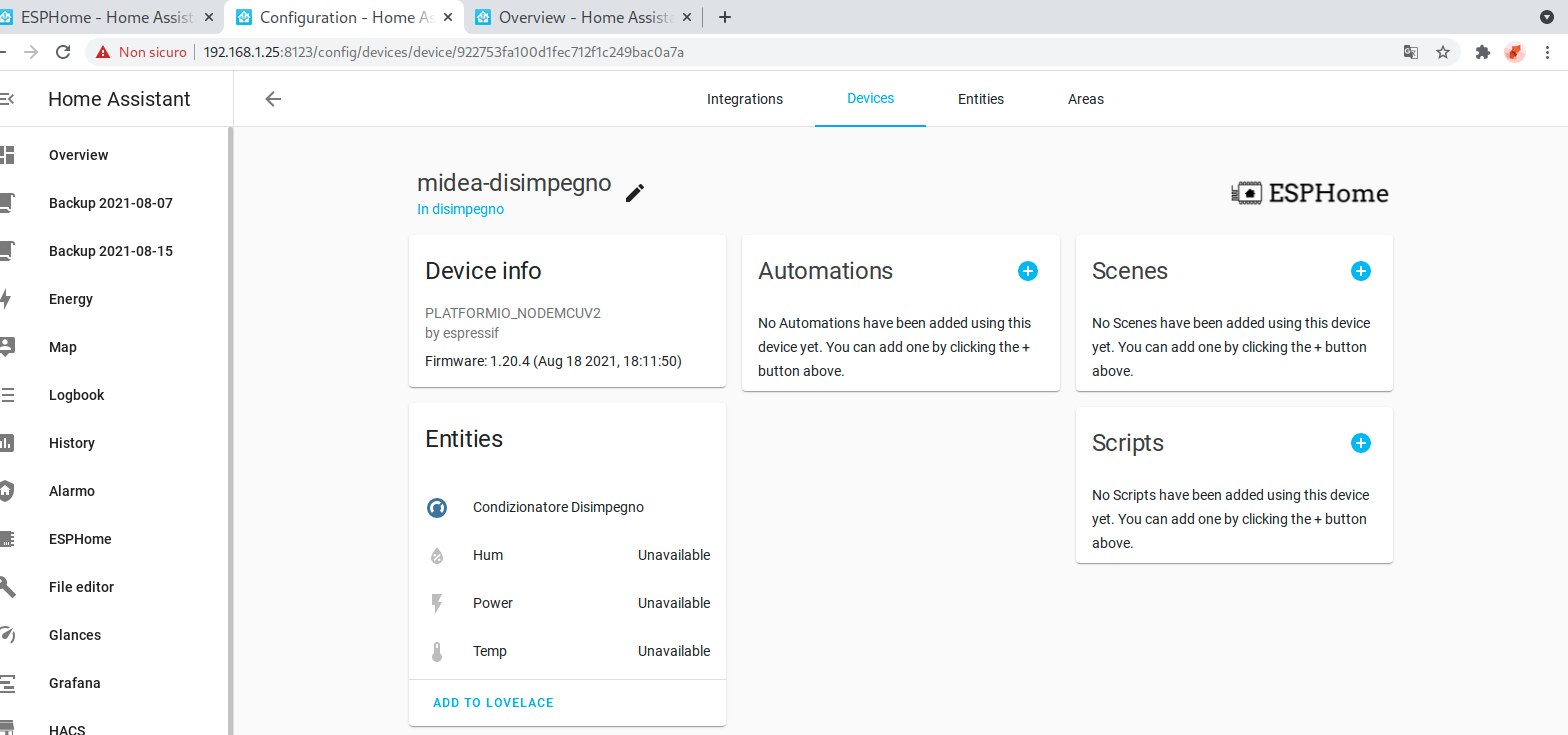
ESPhome dashboard can see online the board, HA also (as a device and entity), but nothing works.
Some screenshots from HA webUI
no…you still need the level shifter…
Actually, what you’re doing could damage the AC (or wemos/nodemcu), as the AC connector is NOT USB…
Here someone who managed to get it going on wemos:
You can check the ESPHome logs…this is how it should look like:
NodeMCUs should be able to work with 5V, but it is not good for your board. And the possibility for errors grows…
And don’t confuse the power to run your board with the voltage that is needed to speak to each other. The communication is 5V here, so a level shifter is really a good idea.
@aceindy sorry, i was going totally stuck. @paddy0174 the point is only the different voltage? i can use a step down… or there are other troubles?
BTW i can use another board, as long as is available via amazon in 1-2 days. Some suggestions?
nodemcu should work, but you should not use the micro-usb connector, but looks like nodemcu has tx/rx available on gpio1/3, advise to use those (with level shifter)
i use still the esp01s with it’s own levelshifter…
works fine and is by far the cheapest
A step down is the right direction, but not the right product.
You need a level shifter (these are available on Amazon as well). I’ll try to explain a little more:
You have four wires:
red = 5V
black = ground (5V)
green = TX <= and here is your culprit, these TX (talking) line needs 5V as well
white = RX <= this is in 5V as well
The communication lines normally are 3.3V, not 5V, even if the board is powered by 5V. You get the idea.
That’s why you need a level shifter, that can turn both directions (TX and RX) into 5V. With a step down you only lower the voltage to power your board, but that has nothing to do with the voltage on the communication lines.
i’m going to buy 5 ESP-01s , 5 ESP-01 serial to serial board and 1 ESP-01 usb adapter. so i’m settling things once and for all.
Someone knows the name of the white header used at the end of the “usb to logic board” connector on the AC?
XH2P ?!
FOUND! JST-XH