Hello everyone,
Many of us who live in drier climates (e.g. New Mexico, Arizona, Texas, etc.) use Evaporative Cooler’s instead of AC units due to their low installation cost as well as being cheaper to run long-term throughout countless summers.
BEFORE CONTINUING WITH THIS TUTORIAL, MAKE SURE YOUR CIRCUIT BREAKER IS OFF! PROCEED AT YOUR OWN RISK!
Traditionally, Evaporative Cooler’s were unable to work with traditional thermostat’s due to the way they inherently operate. They use a 120/240VAC Line Voltage which operates a pump, a low fan speed, and a high fan speed that pulls air through wet pads on the roof which in turn cheaply cools the entire house using the home’s existing duct system.
Thanks to u/TellarHK, I was able to begin reviewing this post on how an Echobee3 (a modern thermostat) could be connected to an Evaporative Cooler using a White-Rodgers (8A18Z-2). Although this was a great start to what I wanted, I did not want to have to rely on a round-about method of controlling my own thermostat with Home Assistant using HomeKit which does not offer Full Local API Access. This is in addition to, in my own personal opinion, that the Echobee3 is just pain-boring to look at. Don’t get me wrong, the Echobee3 is absolutely functional, but I prefer functionality and beauty, not just one or the other.
Boring Echobee3 UI
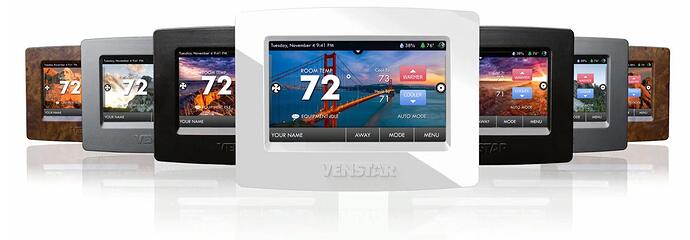
As I continued browsing various online forums, it appeared that the Venstar T7900 WiFi Thermostat not only had a local API that could easily be incorporated into Home Assistant (or simply used as a standalone thermostat without Home Assistant, if one so desired). Not only that, but it also had the option of changing its faceplate to match whatever personal style you have. This in itself was an amazing selling point for me, but I still needed to make it work with my current setup if I was going to use this beautiful touchscreen thermostat.
Venstar T7900 WiFi Thermostat Faceplate Options
Right from the start, I found many issues attempting to figure out how to incorporate the Venstar T7900 into my system which is nowhere near a conventional setup. After all, we are trying to have a modern-day thermostat, a modern heater, and a 120V line-voltage evaporative cooler, all work together in harmony. I even purchased an Echobee3 just in case I would be unable to get this setup fully working. Fortunately, the Echobee3 will be unneeded as everything is working spectacularly after 6 months of trial and error with the Venstar T7900.
I cannot thank PJmax and Caddymac enough for their help with my post on the DoItYourself forms. They helped me tremendously through various ideas on how to get this system to work, and in the end, it’s working perfectly.
I’m going to skip everything that did not work while we troubleshot various ideas over the course of 6 months and instead just skip ahead to what did work. I’m going to lay out for you what did in fact work so you can replicate it yourself, if you so please.
Everything you will need to begin and finish the project:
Let’s begin:
Within a conventional Evaporative Cooler setup, there are 6 wires that we need to be aware of.
There are 3 wires from the home’s electrical circuitry and there are 3 wires that come from the Swamp Cooler.
First, we’ll go ever the House Wires:
-
House Ground Wire (not pictured): Just ground it to something like the electrical box.
-
House Neutral Wire: It won’t harm you, just connect it as shown to the White Rodgers “N” terminal as shown in the diagram below.
-
House Hot Wire: This wire is a dangerous wire and can kill you. This wire operates at either 120V or 240V. If it’s 120V, Connect it to the “L1” terminal as shown in the diagram below.
Next, we will go ever the Evaporative Cooler’s Wires:
-
Evaporative Cooler Water Pump: Connect the wire to the “P1” terminal shown on the diagram below.
-
Evaporative Cooler Low Fan: Connect the wire to the “LO” terminal shown on the diagram below.
-
Evaporative Cooler High Fan: Connect the wire to the “HI” terminal shown on the diagram below.
Now, it’s time to complete the wiring to your Venstar T7900 Thermostat. I have included a diagram below that you can follow which will allow you to control not only your 2-stage evaporative cooler but also your 2-stage furnace.
Once you have successfully followed the instructions above, you should have no issues controlling both your 2-stage heater and 2-stage evaporative cooler from your Venstar T7900 Thermostat.
At this point, you should have no issues connecting your fully local thermostat to Home Assistant.
Best of luck to all of you and please free to reach out if you have any questions.


