Use ESPHome with e-ink Displays to blend in with your home decor!

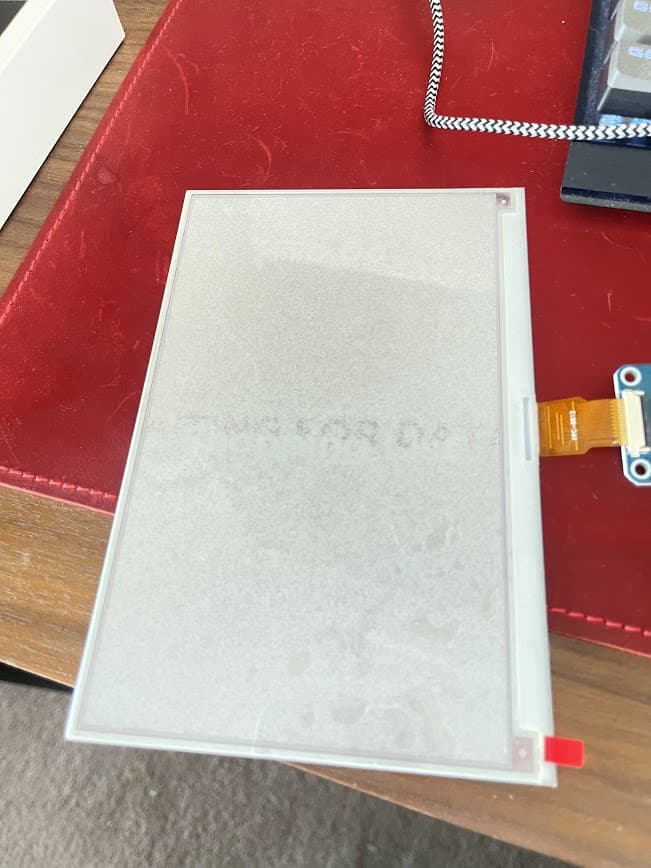
Ok, so have gotten somewhere.

But the display is really bad. I seen people kind of allude to quality issues. But how did you fix it?

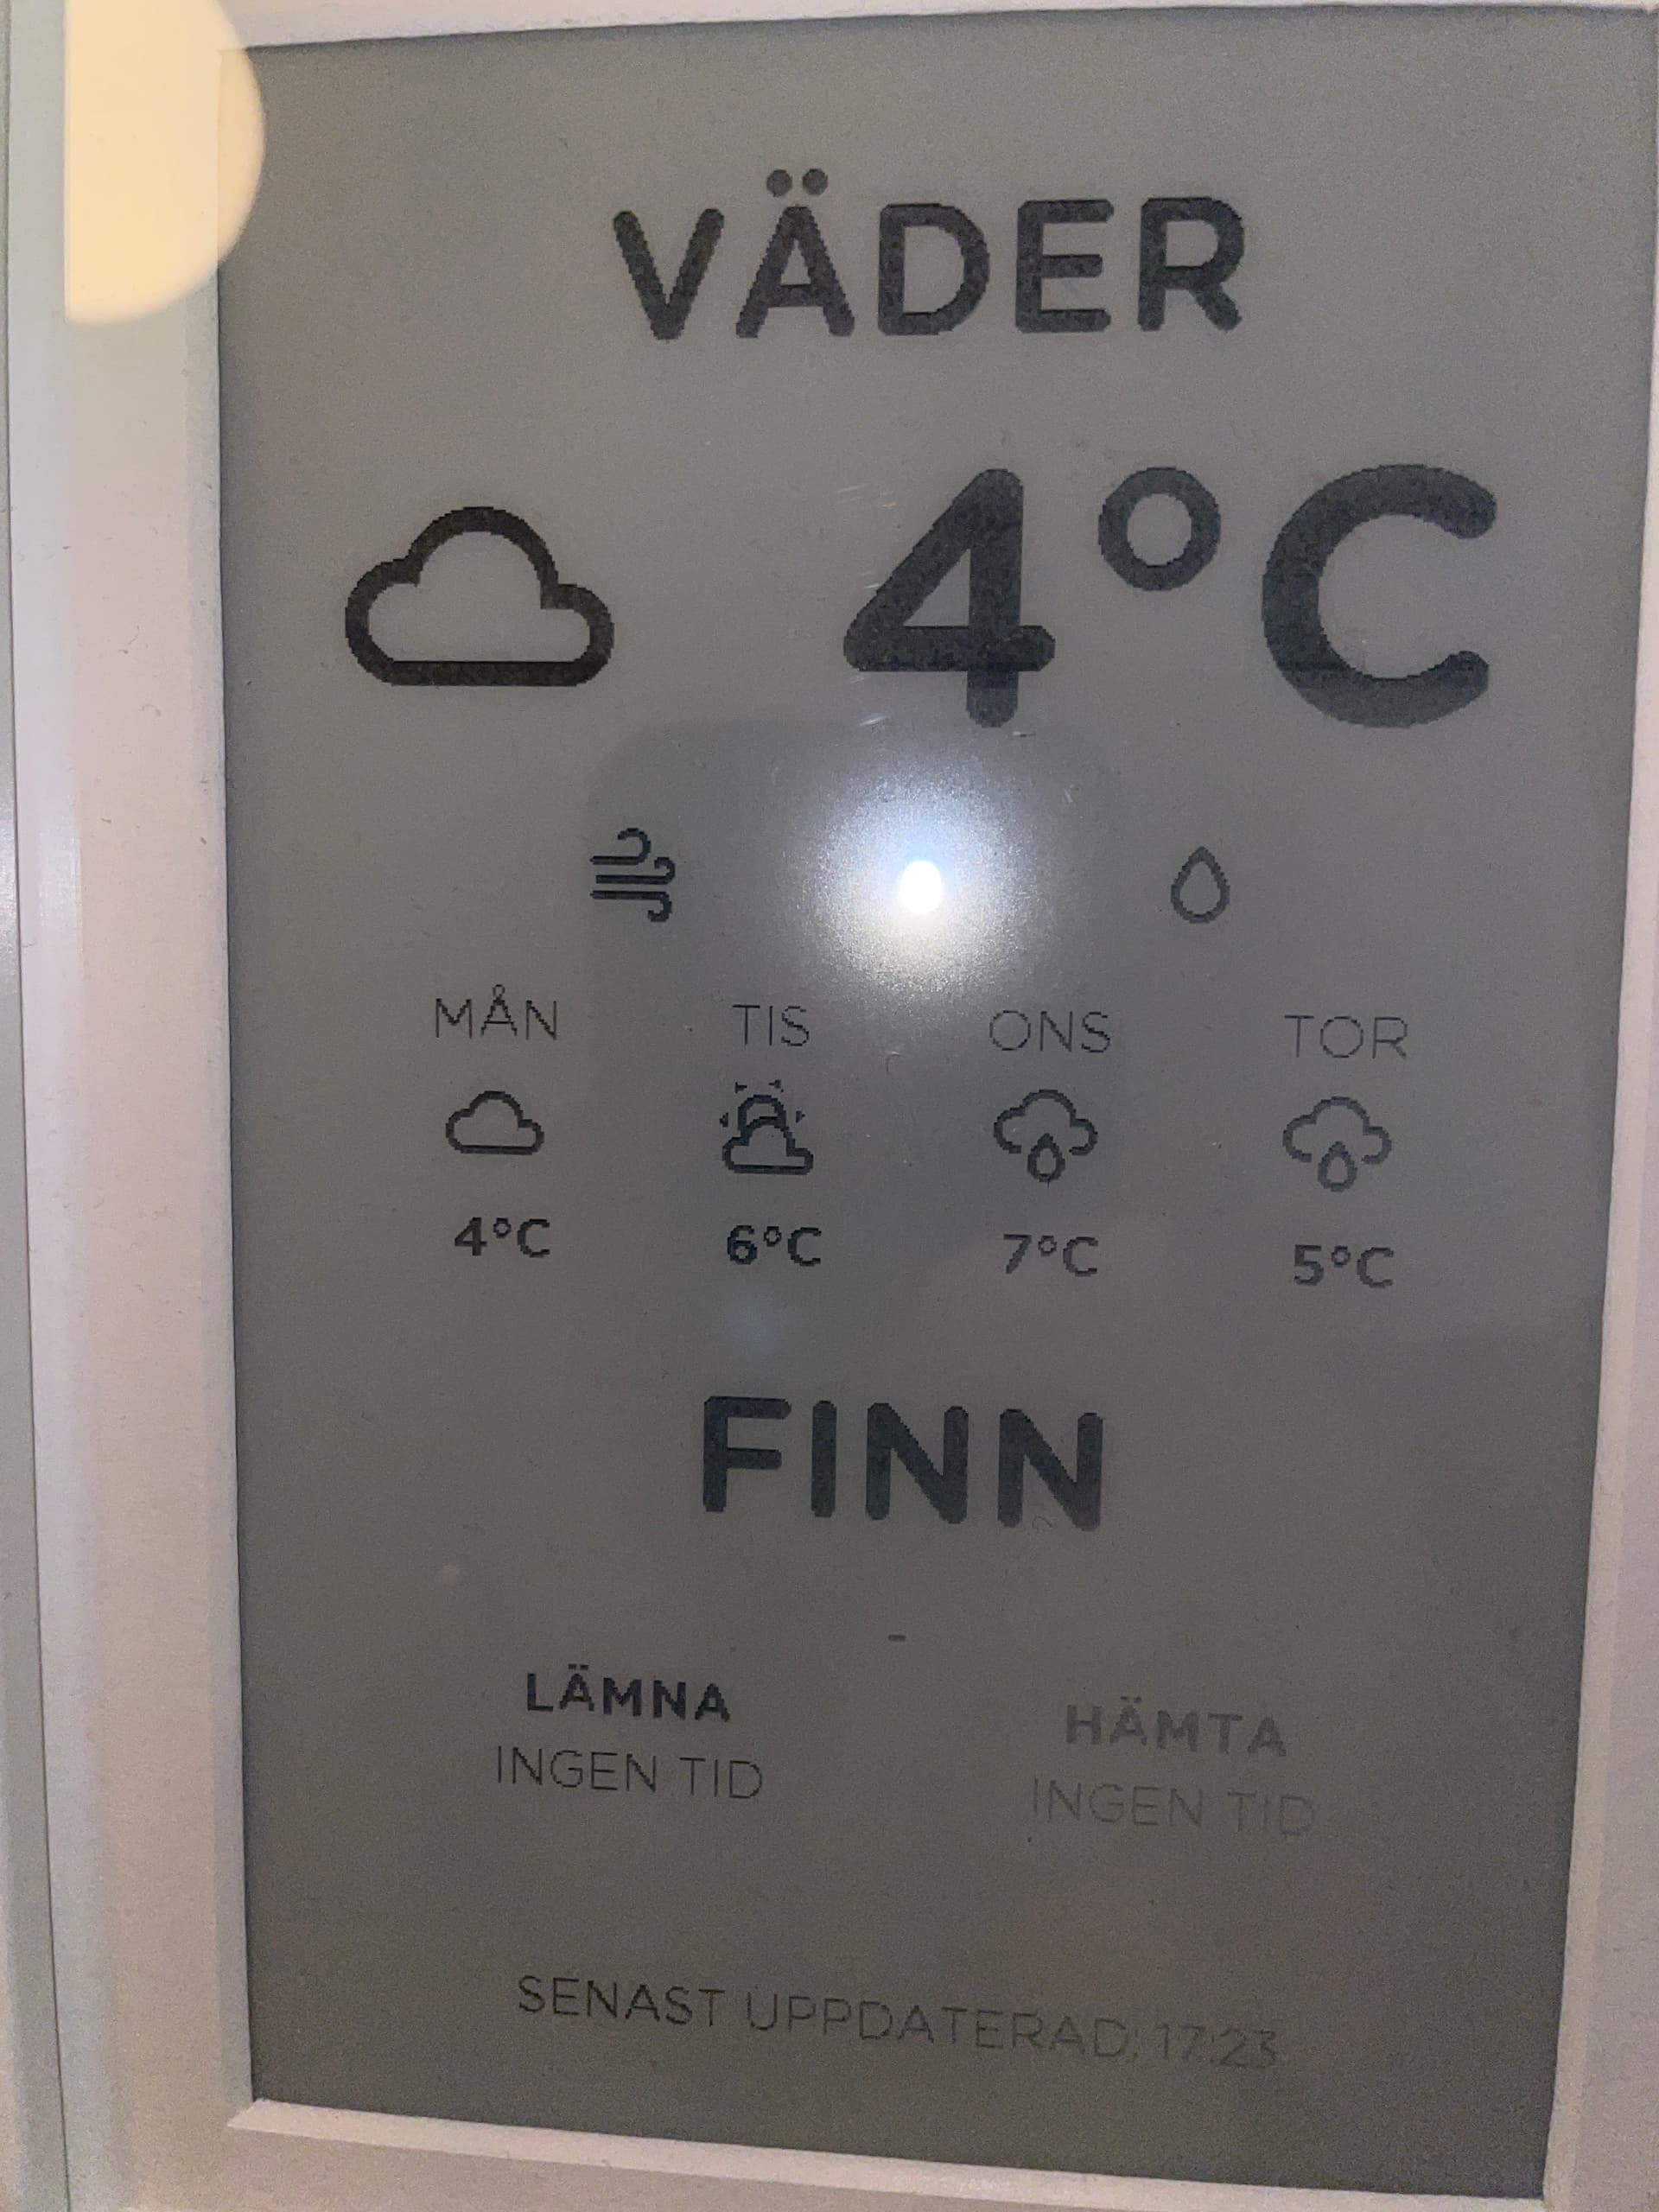
After turning it on, got this

Even though I thought it would be black text on white

Restarted again and now its sitting here

If anyone can give me any advise, would really appreciate it :slight_smile:

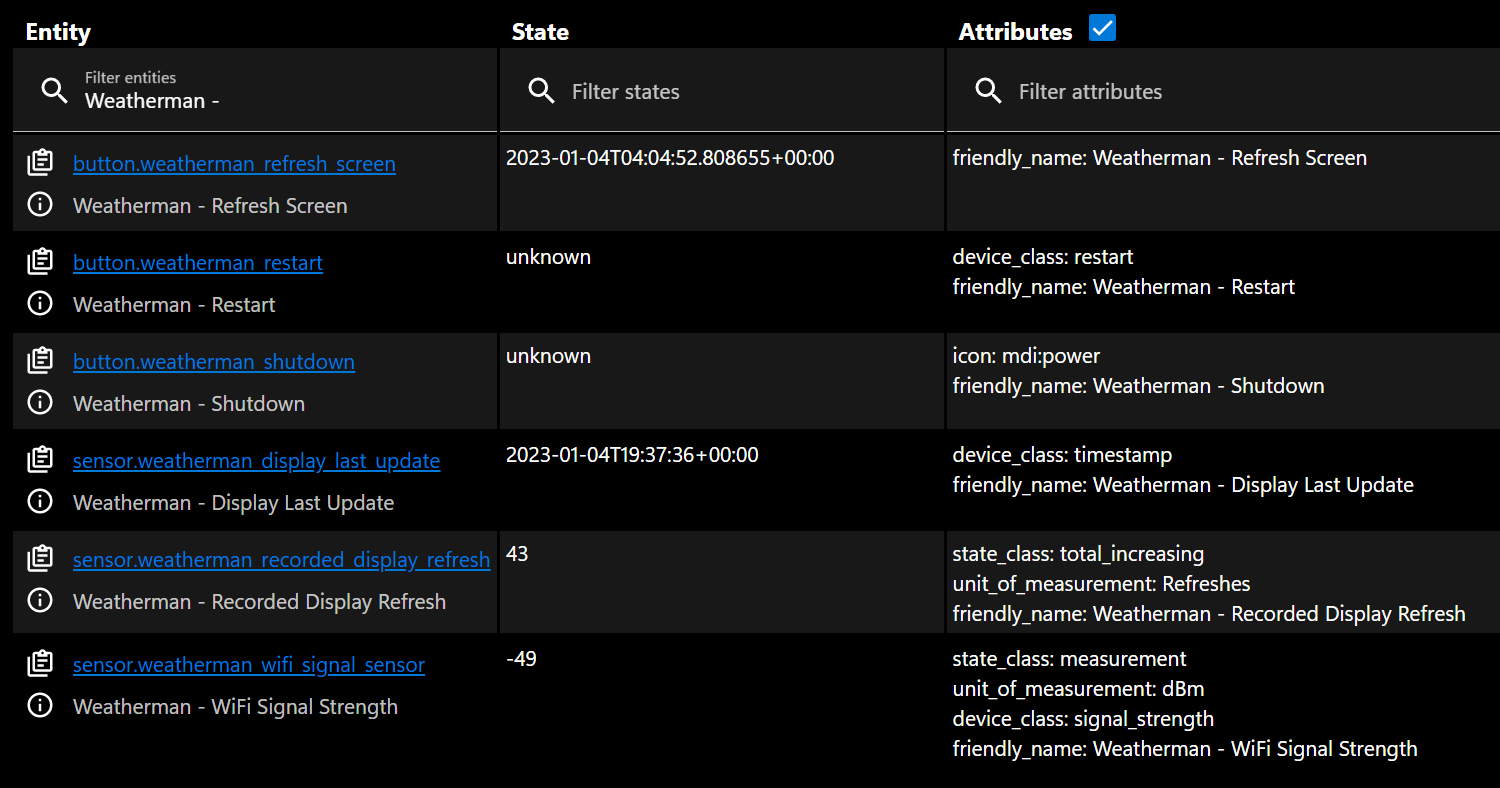
# Global variables for detecting if the display needs to be refreshed. (Thanks @paviro!)
globals:
  - id: data_updated
    type: bool
    restore_value: no
    initial_value: 'false'
  - id: initial_data_received
    type: bool
    restore_value: no
    initial_value: 'false'

# Include custom fonts
font:
  - file: 'fonts/GothamRnd-Book.ttf'
    id: font_small_book
    size: 18
  - file: 'fonts/GothamRnd-Bold.ttf'
    id: font_large_bold
    size: 108
    #glyphs: [' ', '°', '0', '1', '2', '3', '4', '5', '6', '7', '8', '9', 'C']
  - file: 'fonts/GothamRnd-Bold.ttf'
    id: font_title
    size: 54
    #glyphs: ['W', 'E', 'A', 'T', 'H', 'R', 'L', 'I', 'N', ' ']
  - file: 'fonts/GothamRnd-Bold.ttf'
    id: font_medium_bold
    size: 30
    # glyphs: [' ', '0', '1', '2', '3', '4', '5', '6', '7', '8', '9', 'M', 'I', 'N']
  - file: 'fonts/GothamRnd-Bold.ttf'
    id: font_small_bold
    size: 18
    # glyphs: ['°', '0', '1', +'2', '3', '4', '5', '6', '7', '8', '9', 'C', 'M', 'I', 'N']


# Check whether the display needs to be refreshed every minute,
# based on whether new data is received or motion is detected. (Thanks @paviro!)
time:
  - platform: homeassistant
    id: homeassistant_time
    on_time:
      - seconds: 0
        minutes: /1
        then:
          - if:
              condition:
                lambda: 'return id(data_updated) == true;'
              then:
                - lambda: 'id(initial_data_received) = true;'
                - if:
                    condition:
                      binary_sensor.is_on: motion_detected
                    then:
                      - logger.log: "Sensor data updated and activity in home detected: Refreshing display..."
                - component.update: eink_display
                - lambda: 'id(data_updated) = false;'
              else:
                      - logger.log: "Sensor data updated but no activity in home - skipping display refresh."


# Check if motion is detected in the bathroom.
binary_sensor:
  - platform: homeassistant
    entity_id: binary_sensor.bathroom_motion_sensor
    id: motion_detected    

# Call calender sensors from HA.
sensor:
  - platform: homeassistant
    entity_id: calendar.home_assistant_tasks
    id: home_assistant_tasks
    on_value:
      then:
         - lambda: 'id(data_updated) = true;'

  - platform: homeassistant
    entity_id: calendar.alexa_to_do_list
    id: alexa_to_do_list
    on_value:
      then:
         - lambda: 'id(data_updated) = true;'
    
  - platform: homeassistant
    entity_id: calendar.alexa_shopping_list
    id: alexa_shopping_list
    on_value:
      then:
         - lambda: 'id(data_updated) = true;'

# Define colors
# This design is white on black so this is necessary.
color:
  - id: color_black
    red: 0%
    green: 0%
    blue: 0%
    white: 50%
  - id: color_white
    red: 0%
    green: 0%
    blue: 0%
    white: 0%


# Pins for Waveshare ePaper ESP Board
spi:
  clk_pin: GPIO13
  mosi_pin: GPIO14

# Now render everything on the ePaper screen.
display:
  - platform: waveshare_epaper
    id: eink_display
    cs_pin: GPIO15
    dc_pin: GPIO27
    busy_pin: GPIO25
    reset_pin: GPIO26
    reset_duration: 2ms
    model: 7.50inV2
    update_interval: 1h
    rotation: 90°
    lambda: |-


      // Fill background.
      // it.fill(color_bg);

      // Show loading screen before data is received.
      if (id(initial_data_received) == false) {
        it.printf(240, 390, id(font_title), color_black, TextAlign::TOP_CENTER, "WAITING FOR DATA...");
      } else {

        // To Do List
        it.printf(240, 84, id(font_title), color_black, TextAlign::TOP_CENTER, "To Do");


        // Shopping List Section
        it.printf(240, 408, id(font_title), color_black, TextAlign::TOP_CENTER, "Shopping List");


      }


captive_portal:

I had something similar and discovered I had a three colour panel and after some googling found that someone had added support via an external component (YMMV)

Thanks for that, I knew I had the three colour one. I just didn’t know it wasn’t supported LOL

Do you think it safe? *he asks stranger on the internet" HAHA

But really thank you, had no idea that would be an issue :slight_smile:

HARDWARE: ESP32 240MHz, 320KB RAM, 4MB Flash
LDF: Library Dependency Finder -> https://bit.ly/configure-pio-ldf
Dependency Graph
|-- AsyncTCP-esphome @ 1.2.2
|-- WiFi @ 1.0
|-- FS @ 1.0
|-- Update @ 1.0
|-- ESPAsyncWebServer-esphome @ 2.1.0
|   |-- AsyncTCP-esphome @ 1.2.2
|-- DNSServer @ 1.1.0
|-- ESPmDNS @ 1.0
|-- noise-c @ 0.1.4
|   |-- libsodium @ 1.10018.1
|-- SPI @ 1.0
Compiling /data/to-do/.pioenvs/to-do/src/main.cpp.o
src/main.cpp: In function 'void setup()':
src/main.cpp:3702:63: error: invalid new-expression of abstract class type 'esphome::waveshare_epaper::WaveshareEPaper7P5InV2'
   eink_display = new waveshare_epaper::WaveshareEPaper7P5InV2();
                                                               ^
In file included from src/esphome.h:50:0,
                 from src/main.cpp:3:
src/esphome/components/waveshare_epaper/waveshare_epaper.h:312:7: note:   because the following virtual functions are pure within 'esphome::waveshare_epaper::WaveshareEPaper7P5InV2':
 class WaveshareEPaper7P5InV2 : public WaveshareEPaper {
       ^
In file included from src/esphome.h:20:0,
                 from src/main.cpp:3:
src/esphome/components/display/display_buffer.h:373:23: note: 	virtual esphome::display::DisplayType esphome::display::DisplayBuffer::get_display_type()
   virtual DisplayType get_display_type() = 0;
                       ^
*** [/data/to-do/.pioenvs/to-do/src/main.cpp.o] Error 1
========================== [FAILED] Took 5.83 seconds ==========================

Didnt like it, will open a FR with ESPHome :slight_smile:

EDIT

Actually, I have the two colour I think. Lucky I checked

Waveshare 7.5inch E-Paper (B) E-Ink Raw Display 800×480 Pixels Red/Black/White Three-Color with SPI Interface Without PCB >170°Wide Viewing Angle Paper-Like Displaying Without Electricity

I just remember seeing “three colour” lol

7.50in B-type (red-black-white) I asked in one the related github issues if its supported. See if someone responds :slight_smile:

1 Like

How did you set it? A and ON? I have the same problem I think

I’m at work now, so cant check. But initially I did have it in the wrong position. It kinda works now. But its not great. Perhaps because the one I have has 2 colors in it.

Hi, I’m using part of your code to make a board, but I found some points where I get errors (maybe it’s me that I’m not the best at coding).

On the moon time and phase, I defined the sensor templates in HA, but when I compile the ESP32 I get these errors:

/config/eink-frame-1.yaml:356:110: error: request for member 'c_str' in 'moon_rise->esphome::homeassistant::HomeassistantSensor::<anonymous>.esphome::sensor::Sensor::state', which is of non-class type 'float'
             it.printf(155, 260, id(font_small_bold), color_black, TextAlign::CENTER_LEFT, "%s", id(moon_rise).state.c_str());
                                                                                                              ^~~~~
/config/eink-frame-1.yaml:361:110: error: request for member 'c_str' in 'moon_set->esphome::homeassistant::HomeassistantSensor::<anonymous>.esphome::sensor::Sensor::state', which is of non-class type 'float'
             it.printf(365, 260, id(font_small_bold), color_black, TextAlign::CENTER_RIGHT, "%s", id(moon_set).state.c_str());
                                                                                                              ^~~~~
/config/eink-frame-1.yaml:365:122: error: request for member 'c_str' in 'moon_phase->esphome::homeassistant::HomeassistantSensor::<anonymous>.esphome::sensor::Sensor::state', which is of non-class type 'float'
             it.printf(265, 243, id(font_mdi_medlarge), color_black, TextAlign::CENTER, "%s", moon_icon_map[id(moon_phase).state.c_str()].c_str());
                                                                                                                          ^~~~~

Also the moon phase is identified with a percentage, how does it maps to

      std::map<std::string, std::string> moon_icon_map

since there are just names? Where is defined the correspondence?

Regarding the weather, what is sensor.weatherman_data source?

  # # Weatherman entities
  - platform: homeassistant
    entity_id: sensor.weatherman_data
    attribute: weather_condition_now
    id: weather_condition_now

Thank you for any help you can give :grinning:

1 Like

Hi, unfortunately, my display died prematurely over Christmas, but I will try to help you as best I can, and as simply as possible (I am no expert either :wink: )

it.printf(155, 260, id(font_small_bold), color_black, TextAlign::CENTER_LEFT, "%s", id(moon_rise).state.c_str());
it.printf(365, 260, id(font_small_bold), color_black, TextAlign::CENTER_RIGHT, "%s", id(moon_set).state.c_str());
it.printf(265, 243, id(font_mdi_medlarge), color_black, TextAlign::CENTER, "%s", moon_icon_map[id(moon_phase).state.c_str()].c_str());

First, double check in Home Assistant in Dev tools if you have these sensors and if you can see their states:

sensor.moon
sensor.moon_rise
sensor.moon_set

If there is a problem with any of them, go to Settings / Devices / Integrations and check if you have Moon integration listed for the moon phase, and AstroWeather for the moon rise and moon set. Moon is a native integration, while AstroWeather can be installed via HACS, for which I provided a link previously.

The first sensor reports only the moon phase as a string (text) and not as a percentage. It seems to me you might be using some other sensor for this, hence the issue (possibly moon phase sensor from AstroWeather (???)).

Sensor ‘weatherman_data’ groups information from other weather / sensor entities into one sensor for the ease of use.

The code below is from the original project, I only modified it slightly to use the data from my own weather station and the forecast from Yr.no.

# Bundle up all the data to send over to Weatherman.
  - sensor:
      - name: "Weatherman Data"
        state: "OK"
        attributes:
          weather_condition_now: >
            {% set cond_now = states('weather.my_weather_station') %}
            {% if states('sun.sun') == 'below_horizon' %}
                {% if cond_now == 'sunny' %} night {% elif cond_now == 'partlycloudy' %} night-partly-cloudy {% else %} {{ cond_now }} {% endif %}
            {% else %}
                {{ cond_now }}
            {% endif %}
            
          weather_condition_0: >
            {% set cond0 = state_attr('weather.home_hourly', 'forecast')[0].condition %}
            {% set next_setting = as_timestamp(state_attr('sun.sun', 'next_setting')) %}
            {% set next_rising = as_timestamp(state_attr('sun.sun', 'next_rising')) %}
            {% set cond0_time = as_timestamp(state_attr('weather.home_hourly', 'forecast')[0].datetime) %}
            {% if cond0_time > next_setting and cond0_time < next_rising %}
                {% if cond0 == 'sunny' %} night {% elif cond0 == 'partlycloudy' %} night-partly-cloudy {% else %} {{ cond0 }} {% endif %}
            {% else %}
                {{ cond0 }}
            {% endif %}
          weather_temperature_0: >
            {{ state_attr('weather.home_hourly', 'forecast')[0].temperature | round }}
          weather_timestamp_0: >
            {{ as_timestamp(state_attr('weather.home_hourly', 'forecast')[0].datetime) | timestamp_custom('%I') | int }} {{ as_timestamp(state_attr('weather.home_hourly', 'forecast')[0].datetime) | timestamp_custom('%p') }}
            
          weather_condition_1: >
            {% set cond1 = state_attr('weather.home_hourly', 'forecast')[1].condition %}
            {% set next_setting = as_timestamp(state_attr('sun.sun', 'next_setting')) %}
            {% set next_rising = as_timestamp(state_attr('sun.sun', 'next_rising')) %}
            {% set cond1_time = as_timestamp(state_attr('weather.home_hourly', 'forecast')[1].datetime) %}
            {% if cond1_time > next_setting and cond1_time < next_rising %}
                {% if cond1 == 'sunny' %} night {% elif cond1 == 'partlycloudy' %} night-partly-cloudy {% else %} {{ cond1 }} {% endif %}
            {% else %}
                {{ cond1 }}
            {% endif %}
          weather_temperature_1: >
            {{ state_attr('weather.home_hourly', 'forecast')[1].temperature | round }}
          weather_timestamp_1: >
            {{ as_timestamp(state_attr('weather.home_hourly', 'forecast')[1].datetime) | timestamp_custom('%I') | int }} {{ as_timestamp(state_attr('weather.home_hourly', 'forecast')[1].datetime) | timestamp_custom('%p') }}
            
          weather_condition_2: >
            {% set cond2 = state_attr('weather.home_hourly', 'forecast')[2].condition %}
            {% set next_setting = as_timestamp(state_attr('sun.sun', 'next_setting')) %}
            {% set next_rising = as_timestamp(state_attr('sun.sun', 'next_rising')) %}
            {% set cond2_time = as_timestamp(state_attr('weather.home_hourly', 'forecast')[2].datetime) %}
            {% if cond2_time > next_setting and cond2_time < next_rising %}
                {% if cond2 == 'sunny' %} night {% elif cond2 == 'partlycloudy' %} night-partly-cloudy {% else %} {{ cond2 }} {% endif %}
            {% else %}
                {{ cond2 }}
            {% endif %}
          weather_temperature_2: >
            {{ state_attr('weather.home_hourly', 'forecast')[2].temperature | round }}
          weather_timestamp_2: >
            {{ as_timestamp(state_attr('weather.home_hourly', 'forecast')[2].datetime) | timestamp_custom('%I') | int }} {{ as_timestamp(state_attr('weather.home_hourly', 'forecast')[2].datetime) | timestamp_custom('%p') }}
            
          weather_condition_3: >
            {% set cond3 = state_attr('weather.home_hourly', 'forecast')[3].condition %}
            {% set next_setting = as_timestamp(state_attr('sun.sun', 'next_setting')) %}
            {% set next_rising = as_timestamp(state_attr('sun.sun', 'next_rising')) %}
            {% set cond3_time = as_timestamp(state_attr('weather.home_hourly', 'forecast')[3].datetime) %}
            {% if cond3_time > next_setting and cond3_time < next_rising %}
                {% if cond3 == 'sunny' %} night {% elif cond3 == 'partlycloudy' %} night-partly-cloudy {% else %} {{ cond3 }} {% endif %}
            {% else %}
                {{ cond3 }}
            {% endif %}
          weather_temperature_3: >
            {{ state_attr('weather.home_hourly', 'forecast')[3].temperature | round }}
          weather_timestamp_3: >
            {{ as_timestamp(state_attr('weather.home_hourly', 'forecast')[3].datetime) | timestamp_custom('%I') | int }} {{ as_timestamp(state_attr('weather.home_hourly', 'forecast')[3].datetime) | timestamp_custom('%p') }}

Hope this all helps.

1 Like

Thank you for your reply. I fixed some things missing (moon sensor), but I still get errors on the same spot like if the return is not of correct type.
I checked in HA and I can see correctly the entities and attributes

/config/eink-frame-1.yaml:308:133: error: request for member 'c_str' in 'weather_condition_now->esphome::homeassistant::HomeassistantSensor::<anonymous>.esphome::sensor::Sensor::state', which is of non-class type 'float'
         it.printf(245, 335, id(font_mdi_large), color_black, TextAlign::TOP_CENTER, "%s", weather_icon_map[id(weather_condition_now).state.c_str()].c_str());
                                                                                                                                     ^~~~~

Are you aware of any documentation on how to construct these instructions?

Thanks

Hmm…

it.printf(245, 335, id(font_mdi_large), color_black, TextAlign::TOP_CENTER, "%s", weather_icon_map[id(weather_condition_now).state.c_str()].c_str());

The code above only displays the weather state icon, which is assigned in the code below. I would check formatting i.e. missing quotation here:

      std::map<std::string, std::string> weather_icon_map
        {
          {"cloudy", "\U000F0590"},
          {"cloudy-alert", "\U000F0F2F"},
          {"cloudy-arrow-right", "\U000F0E6E"},
          {"fog", "\U000F0591"},
          {"hail", "\U000F0592"},
          {"hazy", "\U000F0F30"},
          {"hurricane", "\U000F0898"},
          {"lightning", "\U000F0593"},
          {"lightning-rainy", "\U000F067E"},
          {"night", "\U000F0594"},
          {"night-partly-cloudy", "\U000F0F31"},
          {"partlycloudy", "\U000F0595"},
          {"partly-lightning", "\U000F0F32"},
          {"partly-rainy", "\U000F0F33"},
          {"partly-snowy", "\U000F0F34"},
          {"partly-snowy-rainy", "\U000F0F35"},
          {"pouring", "\U000F0596"},
          {"rainy", "\U000F0597"},
          {"snowy", "\U000F0598"},
          {"snowy-heavy", "\U000F0F36"},
          {"snowy-rainy", "\U000F067F"},
          {"sunny", "\U000F0599"},
          {"sunny-alert", "\U000F0F37"},
          {"sunny-off", "\U000F14E4"},
          {"sunset", "\U000F059A"},
          {"sunset-down", "\U000F059B"},
          {"sunset-up", "\U000F059C"},
          {"tornado", "\U000F0F38"},
          {"windy", "\U000F059D"},
          {"windy-variant", "\U000F059E"},
        };

The only documentation I used was the one from ESPHome and from the original project, plus a lot of trial and error until I figured it out.

Hi,
You said “connect the e-Paper screen to the driver board” does the screen come with the cable or does the driver board come with the cable or do I have to buy the cable seperatly ?

Amazing project !

Mine arrived with it.

Yes, you need to buy the driver board (and sometimes known as a HAT) in order for the Raspberry Pi to control the e-ink screen.

Btw, I don’t know if anyone had tried before, does the e-ink screen of one brand work with the driver HAT of another? I’d love to hear it from the e-ink screen experts here.

Hey folks,

I got some big updates for the project with the help of our community. Thanks @paviro, @pehses, and @danito for your contributions!

New Features

Intelligent Screen Refreshing

To reduce the frequency of screen refreshes and to prolong the life of the e-ink screen, the screen will now only refresh when motion (or any template criteria) sensor binary_sensor.weatherman_motion_detected is on. I have it set up so that it wakes up when there are any motions from my sensors in the living room.

Last Refreshed Timestamp

The last update timestamp can be displayed on the screen itself. No more wondering when the screen was last refreshed!

Remote Control and Monitoring

The screen can now be controlled and monitored remotely. The screen can be either refreshed manually, restarted, or safely shut down through buttons in your HA. The number of screen refreshes in its lifetime as well as its last update timestamp and wifi signal strength can also be monitored.

Other changes:

  • Negative temperatures can now be displayed. Perfect for winter.
  • A nice loading screen is shown before any data is received.
  • Titles are now in text rather than bitmaps. Much easier to change it to anything you like.
6 Likes

Out of interest, how many refreshes can these eink displays handle?

I’d like to use them to show my wife’s glucose levels from her Dexcom so she doesn’t need to keep looking at her phone.

The issue with this though is the refresh rate, as information like that needs to be kept up to date in a realtime bases (I think the Dexcom integration actually updates every few minutes)

1 Like

I want to thank everyone for sharing their examples, code and pictures. Finished my setup today.

9 Likes

Looks fantastic! I’m glad the project helps!

The screen that I have is supposed to have a lifespan of one million refreshes. That means you can’t have it refresh every minute, because it would hit 1/25 of its lifespan in just a month and would be over the limit in two years. This is why the project has multiple safeguards to avoid refreshing unless necessary.

1 Like

this is amazing @madelena thanks for sharing :slight_smile:

quick question, how is it powered? and how did you manage to hide the cable powering the screen in the wall etc?

1 Like

I’ll try the new updates! Awesome work!

I have a problem where my display is uneven after refresh. Some parts are very visible and looks like an E-ink should but one specific corner is like always a little less visible. I hade a problem in the beginning where all the screen could look like that but after changing power supply it went away but not this instead. But it’s never 100% clear ever.

It’s the same corner where the ESP is, I wonder if there might be a connection with that? Idk not sure how the technology works to be honest.

4 Likes